Designing a Scheduled Group
The schedule allows users to choose the charging type (off-peak, mid-peak, on-peak, regular), set the start and end times for each type, and configure the following options:
- Allow Charging: Whether to allow new charging sessions during the current period.
- Auto Stop: Stop any ongoing charging sessions during this period.
- Active Days: Select the weekdays when this configuration should be active.
To design a scheduled charging group, follow these steps:
- Navigate to Load Management > Scheduled Charging. The following screen appears:

- Click on the Design New Group button. The following screen appears:L
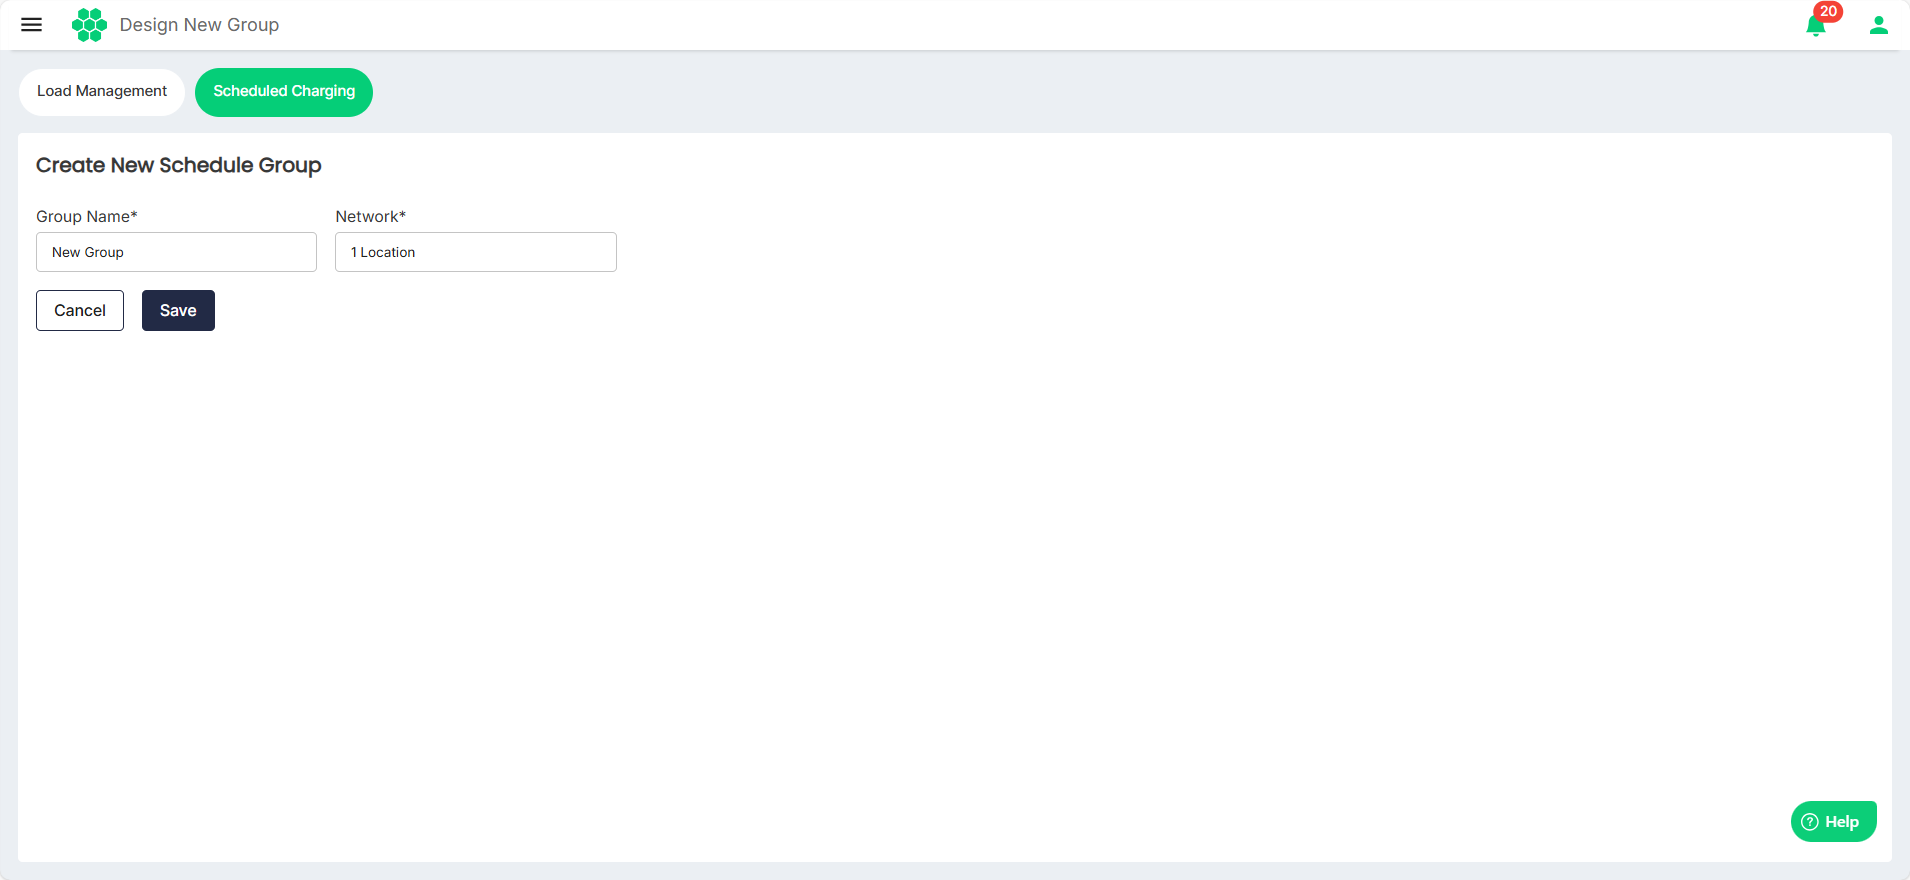
- Enter the Group Name and select the location from the Network drop-down list. Then, click Save. The following screen appears:
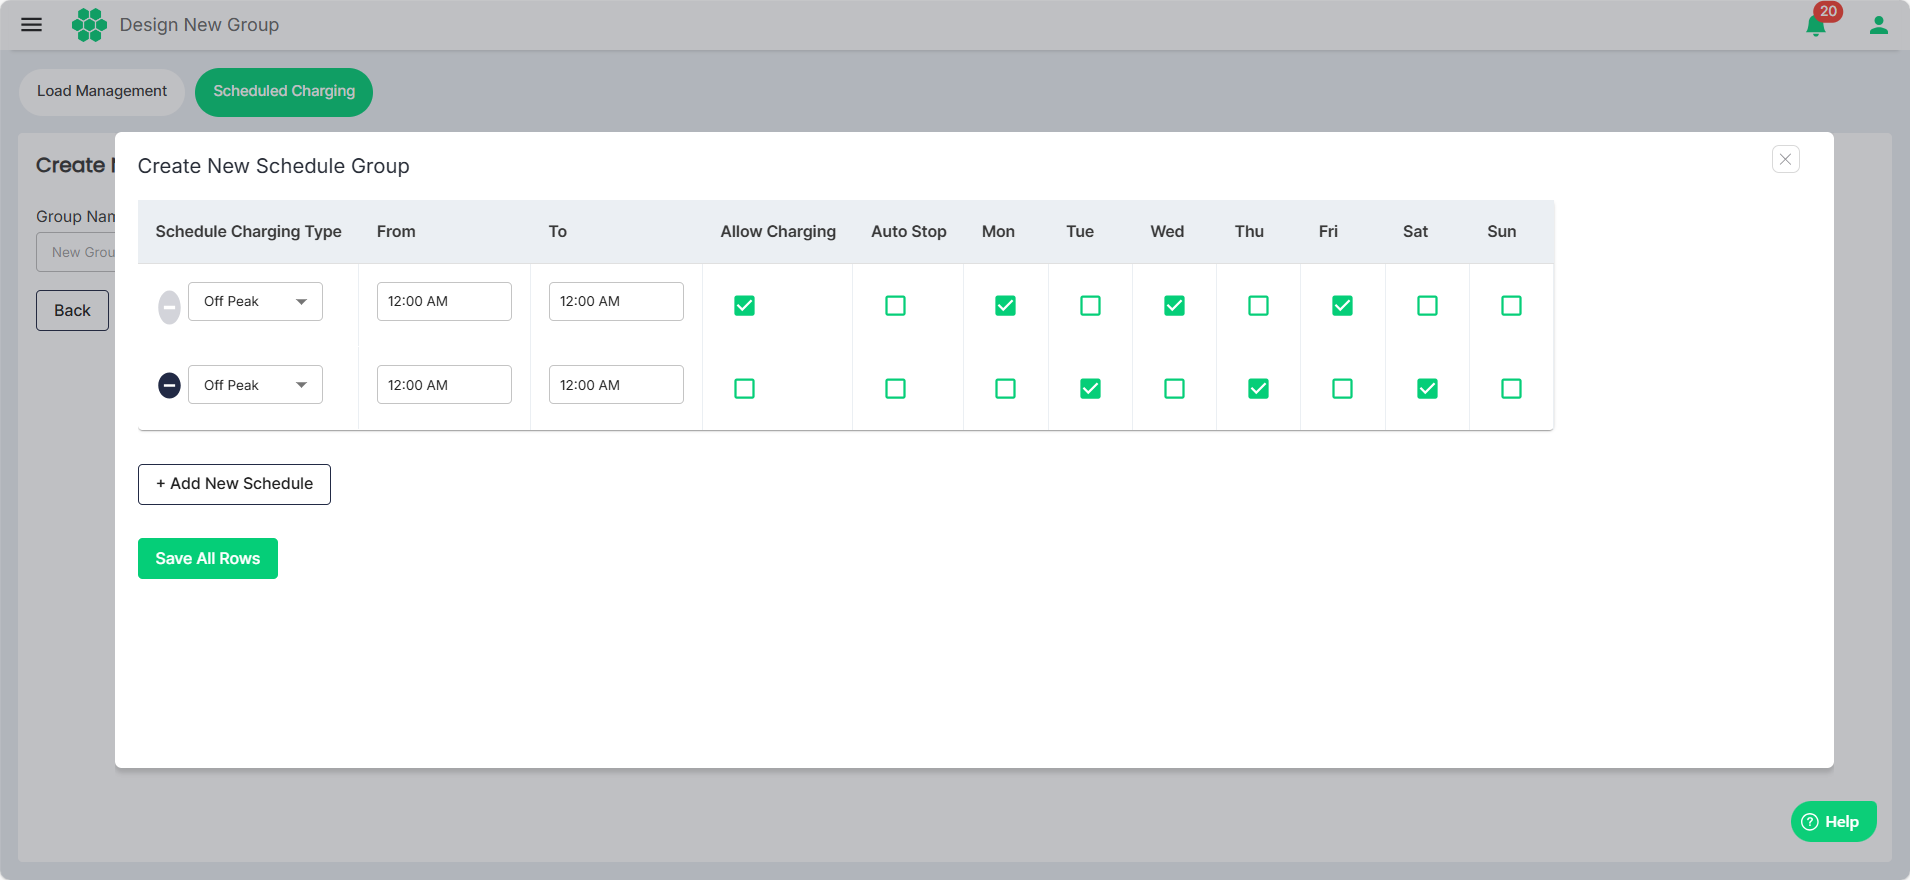
- Make the desired updates.
- Select the Schedule Charging Type (Off Peak, Mid Peak, or On Peak).
- Time Range (From and To)
- Select the Allow Charging, Auto Stop, and the active days as desired.
- Click Add New Schedule to add additional rows.
- Click the (-) button to delete the rows.
- Click Save All Rows.