About Revenue Share
Purpose
The Revenue Share module allows an authorized operator to define the business entities that participate in charging revenue, organize charging locations into revenue-share groups, assign a percentage of revenue to each participating entity, review summarized revenue by entity, and examine refund records associated with charging sessions.
The module contains four working areas:
- Entities - maintains the parties that can participate in a revenue-share arrangement.
- Revenue Share Groups - associates one or more locations with participating entities and their percentage shares.
- Reports - summarizes session counts, revenue, and tax by entity for the selected reporting period and scope.
- Refund Reports - provides transaction-level refund information, including the associated customer, charging session, refund destination, remarks, and charges.
Navigate to Revenue Share from the menu on the left.
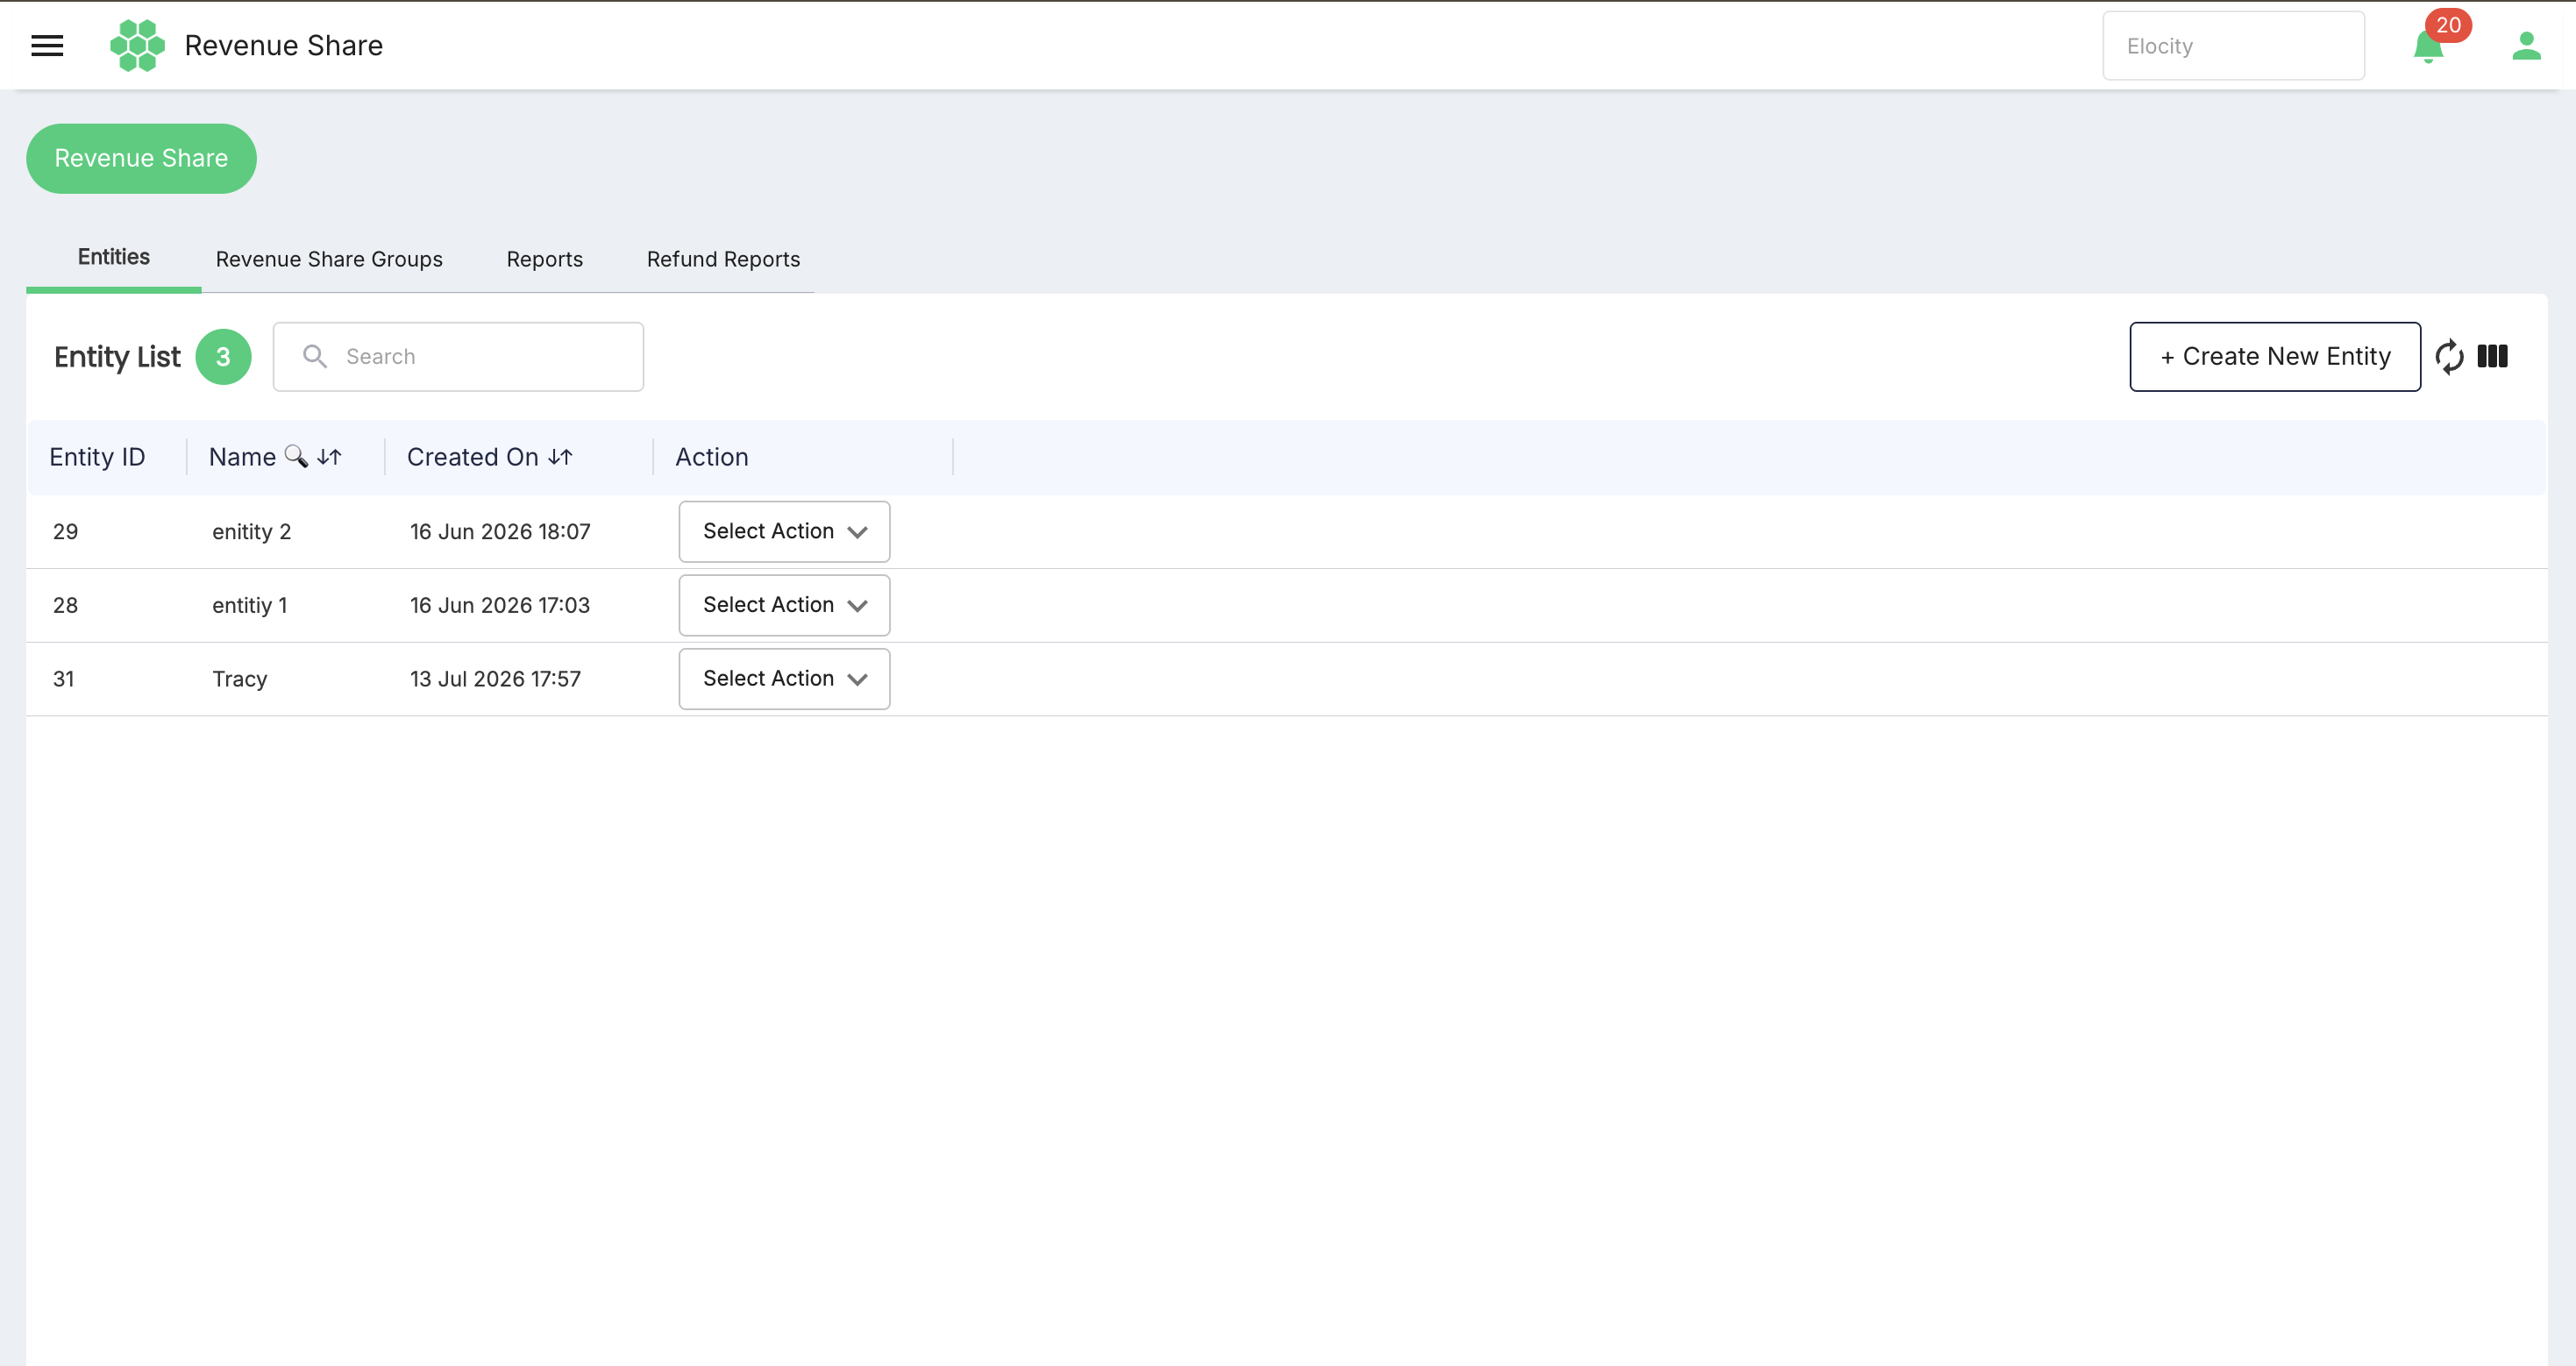
Accessing the module
- Sign in to the HIEV portal.
- Confirm the required business in the business selector.
- Open Revenue Share from the navigation menu.
- Select Entities, Revenue Share Groups, Reports, or Refund Reports.
The business selection determines which entities, locations, groups, charging sessions, and refund records are available. Access is controlled through feature-specific permissions. These permissions can be assigned to any role; a user can access a page or perform an action only when the required permission is mapped to the user's role.
Revenue-share workflow
Use the module in the following order:
- Create every participating party under Entities.
- Create a Revenue Share Group.
- Select the charging locations covered by the group.
- Add the participating entities and enter their revenue-share percentages.
- Save and review the group.
- Use Reports to review revenue allocated to entities.
- Use Refund Reports to review refunds associated with charging sessions.
Entities
An entity represents a party that can receive a portion of charging revenue. The legacy requirements describe entities as participating business parties. The live creation form records the entity's name and assigns its Entity ID after creation.
Entity List
The number beside Entity List represents the entities currently returned for the selected business.
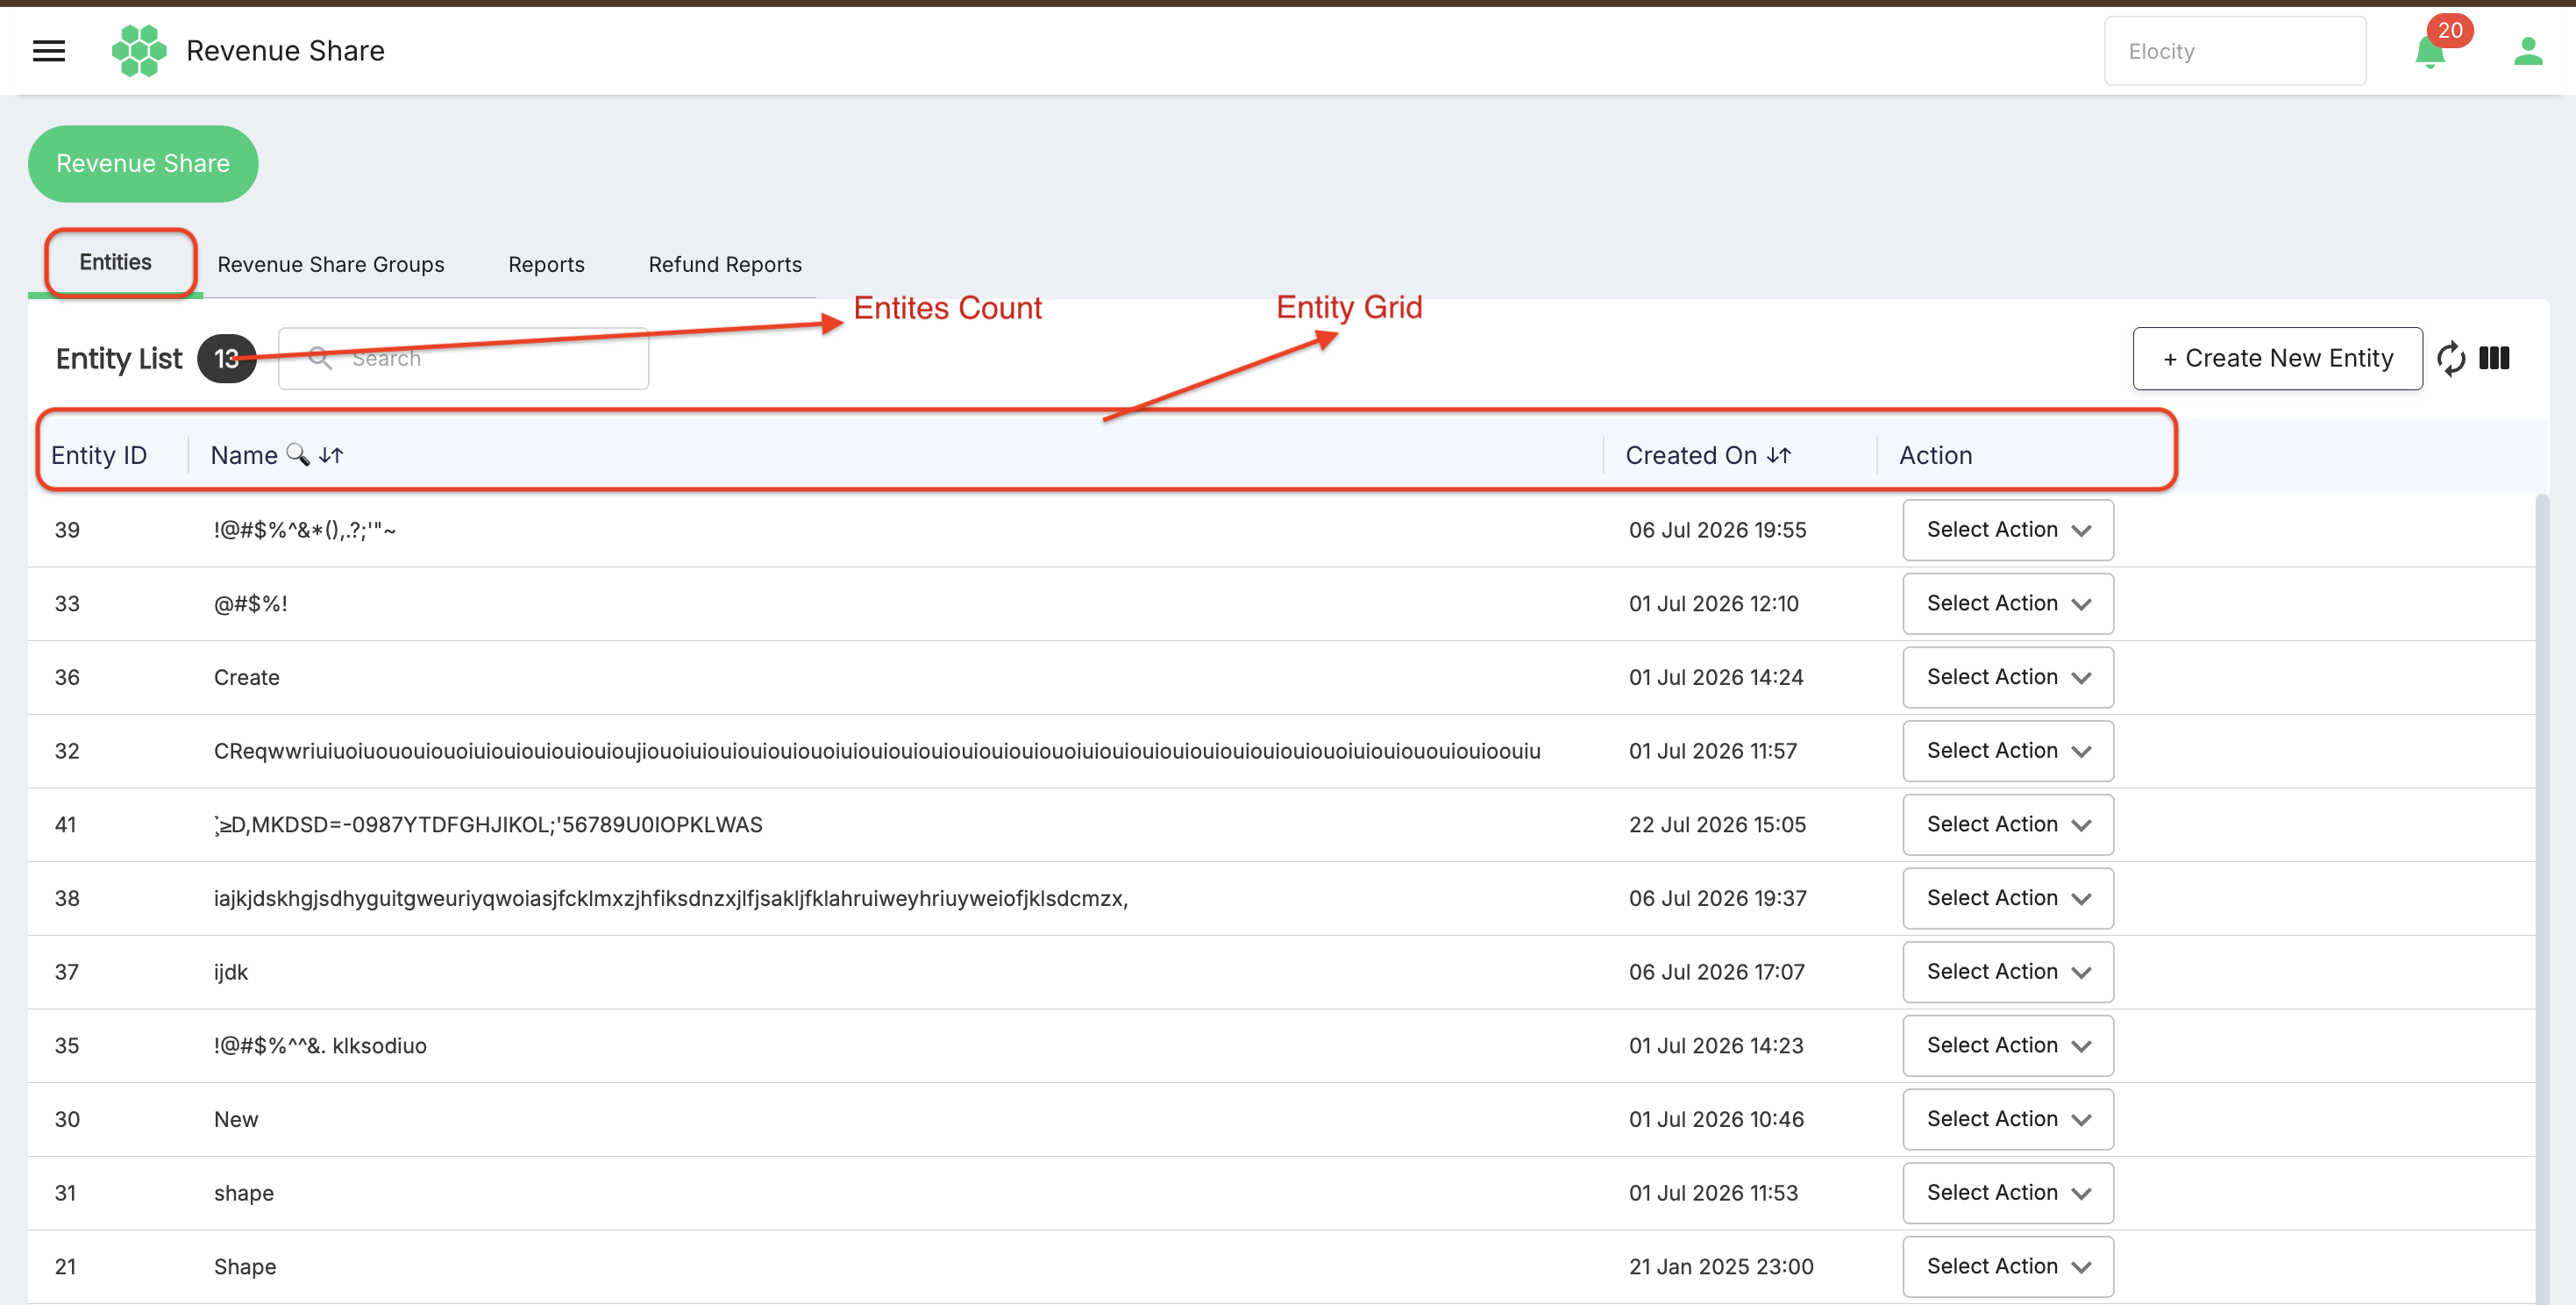
| Column | Description |
|---|---|
| Entity ID | System-assigned identifier for the entity. |
| Name | Entity's display name. |
| Created On | Date and time when the entity was created. |
| Action | Opens the available View/Edit and Delete actions for the row. |
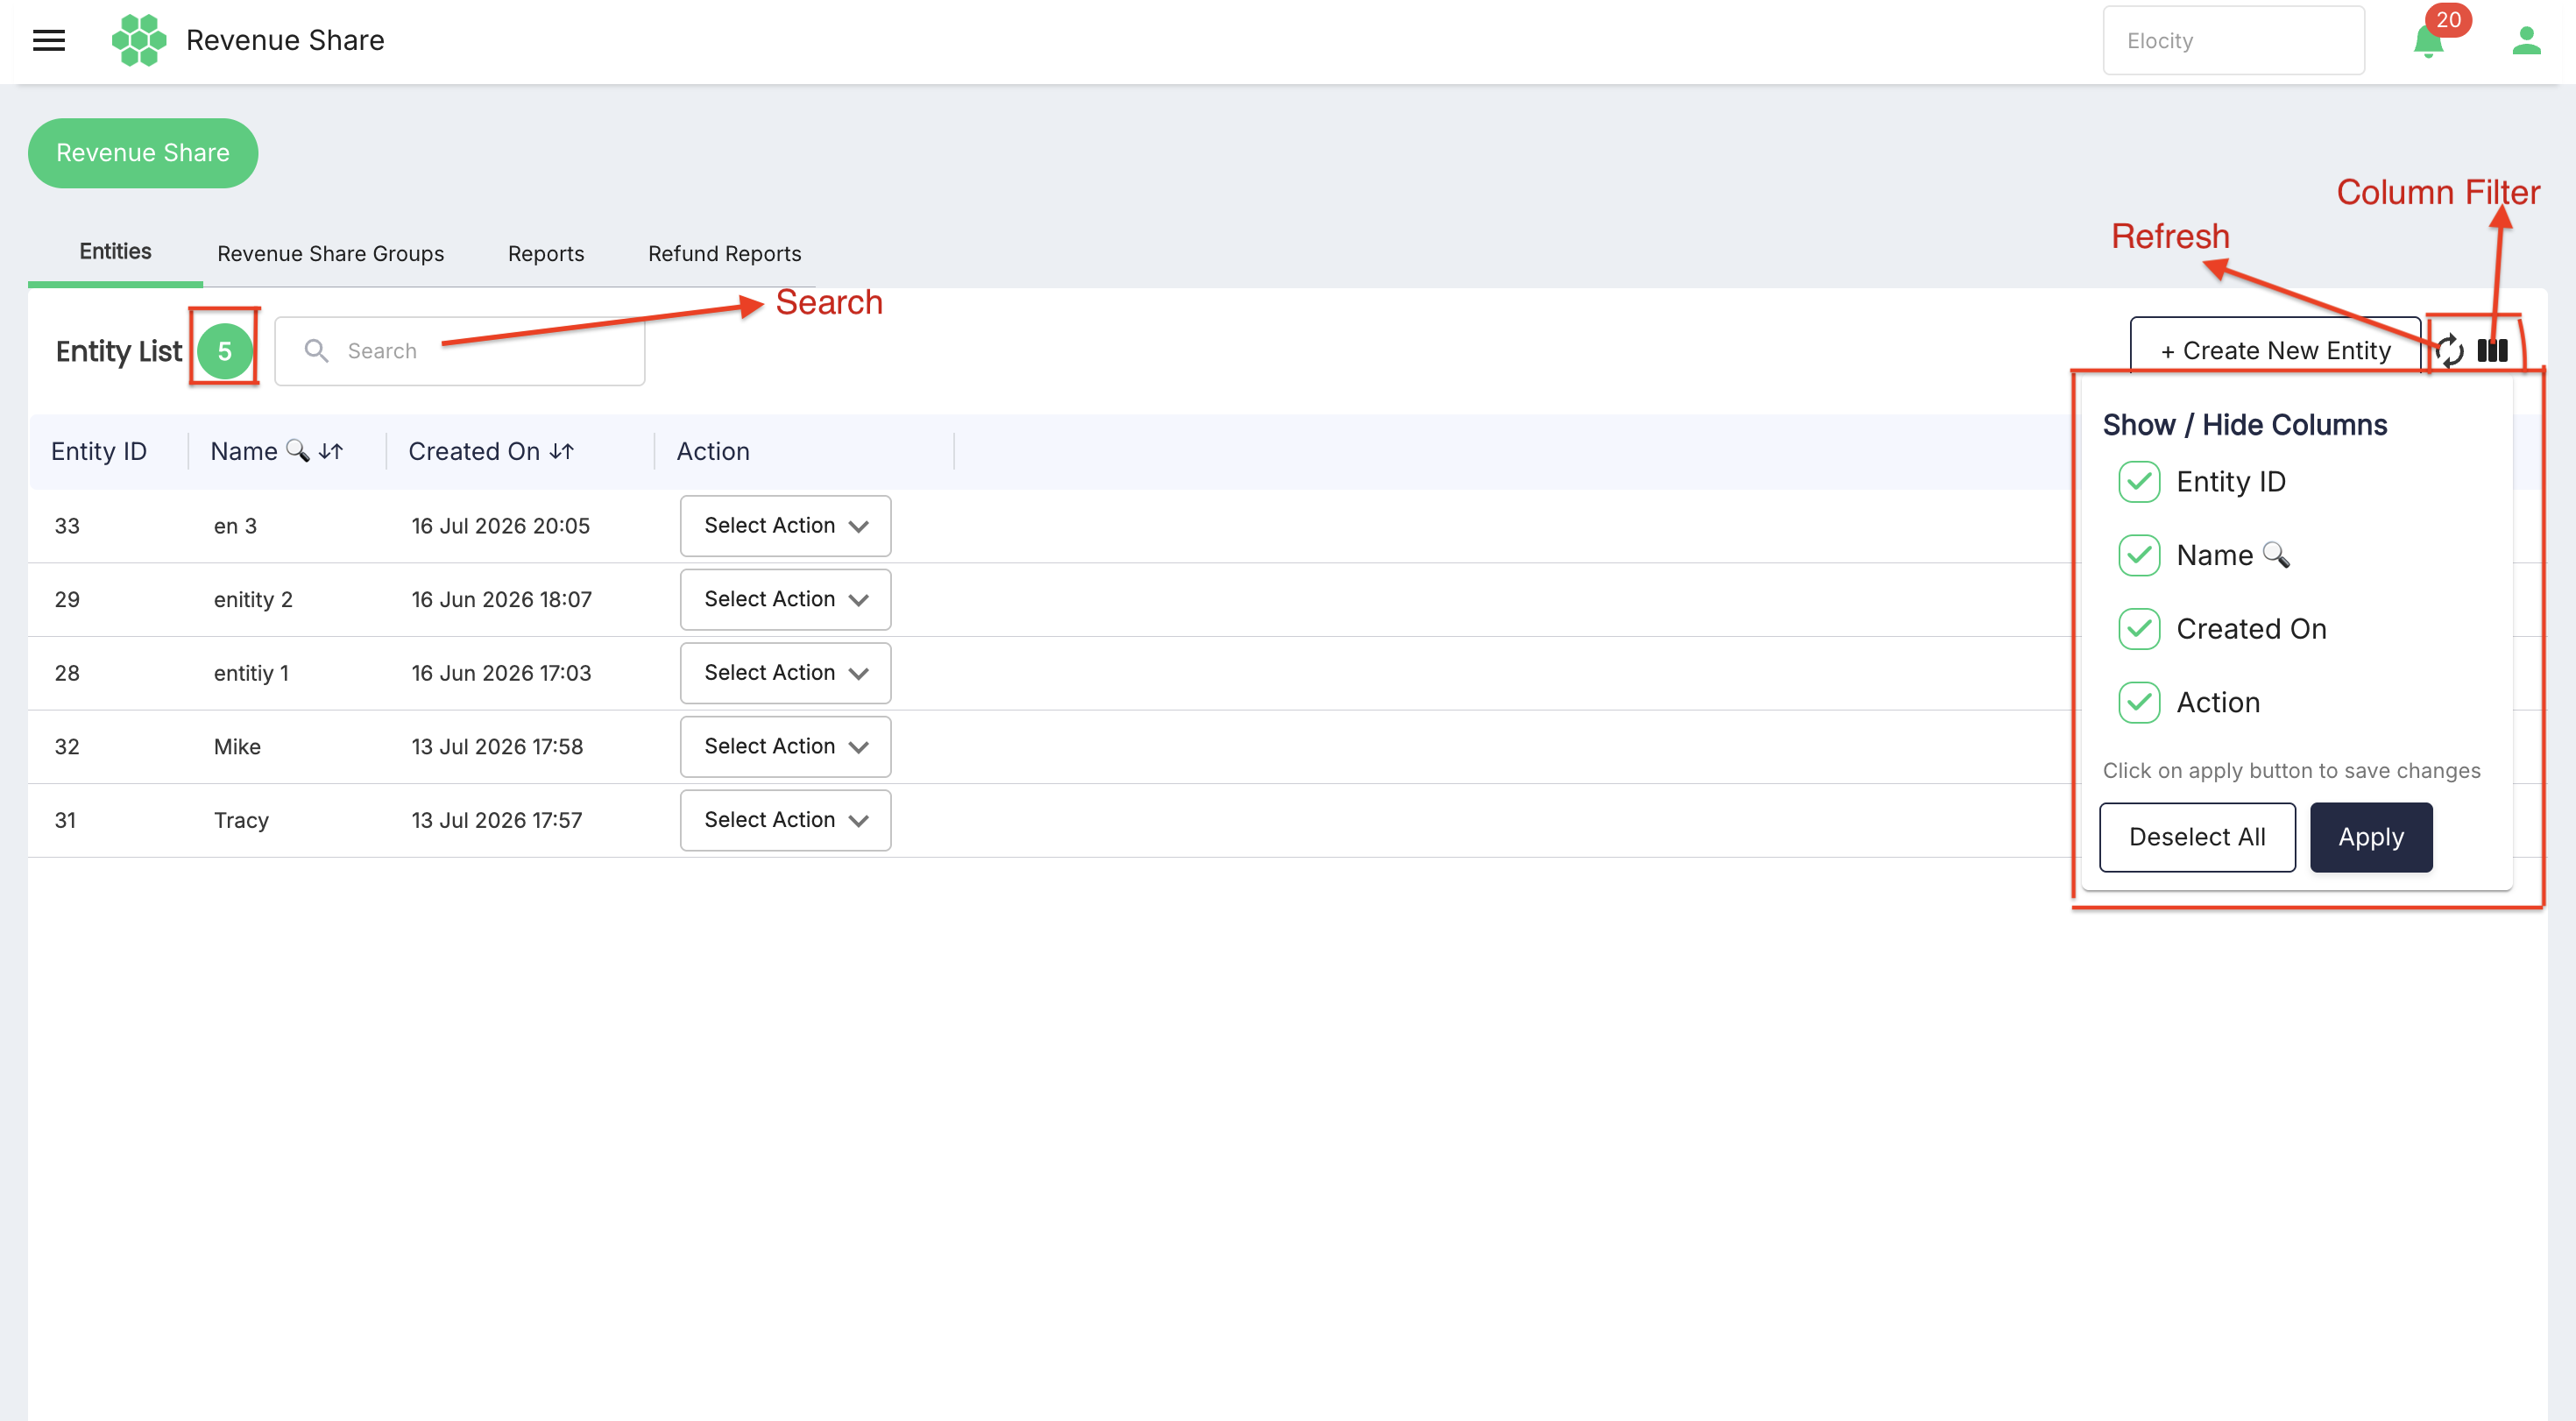
The page also provides:
- Search to locate an entity in the grid.
- Refresh to request the latest entity records.
- Column Filter to show or hide Entity ID, Name, Created On, and Action.
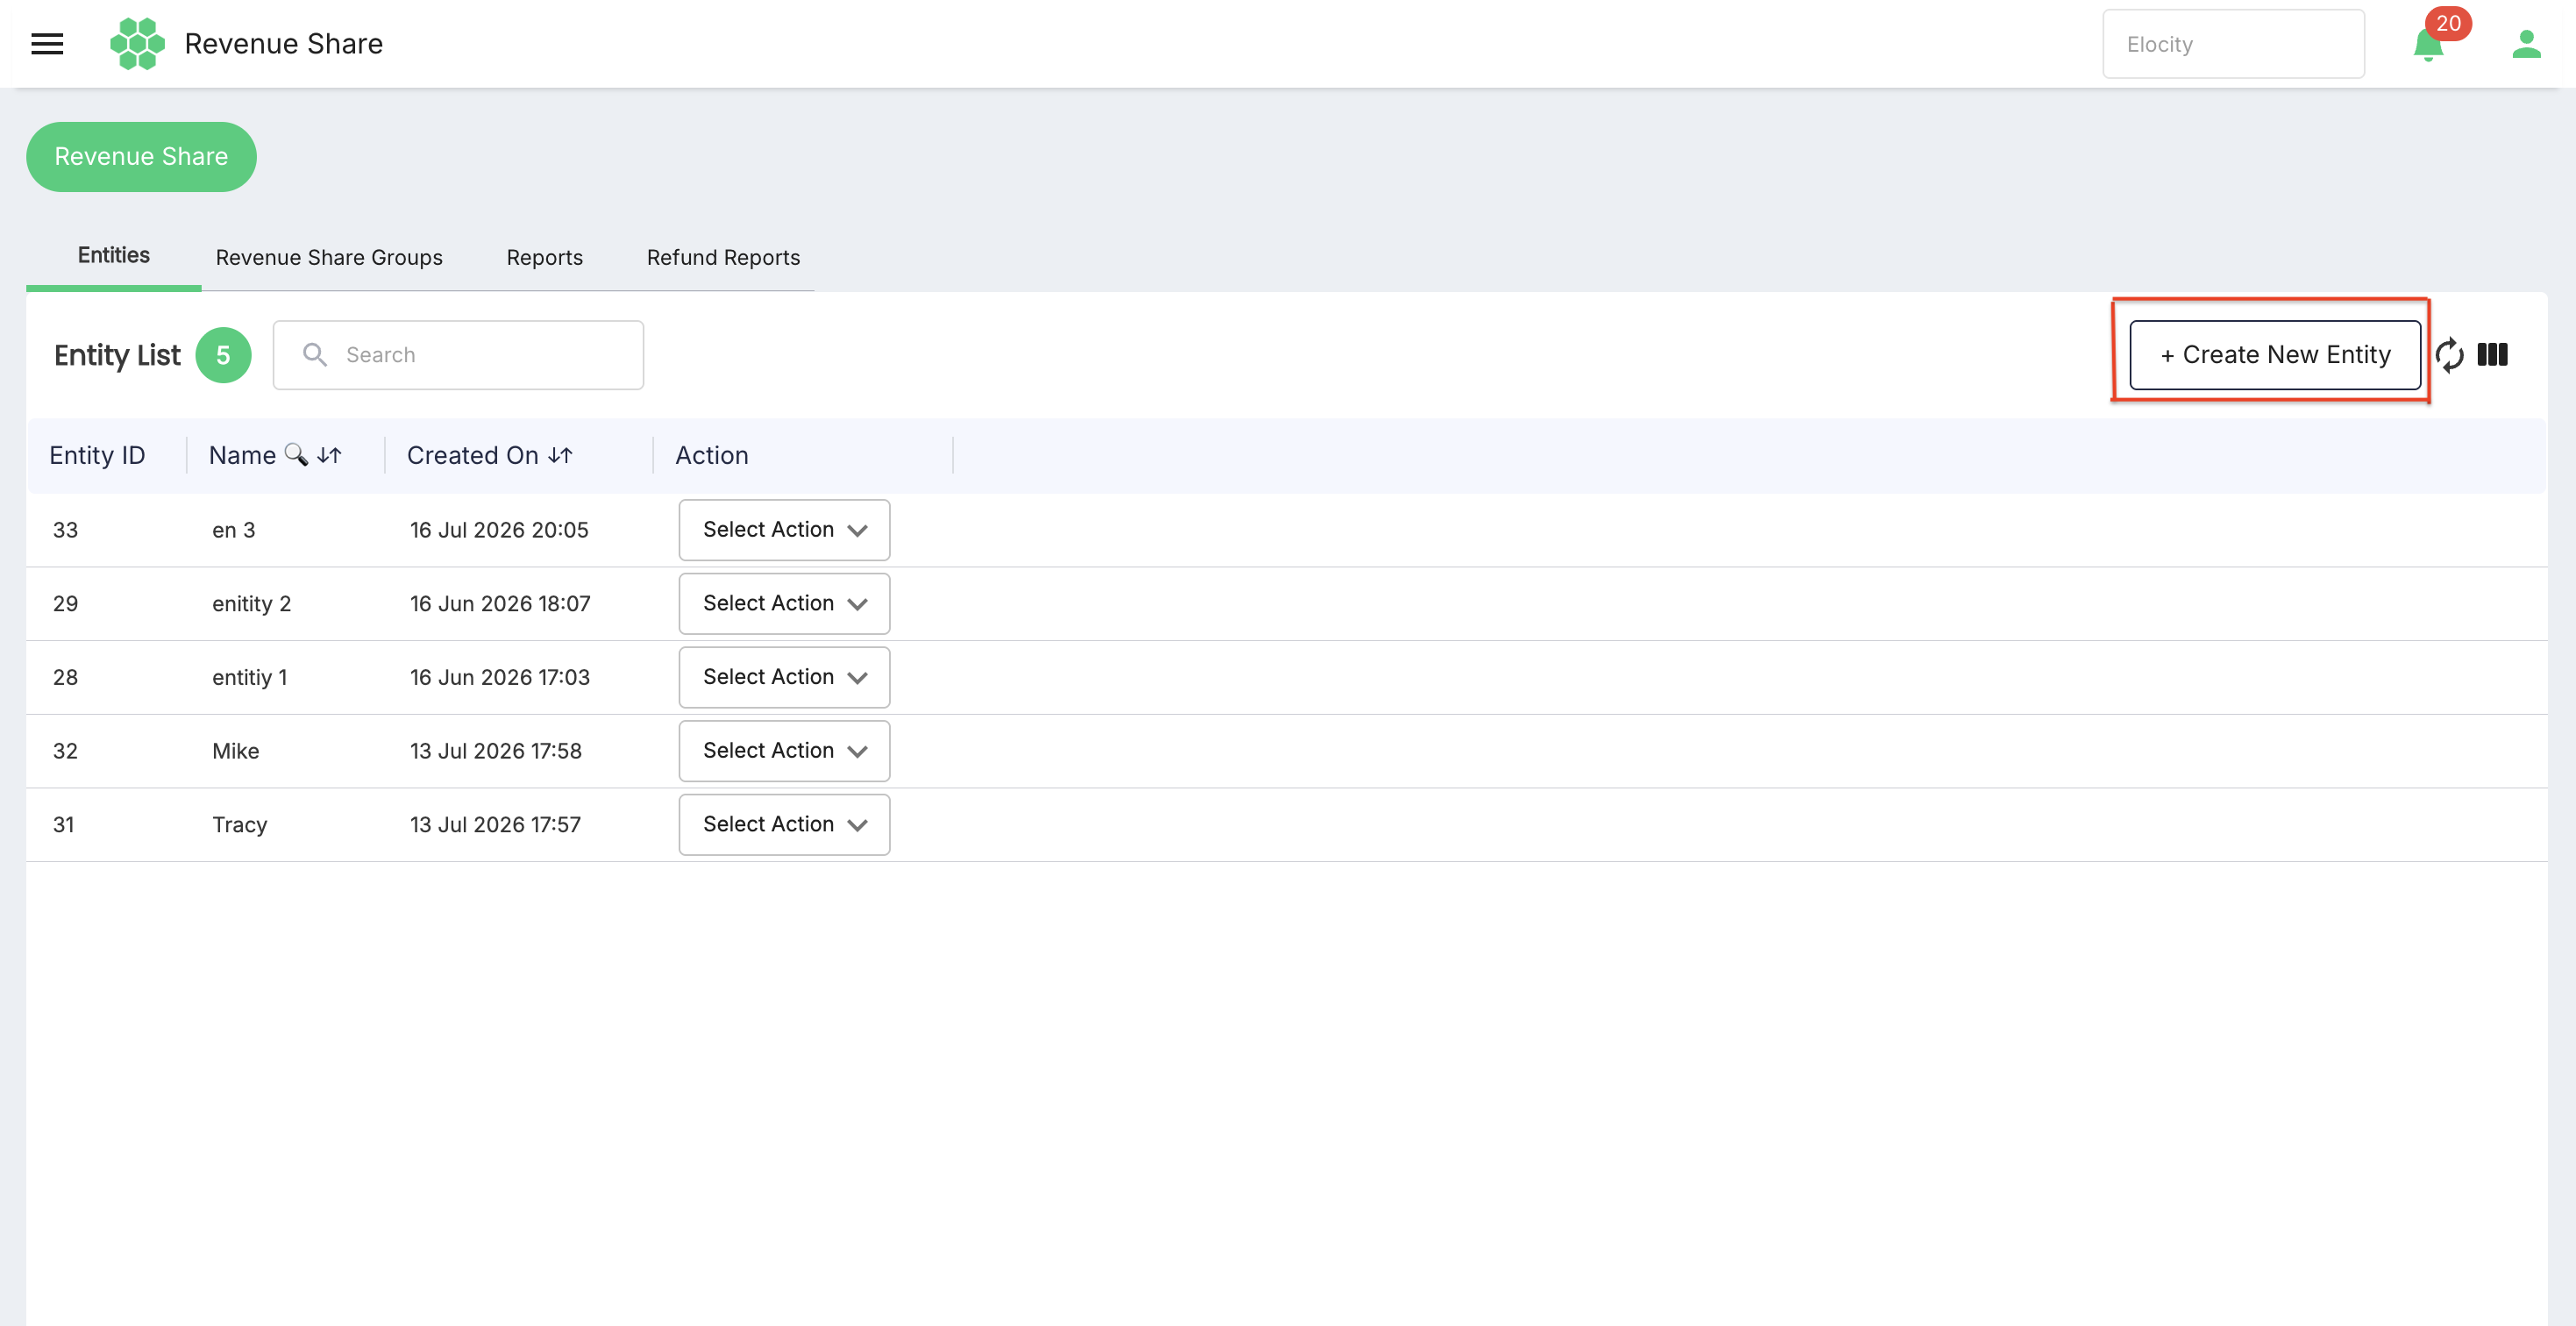
Creating an entity
- Select + Create New Entity.
- Enter the required Name.
- Select Save.
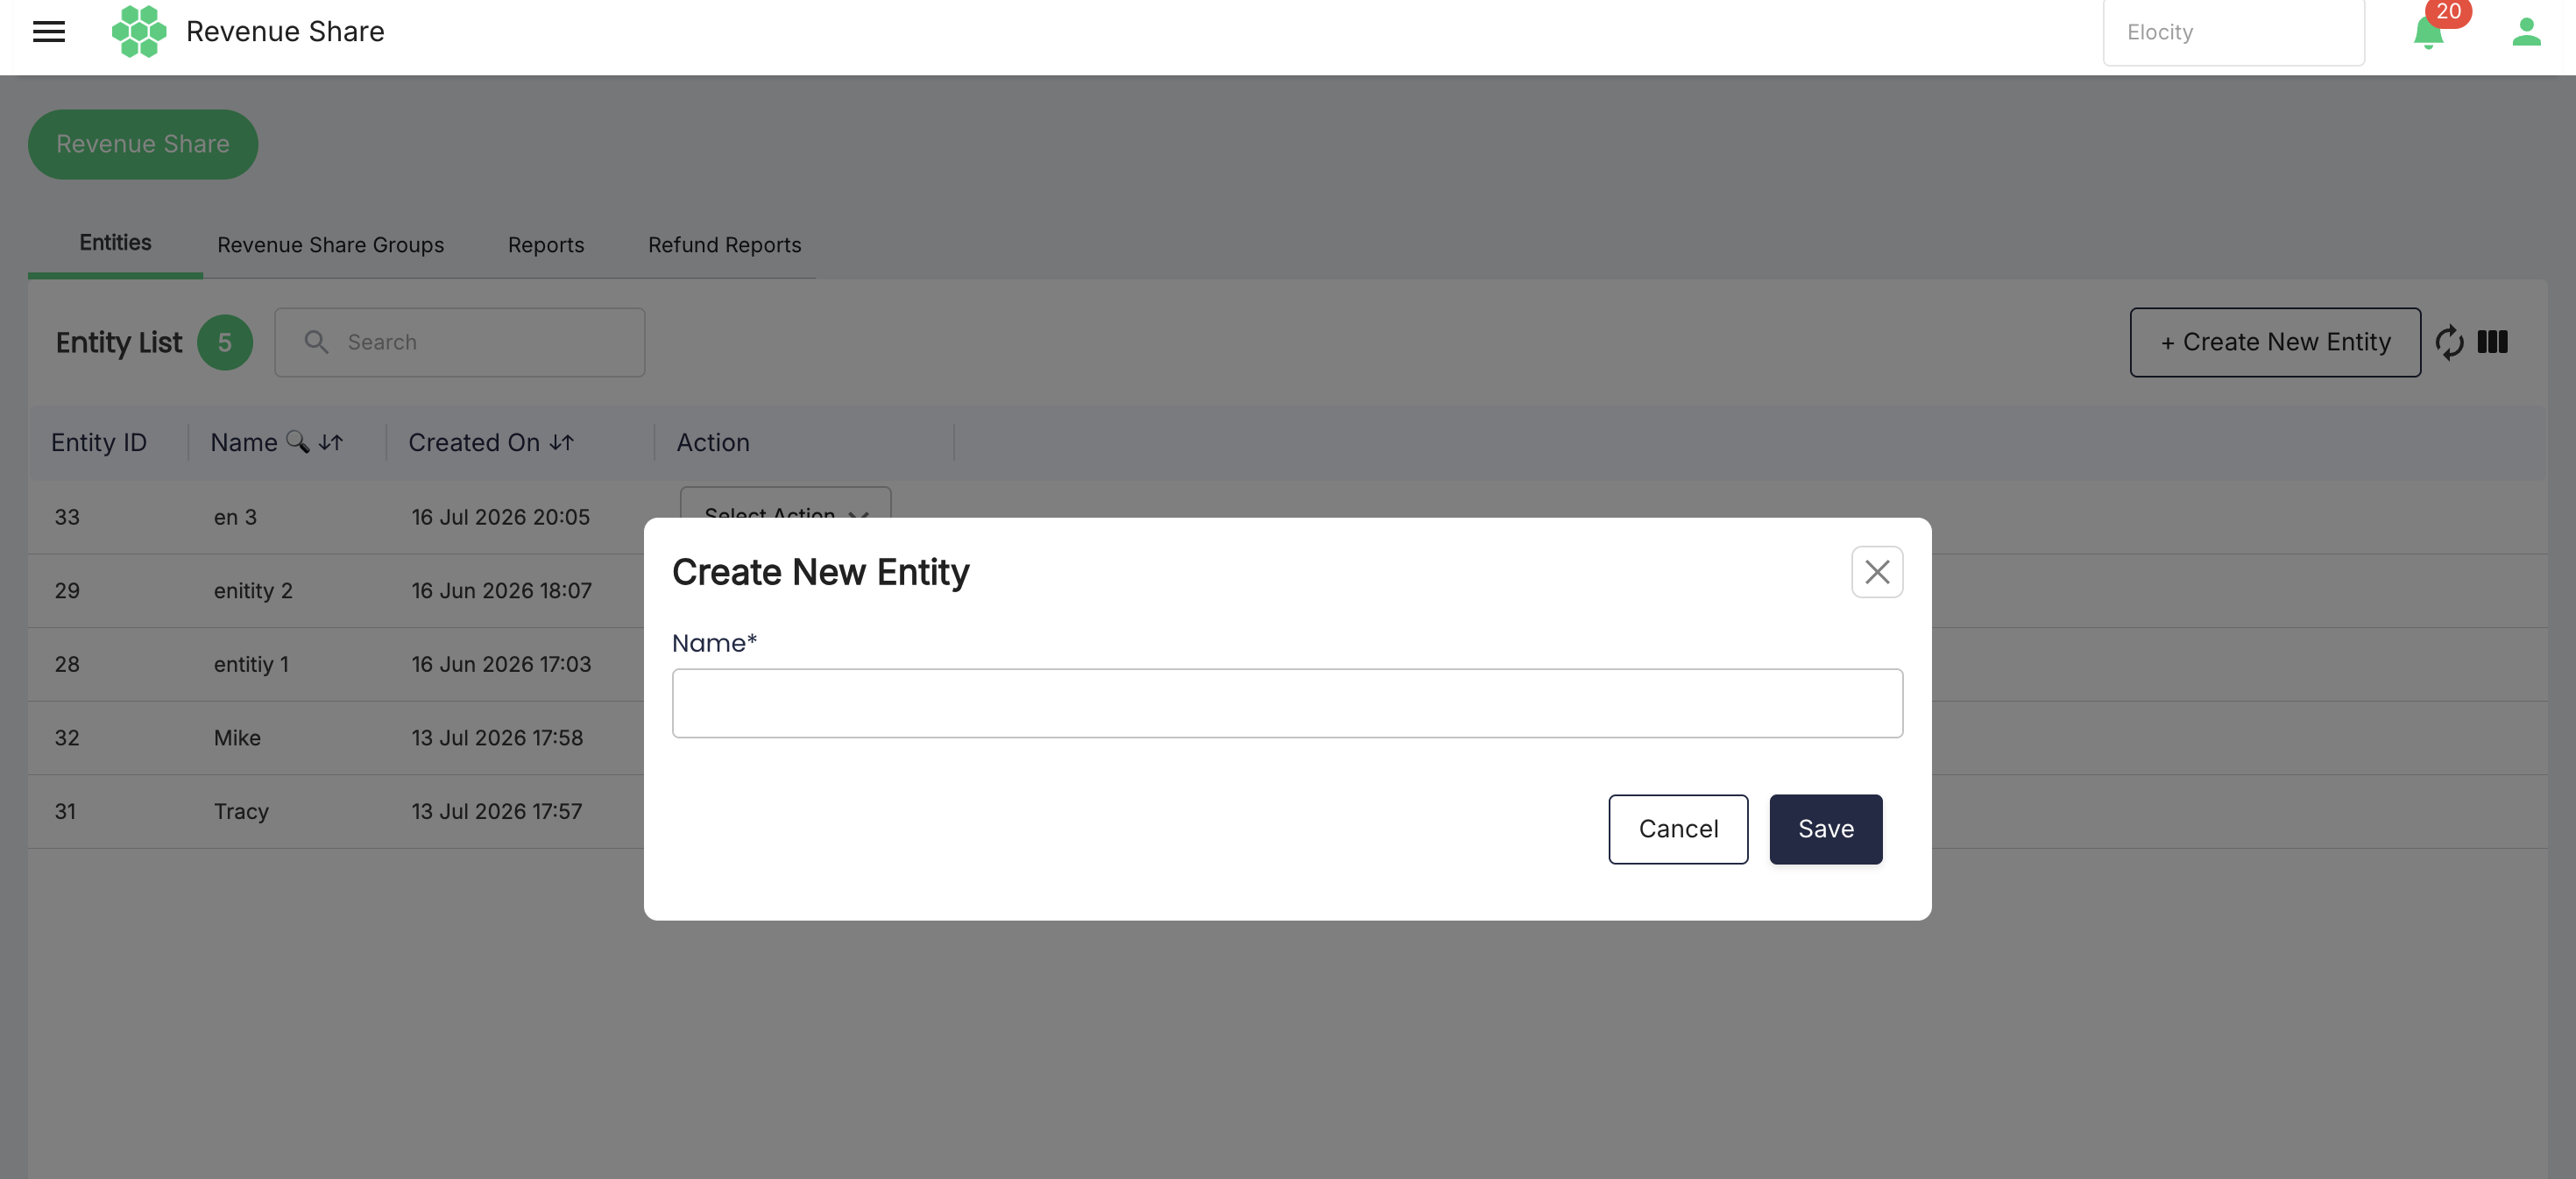
Select Cancel to close the panel without creating the entity.
Viewing or editing an entity
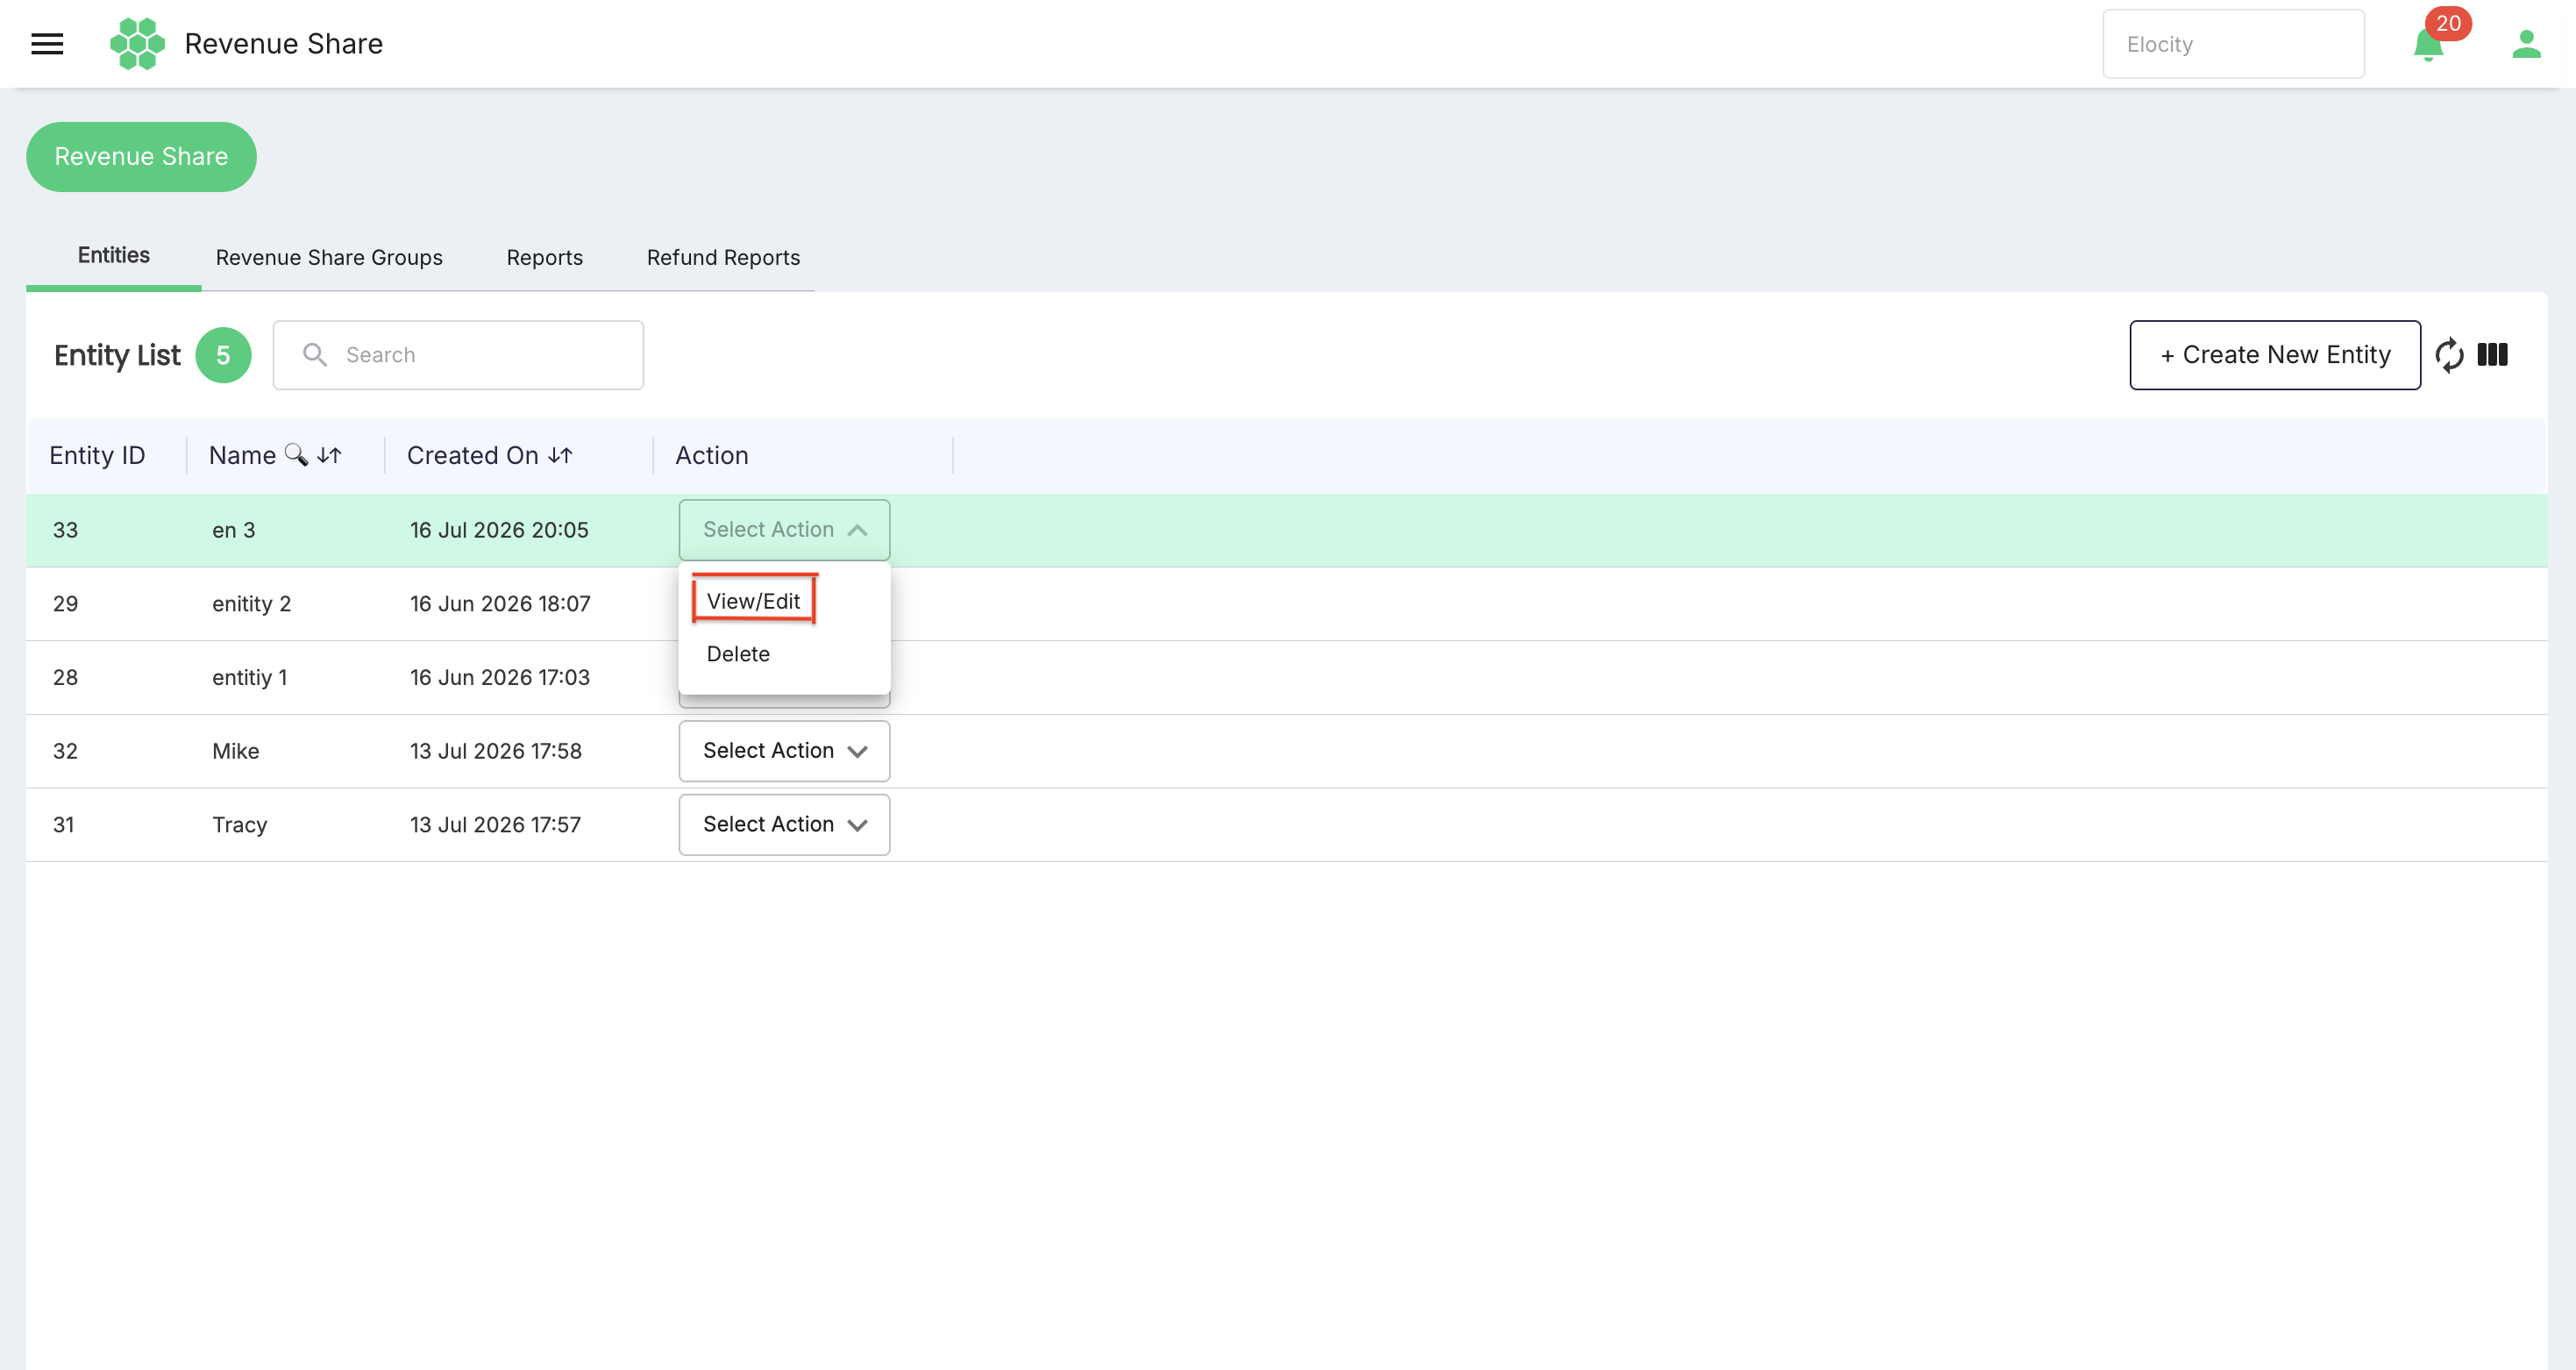
- Locate the entity in the grid.
- Open Select Action.
- Select View/Edit.
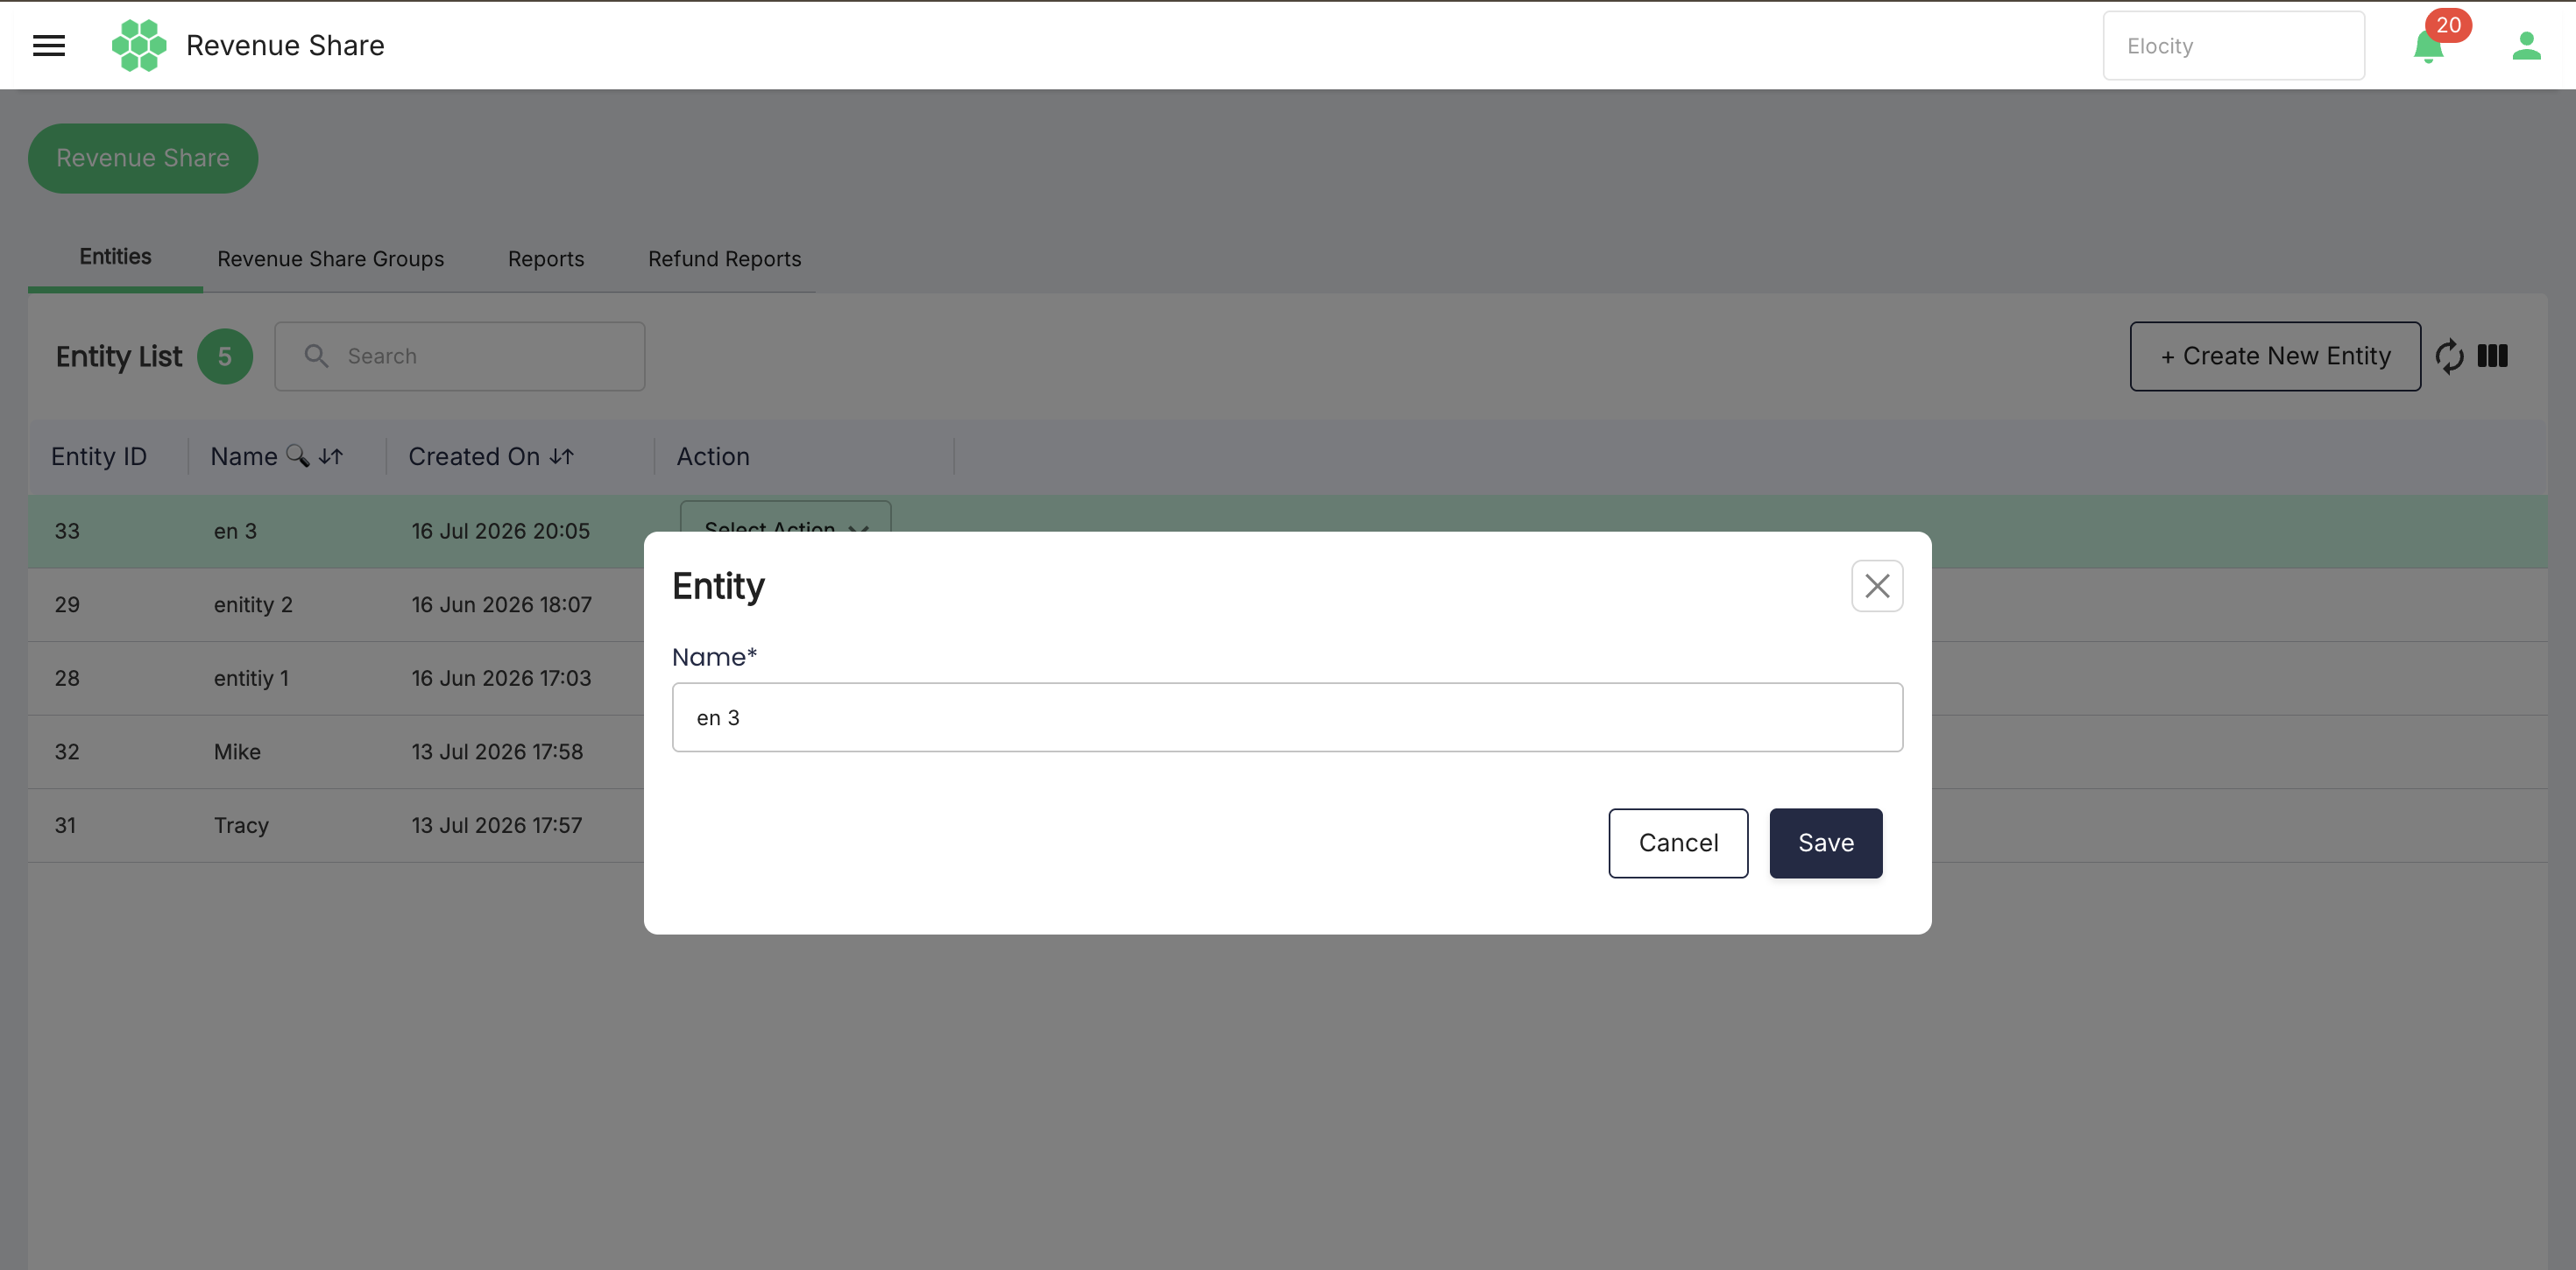
- Review or change the entity name.
- Select Save to retain the change, or Cancel to leave it unchanged.
Deleting an entity
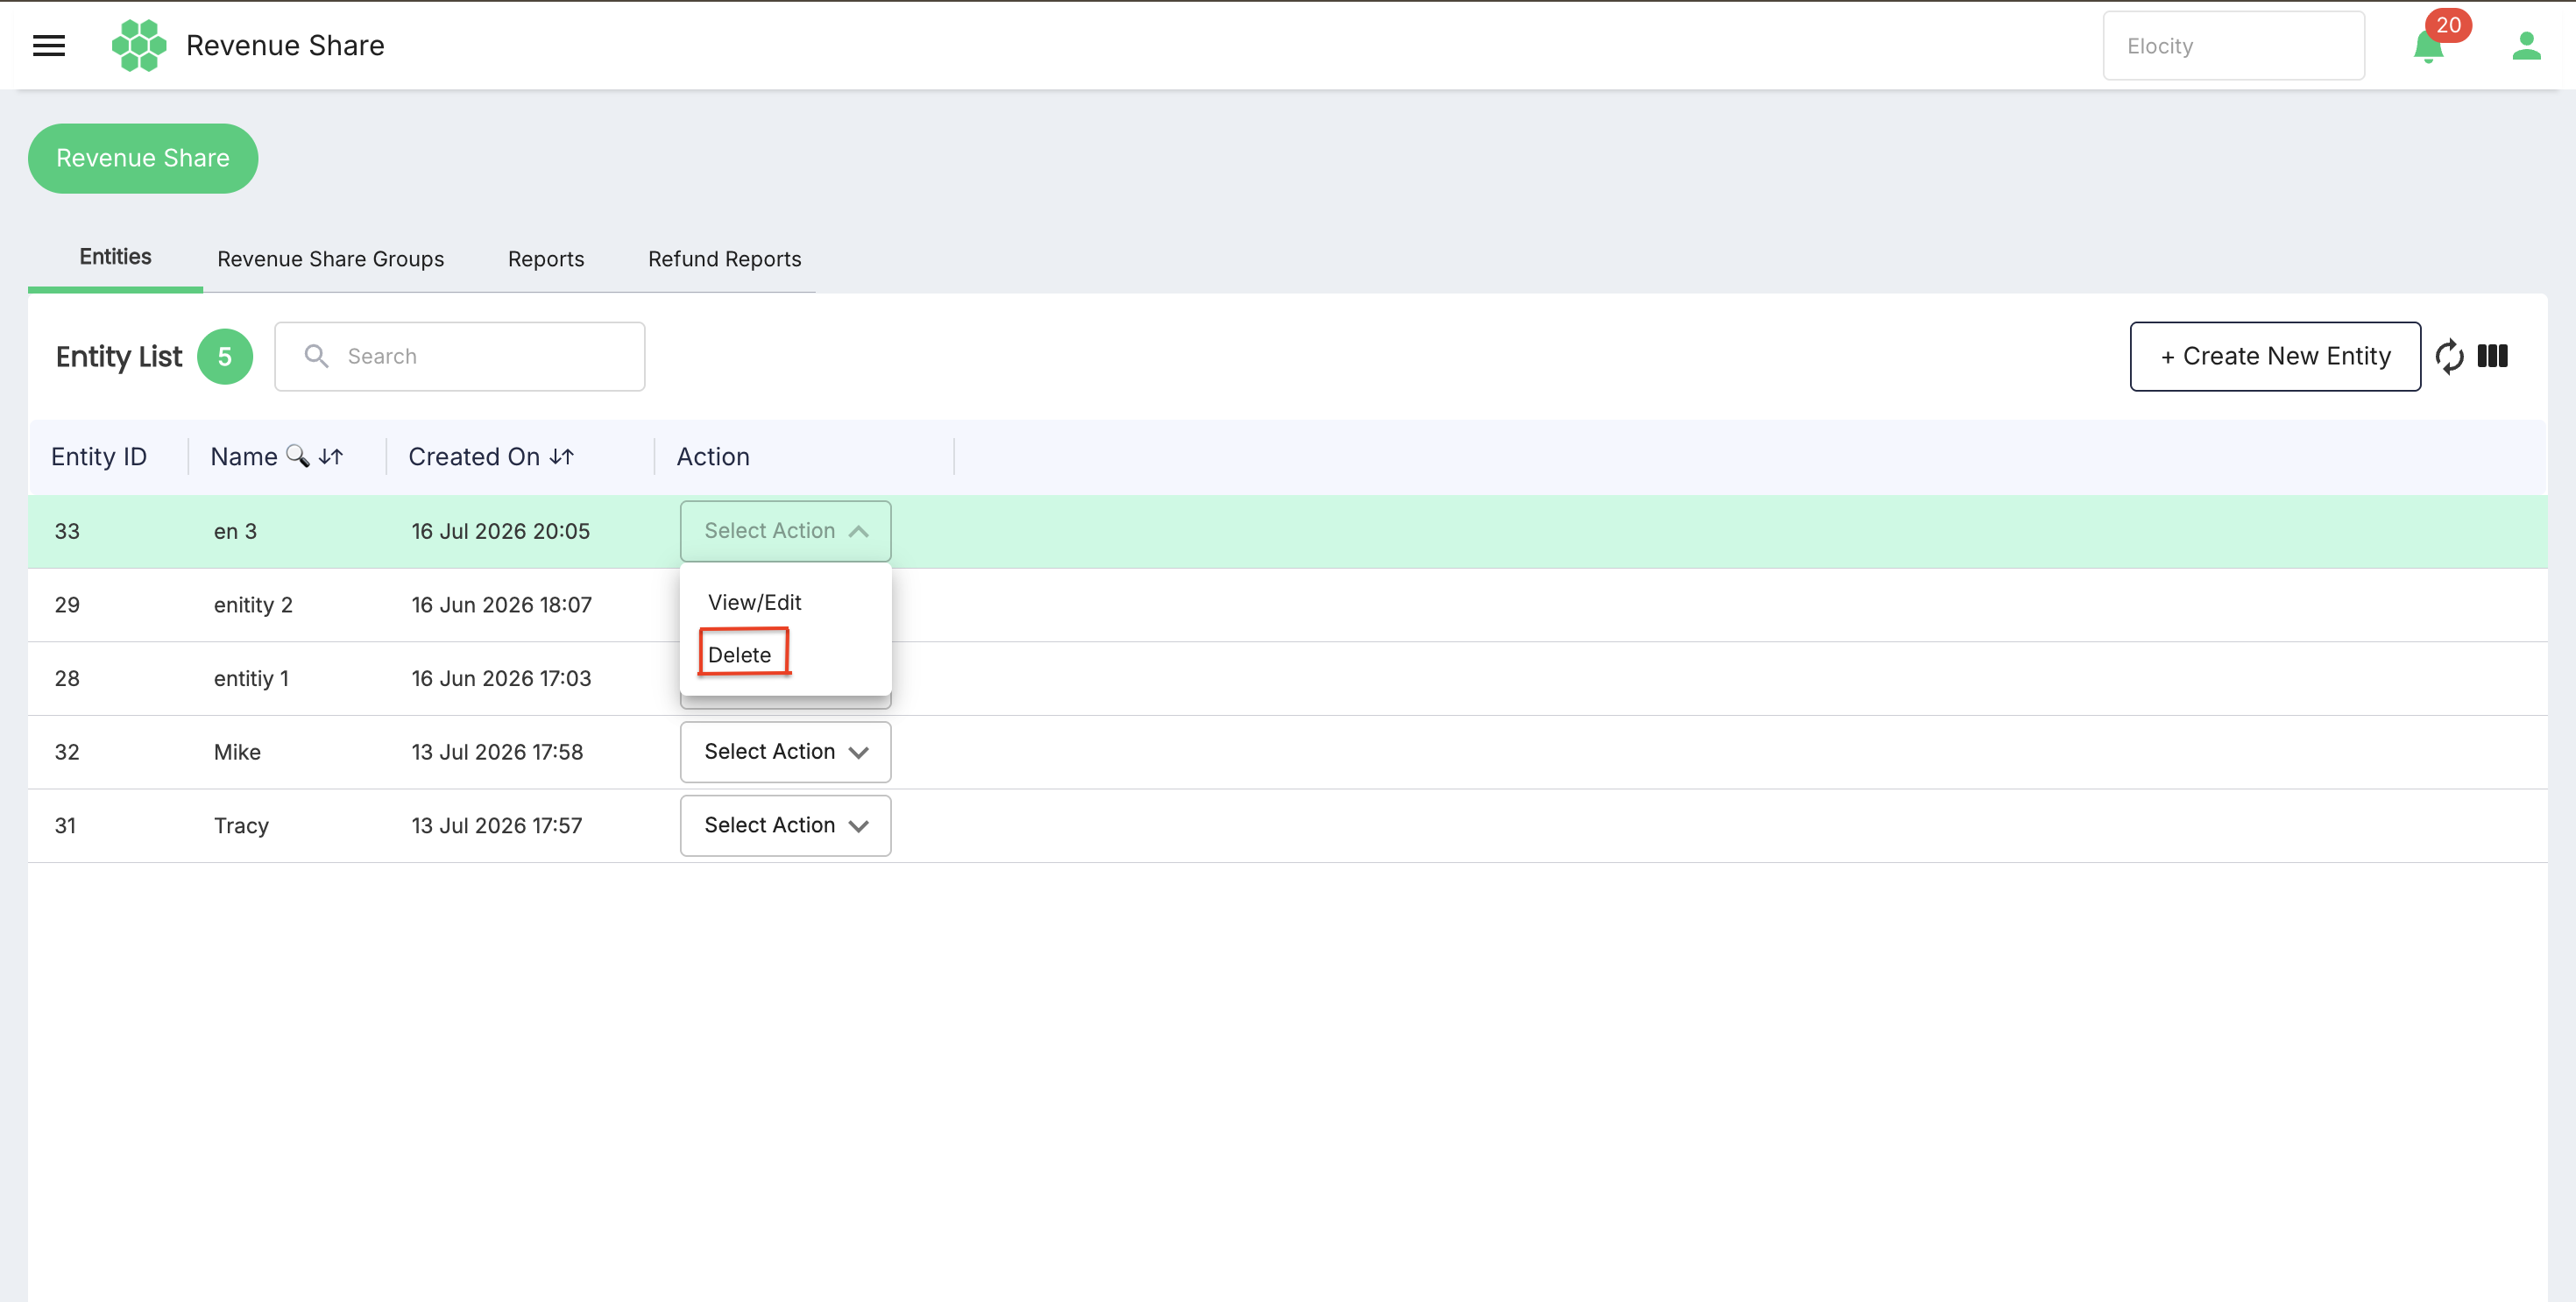
- Locate the entity in the grid.
- Open Select Action.
- Select Delete.
- Review the confirmation message: Are you sure you want to delete this entity?
- Select Delete to confirm, or Cancel to retain the entity.
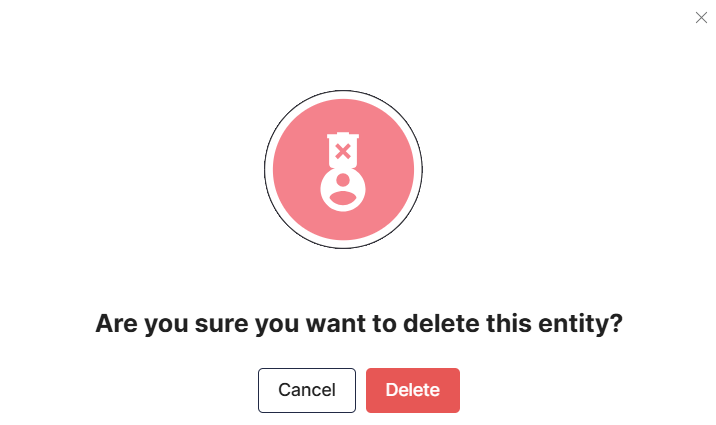
The current system does not prevent deletion merely because an entity has been used by a revenue-share group or charging session. Before deleting an entity, verify its dependencies and the effect on historical reporting. Delete only when the entity is no longer required.
Revenue Share Groups
A Revenue Share Group connects a group of charging locations with the entities that participate in revenue generated at those locations. The current product supports percentage-based revenue sharing only. Fixed-amount and percentage-plus-fixed arrangements are not currently supported.
Revenue Share Groups list
The number beside Revenue Share Groups represents the groups currently returned for the selected business.
| Column | Description |
|---|---|
| Group Name | Identifies the saved revenue-share arrangement. |
| Number of Locations | Number of charging locations assigned to the group. |
| Created On | Date and time when the group was created. |
| Action | Opens the available View/Edit and Delete actions. |
The page provides Search, Refresh, and Column Filter, together with + Create New Revenue Share Group.
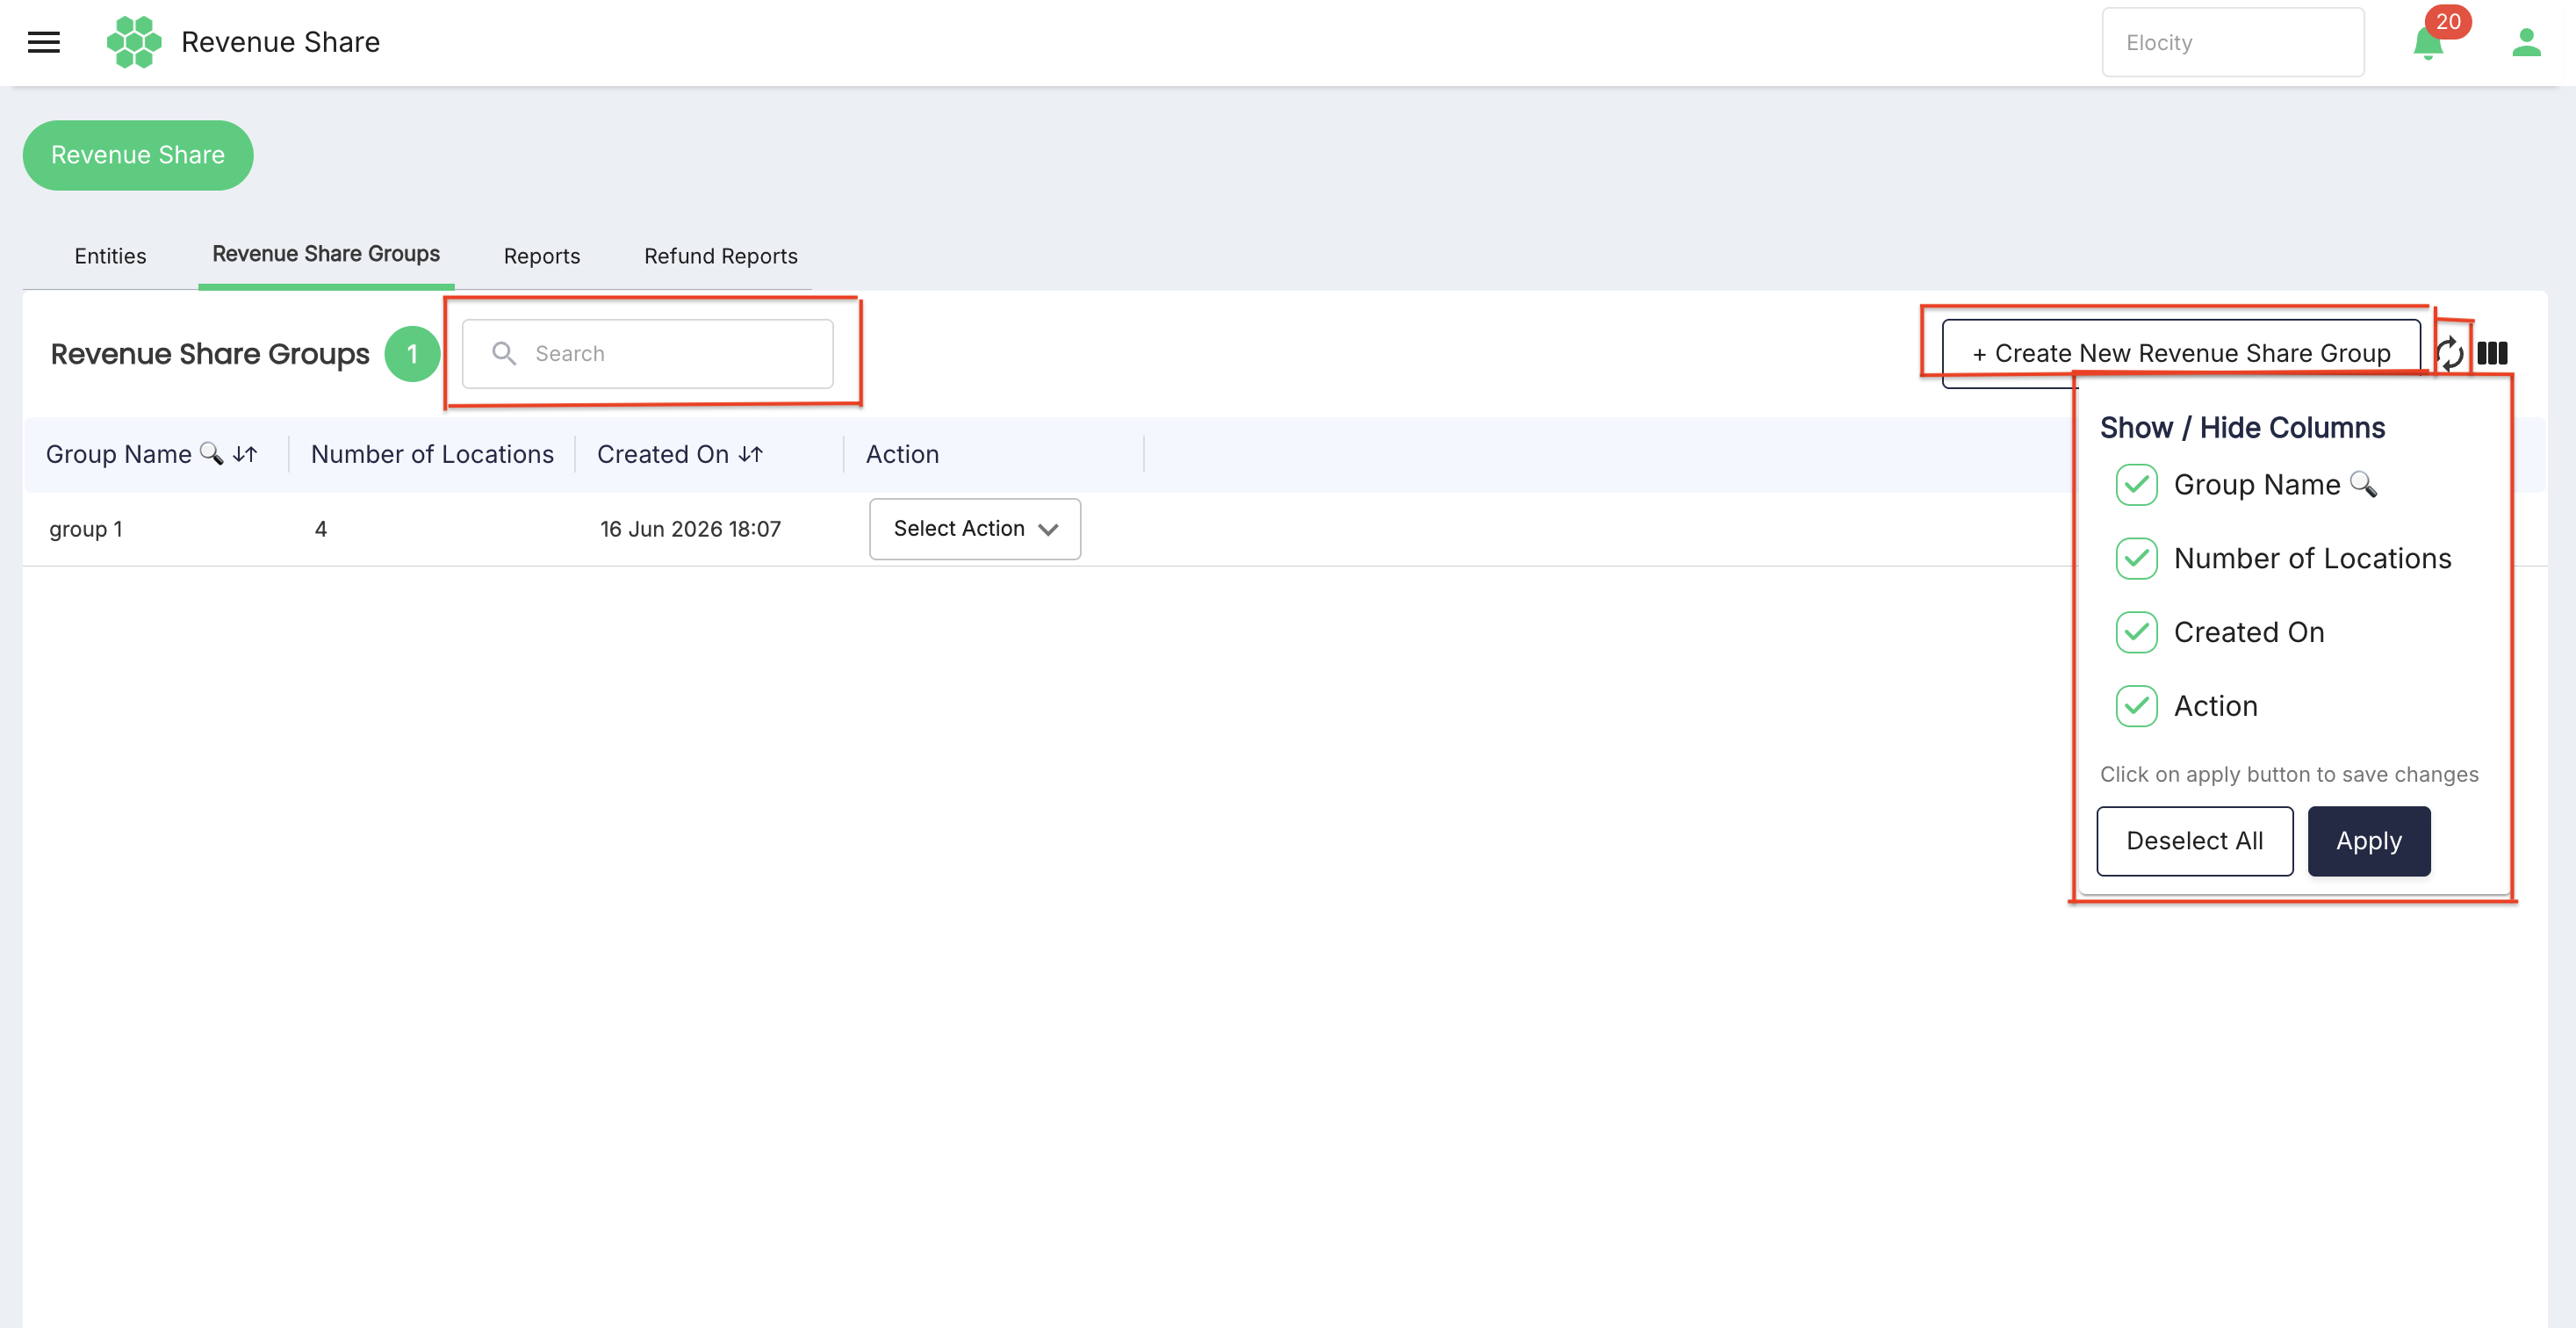
Creating a Revenue Share Group
- Select + Create New Revenue Share Group.
- Enter the required Group Name.
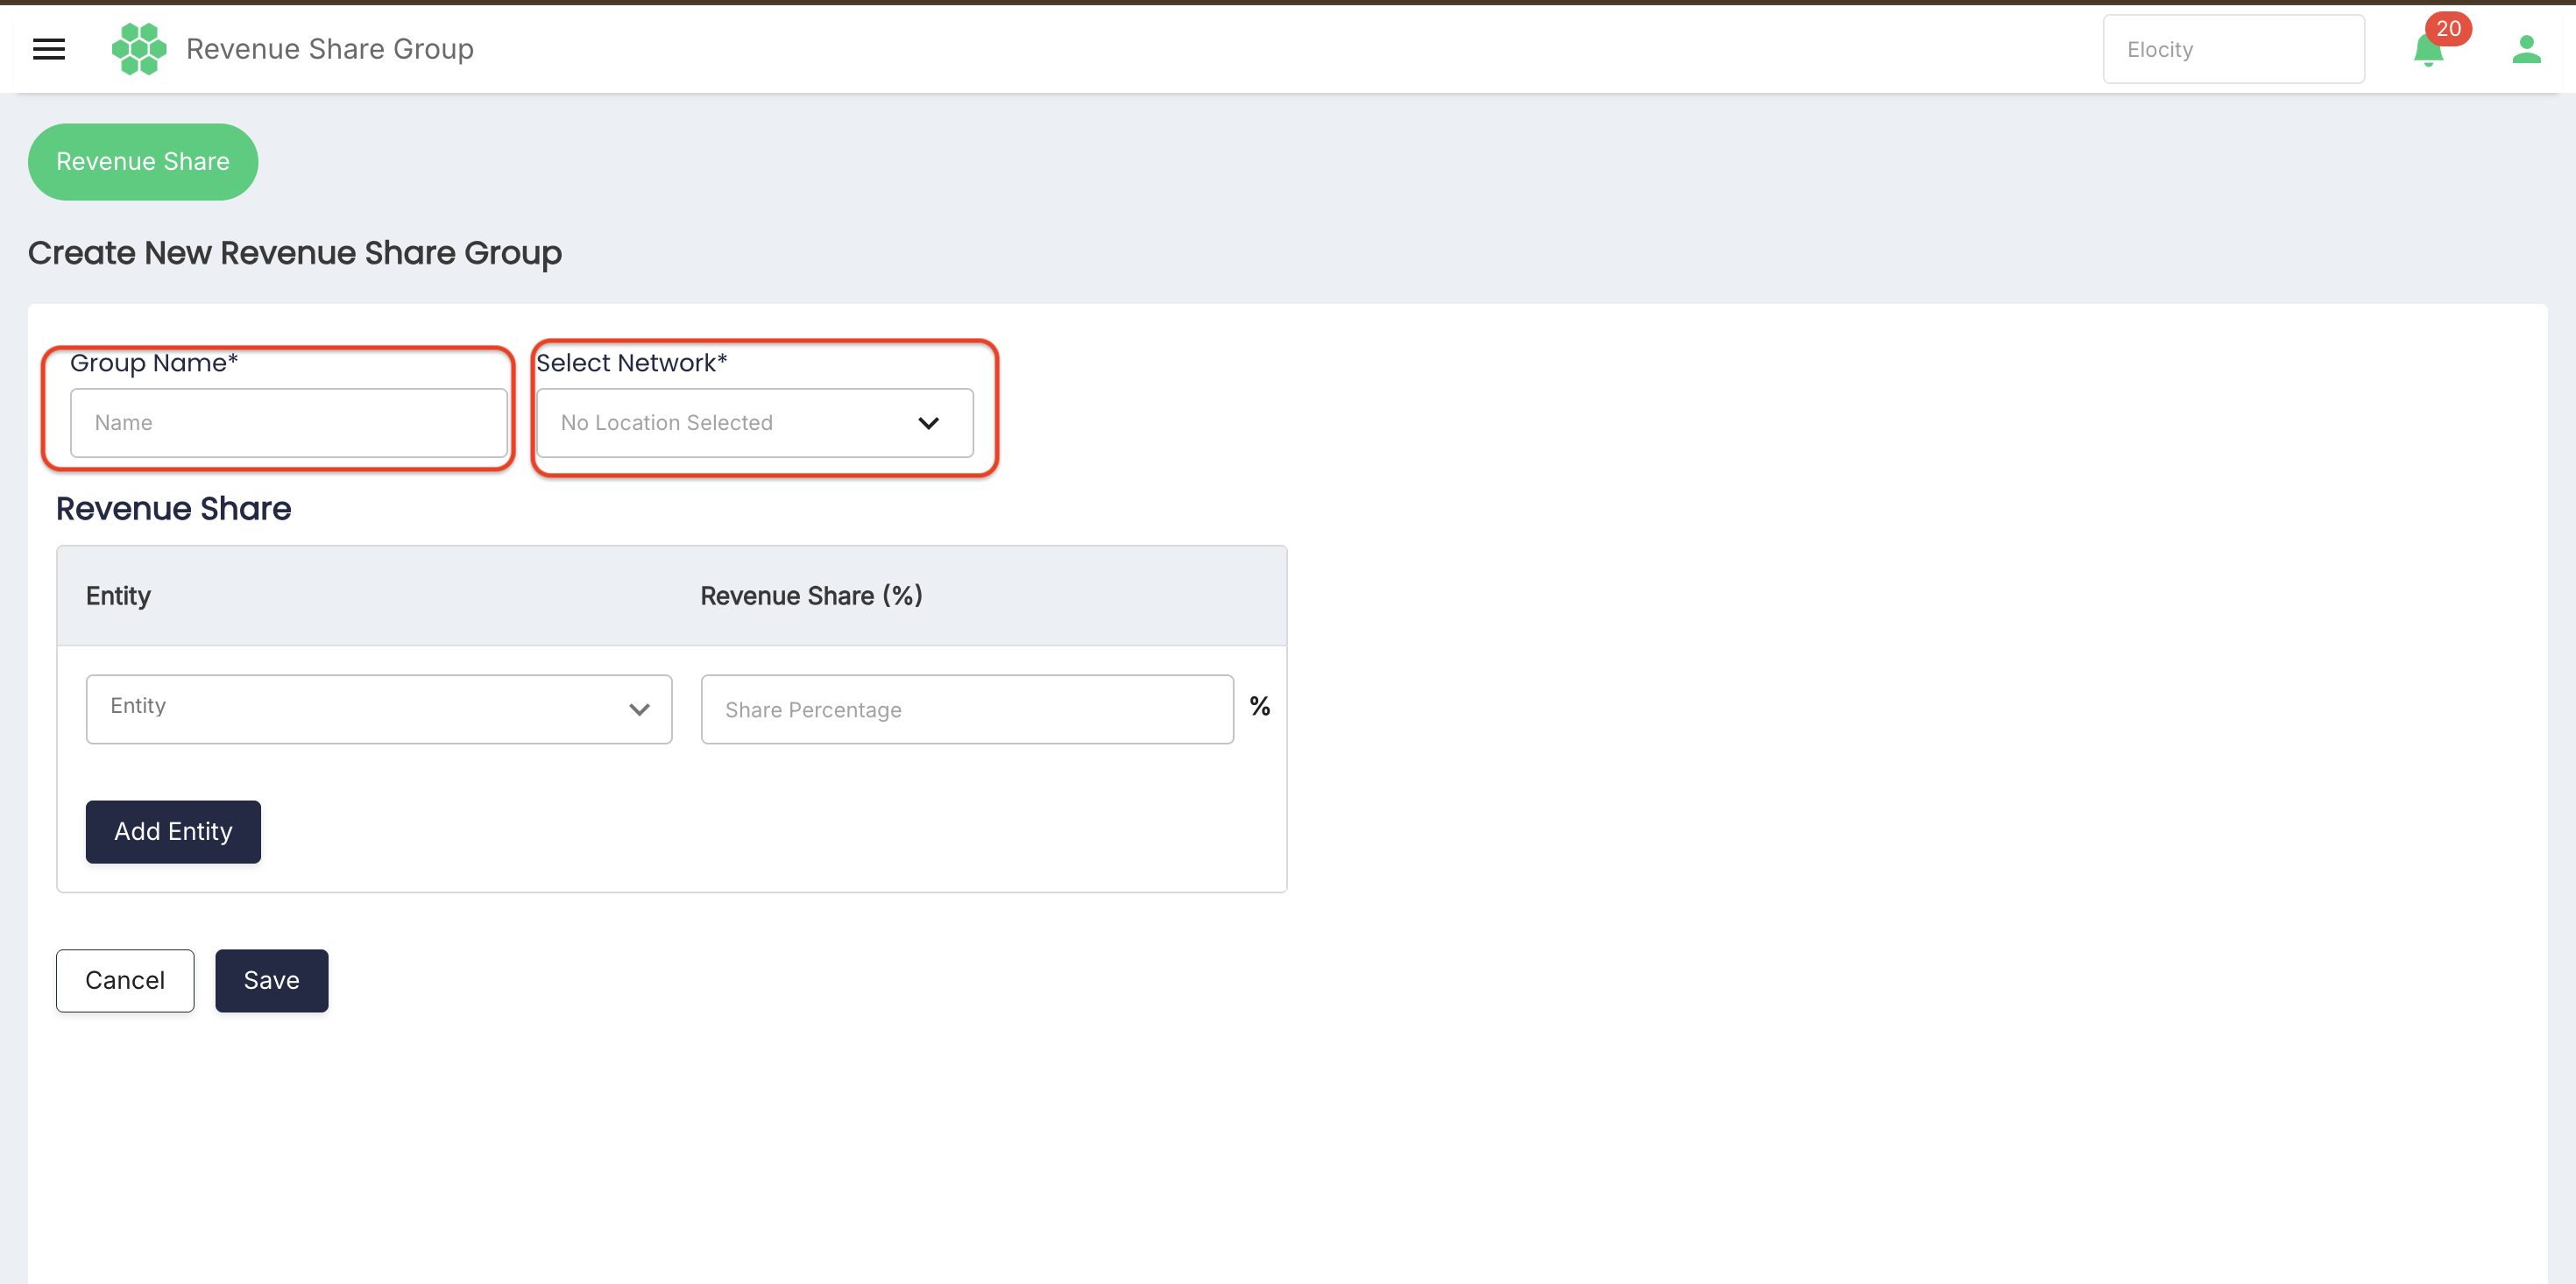
- Open Select Network.
- Expand the Country, Province/State, and City levels to locate the required charging locations.
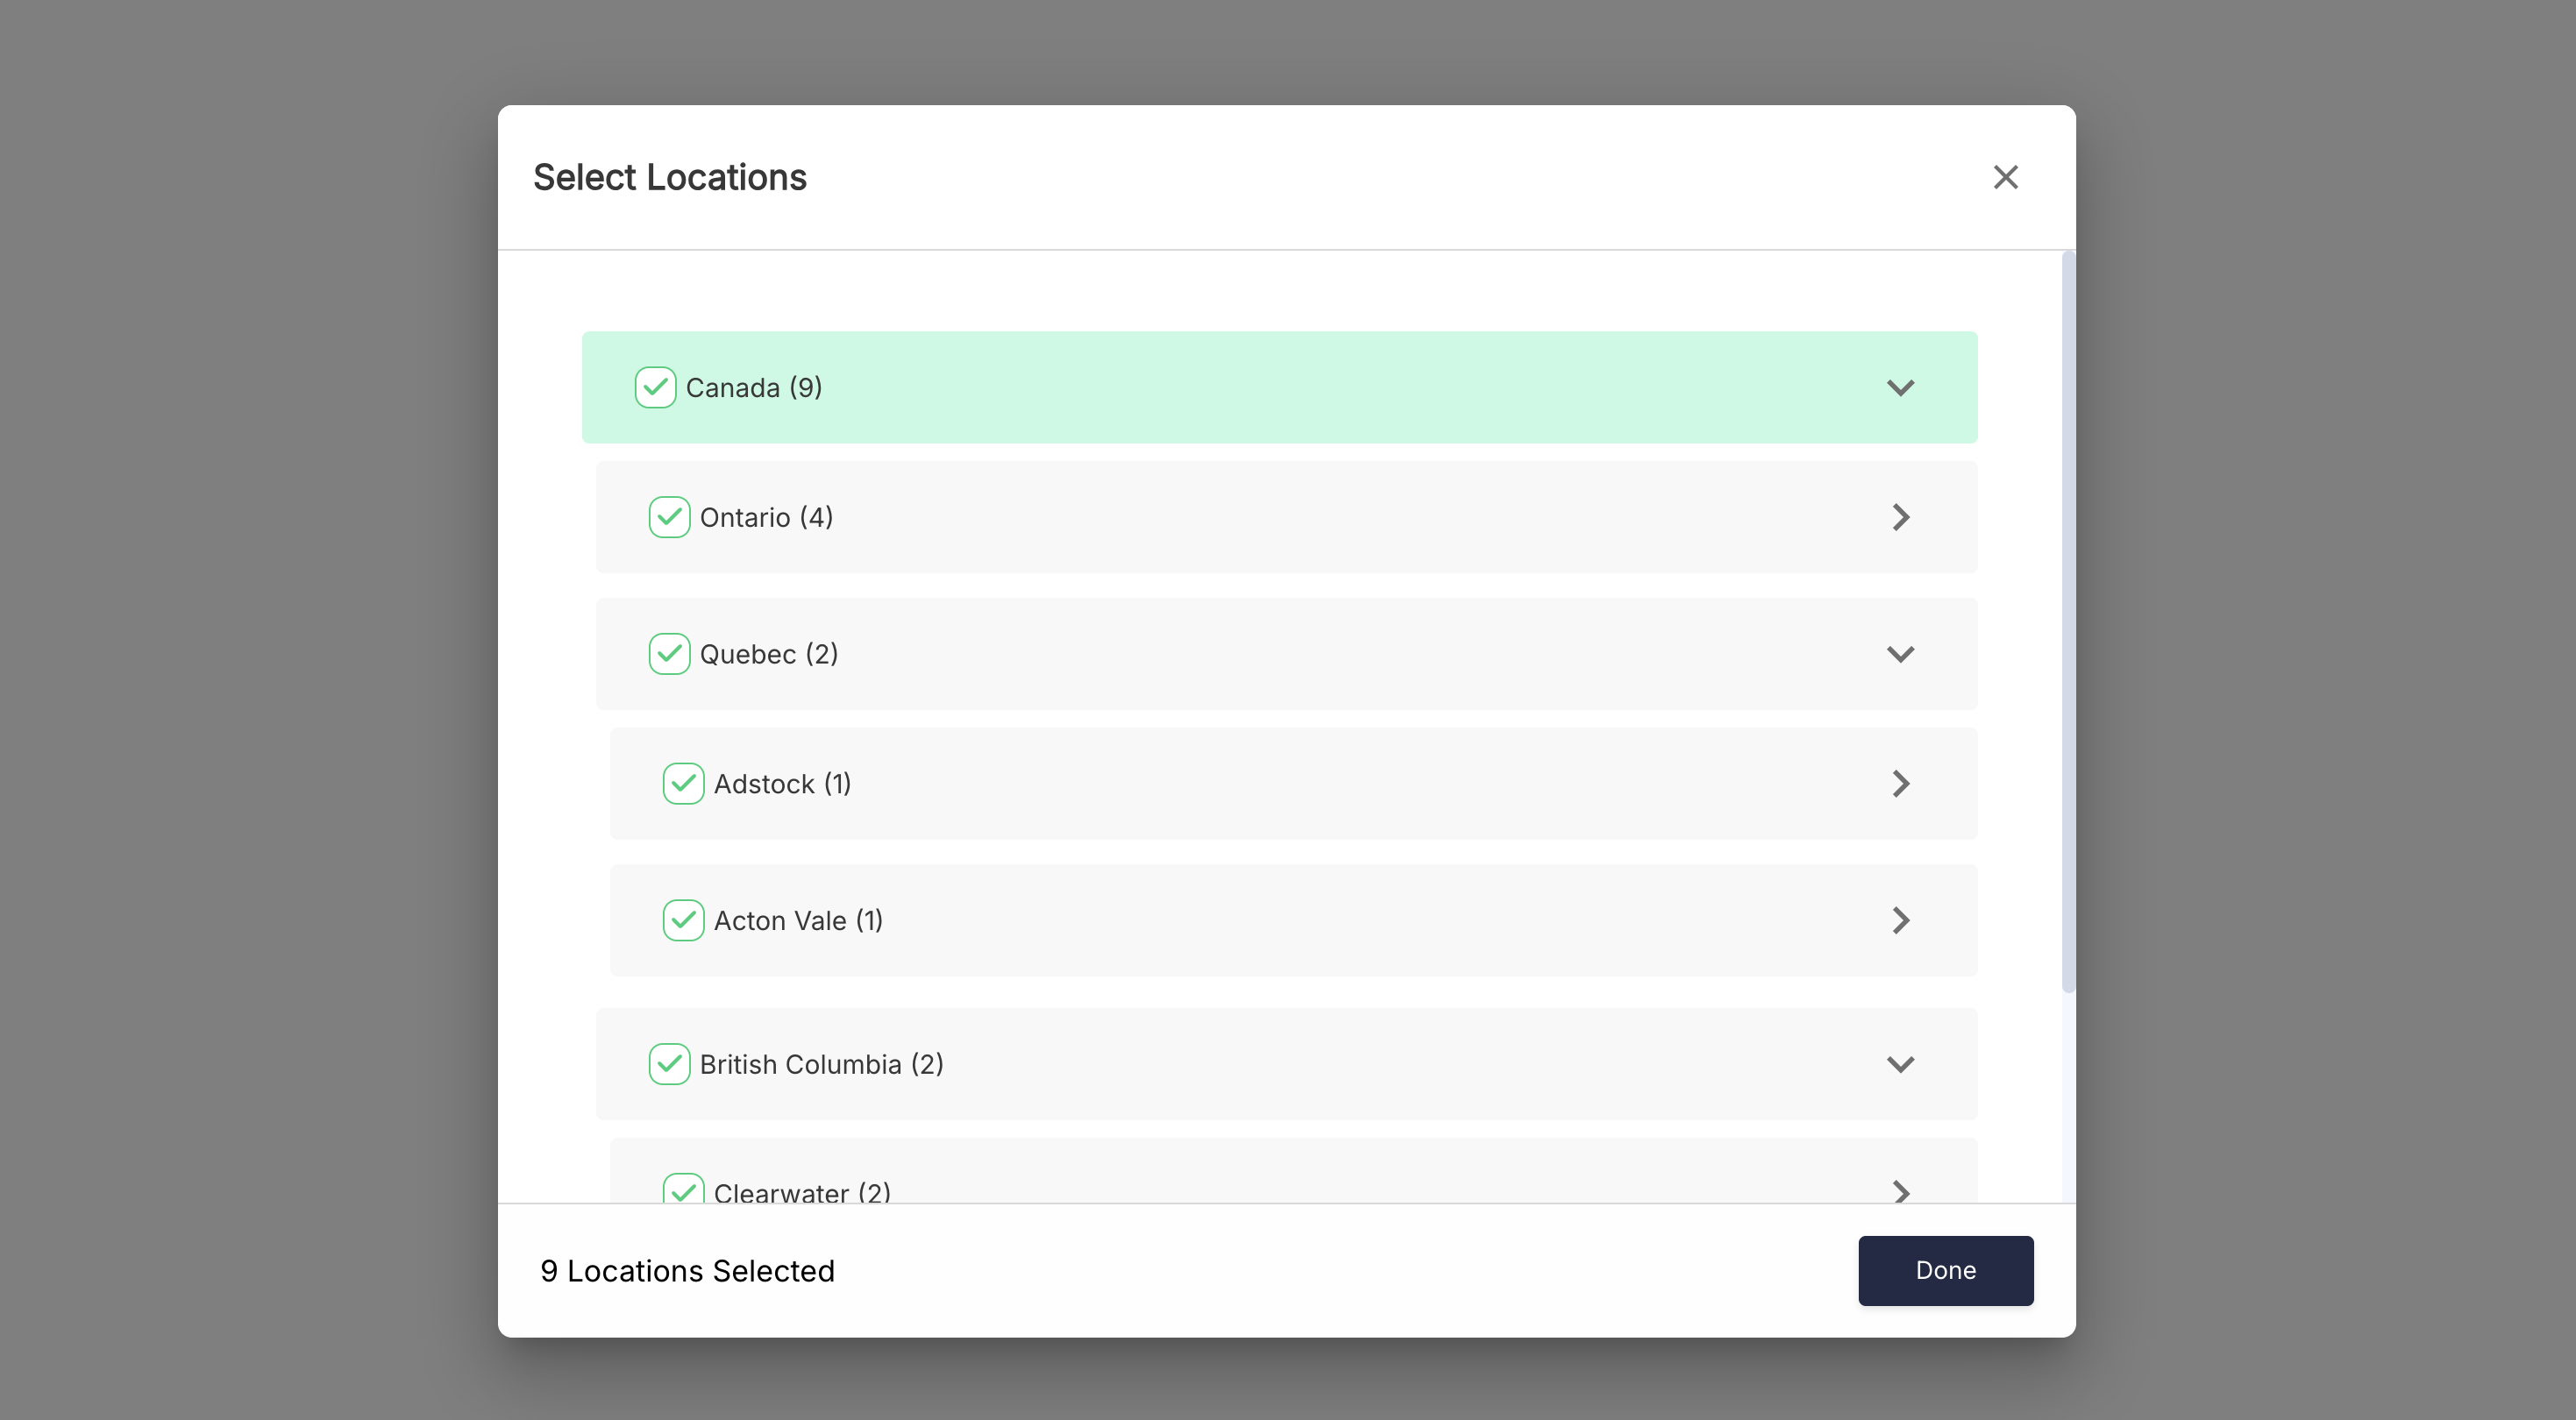
- Select one or more locations and select Done.
- In the Revenue Share table, select the first Entity.
- Enter the entity's Revenue Share (%).
- Select Add Entity to create another entity/share row.
- Repeat the entity and percentage entries for all participating parties.
- Confirm that the combined percentages equal exactly 100%. Decimal percentage values are supported.
- Review the location scope and entered shares.
- Select Save.
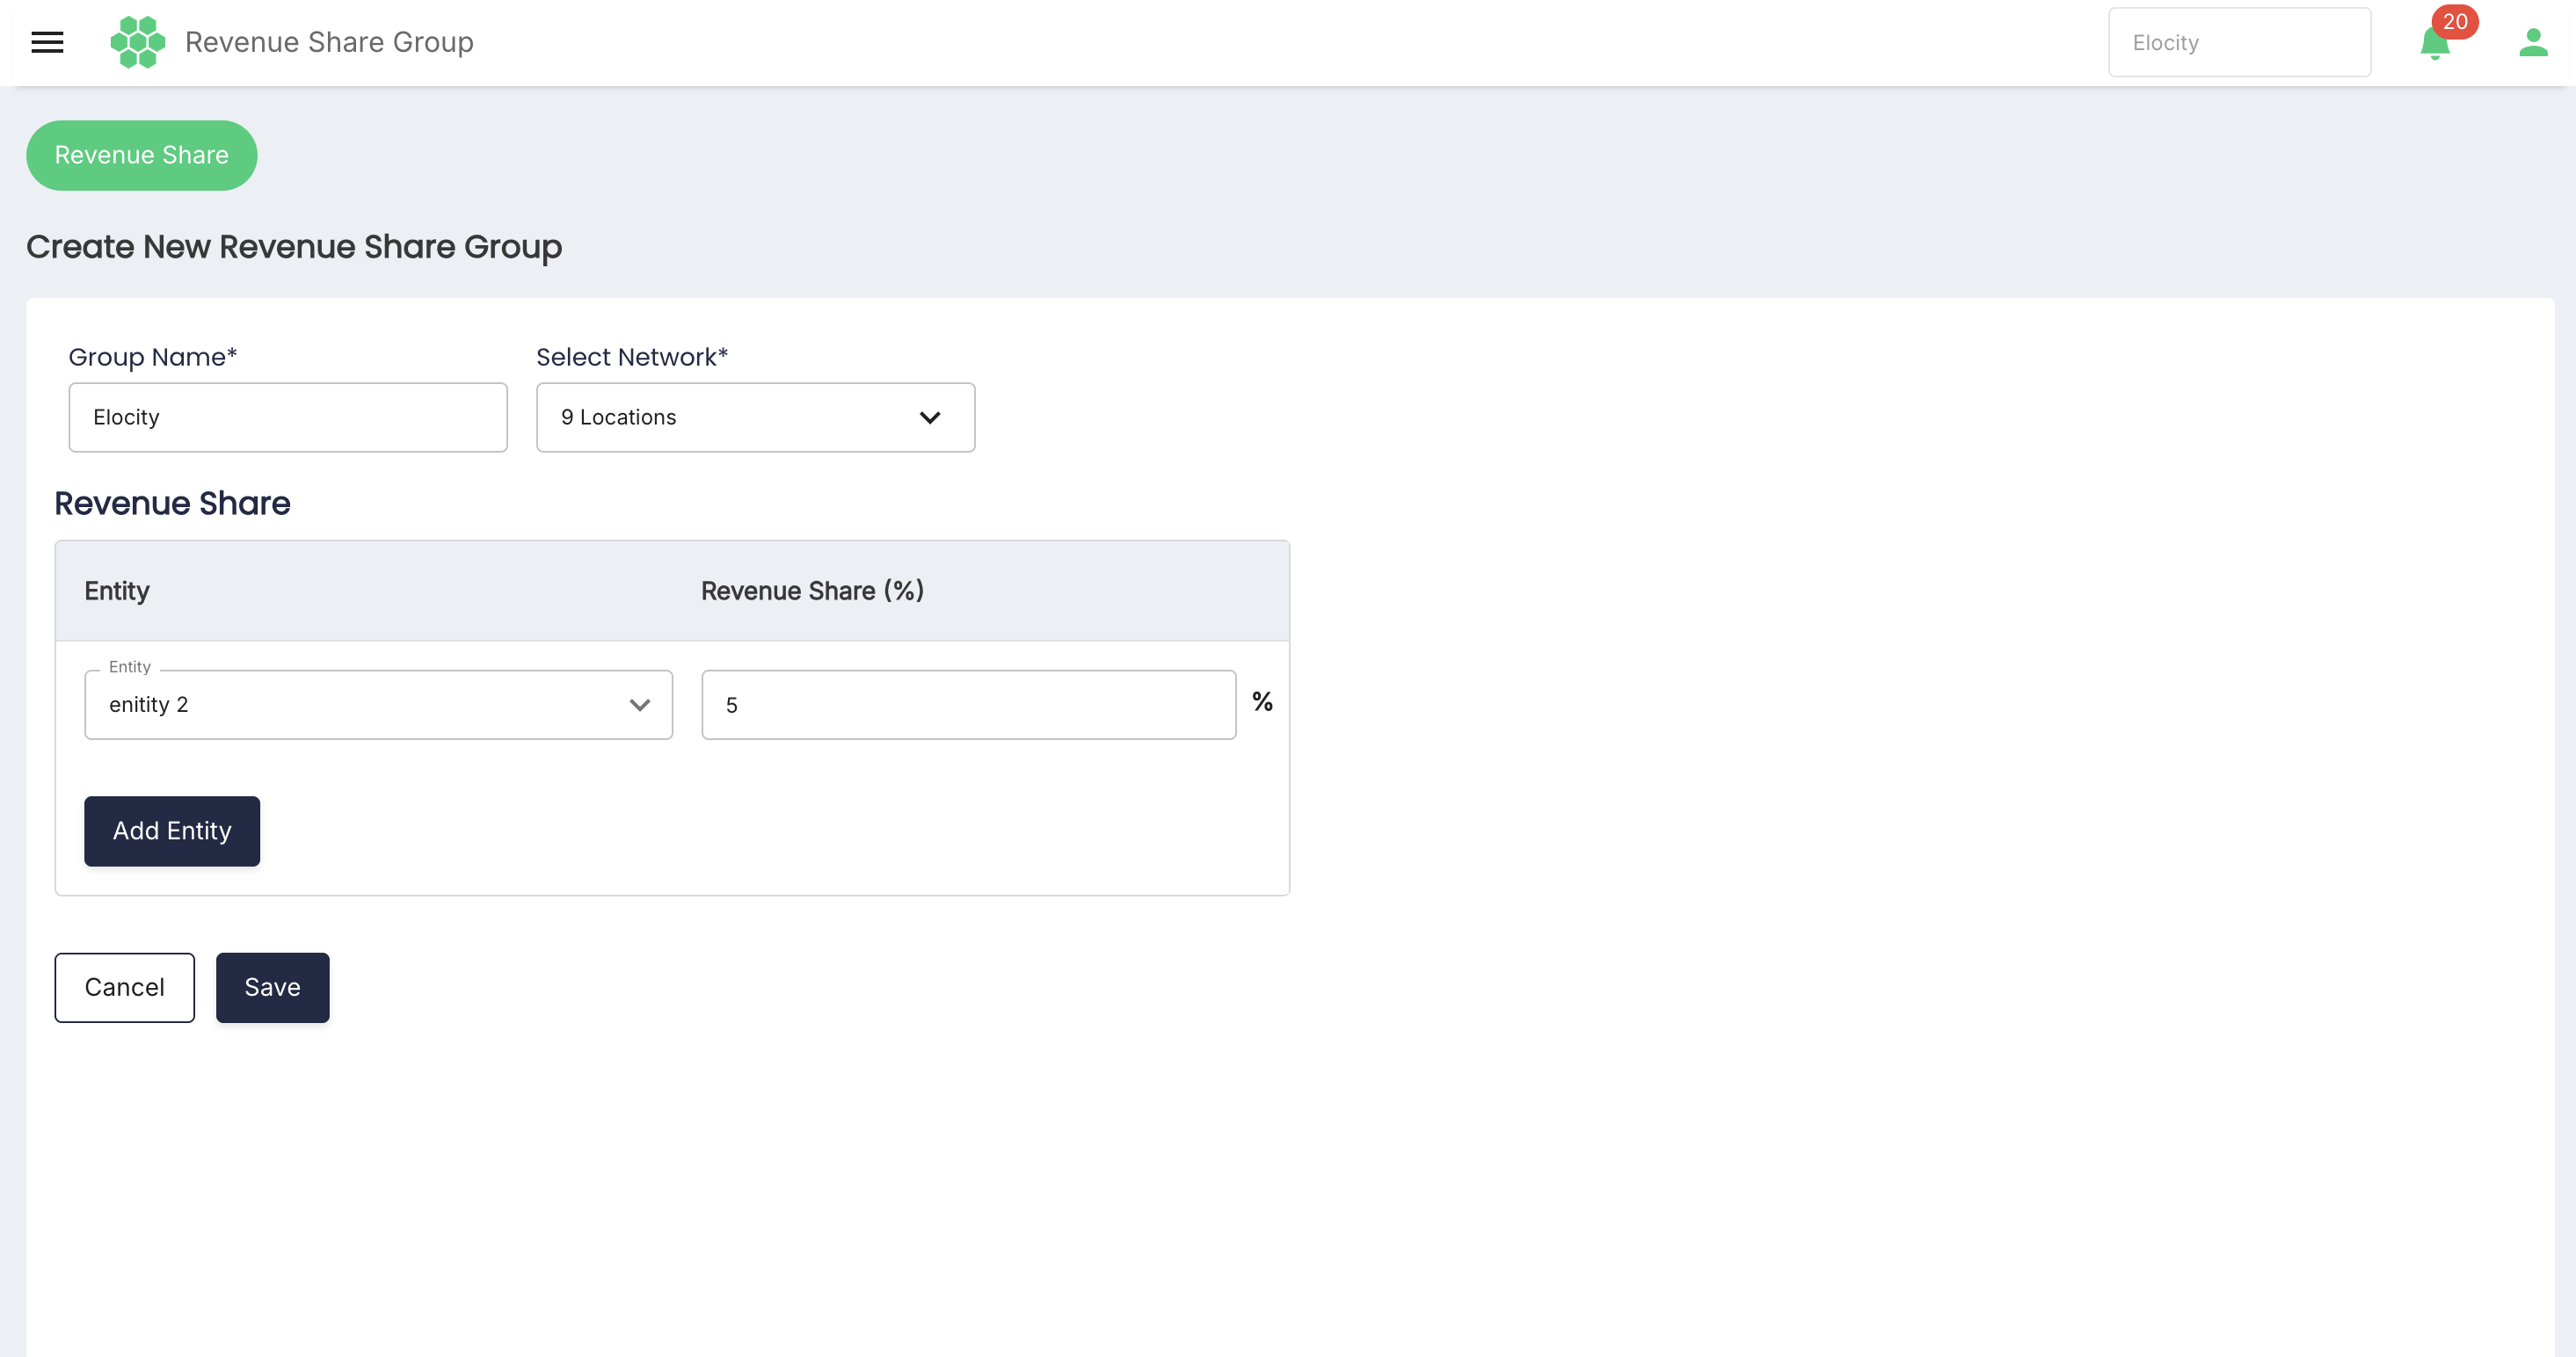
The location selector supports parent-level checkboxes and displays the number of locations available under each geographic level. If no location is selected, the form displays a validation message stating that at least one network location must be selected.
The Entity selector is populated from the records maintained under the Entities tab. The Add Entity control becomes useful after the current row has an entity and percentage; it then adds another row for an additional participating party.
A location normally belongs to one Revenue Share Group. Before assigning locations, review existing groups to avoid overlapping arrangements.
Select Cancel to leave the form without saving the new group.
Viewing a Revenue Share Group
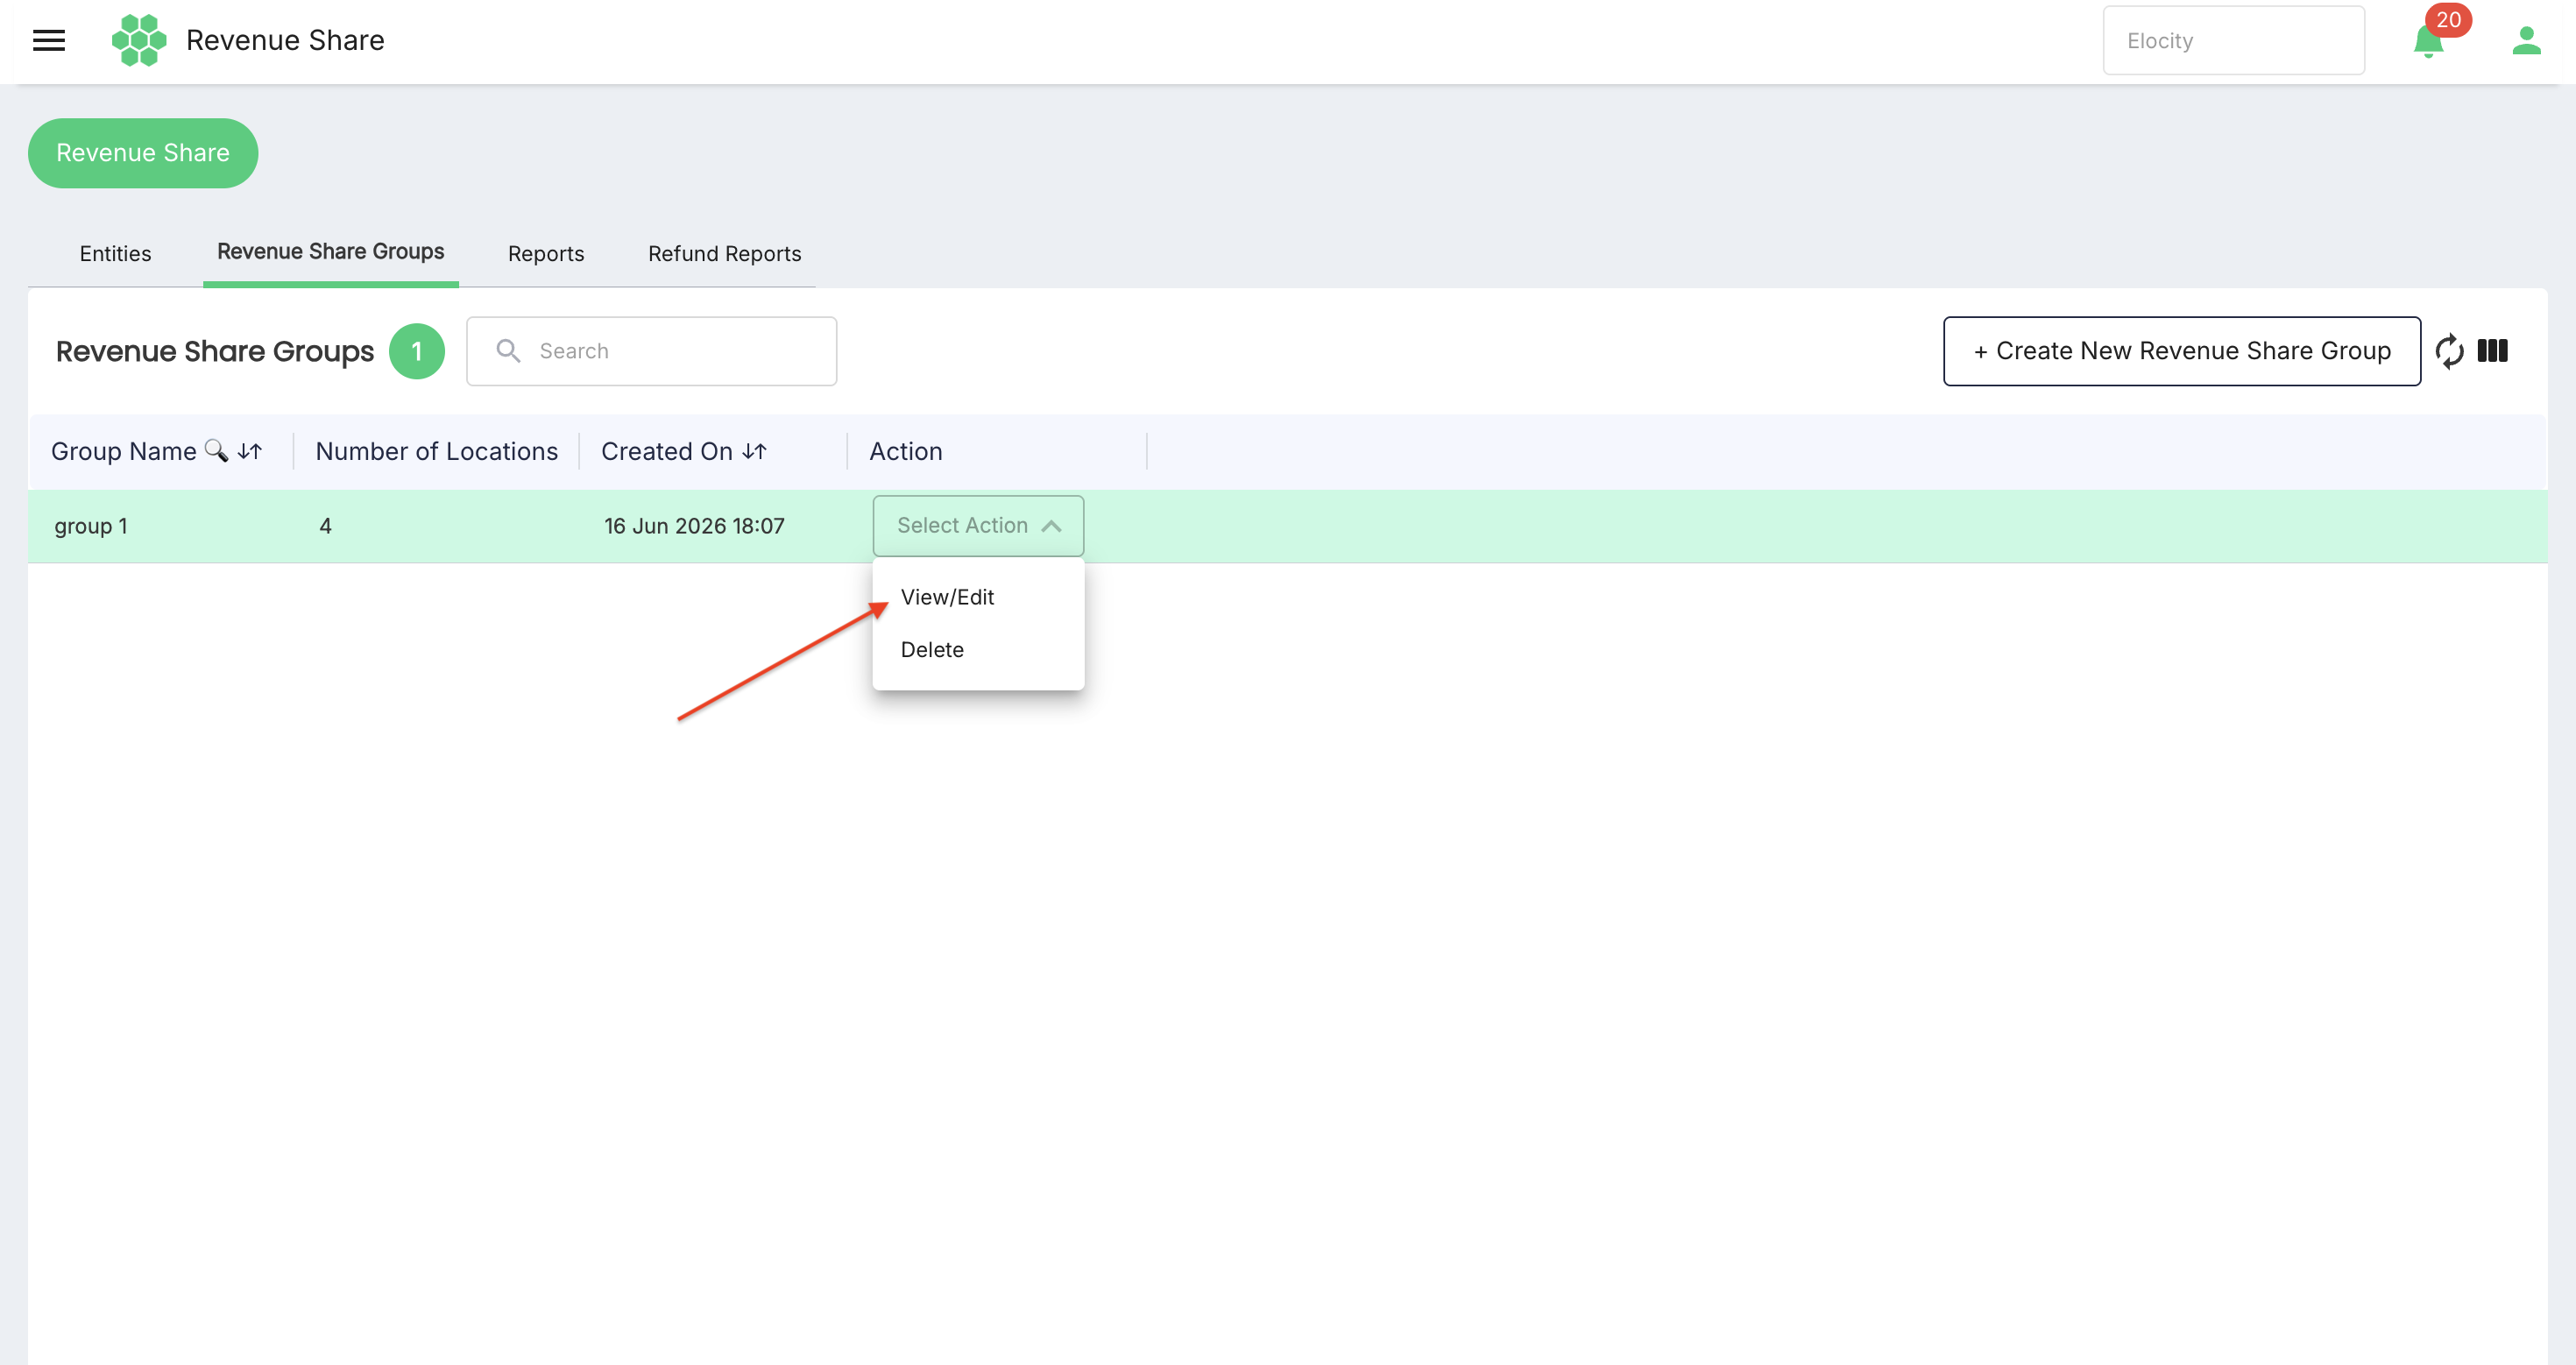
- Locate the group in the Revenue Share Groups grid.
- Open Select Action.
- Select View/Edit.
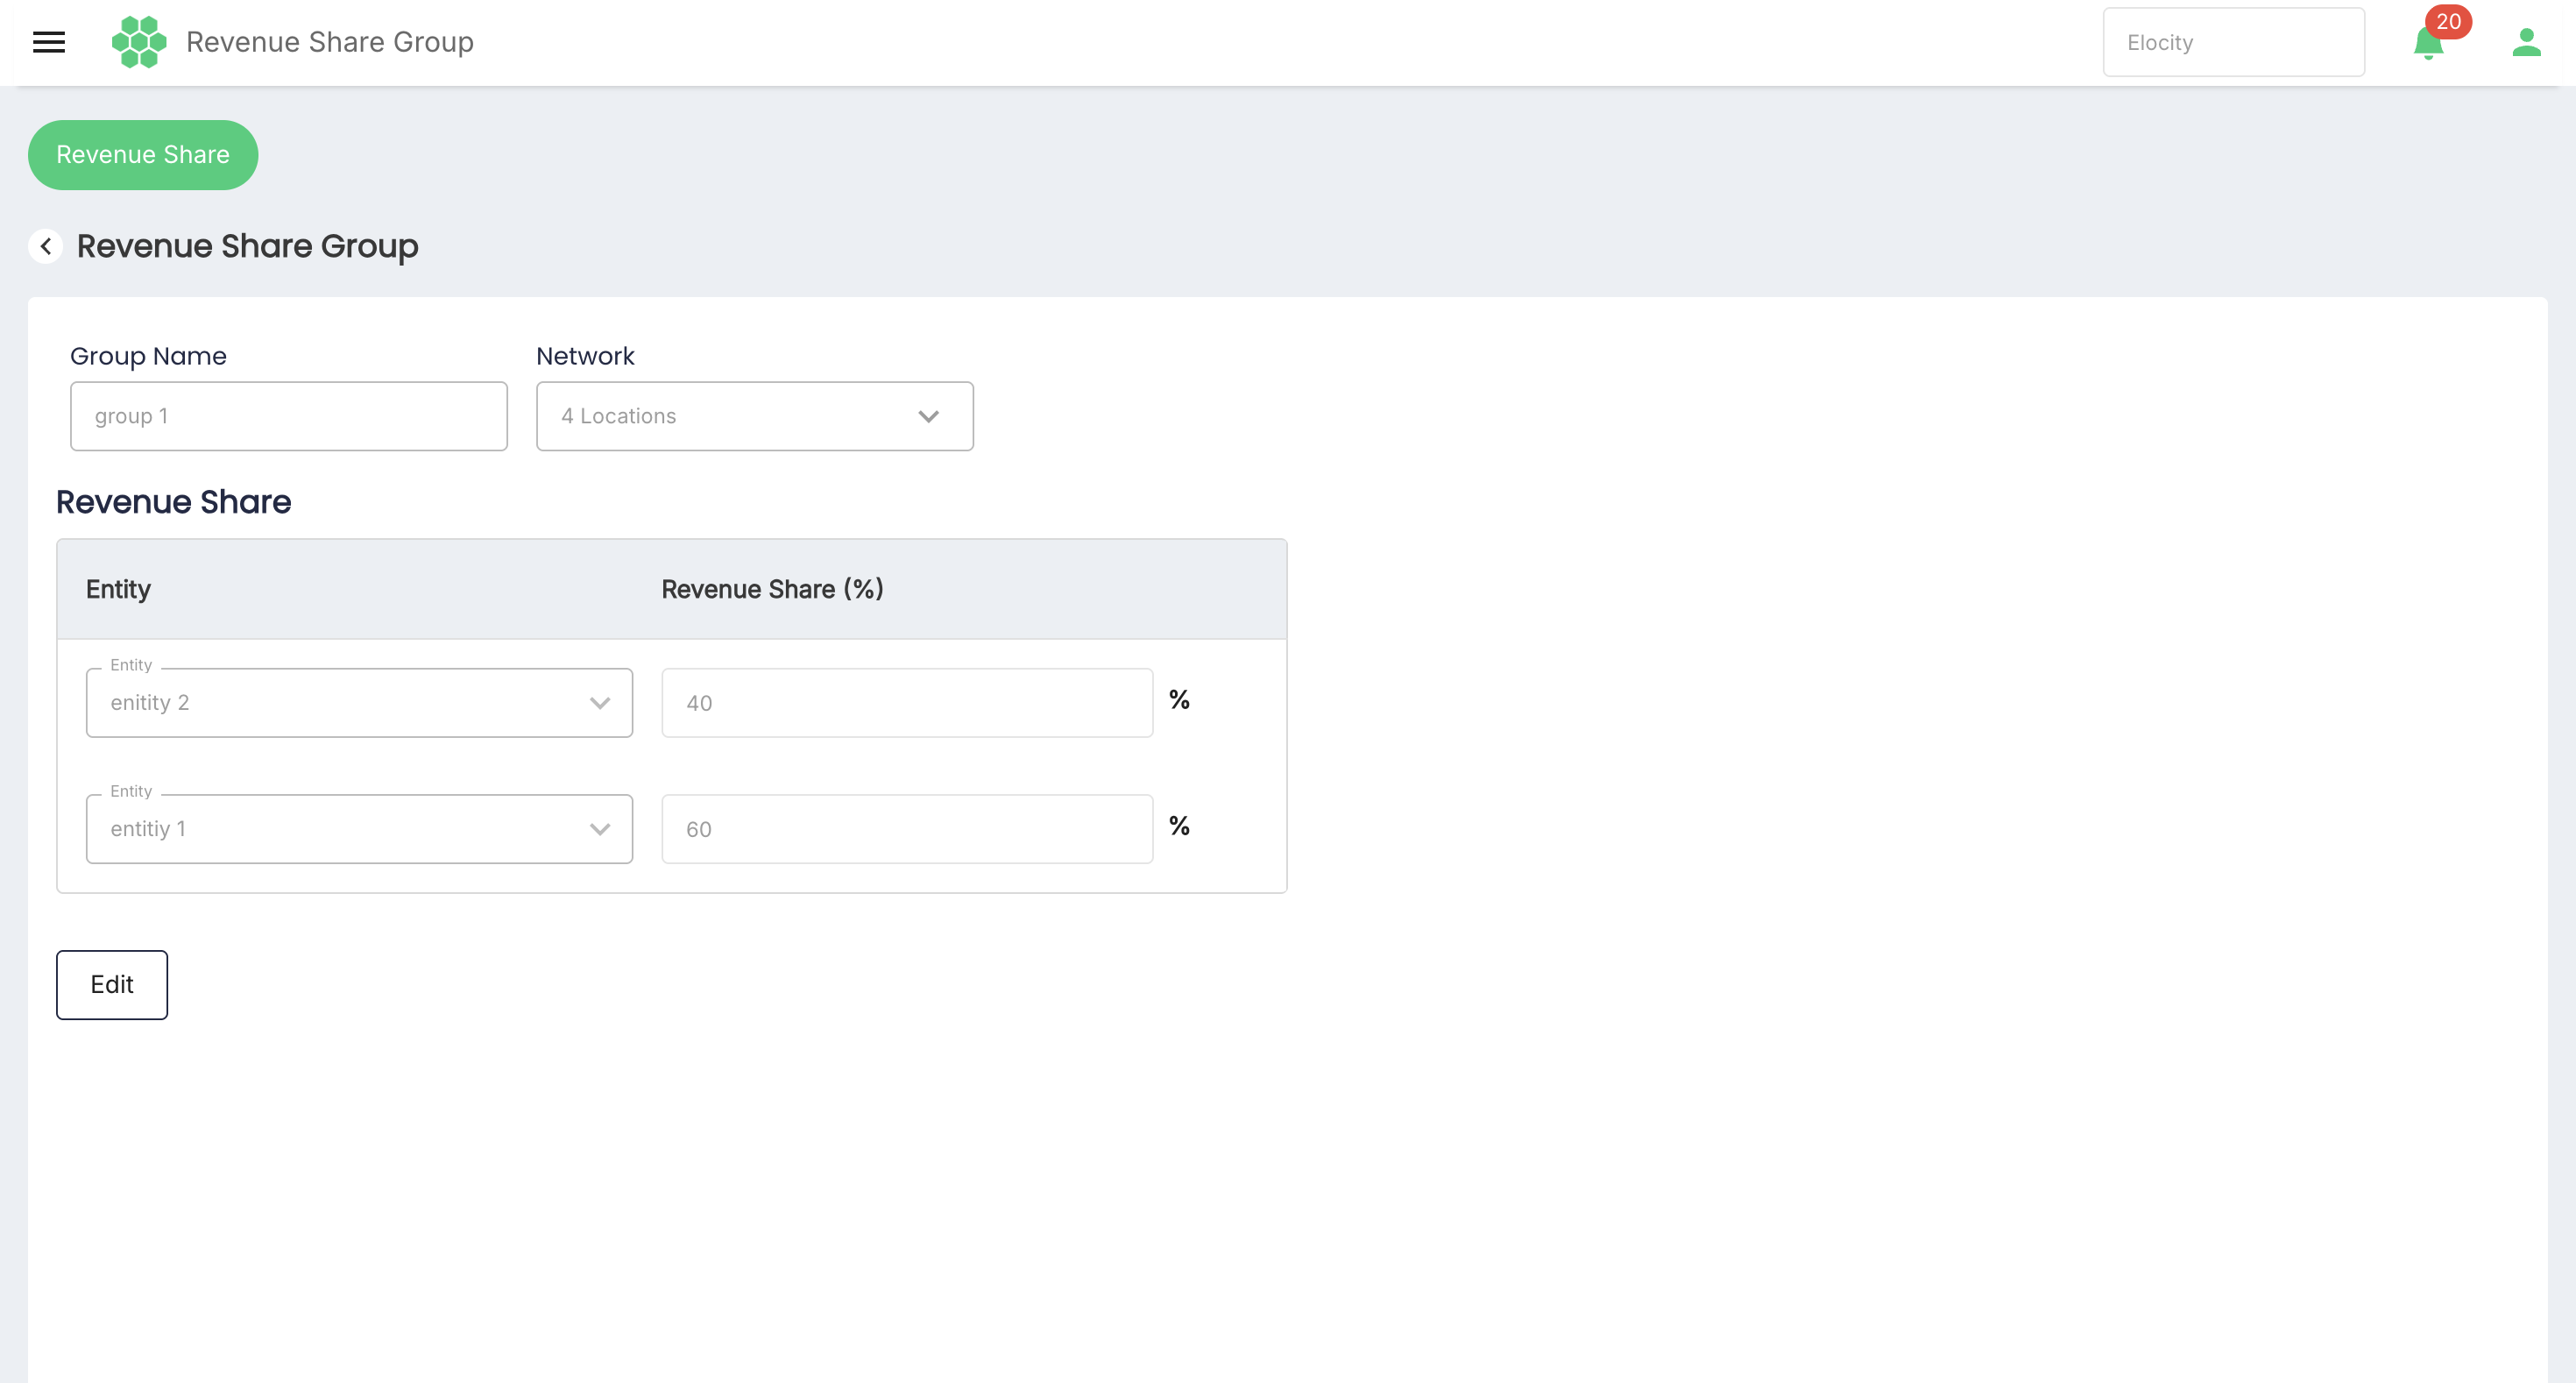
The initial detail page is read-only and shows:
- Group Name.
- Number of selected locations.
- Each participating entity.
- Each entity's Revenue Share percentage.
Editing a Revenue Share Group
- Open the group through View/Edit.
- Select Edit.
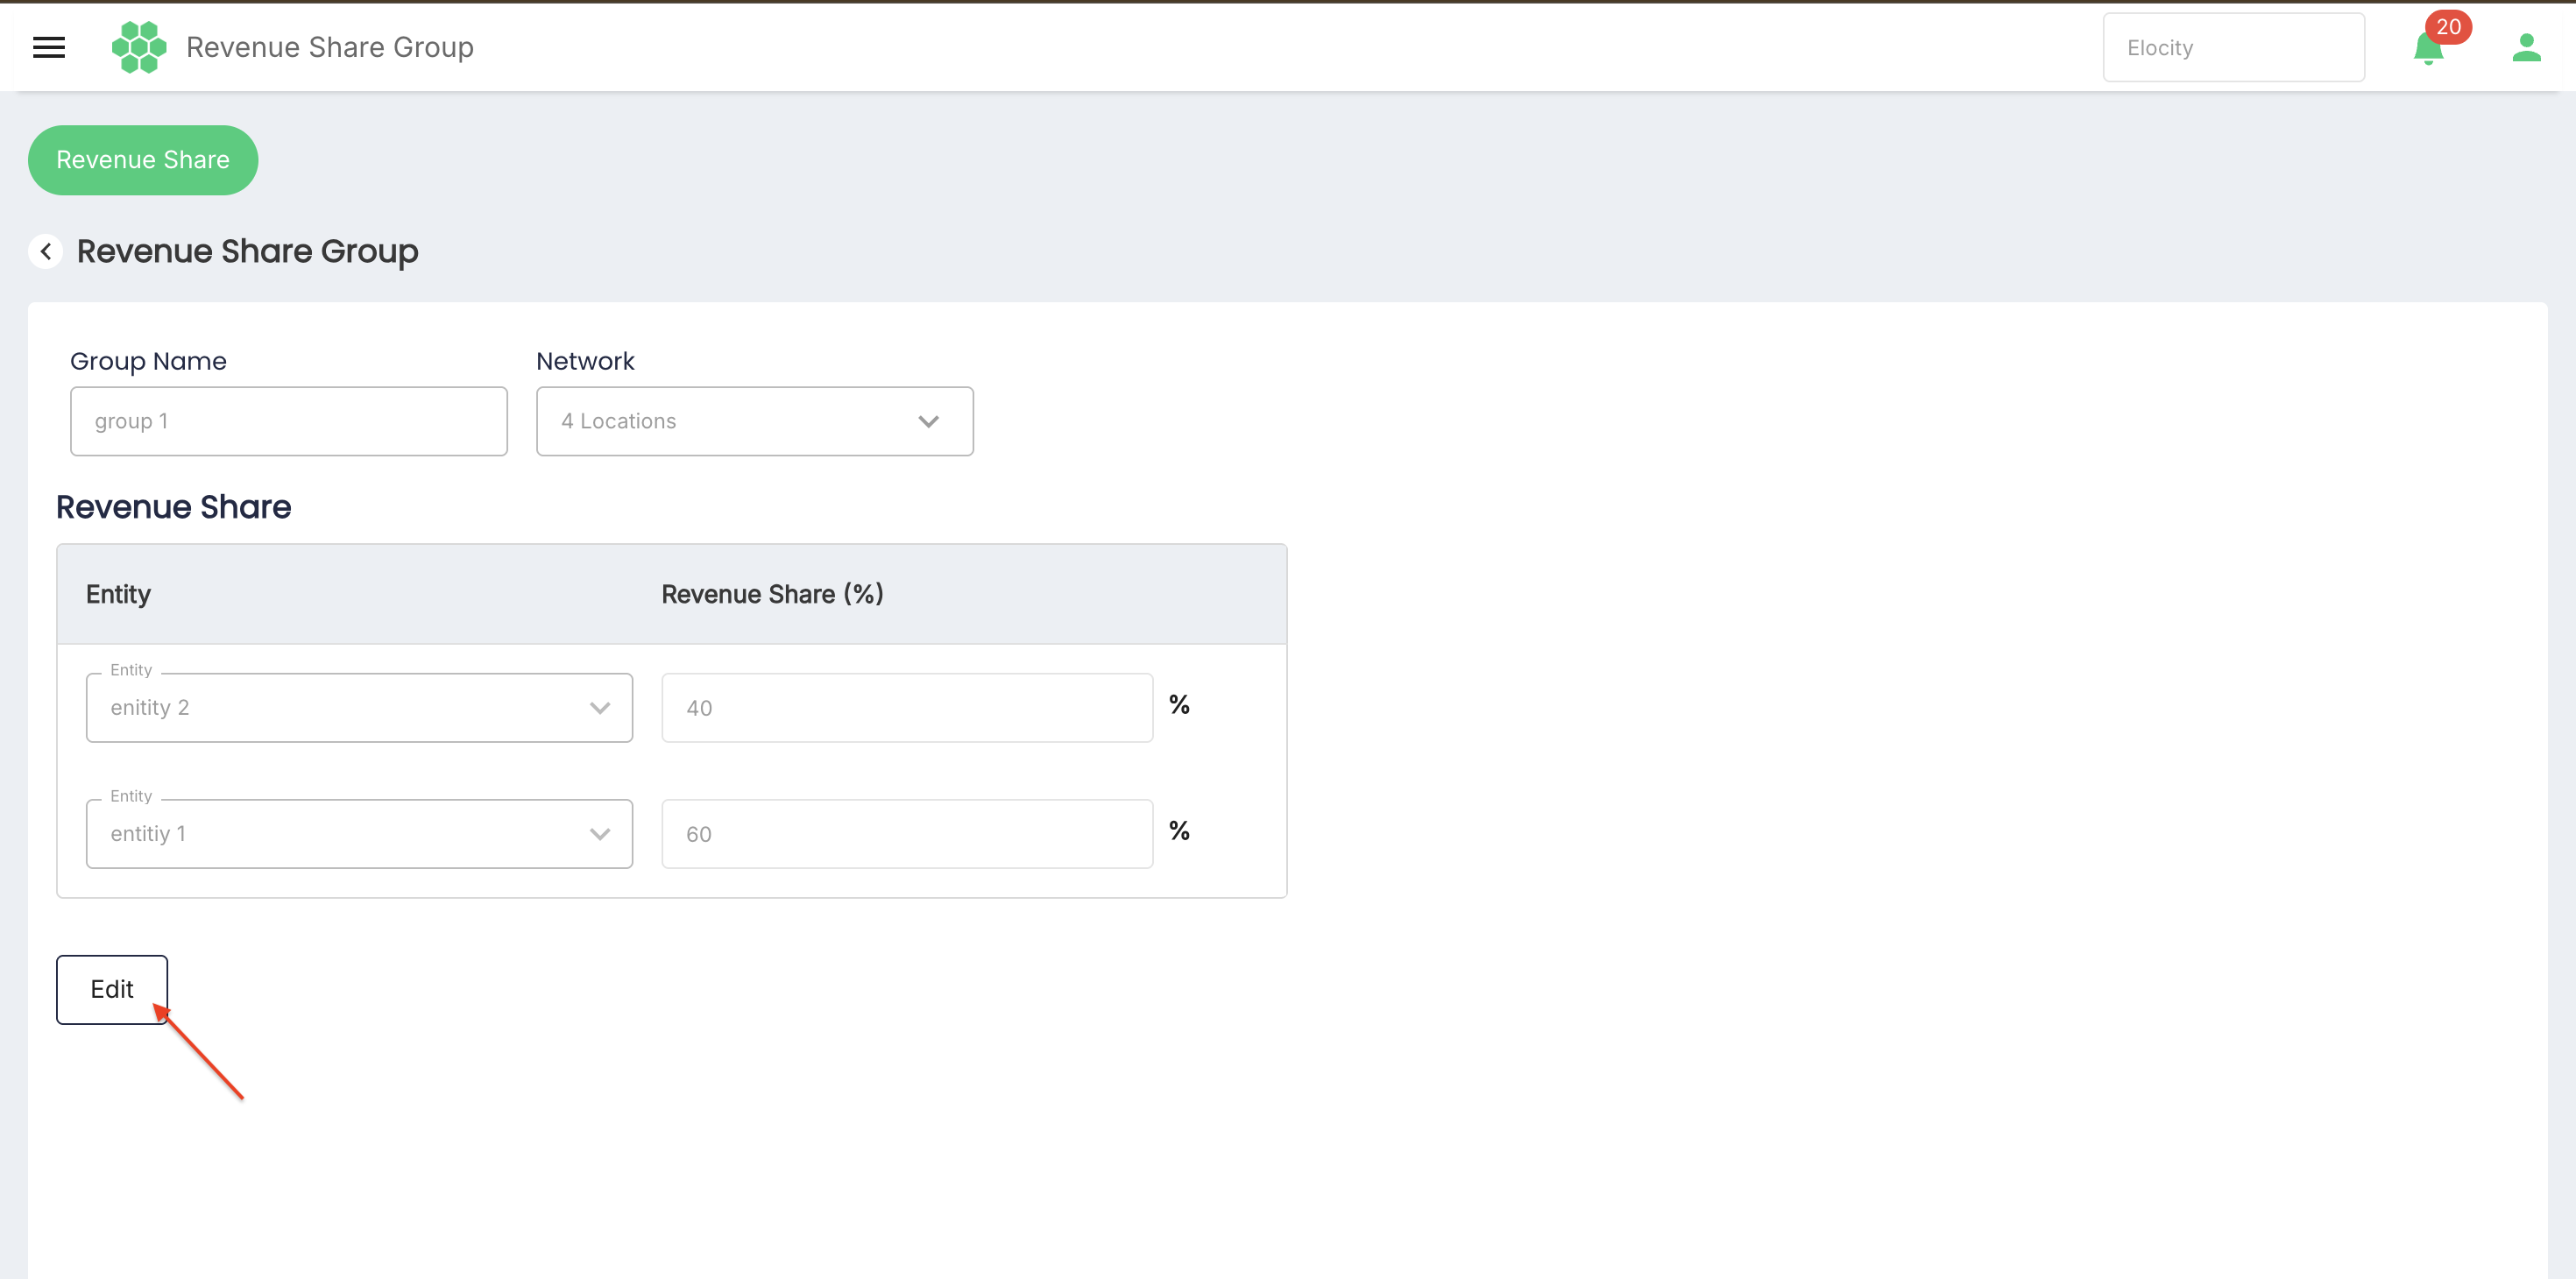
- Update the group name, network locations, entities, or percentages as required.
- Use Add Entity when another participating party is required.
- Select Save, or select Cancel to return to the read-only details without saving.
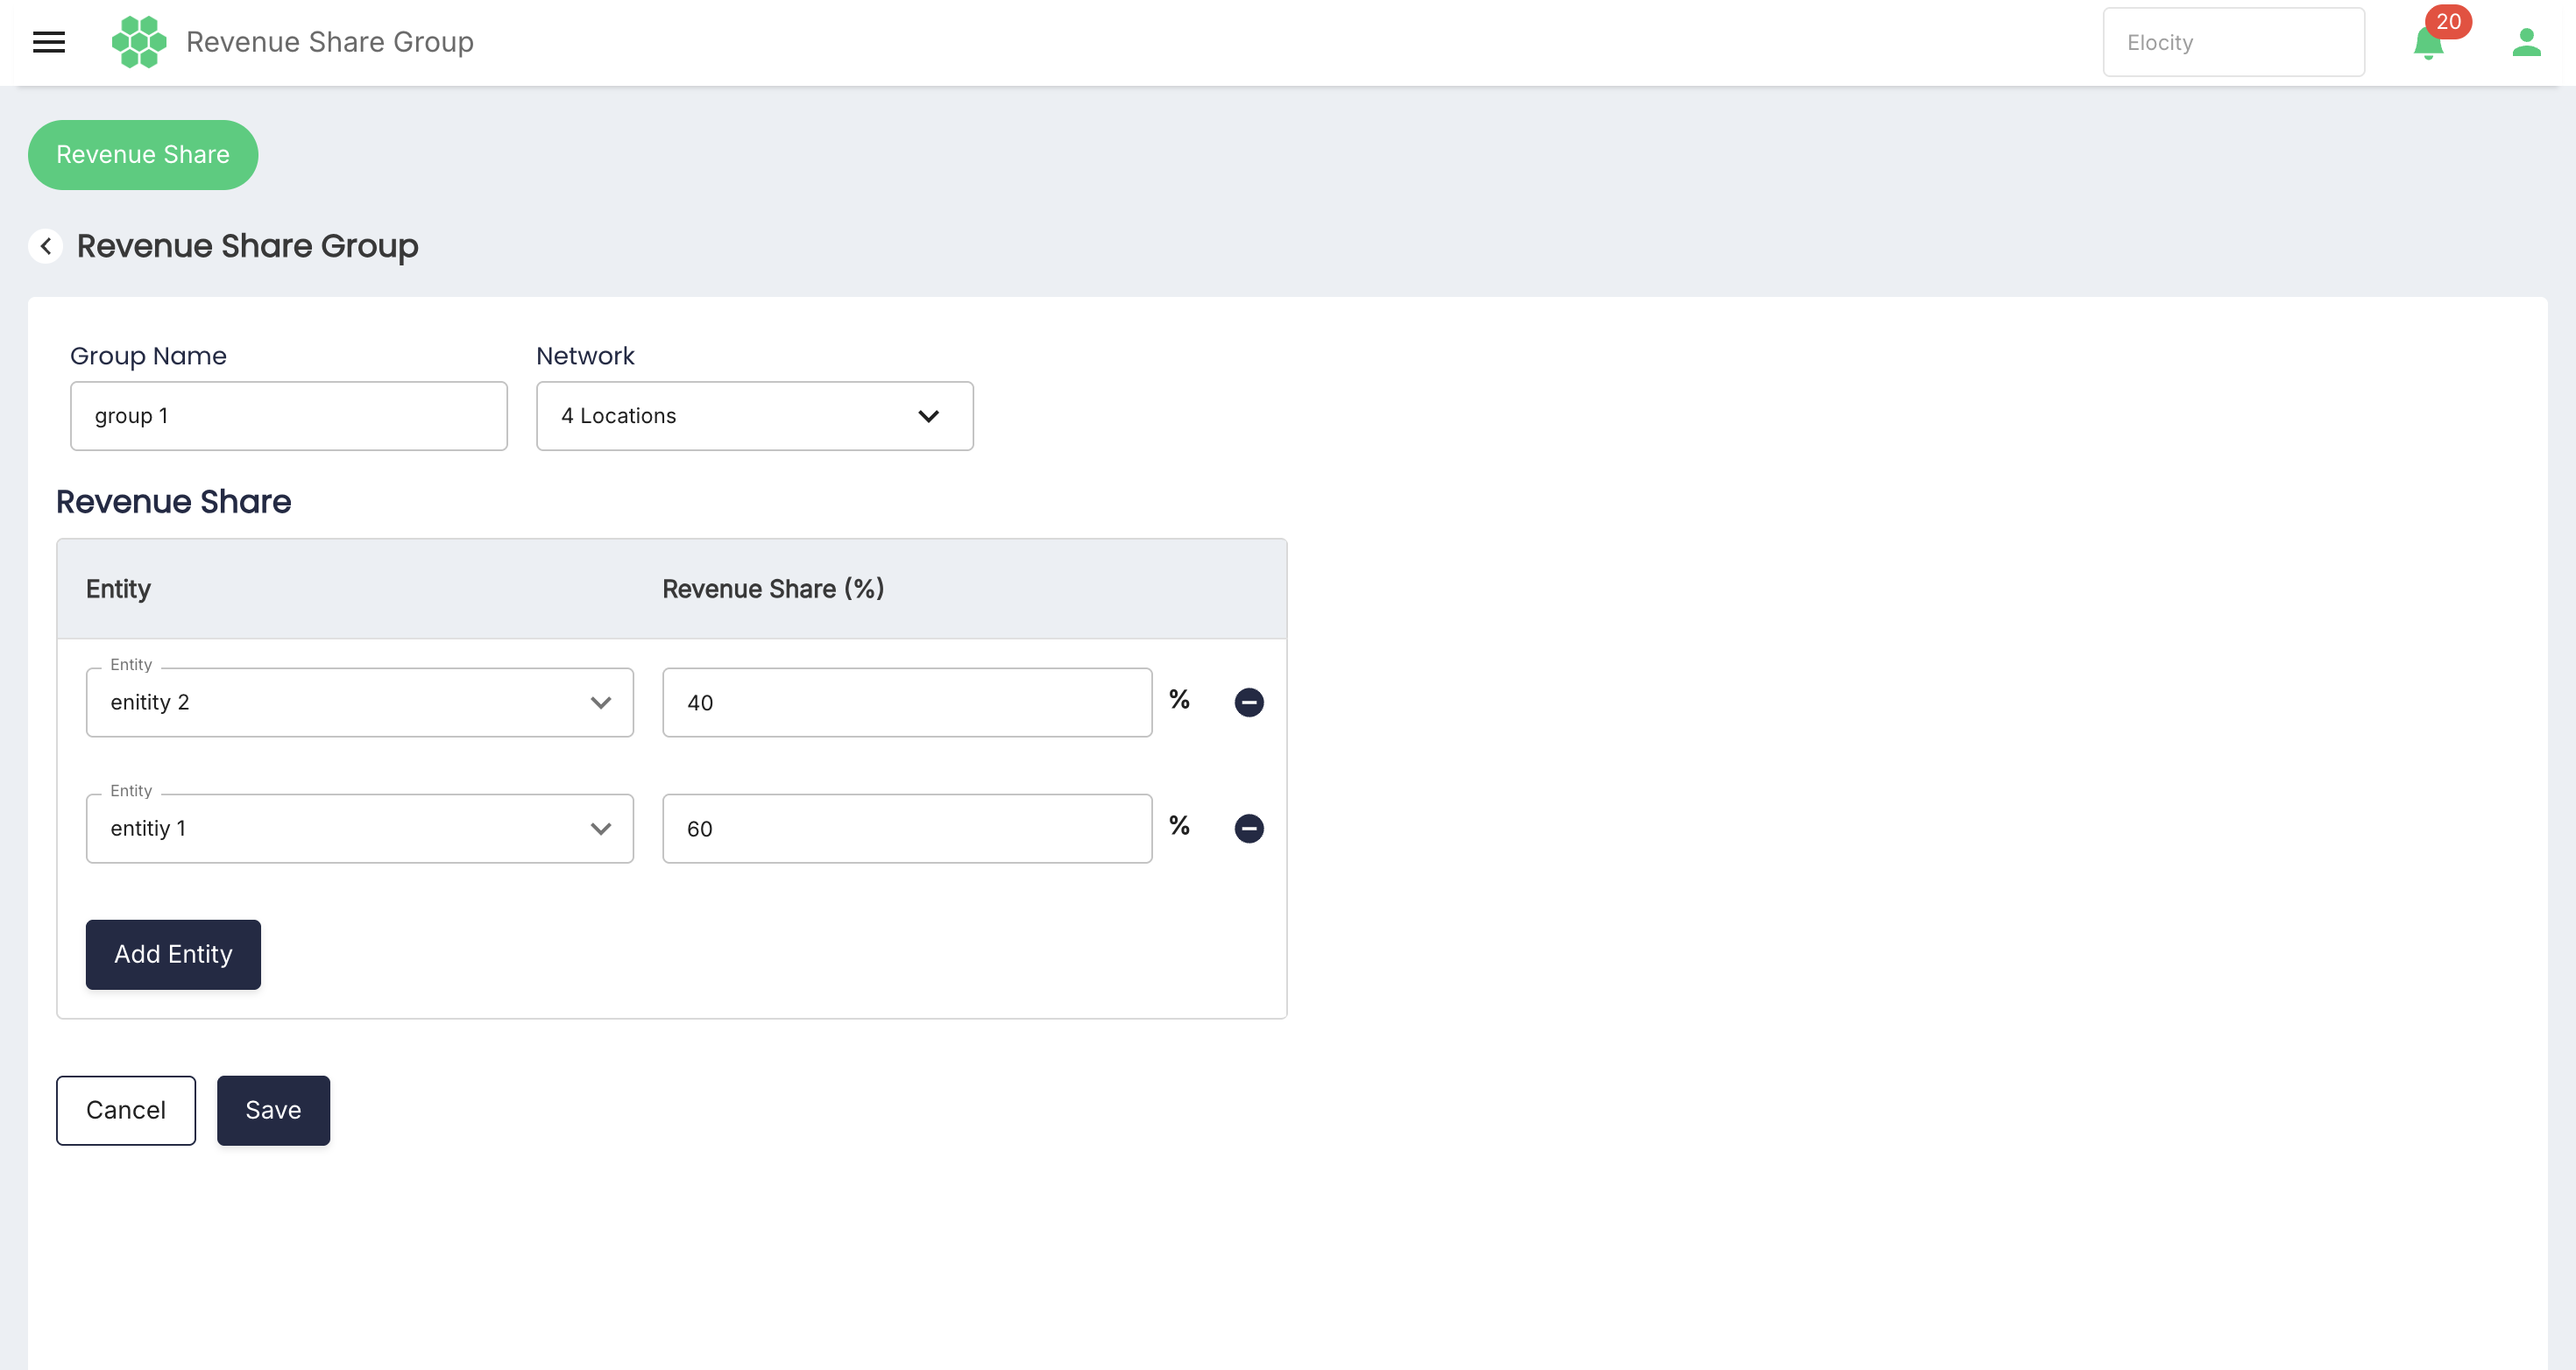 Changes to a Revenue Share Group apply to future charging sessions only. Historical sessions retain the revenue-share arrangement captured when those sessions were processed.
Deleting a Revenue Share Group
Open Select Action for the required group and select Delete.
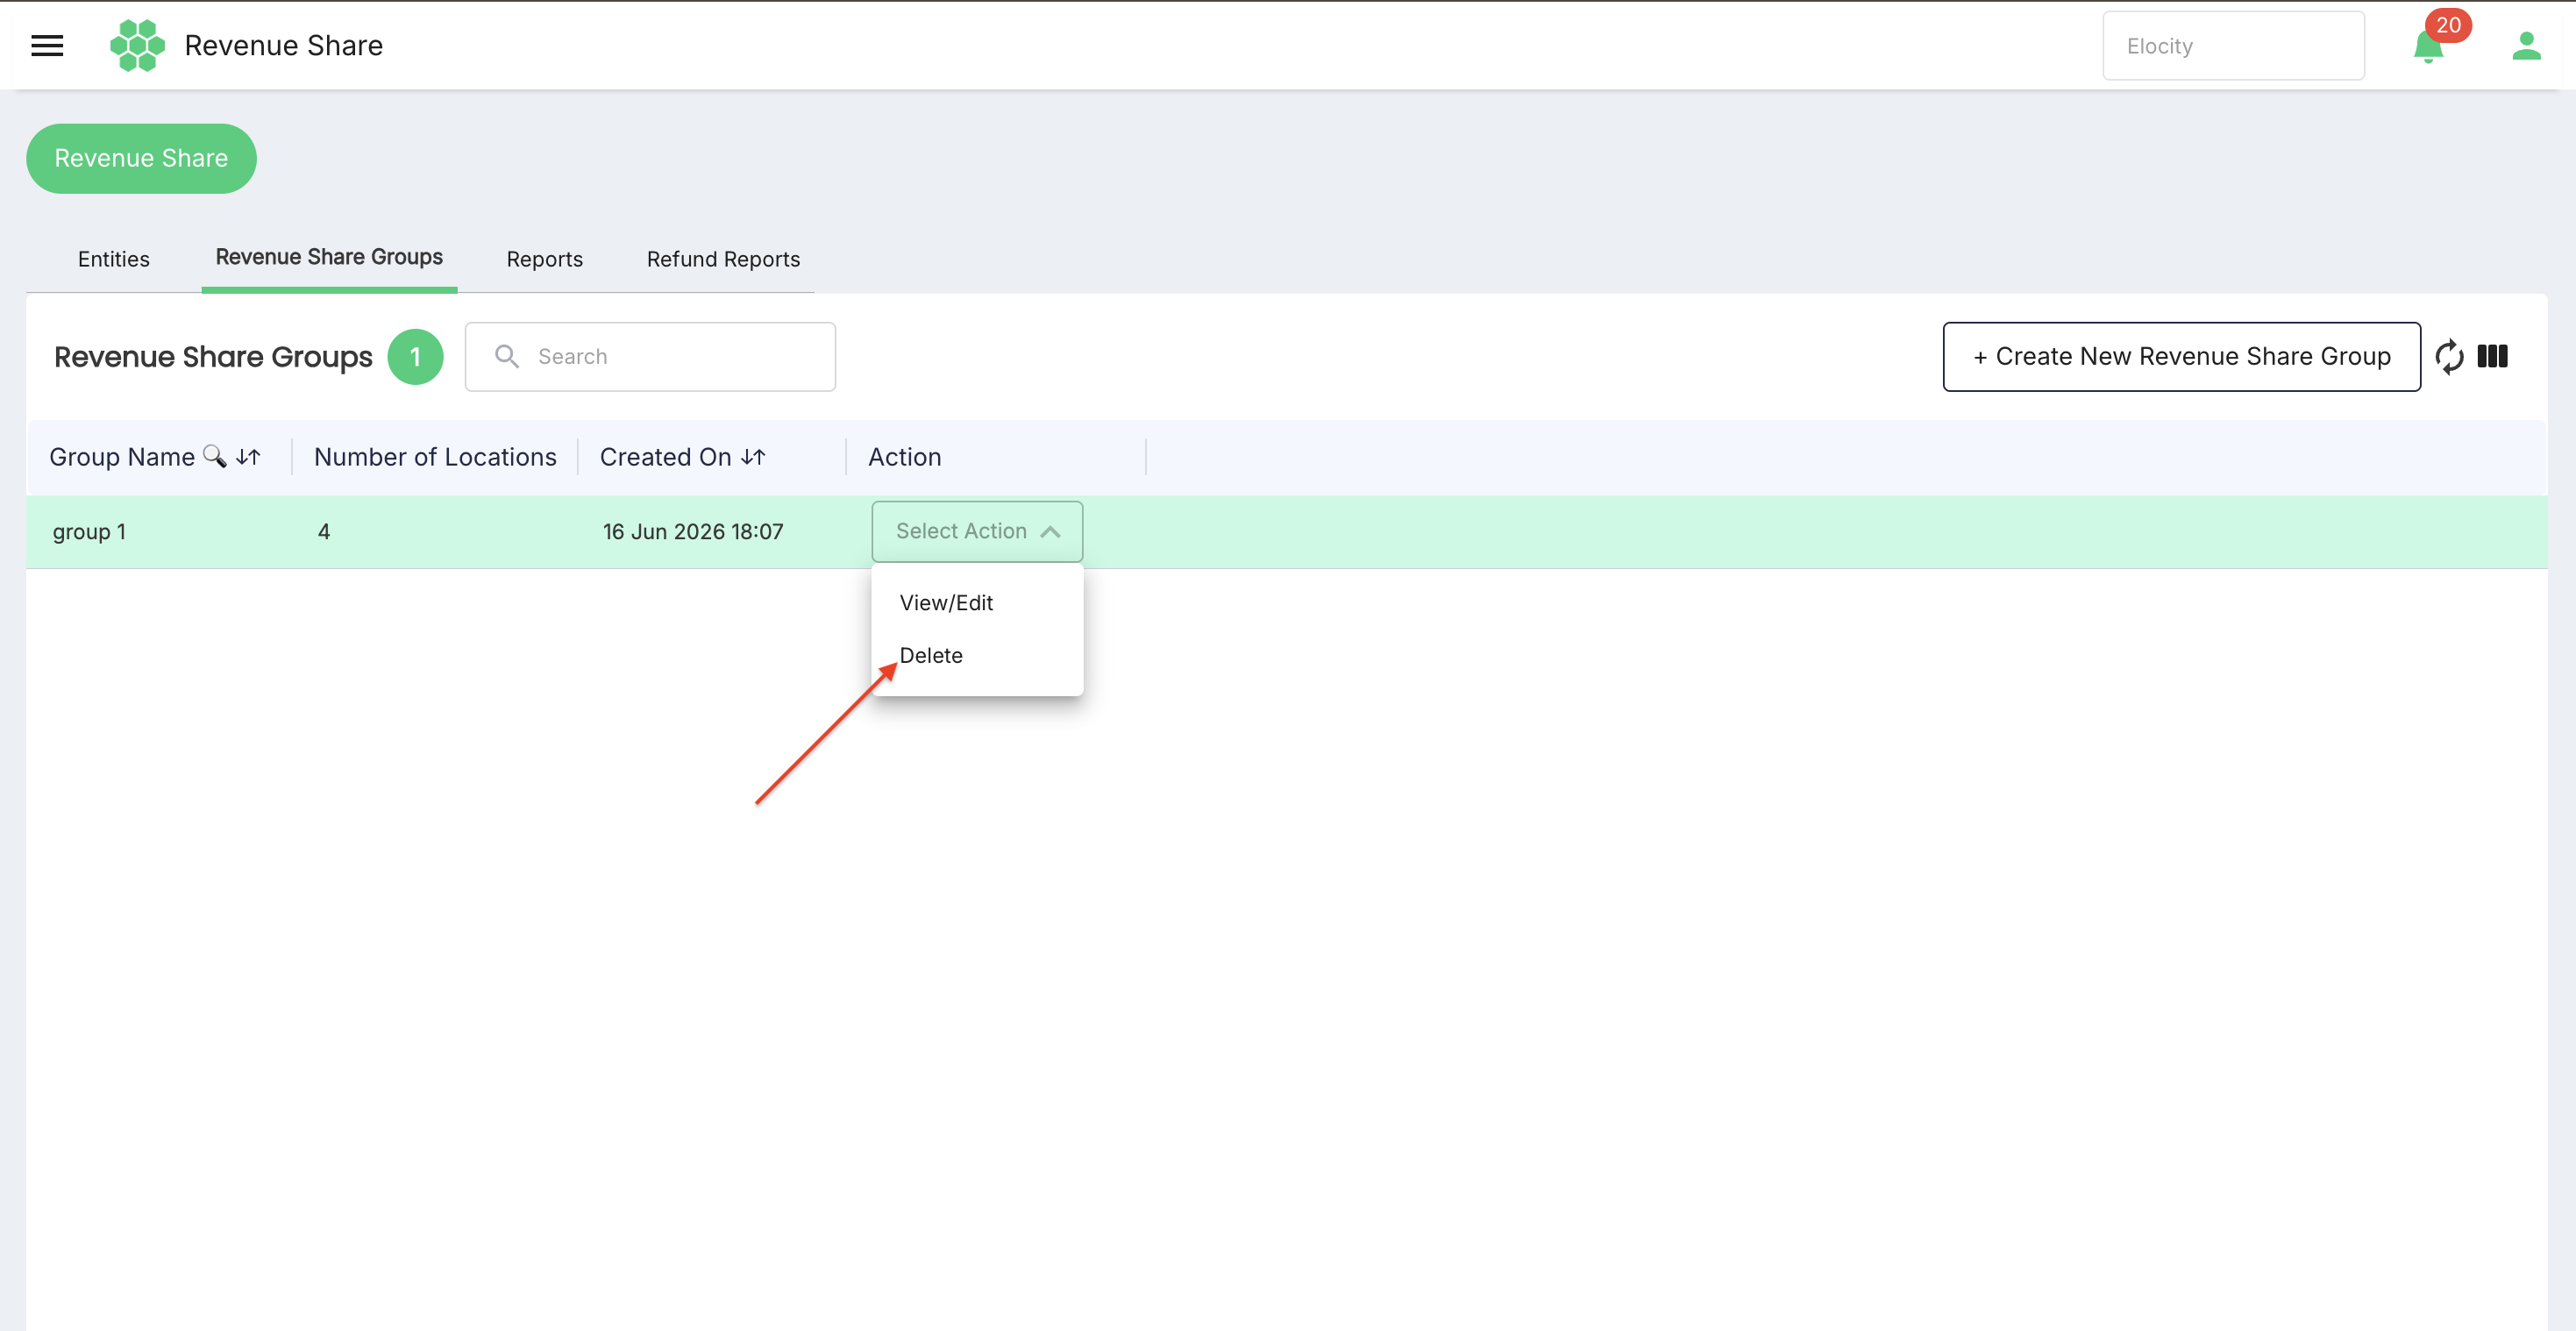
Review the confirmation before completing the deletion.
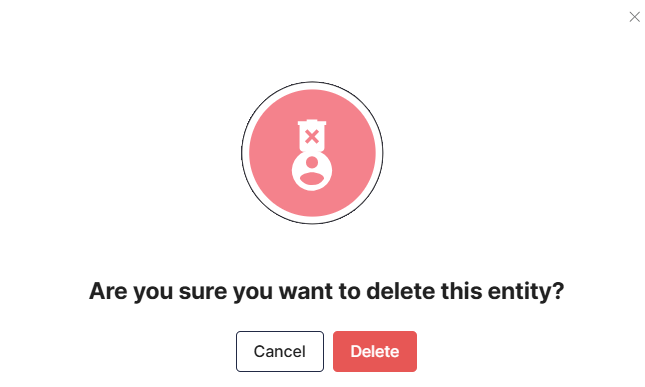
The current system does not prevent deletion merely because a group has already been used by charging sessions. Historical sessions retain their previously captured shares, but administrators should verify dependencies and reporting impact before deleting a group.
Reports
The Reports tab summarizes revenue-share results by entity. The report is generated from the selected date range and optional group and location scope.
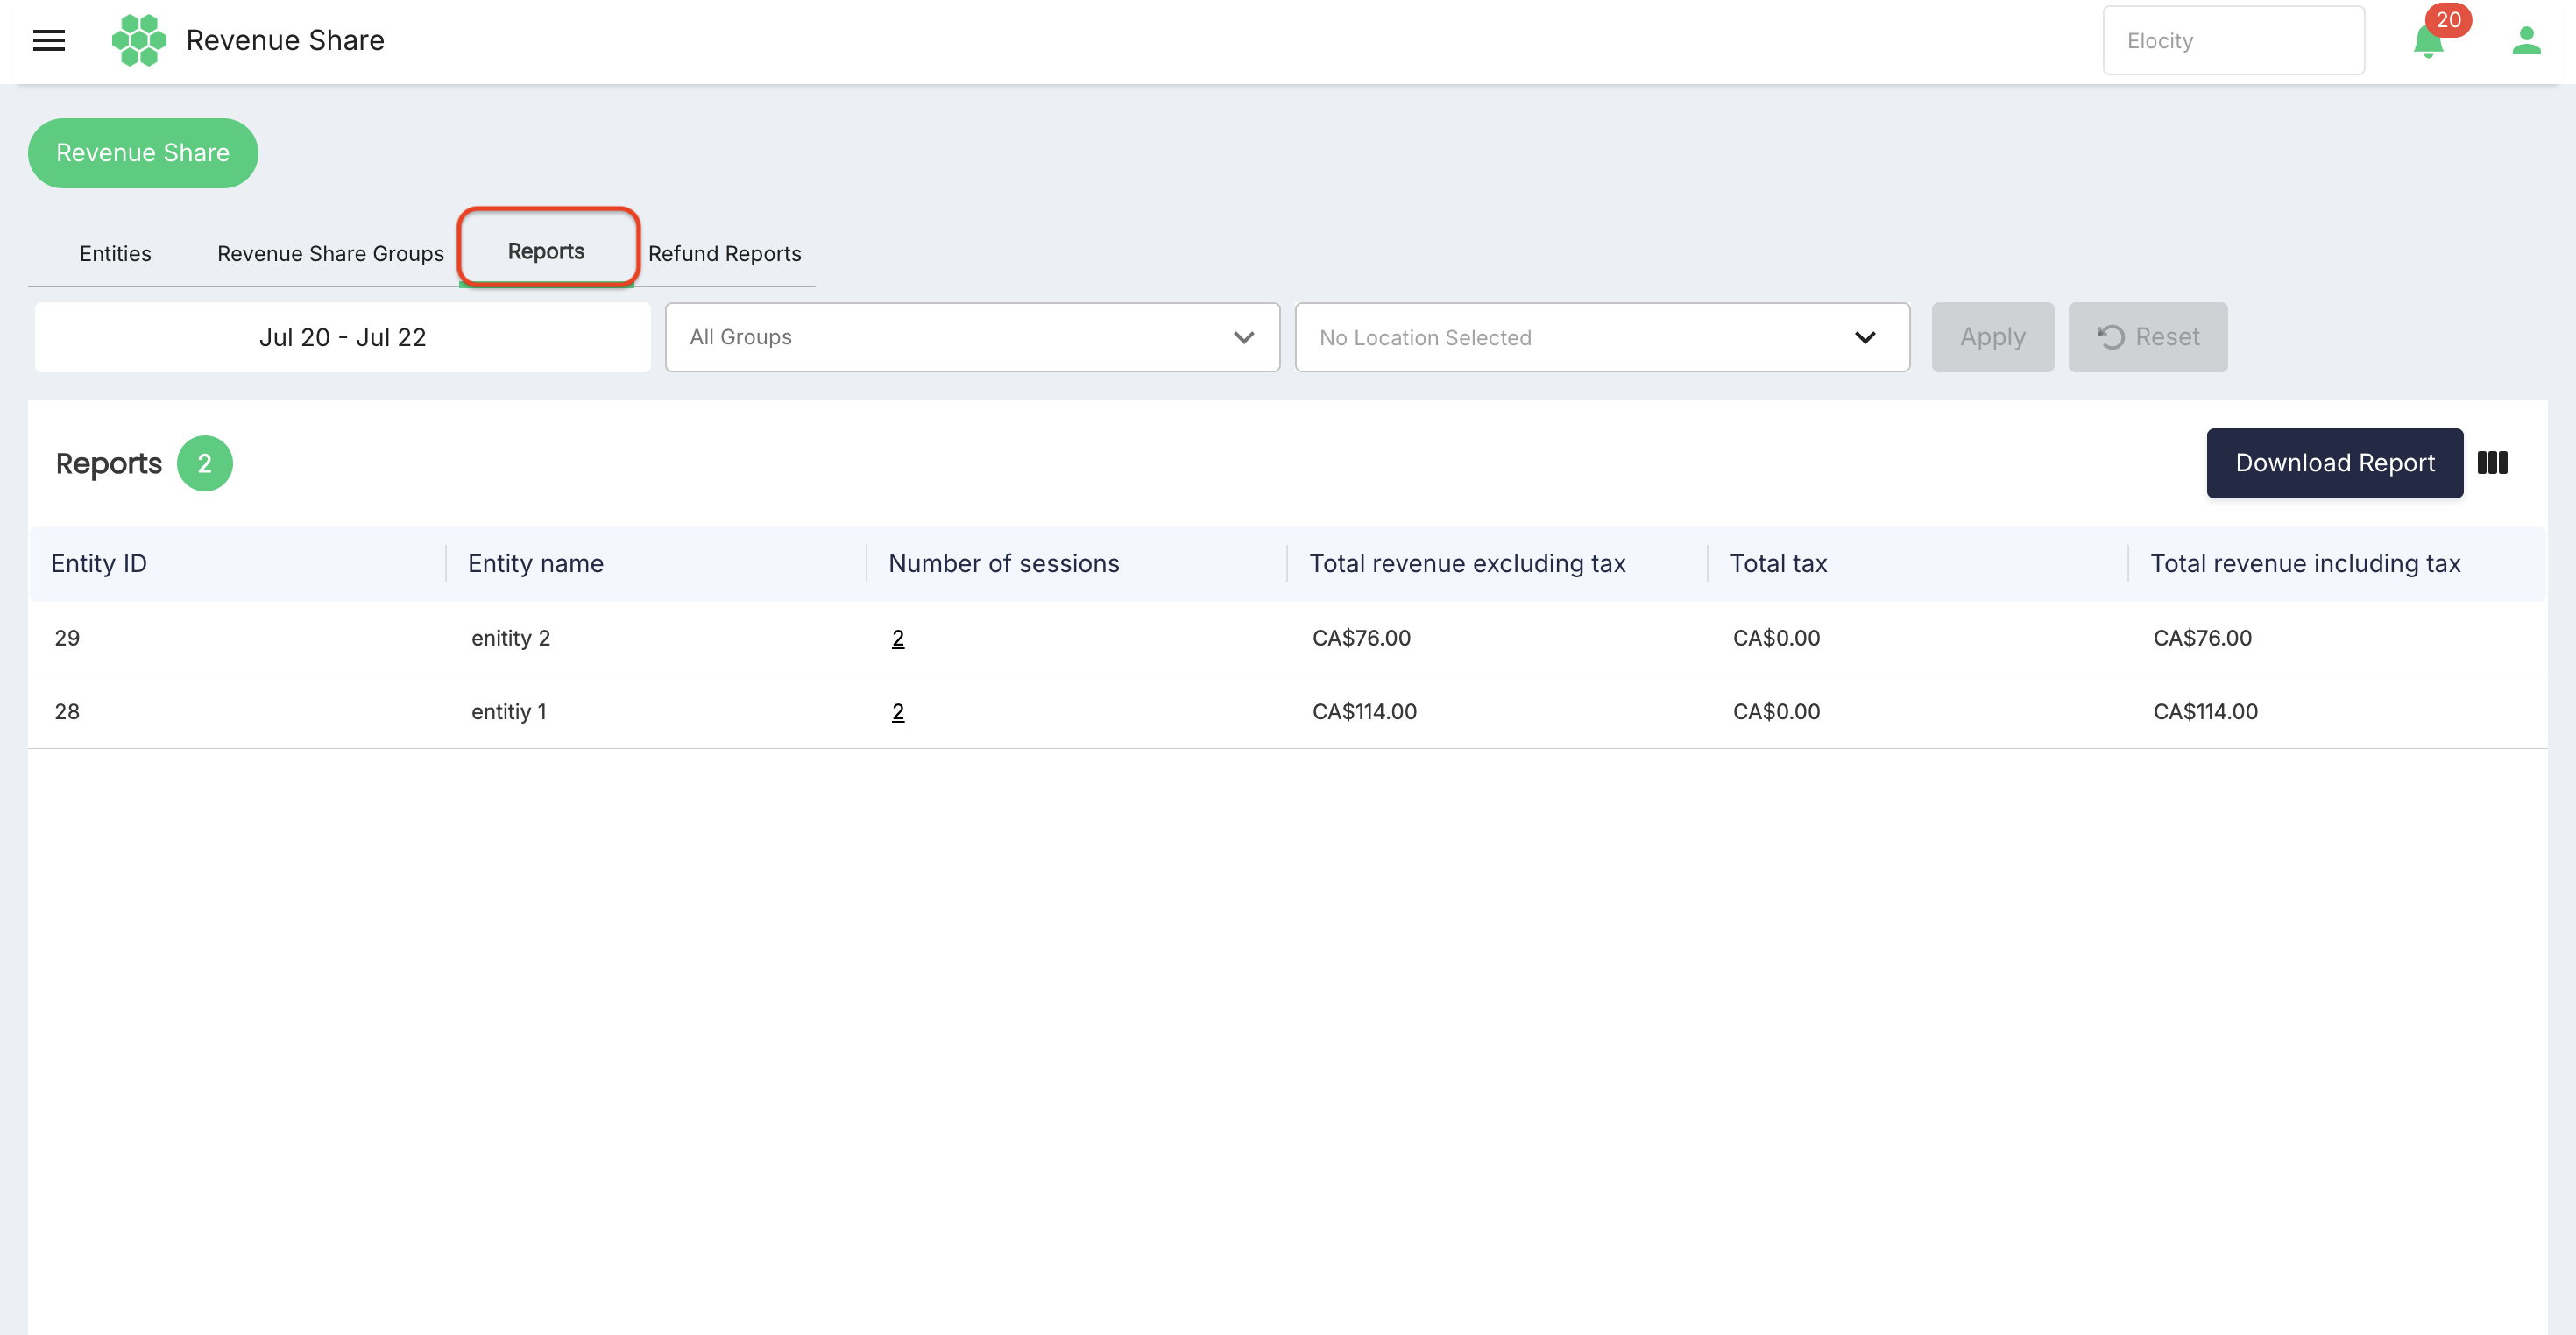
Report filters
| Filter | Description |
|---|---|
| Date range | Selects the reporting period. A custom start and end date can be selected from the two-month calendar. |
| All Groups | Limits the report to selected revenue-share groups when options are available. |
| No Location Selected | Opens the hierarchical location selector to limit the report to selected locations. |
The reporting period is evaluated using each session's exact end time. Internally, the system maintains reporting data in 15-minute intervals. The date and time filters are interpreted in the browser's timezone.
The date picker provides the following presets:
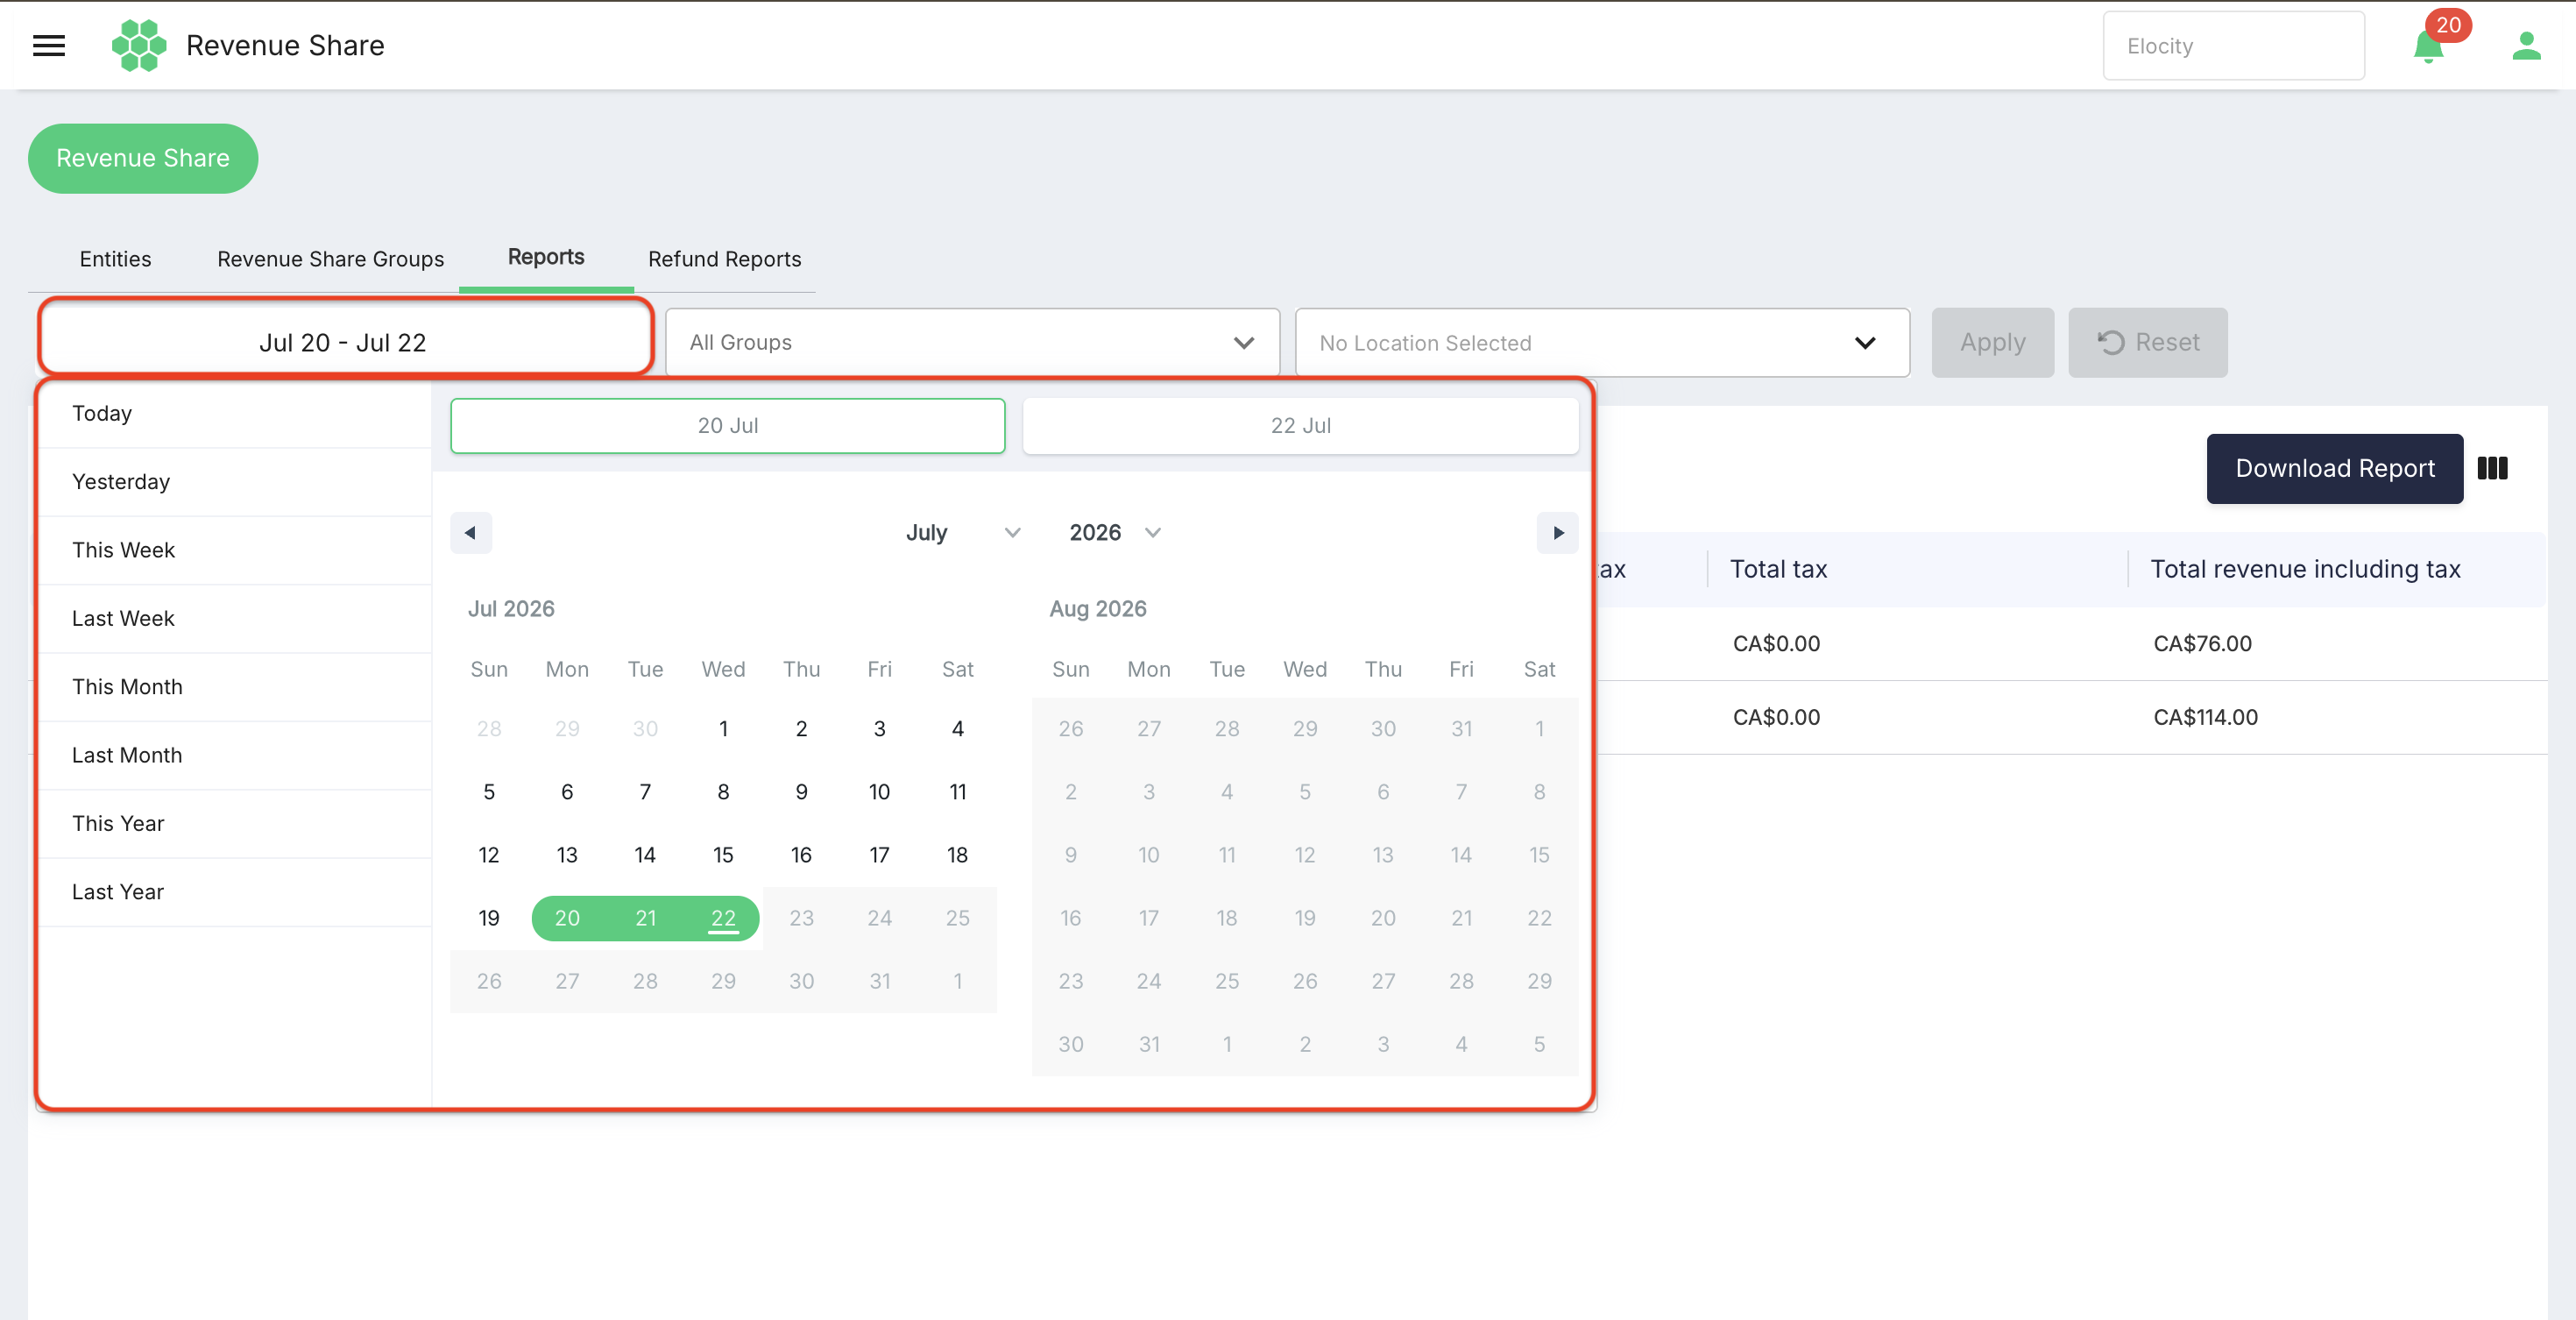
- Today
- Yesterday
- This Week
- Last Week
- This Month
- Last Month
- This Year
- Last Year
After changing the filters, select Apply. Select Reset to return to the default filter state.
 If no records match the selected criteria, the grid displays No Reports Exist.
Report results
The number beside Reports shows the number of entity summary rows returned for the current filter selection.
| Column | Description |
|---|---|
| Entity ID | System identifier of the revenue-share entity. |
| Entity name | Name of the participating entity. |
| Number of sessions | Number of charging sessions included in the entity's summarized result. |
| Total revenue excluding tax | Entity revenue total before tax for the filtered records. |
| Total tax | Tax total associated with the entity's summarized revenue. |
| Total revenue including tax | Entity revenue total after the displayed tax is included. |
The report considers charging-session revenue belonging to the selected timeframe. Use the session end time when reconciling whether a session should appear in the report.
Currency is displayed with the deployment's configured currency symbol; the inspected deployment displays CA$.
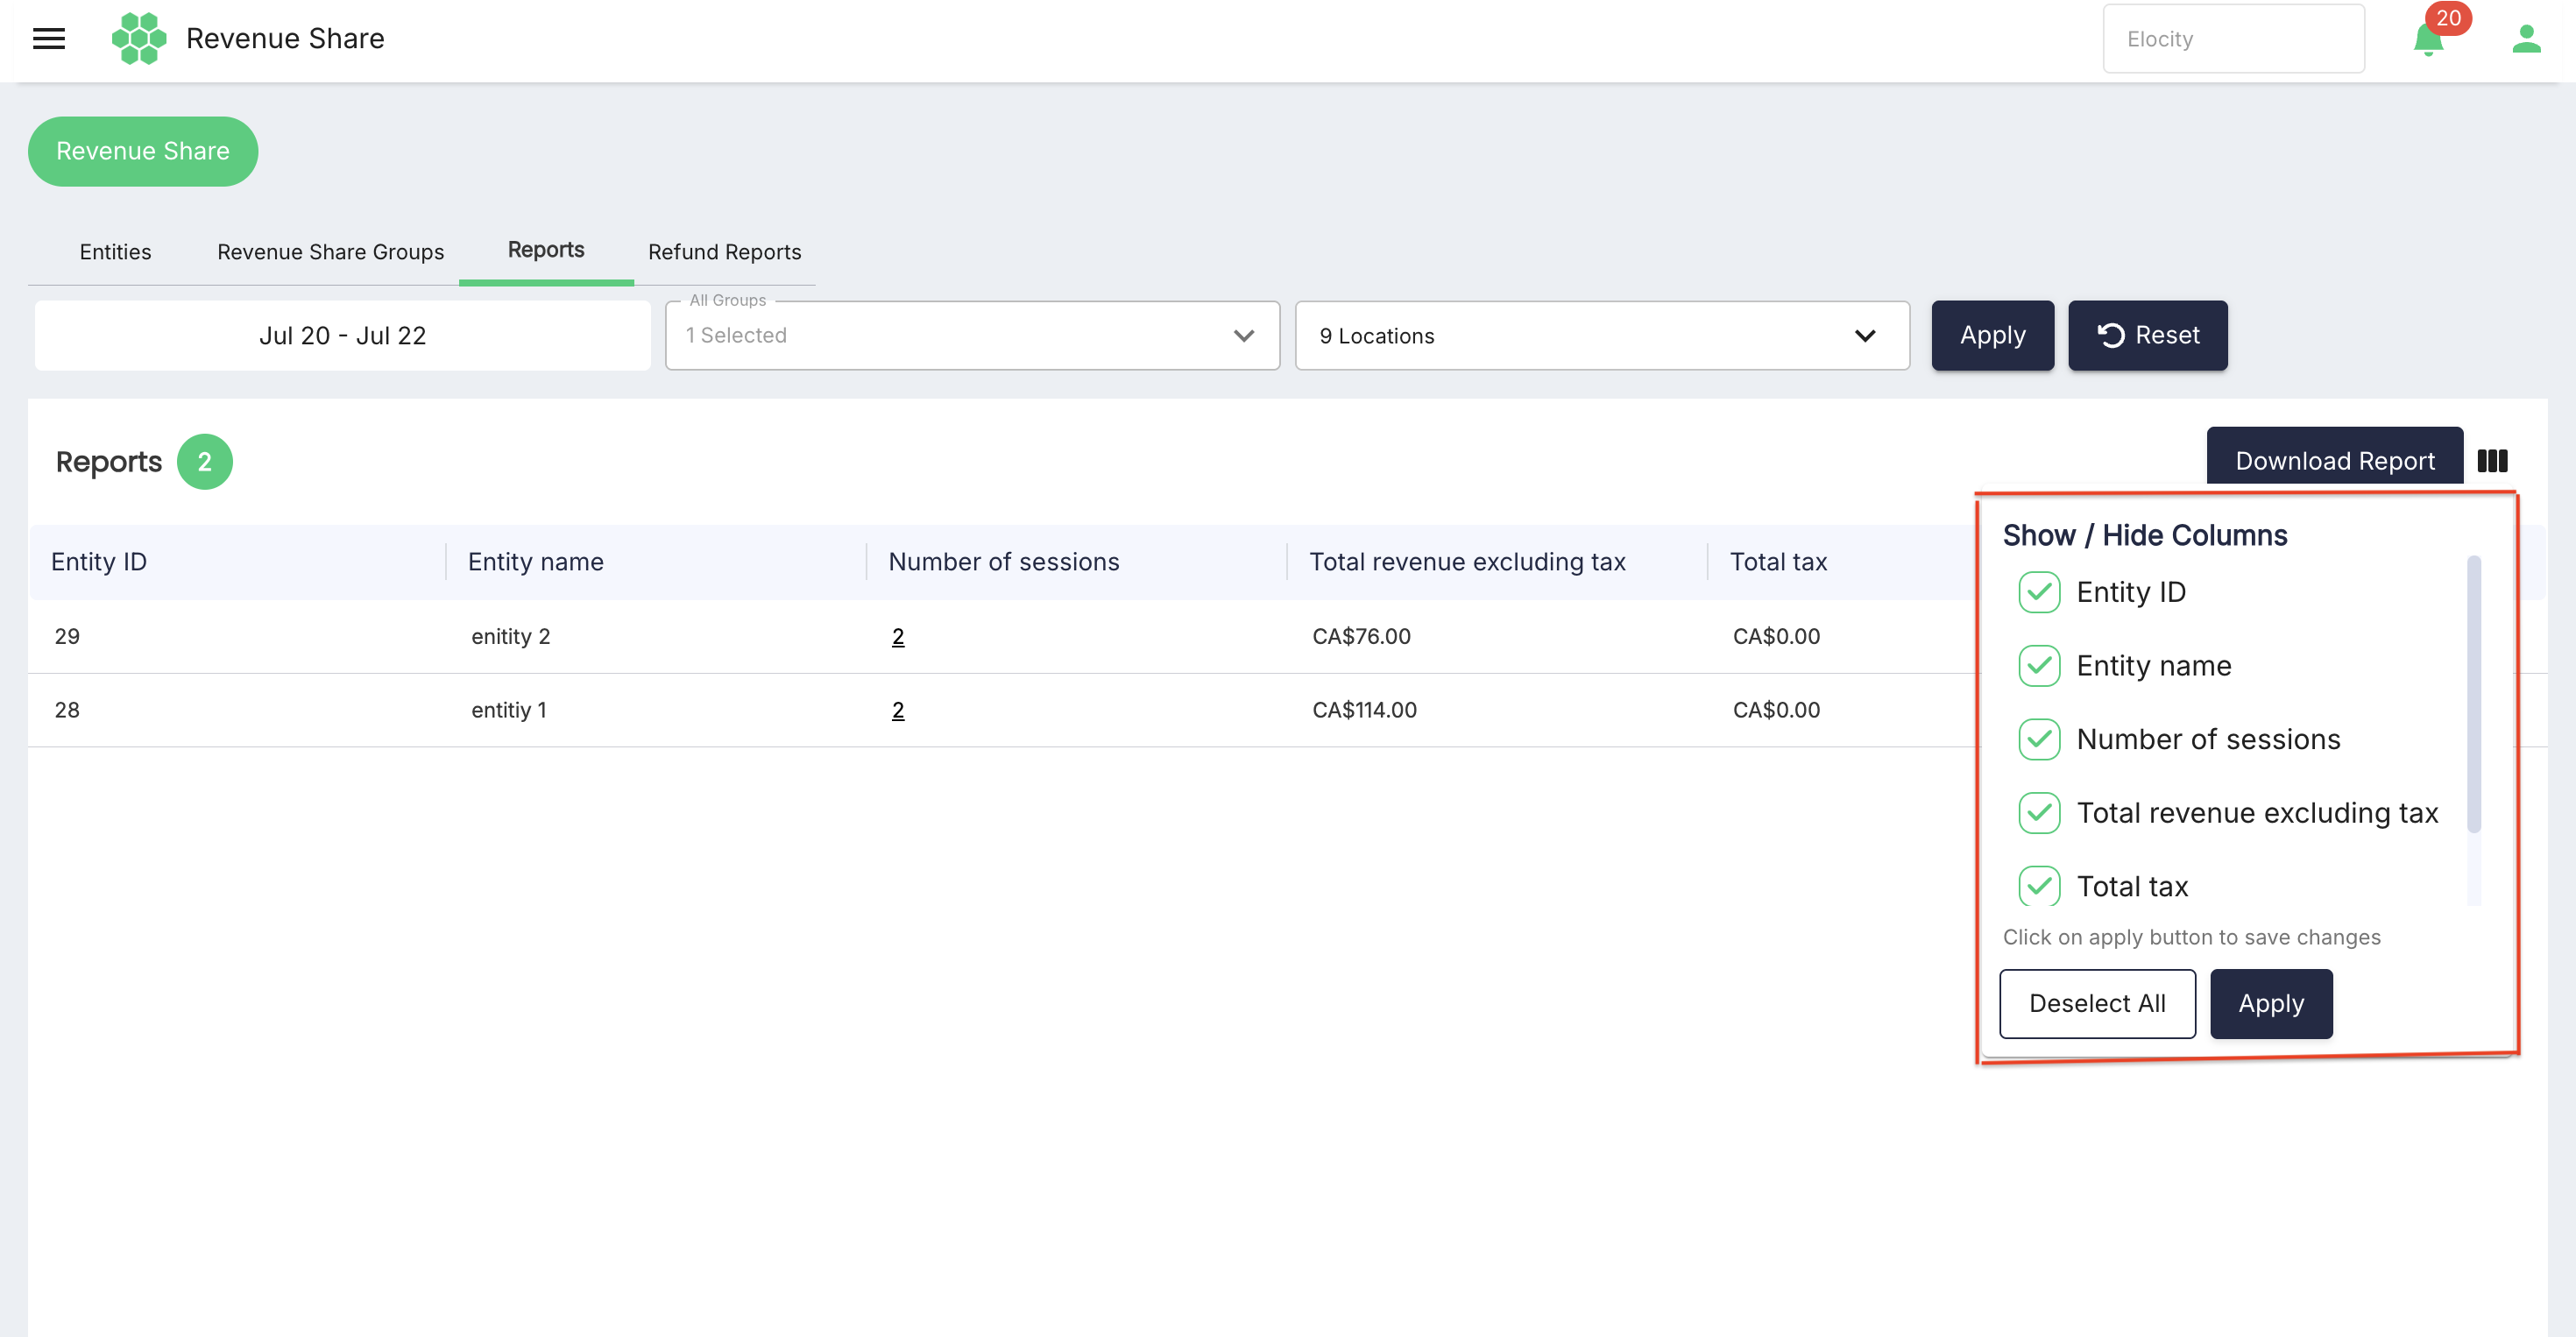
Use Column Filter to show or hide the six report columns. Column visibility affects the on-screen grid arrangement.
Downloading a Revenue Share report
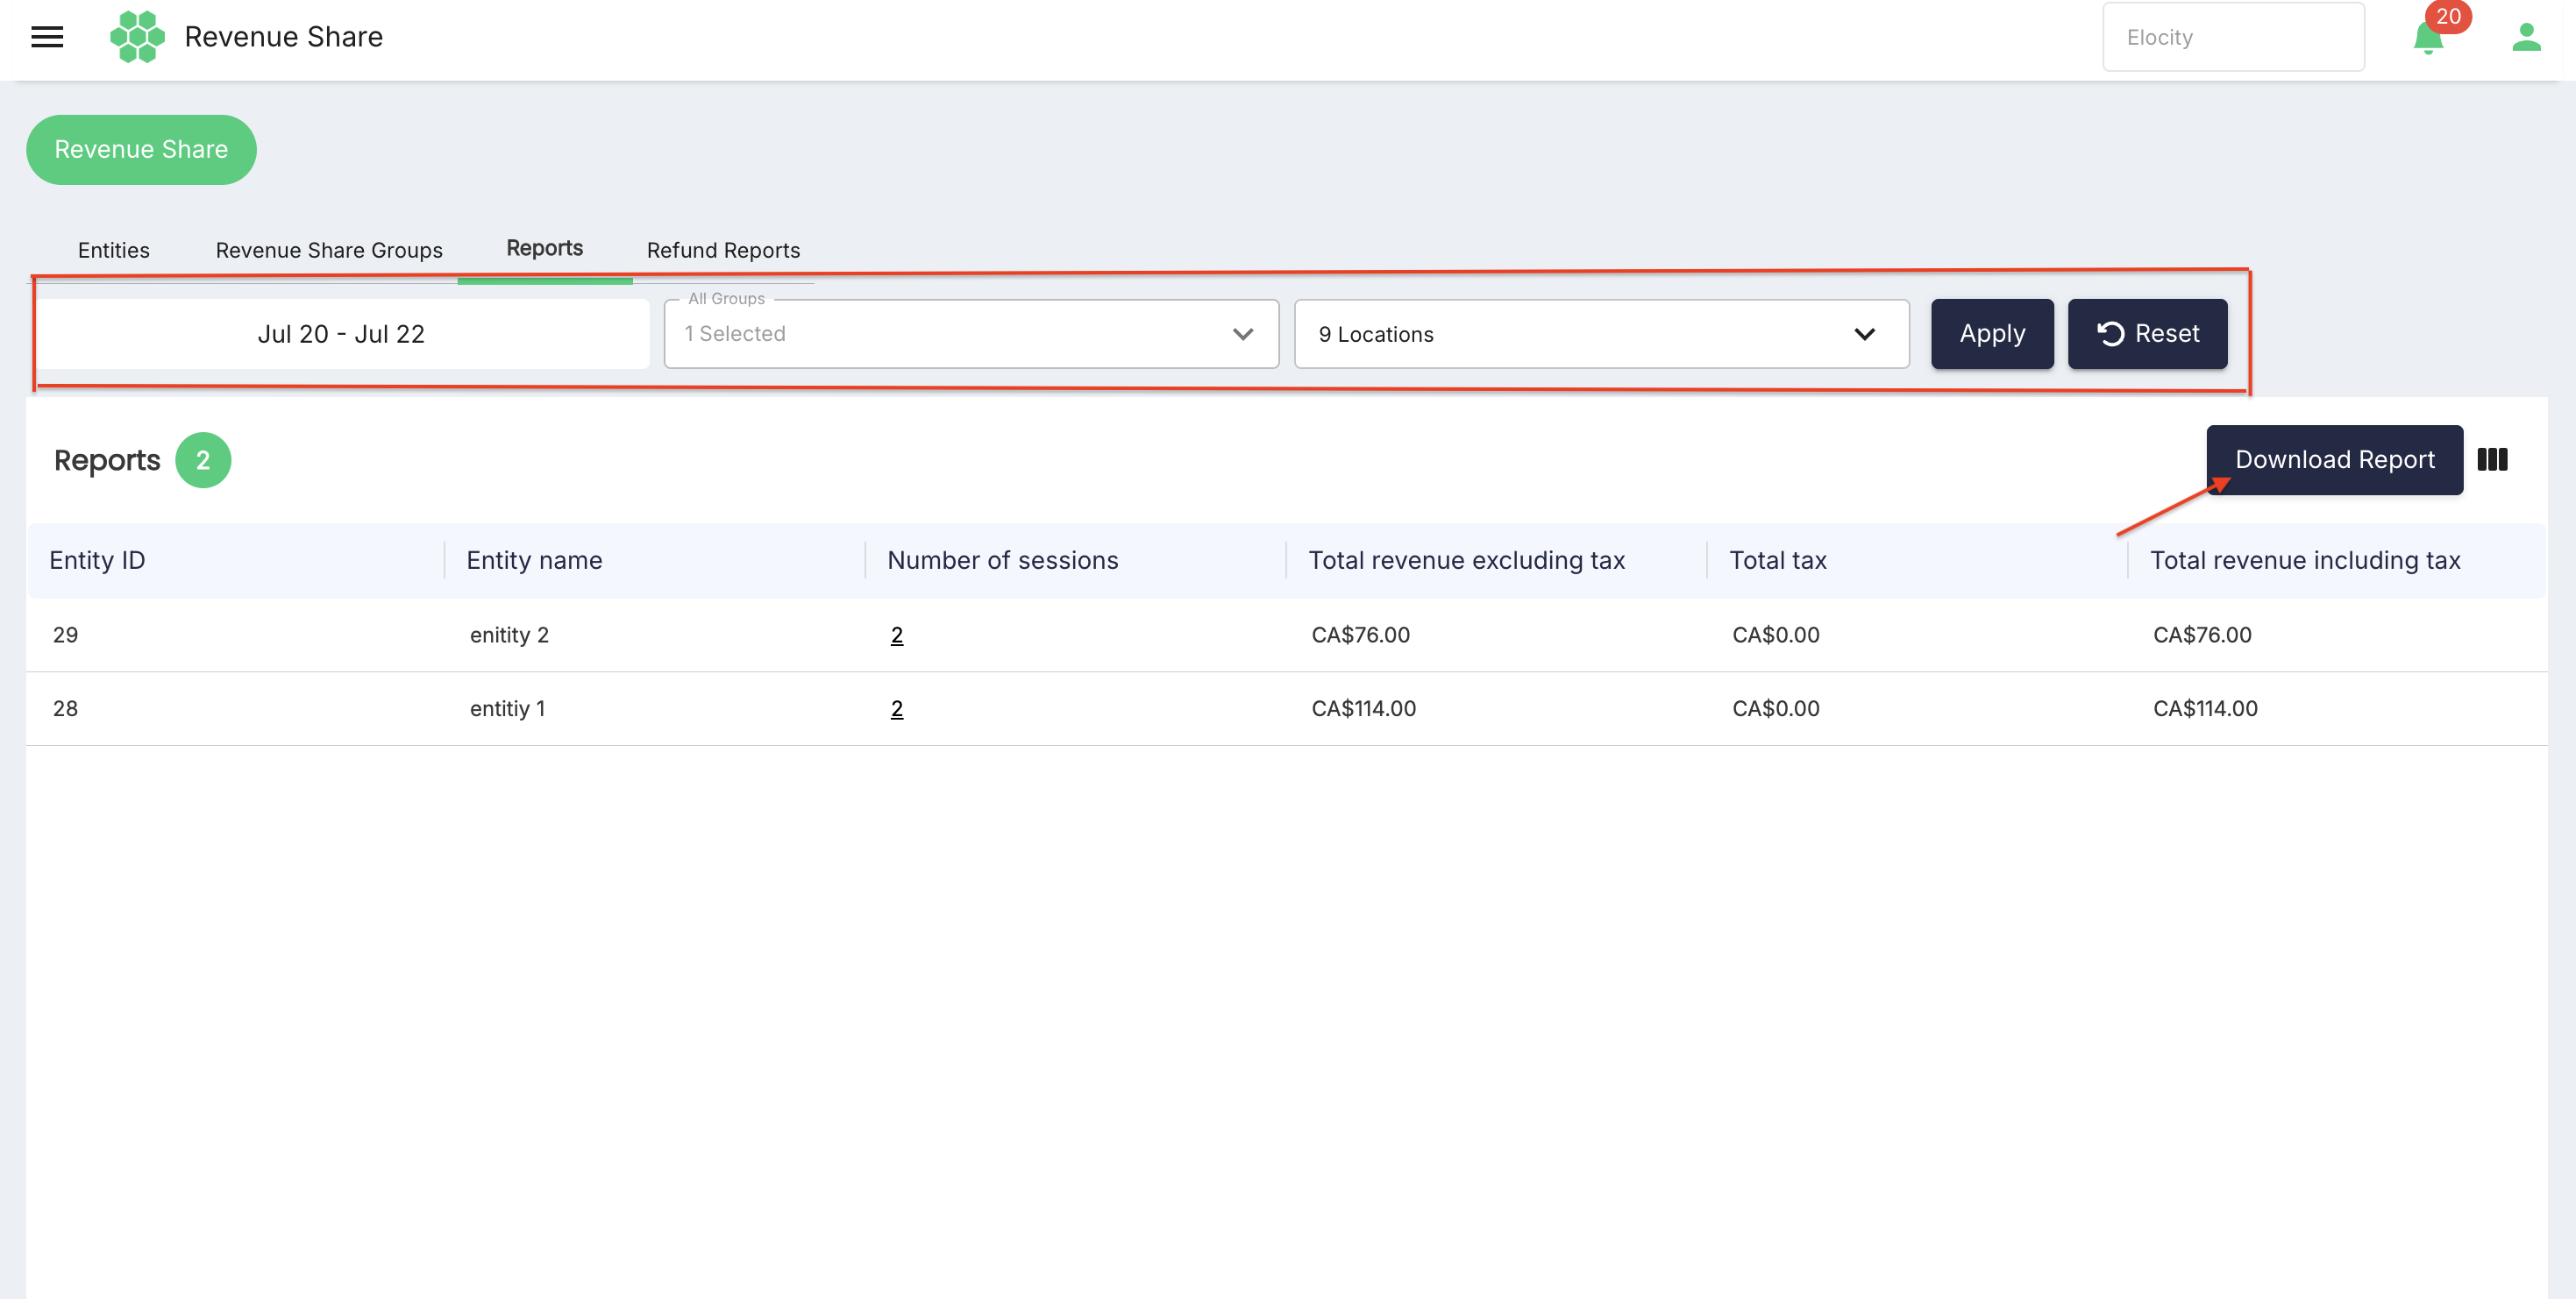
The Download Report button appears when report data is available.
- Apply the required date, group, and location filters.
- Review the returned rows and report count.
- Select Download Report.
- Choose PDF or CSV under Report Format.
- Select Download, or select Cancel to close the dialog.
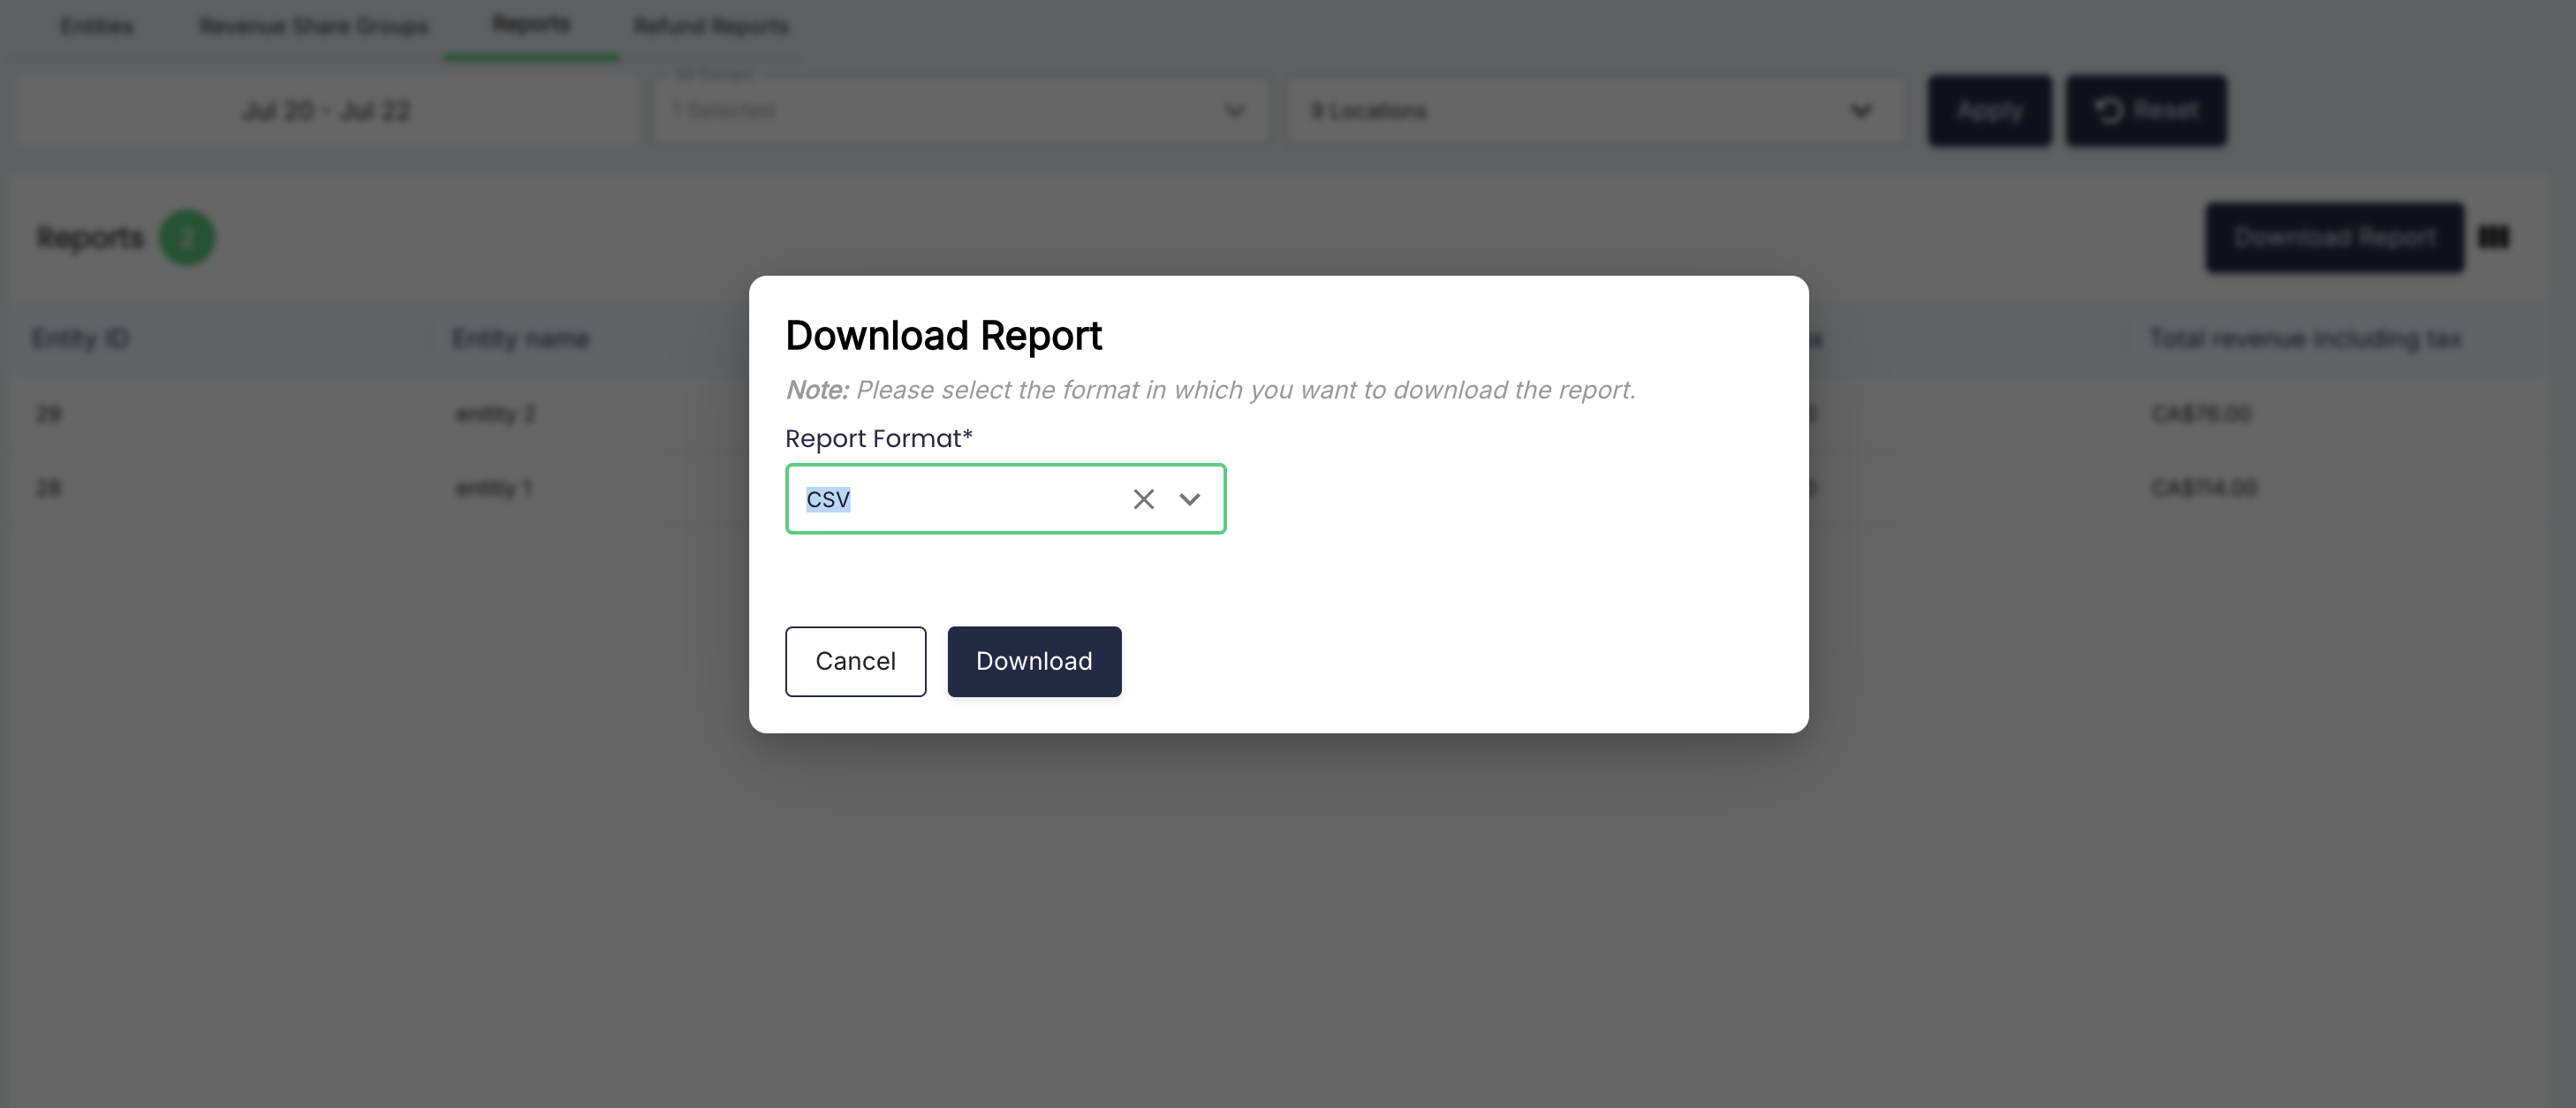
The legacy PDF requirement proposes a report header containing the report title, reporting duration, total sessions, total energy consumed, total revenue, total tax, and total refunds, followed by an entity breakdown containing Entity Name, Share (%), Revenue Share, Adjusted Revenue, and Tax. The live export dialog confirms PDF and CSV support, but the exact current contents of each downloaded format require confirmation.
Refund Reports
The Refund Reports tab provides transaction-level information about refunds associated with charging sessions. This page is broader than the older refund attachment, which contains no readable requirements content.
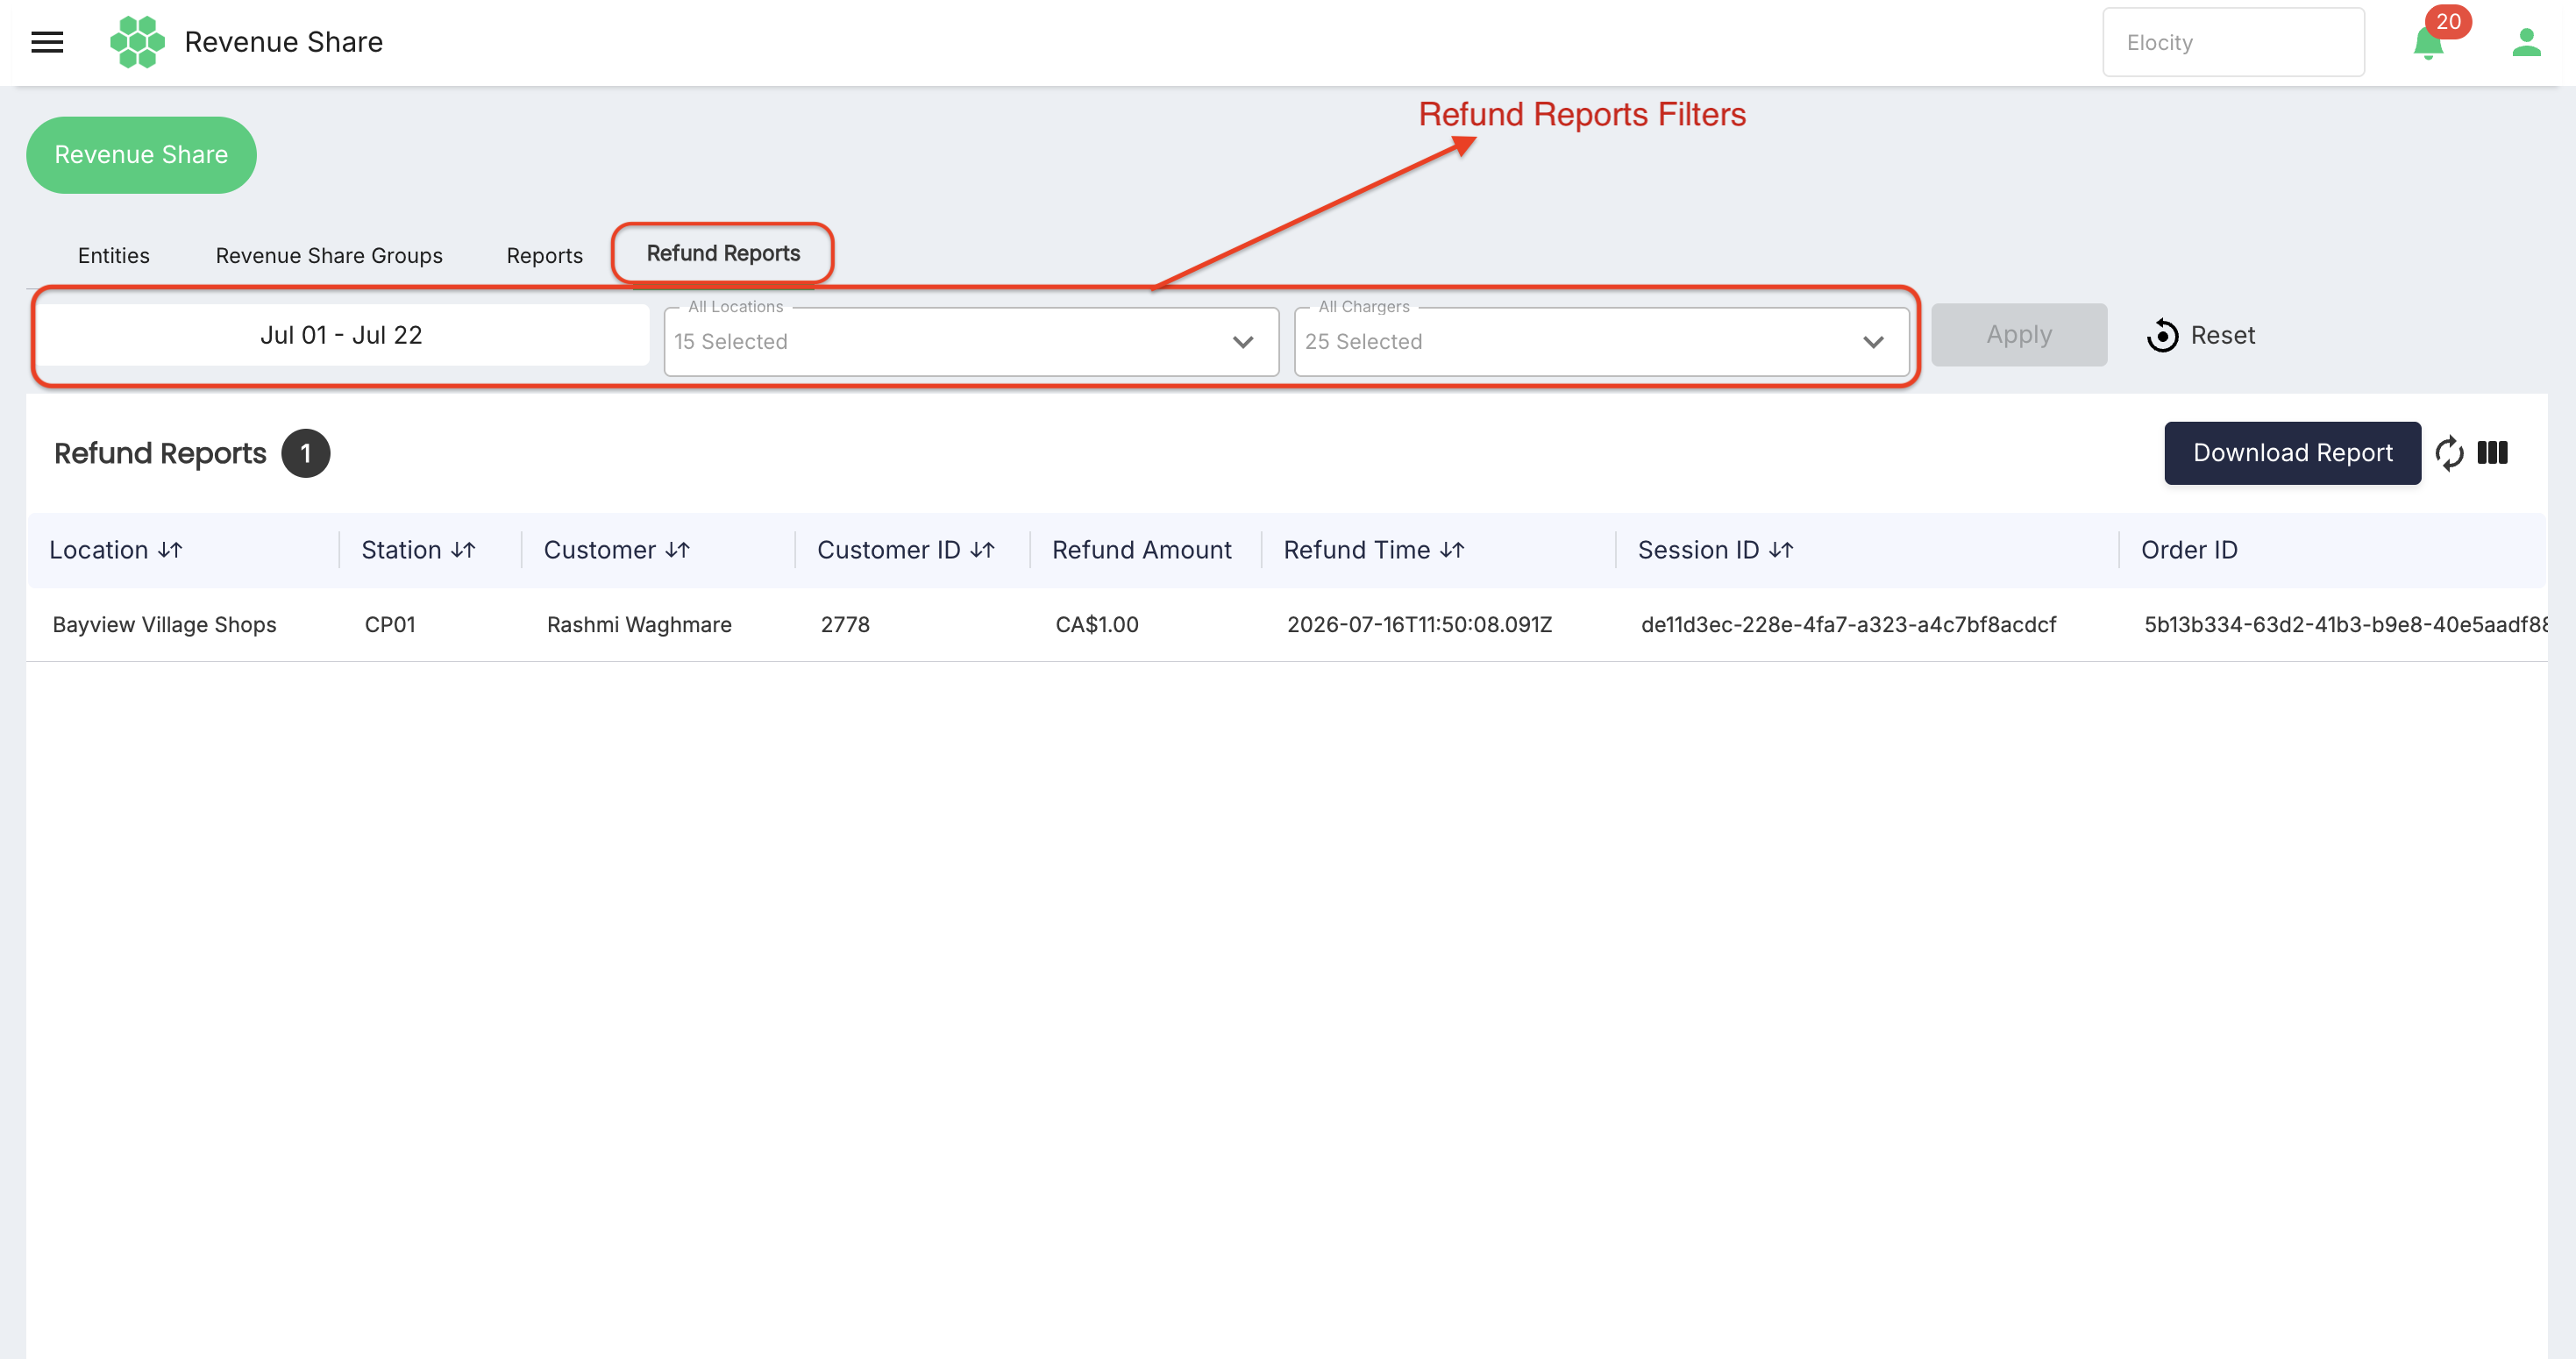
Refund report filters
| Filter | Description |
|---|---|
| Date range | Selects the refund-report period and provides the same presets and custom calendar as the Reports tab. A refund is included when its Refund Time falls within the user-selected period. |
| All Locations | Multi-select list of locations. It includes Select all and individual location checkboxes. |
| All Chargers | Multi-select list of chargers available for the selected business and filter context. |
Select Apply after changing a filter. Select Reset to clear the page-level selections. Select Refresh to request the latest matching refund records.
 If no refunds match the selected criteria, the page displays No Refund Report Exist.
Refund report columns
Each row represents one refund record associated with a charging session.
| Column | Description |
|---|---|
| Location | Charging location associated with the refunded session. |
| Station | Station or Charge Point ID associated with the session. |
| Customer | Customer name recorded for the refunded transaction. |
| Customer ID | System identifier of the customer. |
| Refund Amount | Amount returned to the customer. |
| Refund Time | Timestamp when the refund was recorded. Live values use ISO 8601 timestamps ending in Z. |
| Session ID | Unique identifier of the charging session. |
| Order ID | Identifier of the related payment or order record. |
| Session Start Time | Recorded start timestamp of the charging session. |
| Session End Time | Recorded end timestamp of the charging session. |
| Charging Session Cost | Original or recorded cost of the charging session. |
| Refund Remarks | Reason or explanatory text stored with the refund. |
| Refund To | Destination to which the refund was returned. Live examples display wallet. |
| Additional Comments | Supplementary comments stored with the refund, when available. |
| Refund Charges | Charges associated with processing the refund. Live examples display 0. |
Use the horizontal scrollbar to review columns that are outside the visible grid area.
Showing and hiding refund columns
Select Column Filter to open Show / Hide Columns. All 15 refund columns can be selected or cleared. Select Apply inside the column menu to save the visible-column selection, or select Deselect All to clear the selections.
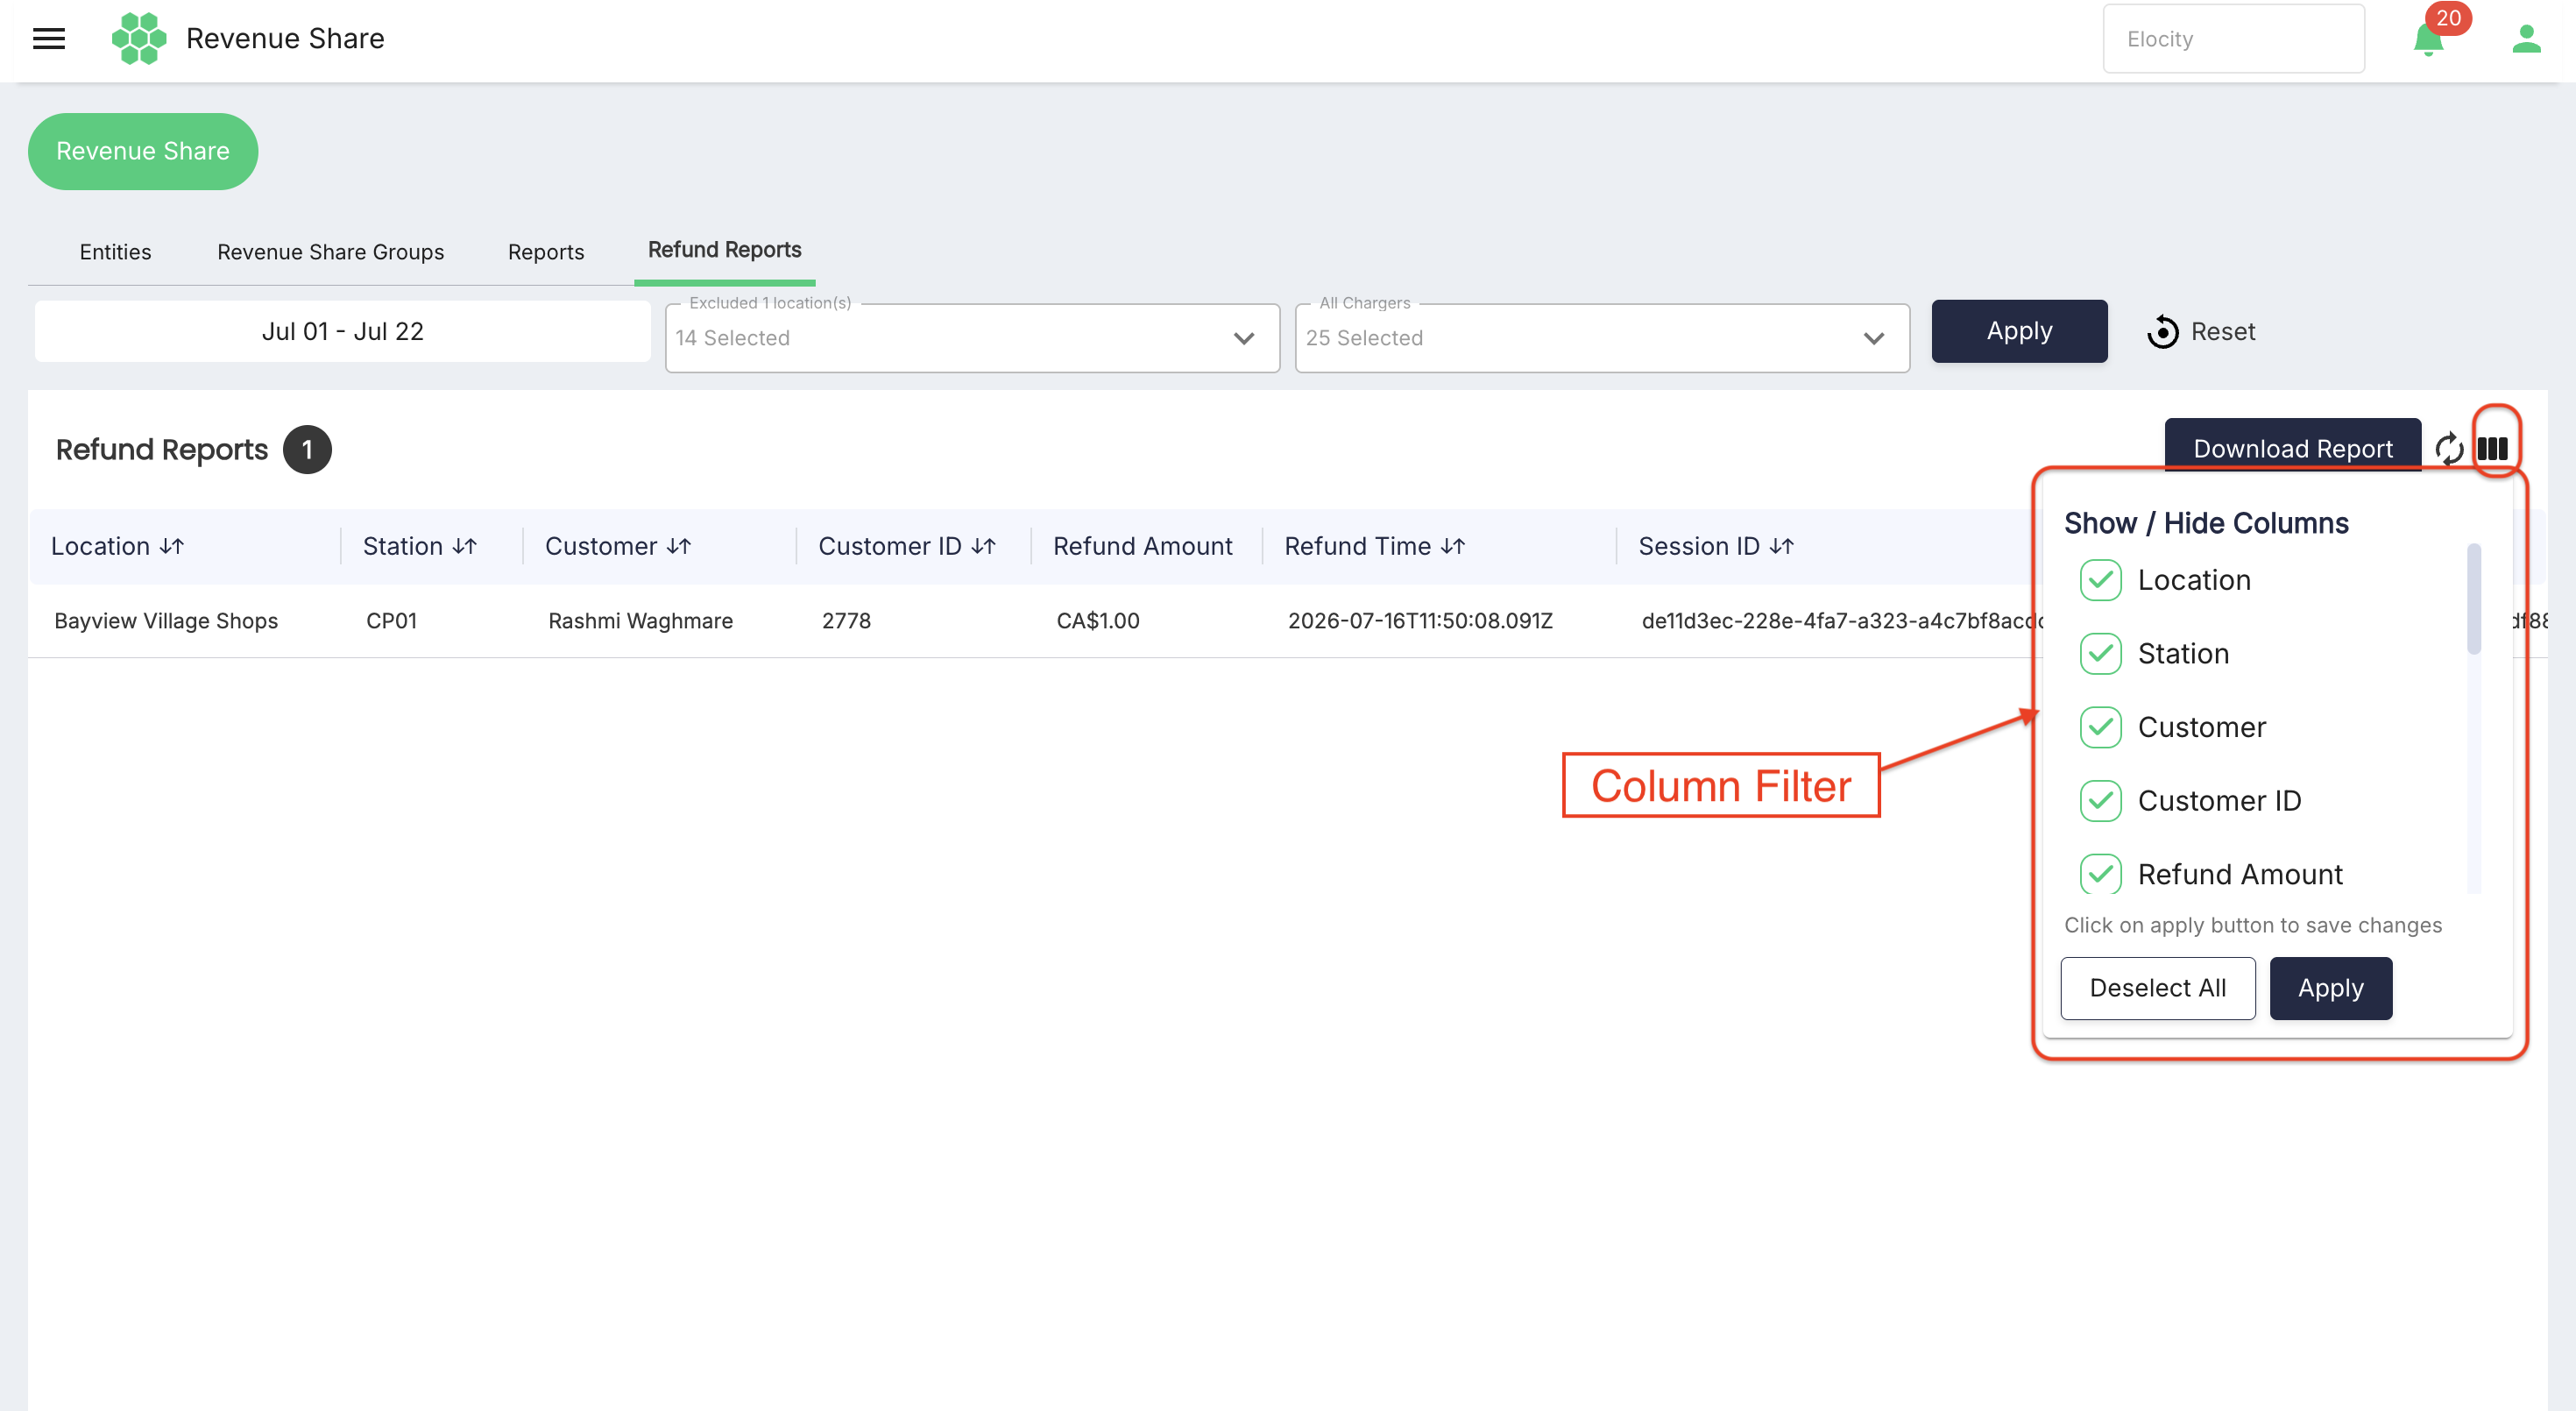
Changing column visibility does not change the underlying refund records.
Downloading a Refund report
The Download Report button is displayed when matching refund records are available. Apply the required filters, review the result count, and select Download Report.
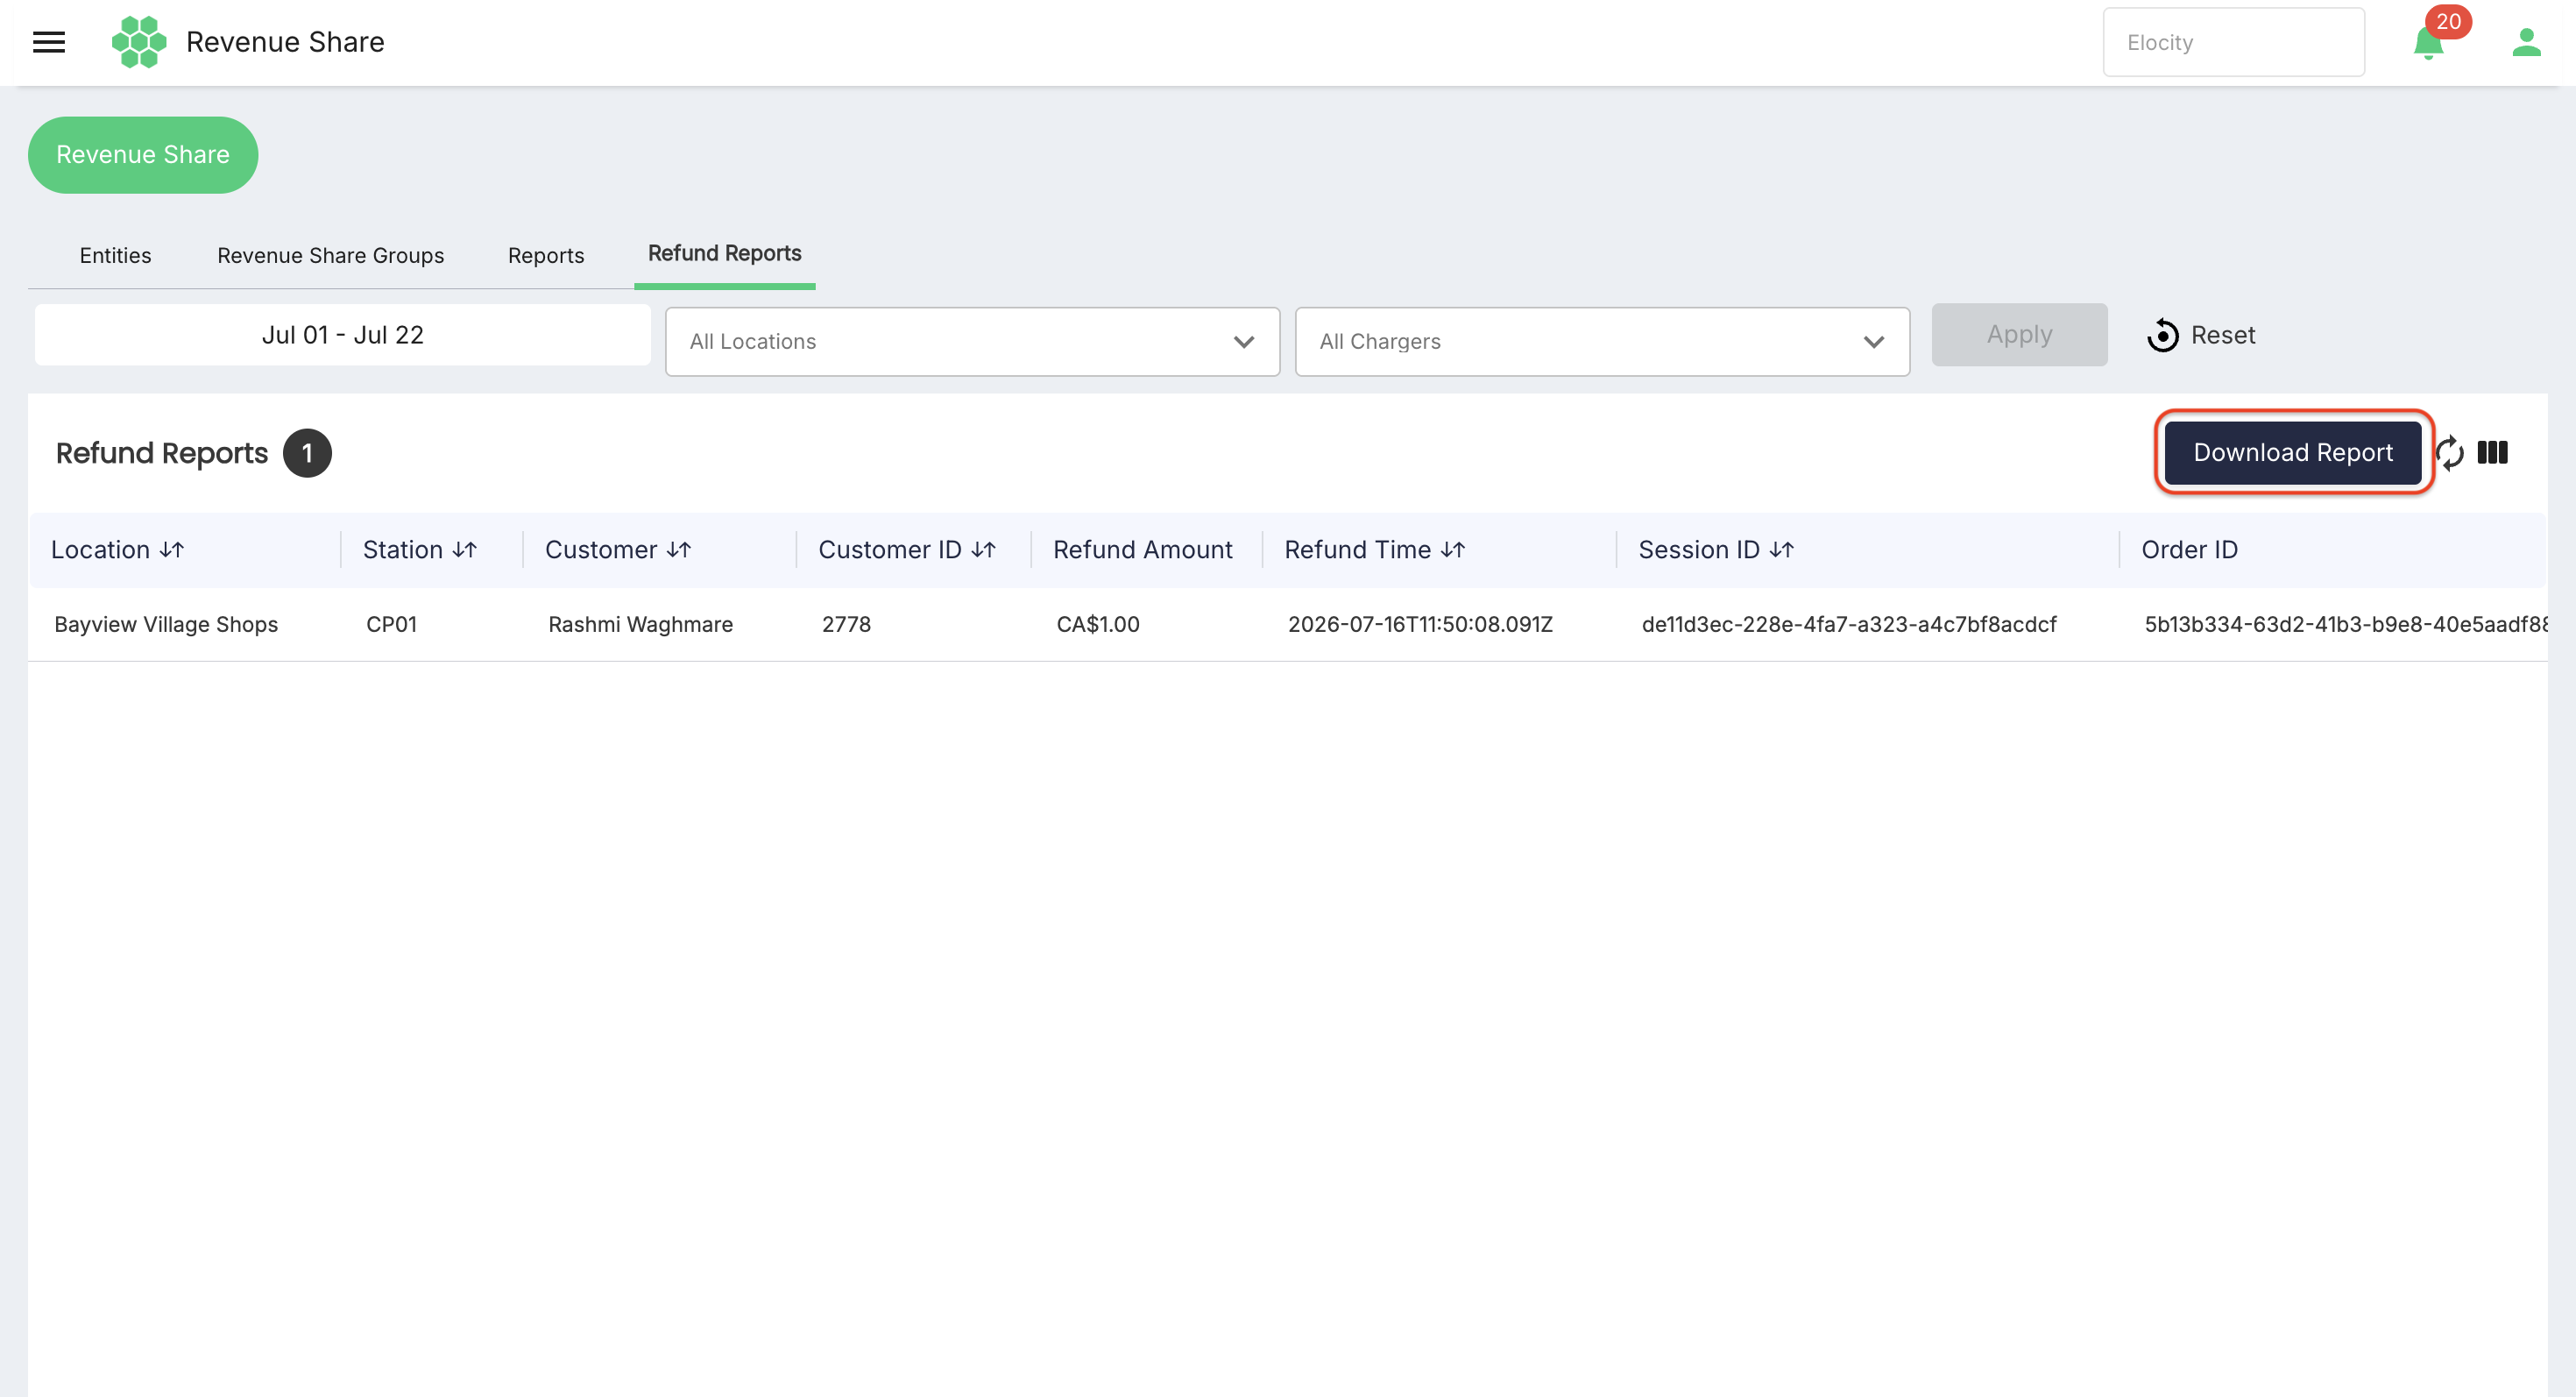 The Refund Reports download is generated in CSV format. Whether hidden columns remain included in the downloaded file requires confirmation.
Relationship between sessions, shares, and refunds
The older Revenue Share requirements describe the intended processing model as follows:
- When a charging session terminates, the system obtains the revenue-share arrangement for the involved location and records the calculated shares with the terminated session.
- Payment processing uses the revenue-share information captured for the session.
- Revenue reports aggregate terminated-session information by participating account or entity using the selected date and location filters.
- Revenue adjustments caused by refunds should be represented in reporting.
Refunds are settled in the next settlement cycle and are distributed using the same revenue-share ratio that applied to the original charging session.
Recommended operating workflow
- Confirm the selected business.
- Review the Entities list and create any missing participating parties.
- Create or review the Revenue Share Group for the required locations.
- Confirm every selected location and participating entity.
- Verify all revenue-share percentages before saving.
- Generate a Revenue Share report for a short known period and reconcile the number of sessions and revenue totals with the source charging-session data.
- Download the report in the required PDF or CSV format.
- Review Refund Reports for the same operational period.
- Correlate refunds using Location, Station, Customer ID, Session ID, Order ID, session timestamps, and Refund Time.
- Reconcile the refund against the next settlement cycle and confirm that it uses the original session's revenue-share ratio.
Confirmed product rules
- Revenue shares are percentage-based and must total exactly 100%; decimal percentages are supported.
- Fixed-amount and percentage-plus-fixed share methods are not currently supported.
- A location normally belongs to one Revenue Share Group.
- Group changes affect future sessions only; historical sessions retain the shares captured when they were processed.
- The system currently has no prevention logic that blocks deletion of an entity or group already used by sessions.
- Revenue reporting uses the exact session end time, stores internal reporting data in 15-minute intervals, and interprets filters using the browser timezone.
- Refund Reports use the user-selected Refund Time period and download in CSV format.
- Refunds are applied in the next settlement cycle using the original session's revenue-share ratio.
- Access and actions are controlled by feature-specific permissions that can be mapped to any role.