User Management
Application: HIEV Administration Portal
Page: Administration > User Management
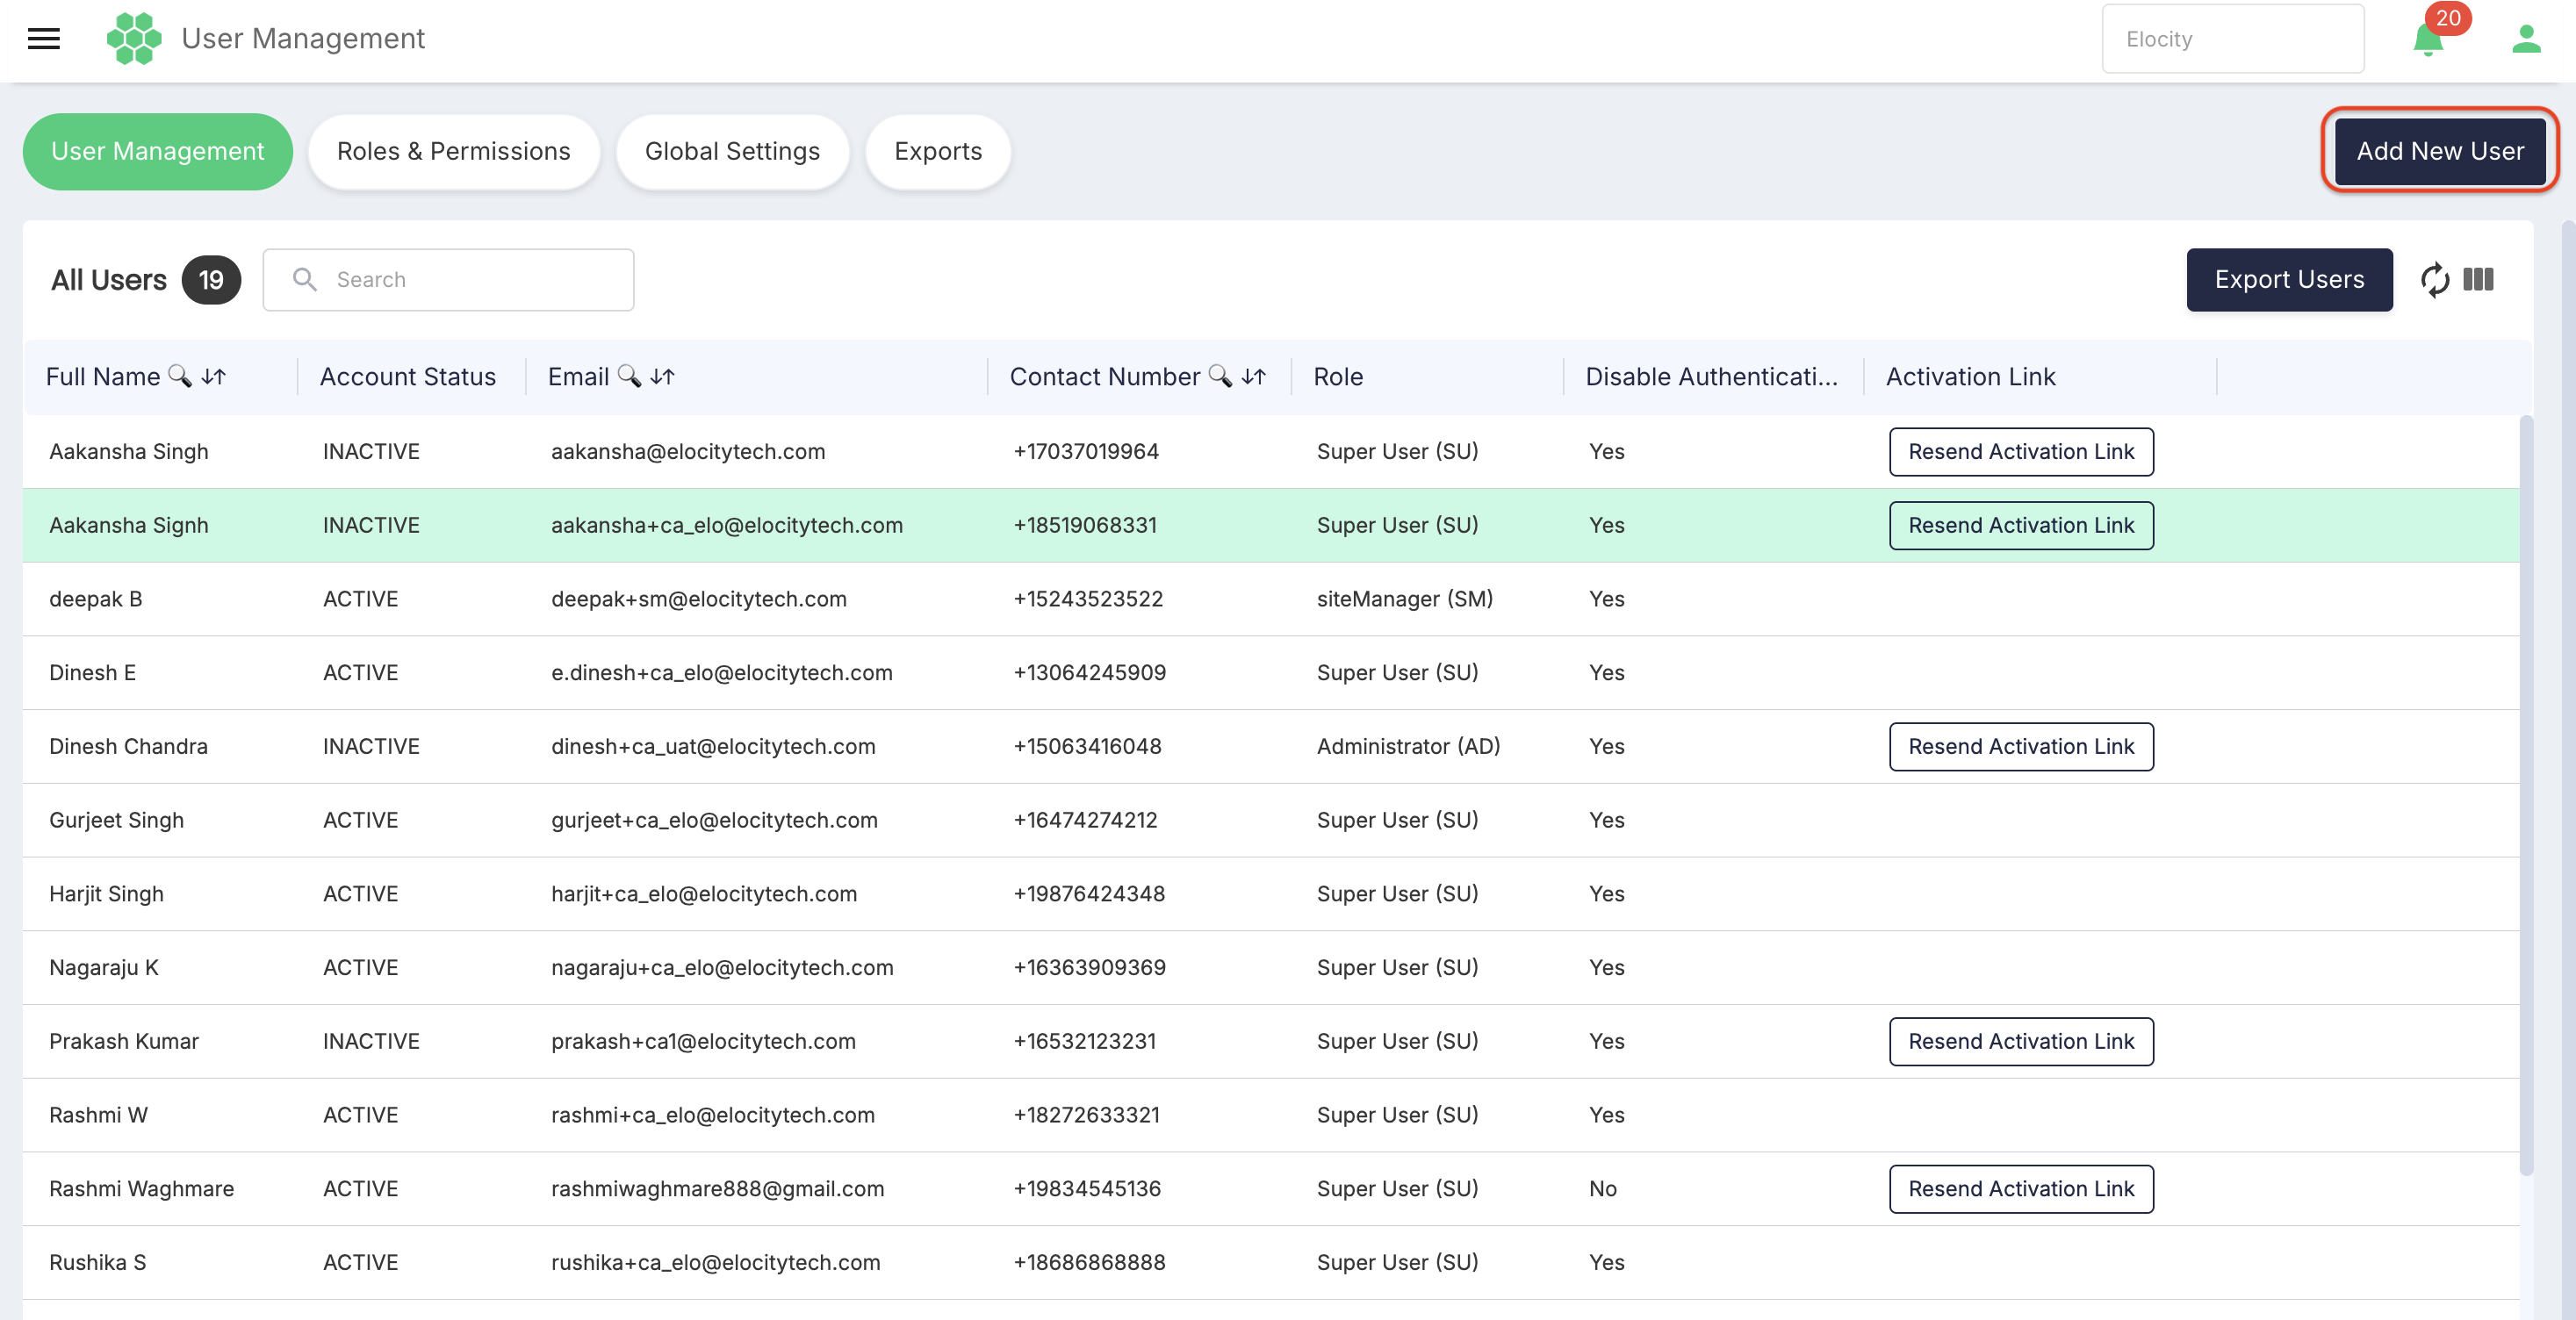
Page URL: https://hiev.ca/ca/user-management
Document status: Revised draft based on the live interface, legacy documentation, and product clarifications reviewed on 22 July 2026
1. Overview
User Management is the administrative area for viewing portal users, creating individual or multiple users, reviewing user details, updating user information and access, and initiating account actions.
The reviewed interface provided these primary functions:
- View and search the user register.
- Sort selected identity columns.
- Refresh the register.
- Show or hide grid columns.
- Export user information.
- Add one user through an online form.
- Add multiple users through an Excel template.
- View an individual user's details.
- Edit identity, role, network access, and two-factor-authentication settings.
- Initiate Suspend or Delete actions for an active user.
User Management contains personal information and access-control settings. Only authorized administrators should use its creation, editing, export, suspension, and deletion functions.
User-management capabilities are controlled by dedicated permissions assigned to roles. Users inherit the permissions of their assigned role.
2. Accessing User Management
- Sign in to the HIEV Administration Portal.
- Open the Administration area.
- Select User Management.
- Verify the business or site context displayed at the top of the portal.
The business selector applies to User Management. In the current business model, each user belongs to one business.
The live page also provides navigation to:
- Roles & Permissions
- Global Settings
- Exports
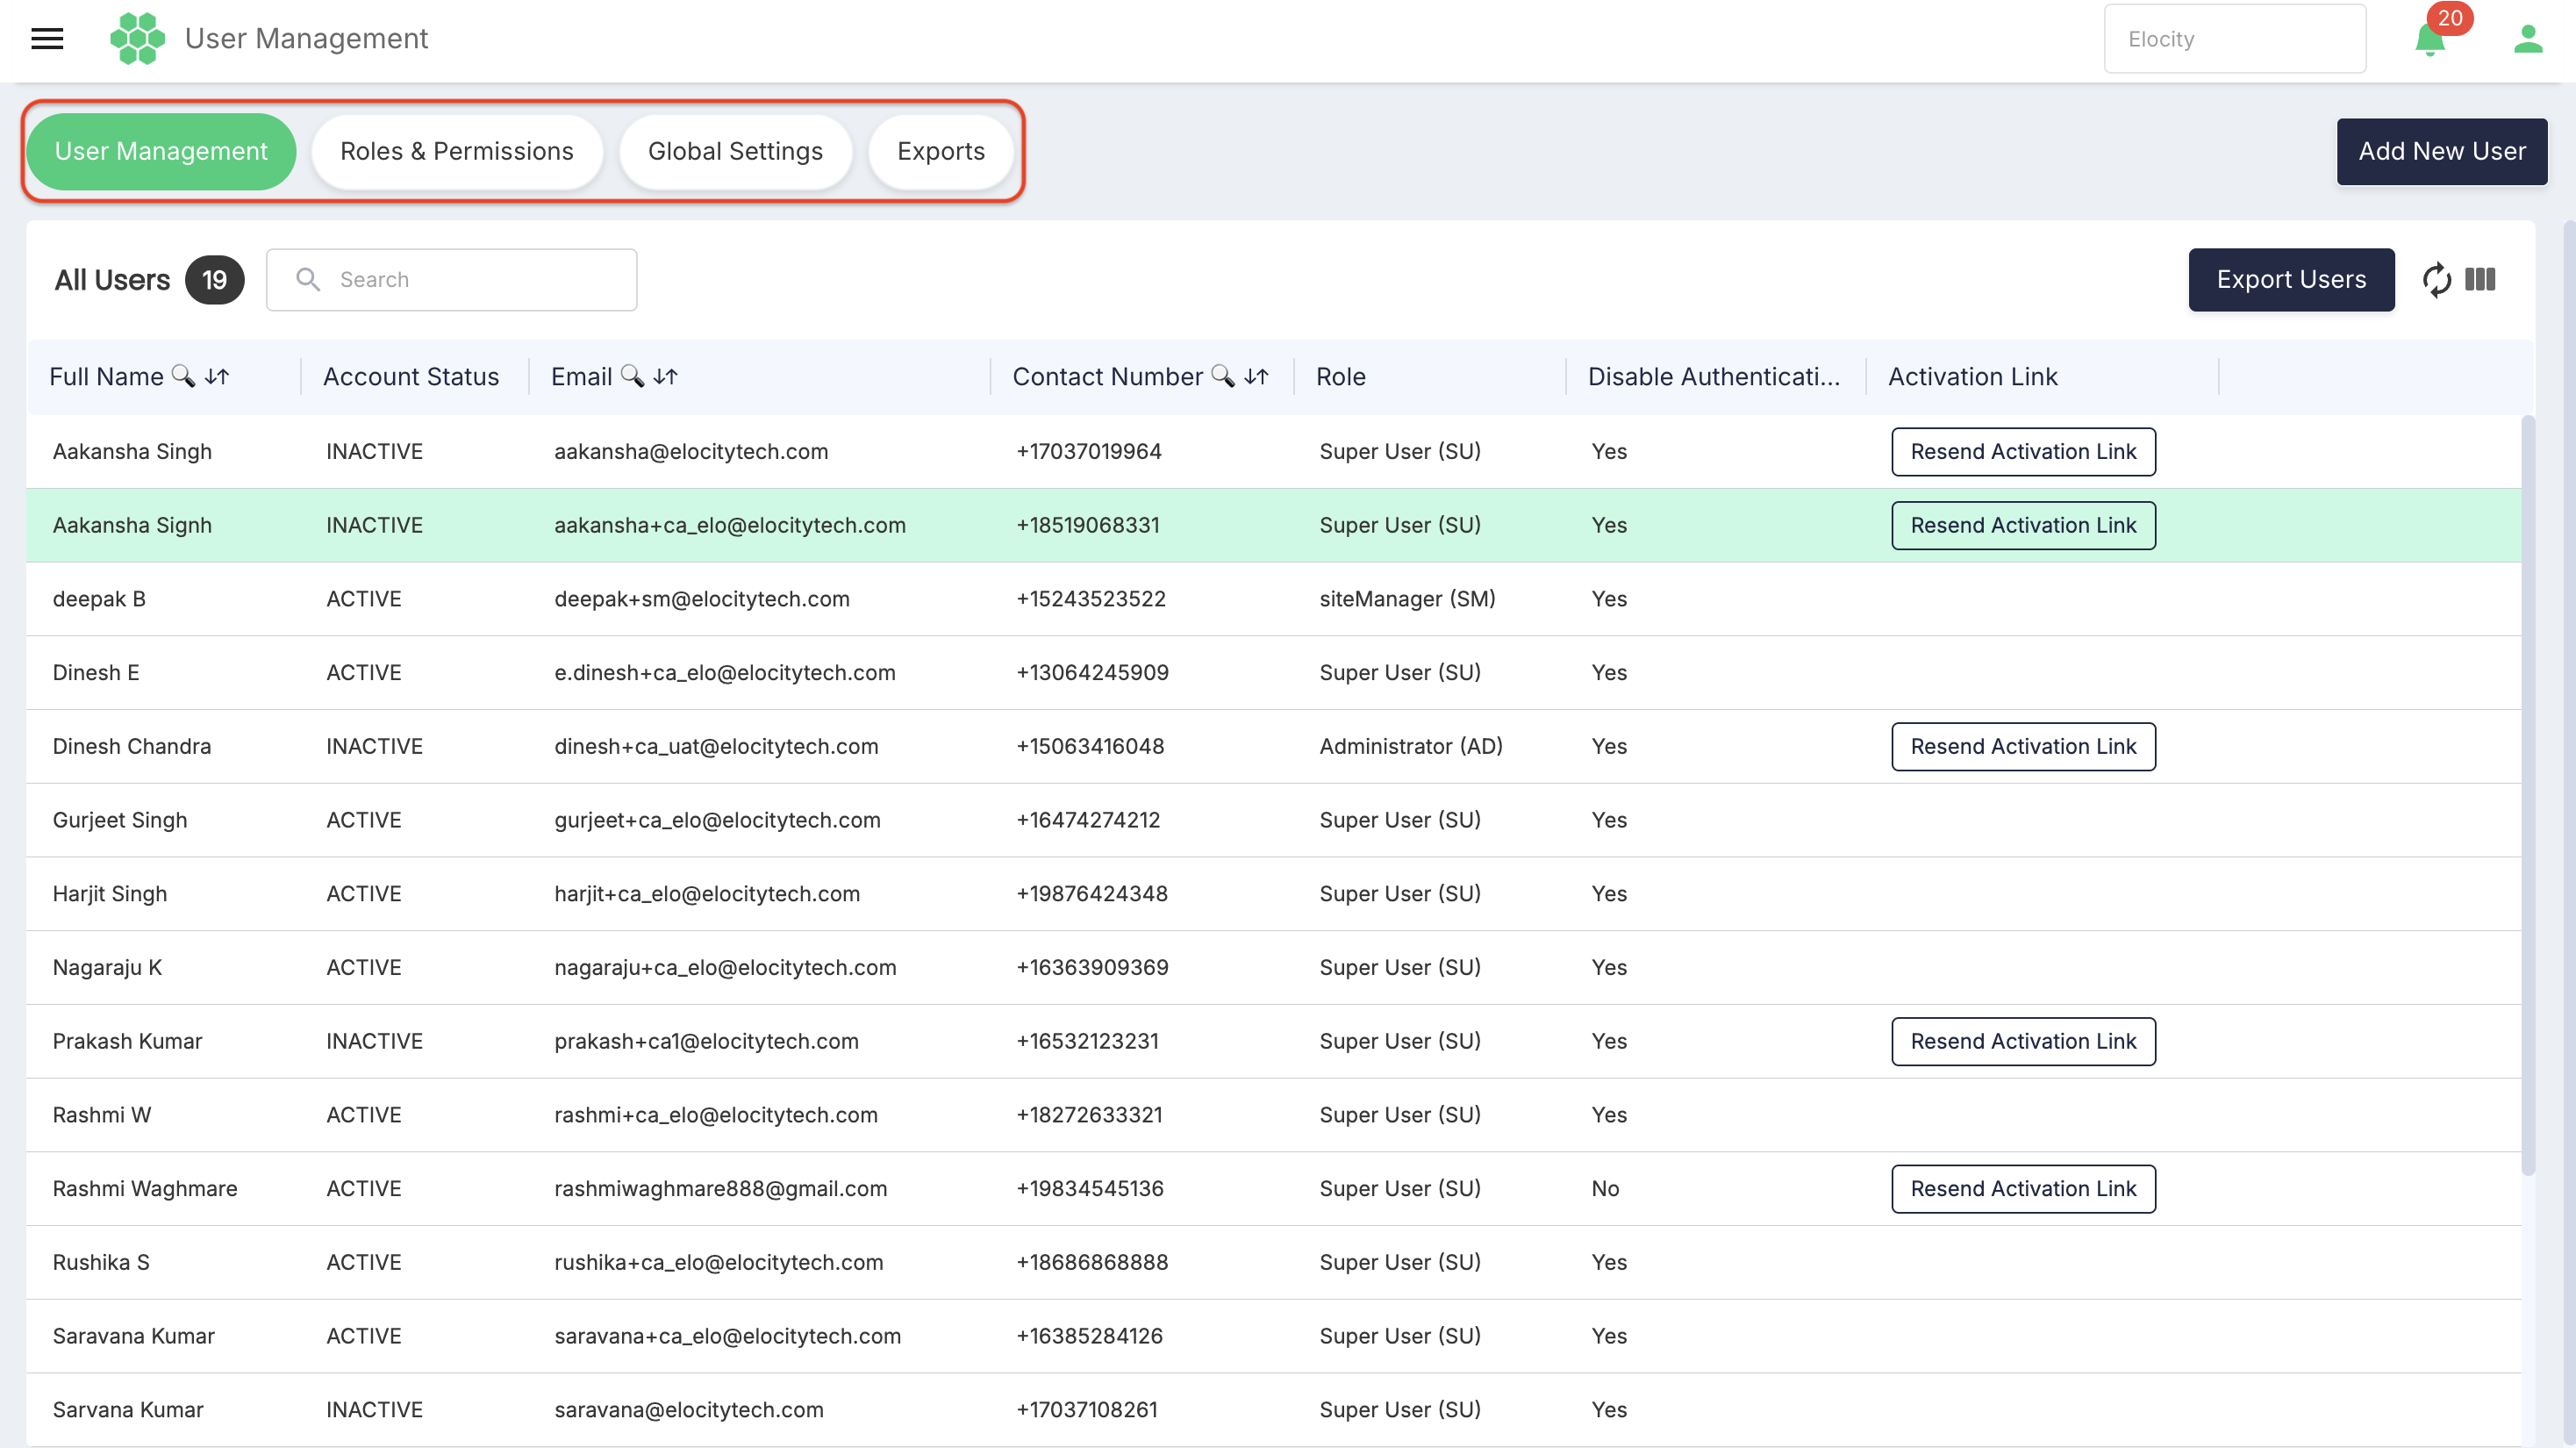
These buttons open related Administration modules. Their internal features are outside the scope of this User Management guide.
3. User Register
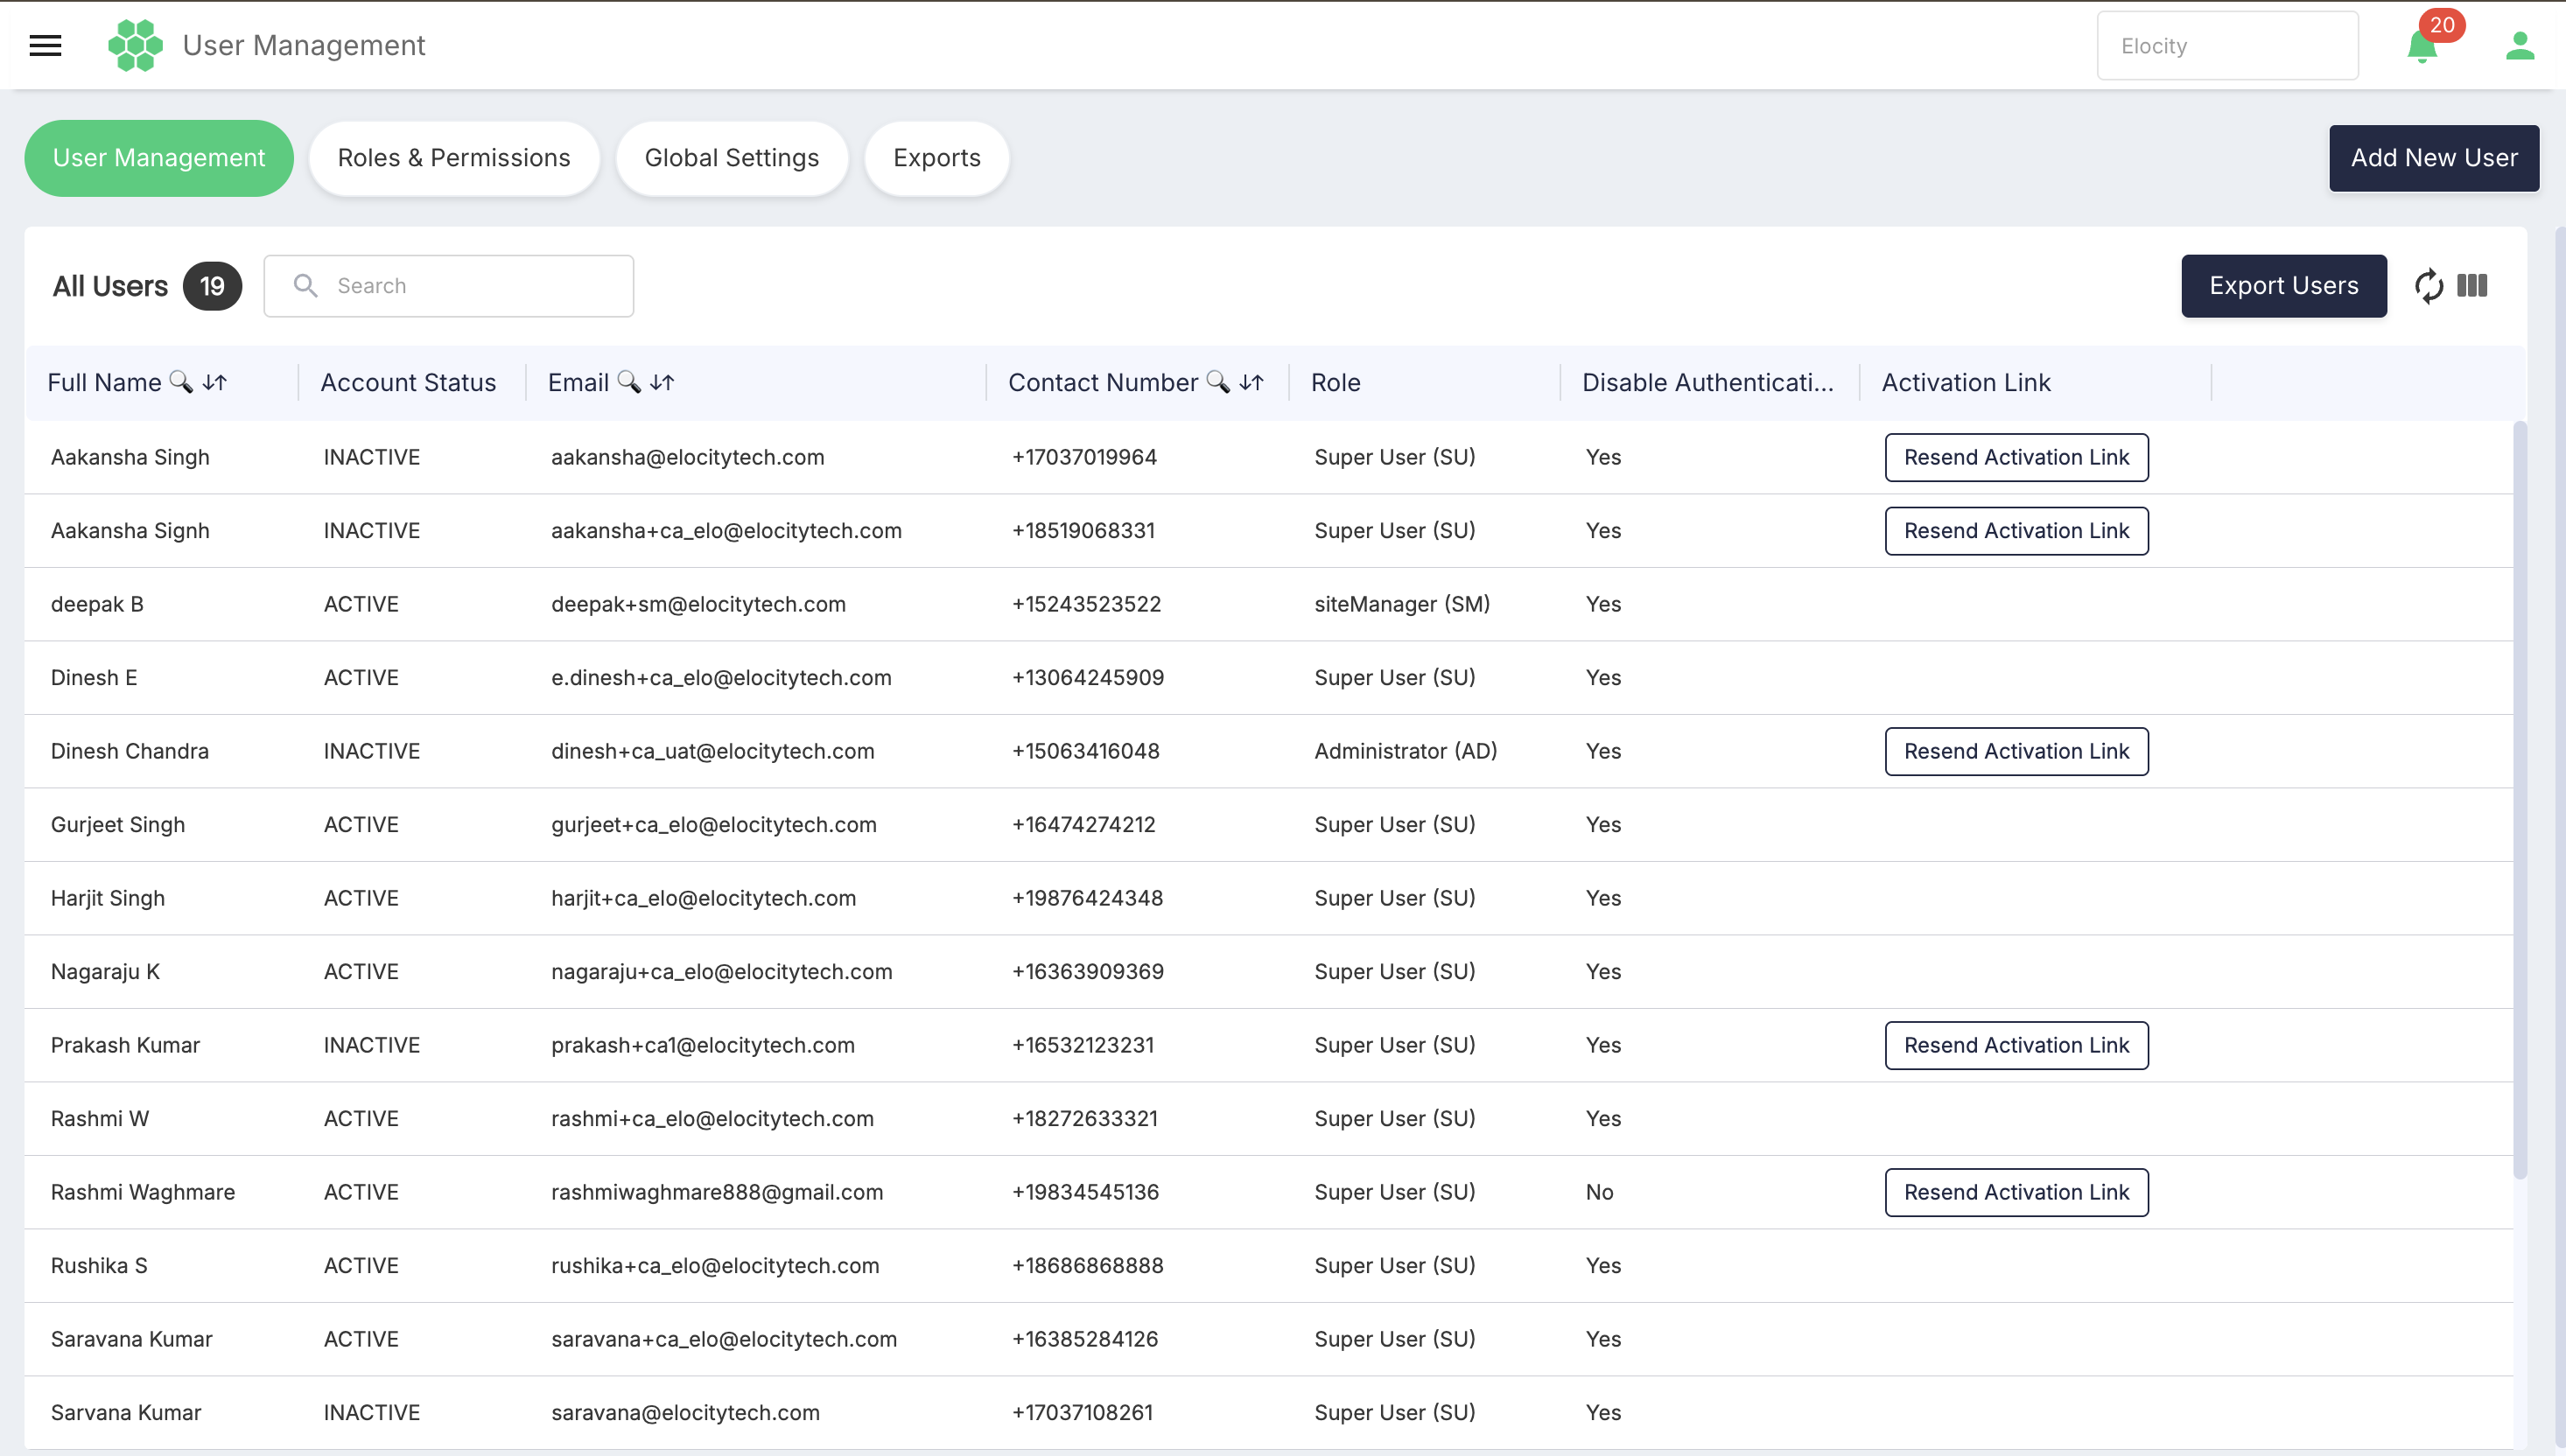
The main page displays the heading All Users, a record count, page controls, and the user grid.
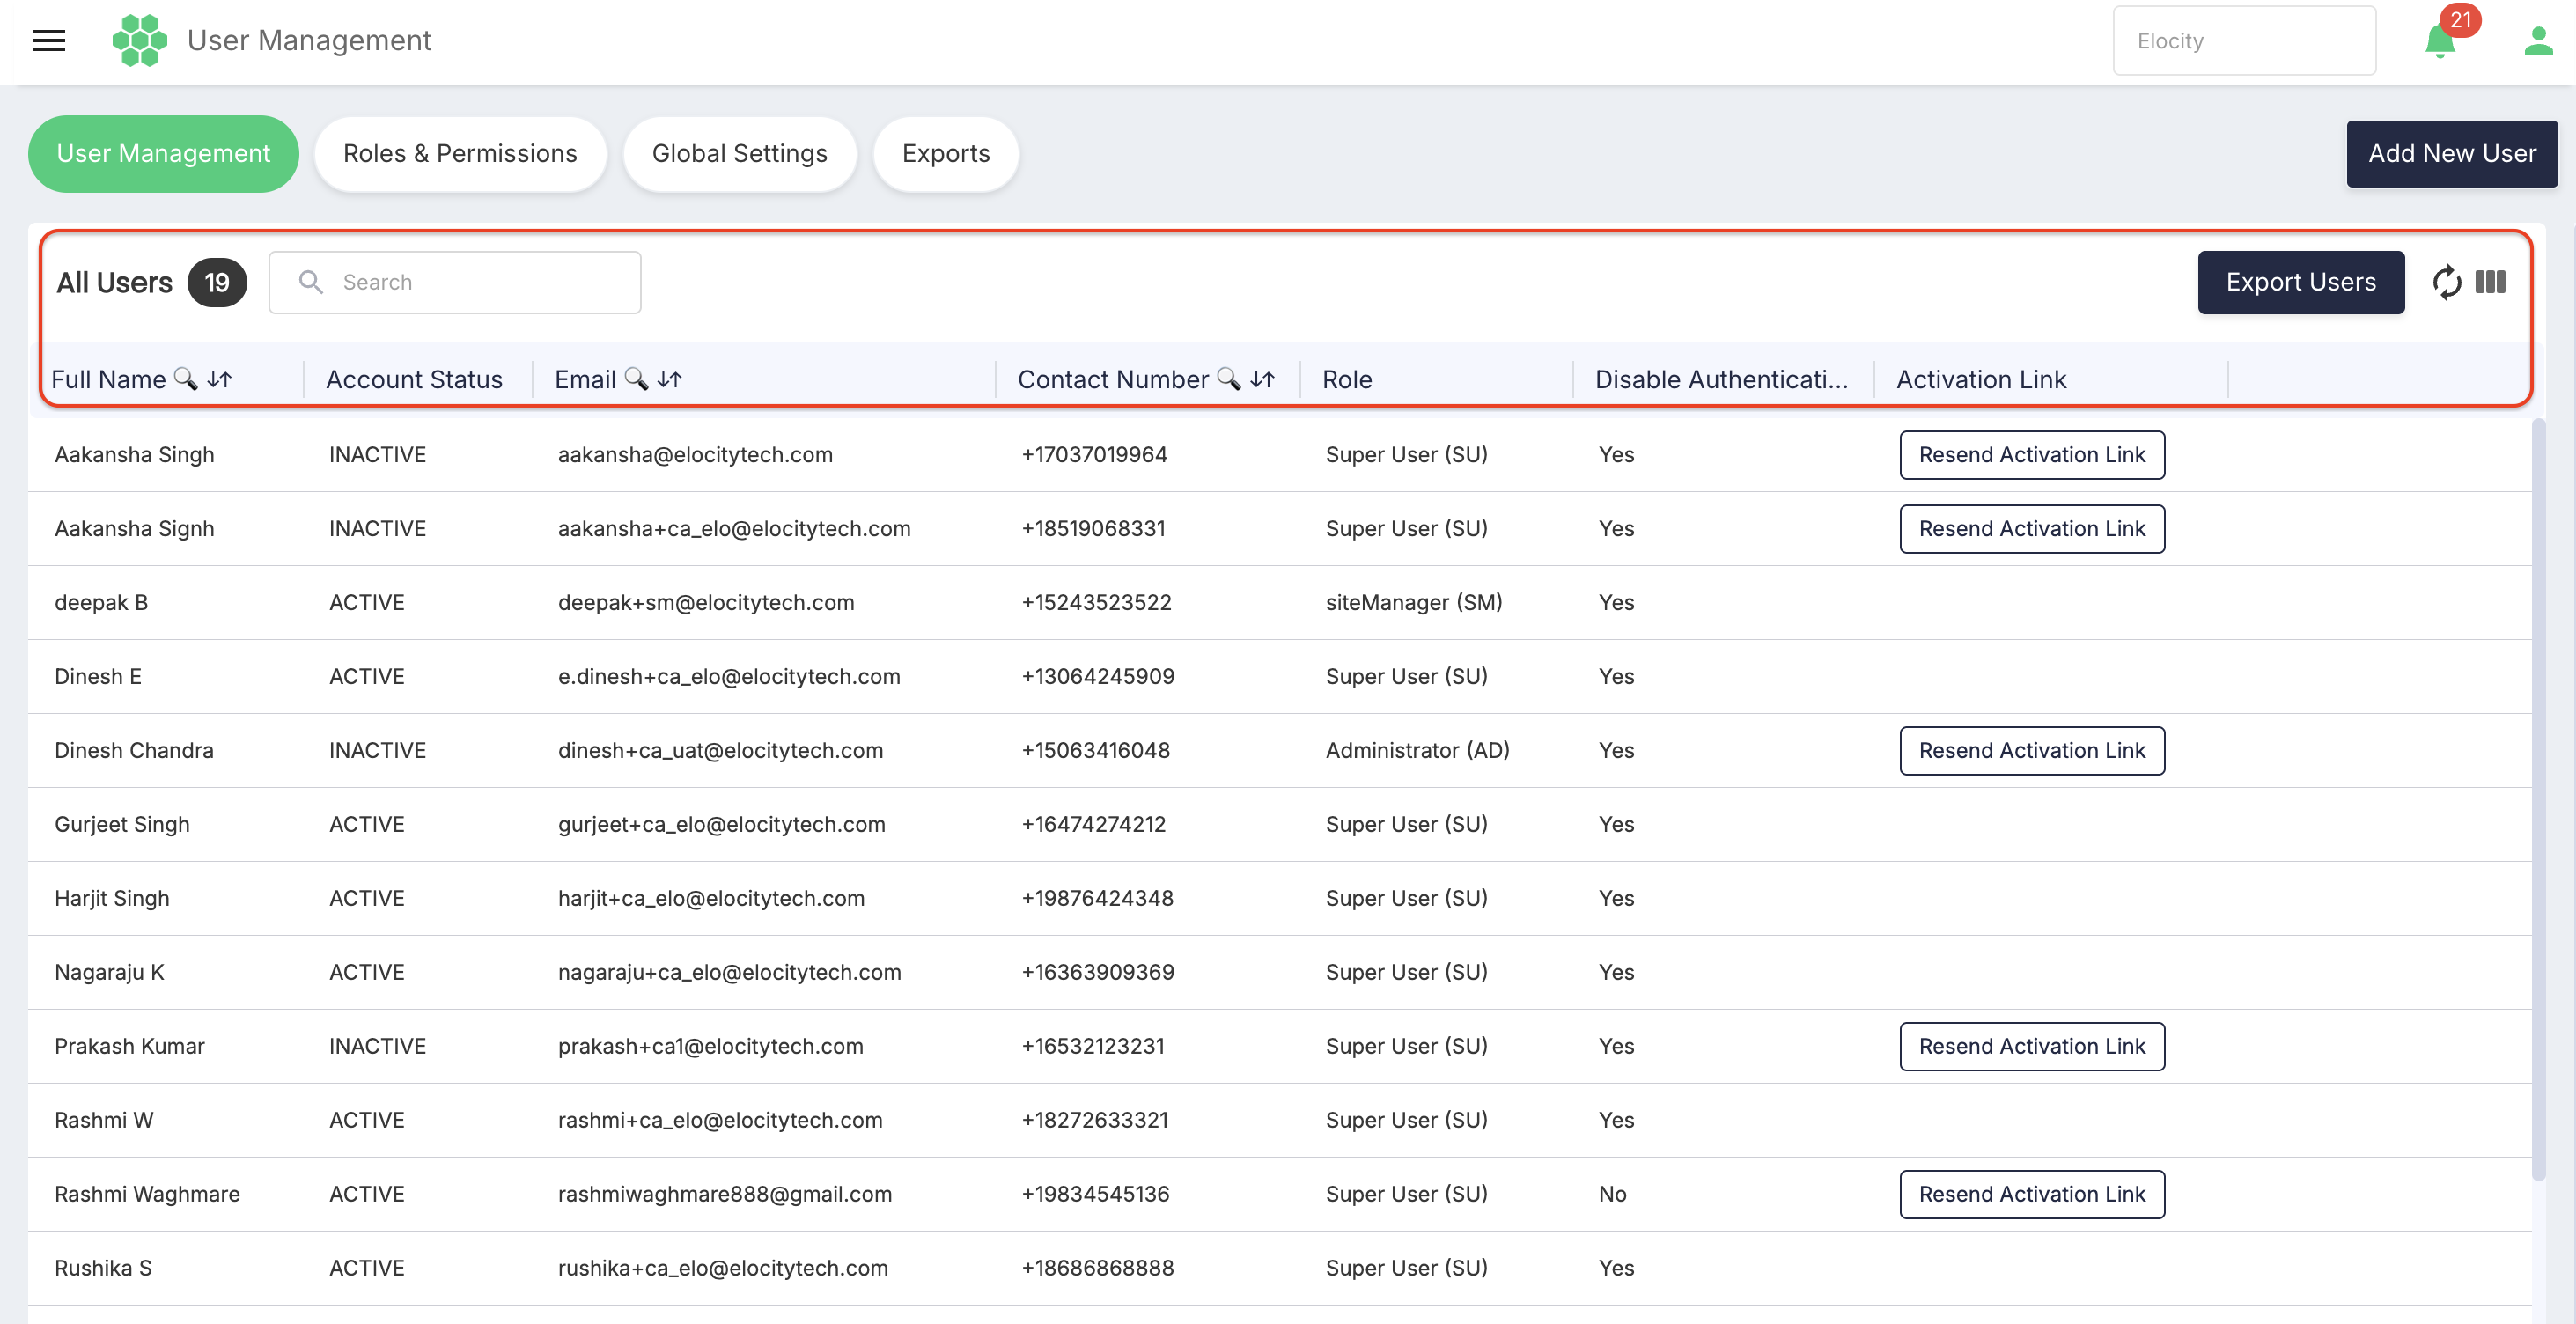
User grid columns
| Column | Description |
|---|---|
| Full Name | User's combined first and last name. |
| Account Status | Current status displayed for the account. Only ACTIVE was present in the reviewed result set. |
| Primary email address associated with the account. | |
| Contact Number | Contact number including the country code. |
| Role | Role assigned to the user, including the role abbreviation shown by the portal. |
| Disable Authentication | Displays whether the authentication-disable setting is selected. In the user form, the corresponding control is labelled Disable Two-Factor Authentication. |
| Activation Link | Area reserved for an activation-link action or value. It was blank for the reviewed active users. |
4. User Register Controls
4.1 Search
Use the Search box to filter the user grid. The columns marked with a magnifying-glass symbol are:
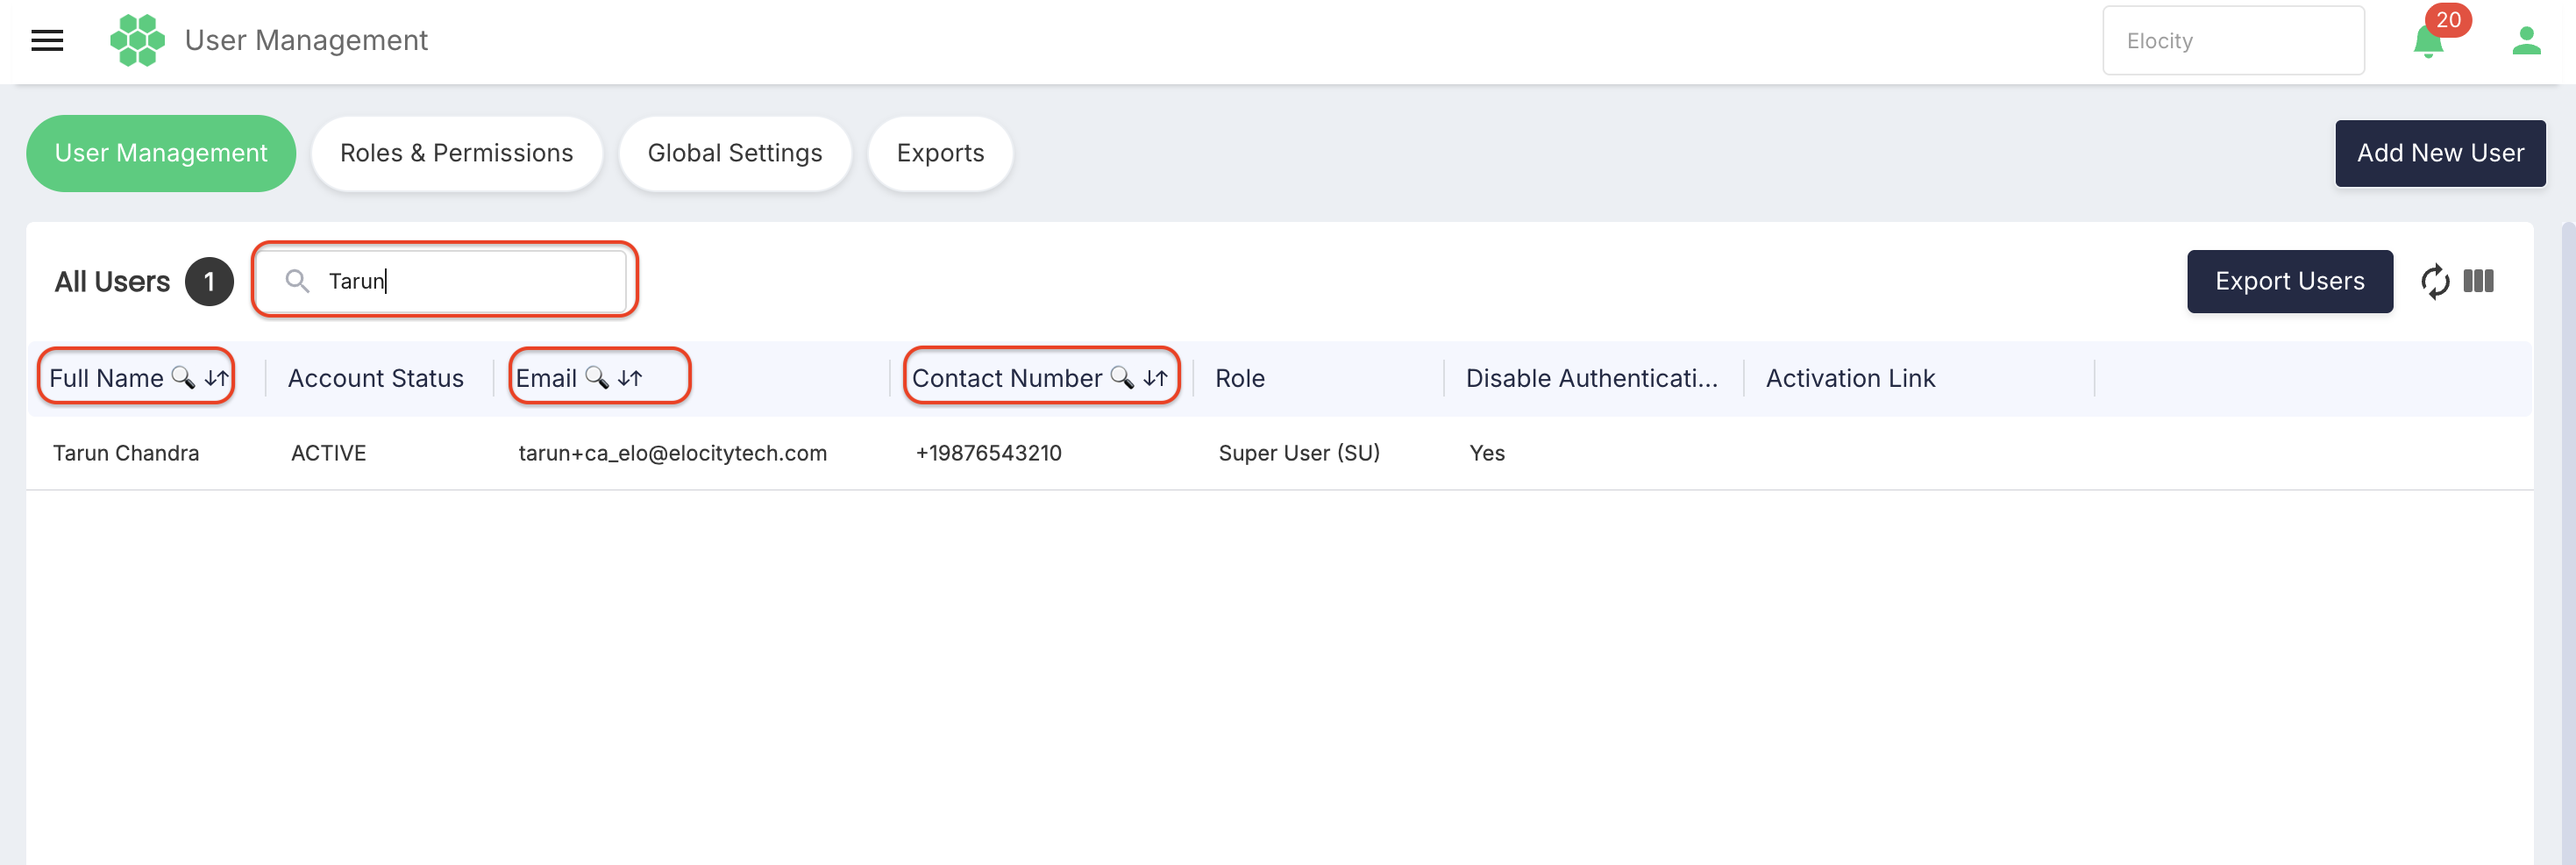
- Full Name
- Contact Number
Clear the Search box to restore the unfiltered list.
4.2 Sort
The live grid provided sorting on:

- Full Name
- Contact Number
Select a sortable heading to cycle through ascending, descending, and no-sort states. Keyboard users can focus the heading and press Enter.
The other visible columns did not expose sorting controls in the reviewed interface.
4.3 Refresh
Select Refresh to request the latest records for the current User Management view.

4.4 Column Filter
Use Column Filter to control which grid columns are visible.
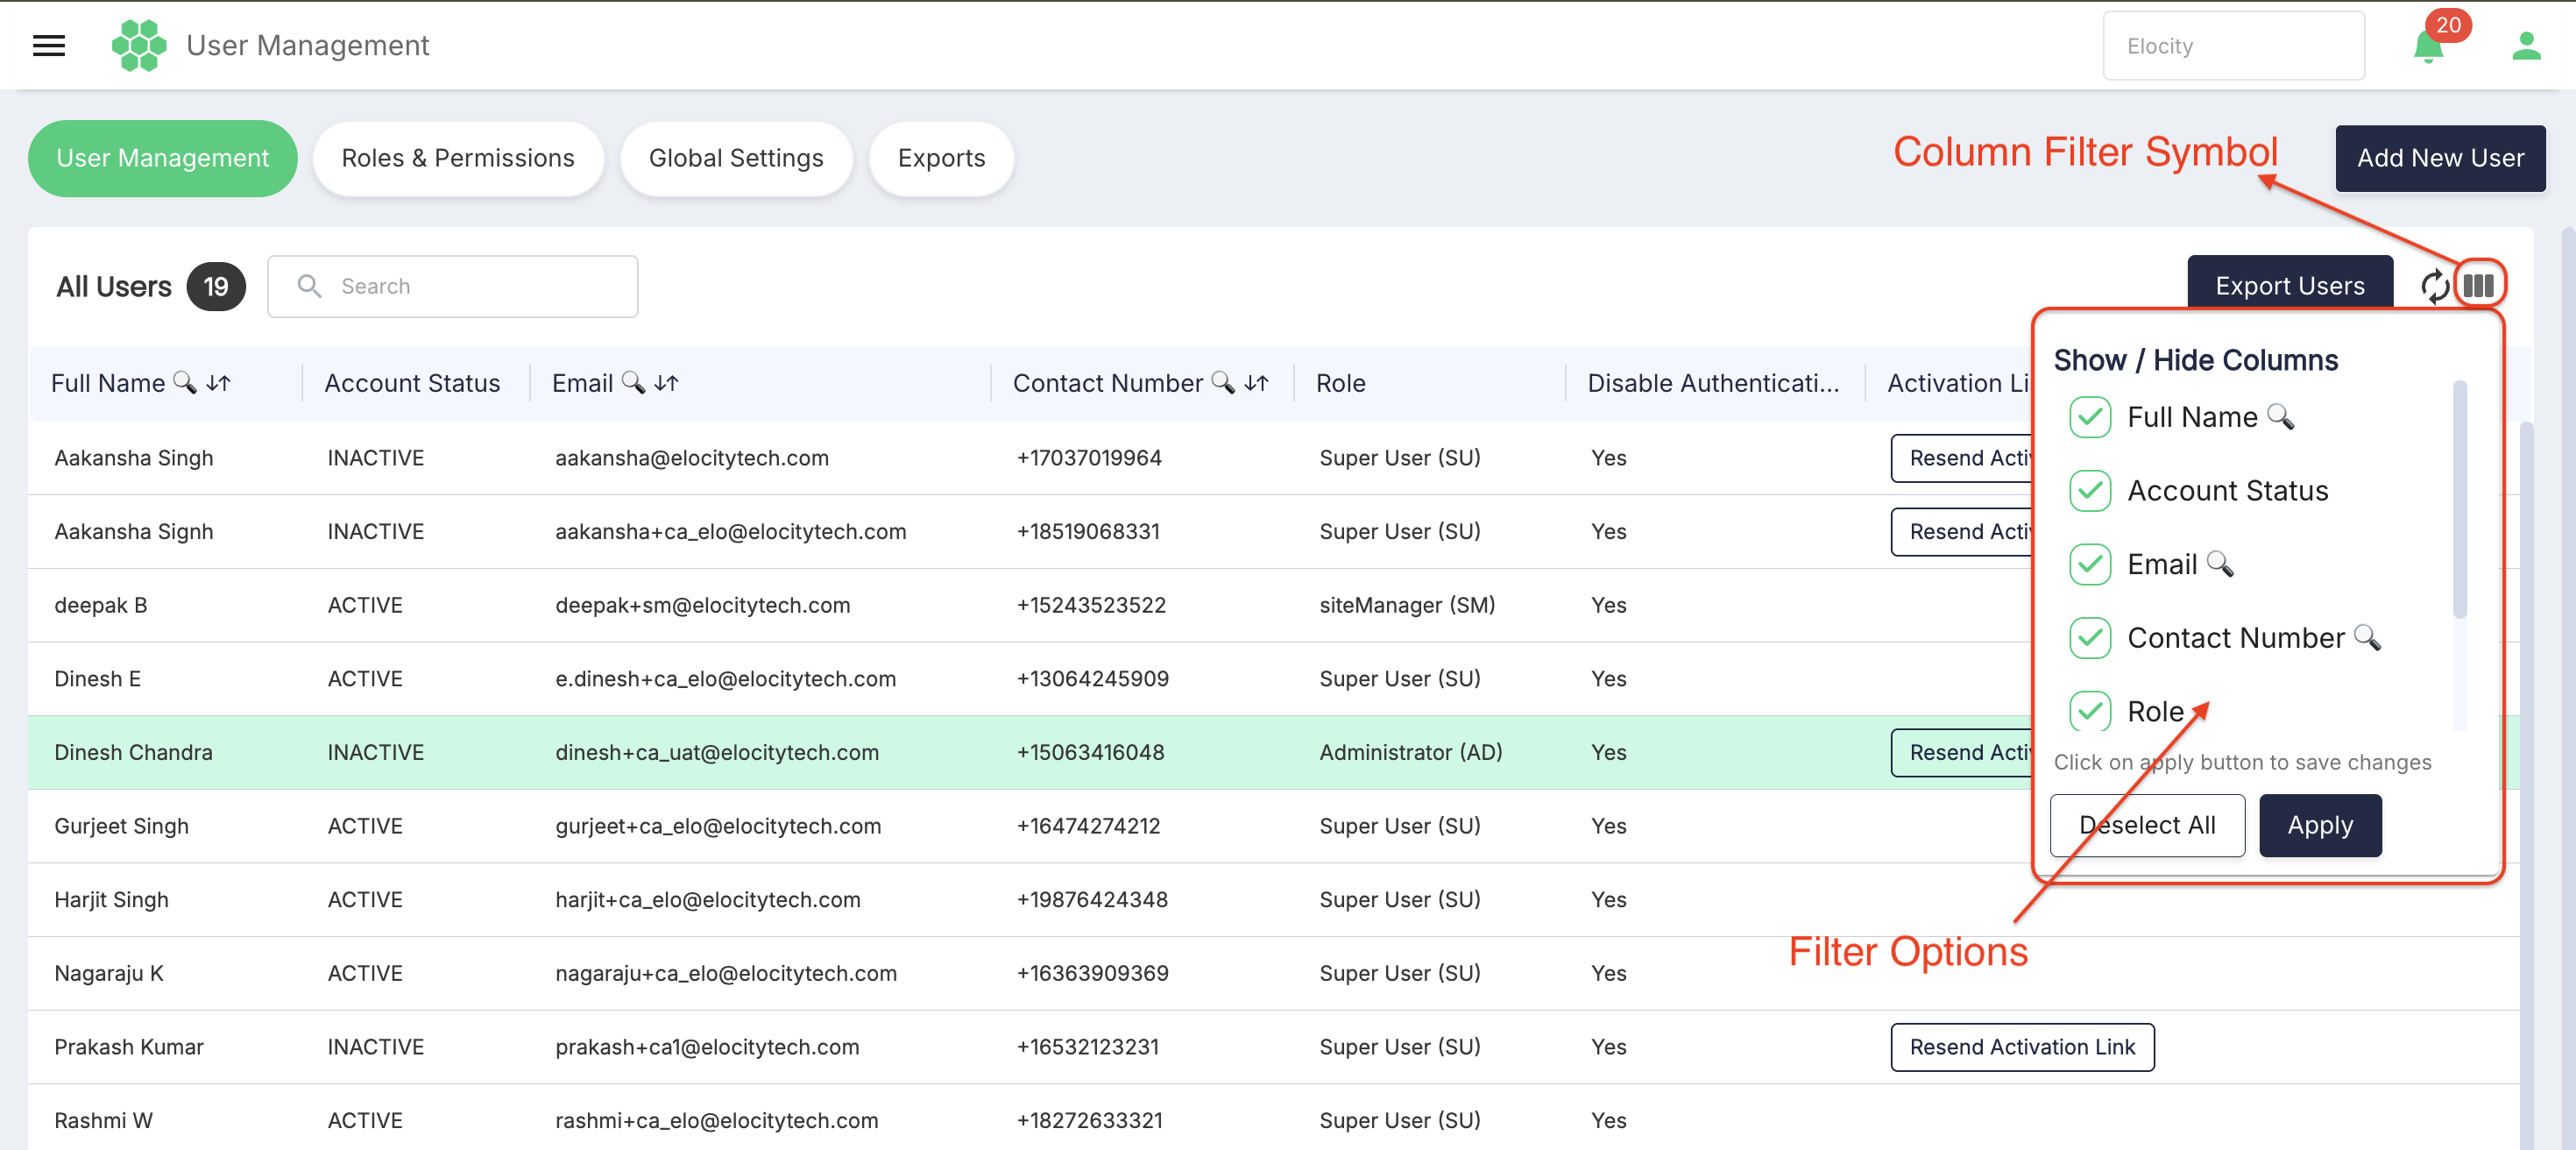
- Select Column Filter.
- Select or clear the checkbox beside a column.
- To clear all selections, select Deselect All.
- Select Apply inside the column panel.
The panel included all seven user-grid columns. This function changes the grid presentation; it does not change user data.
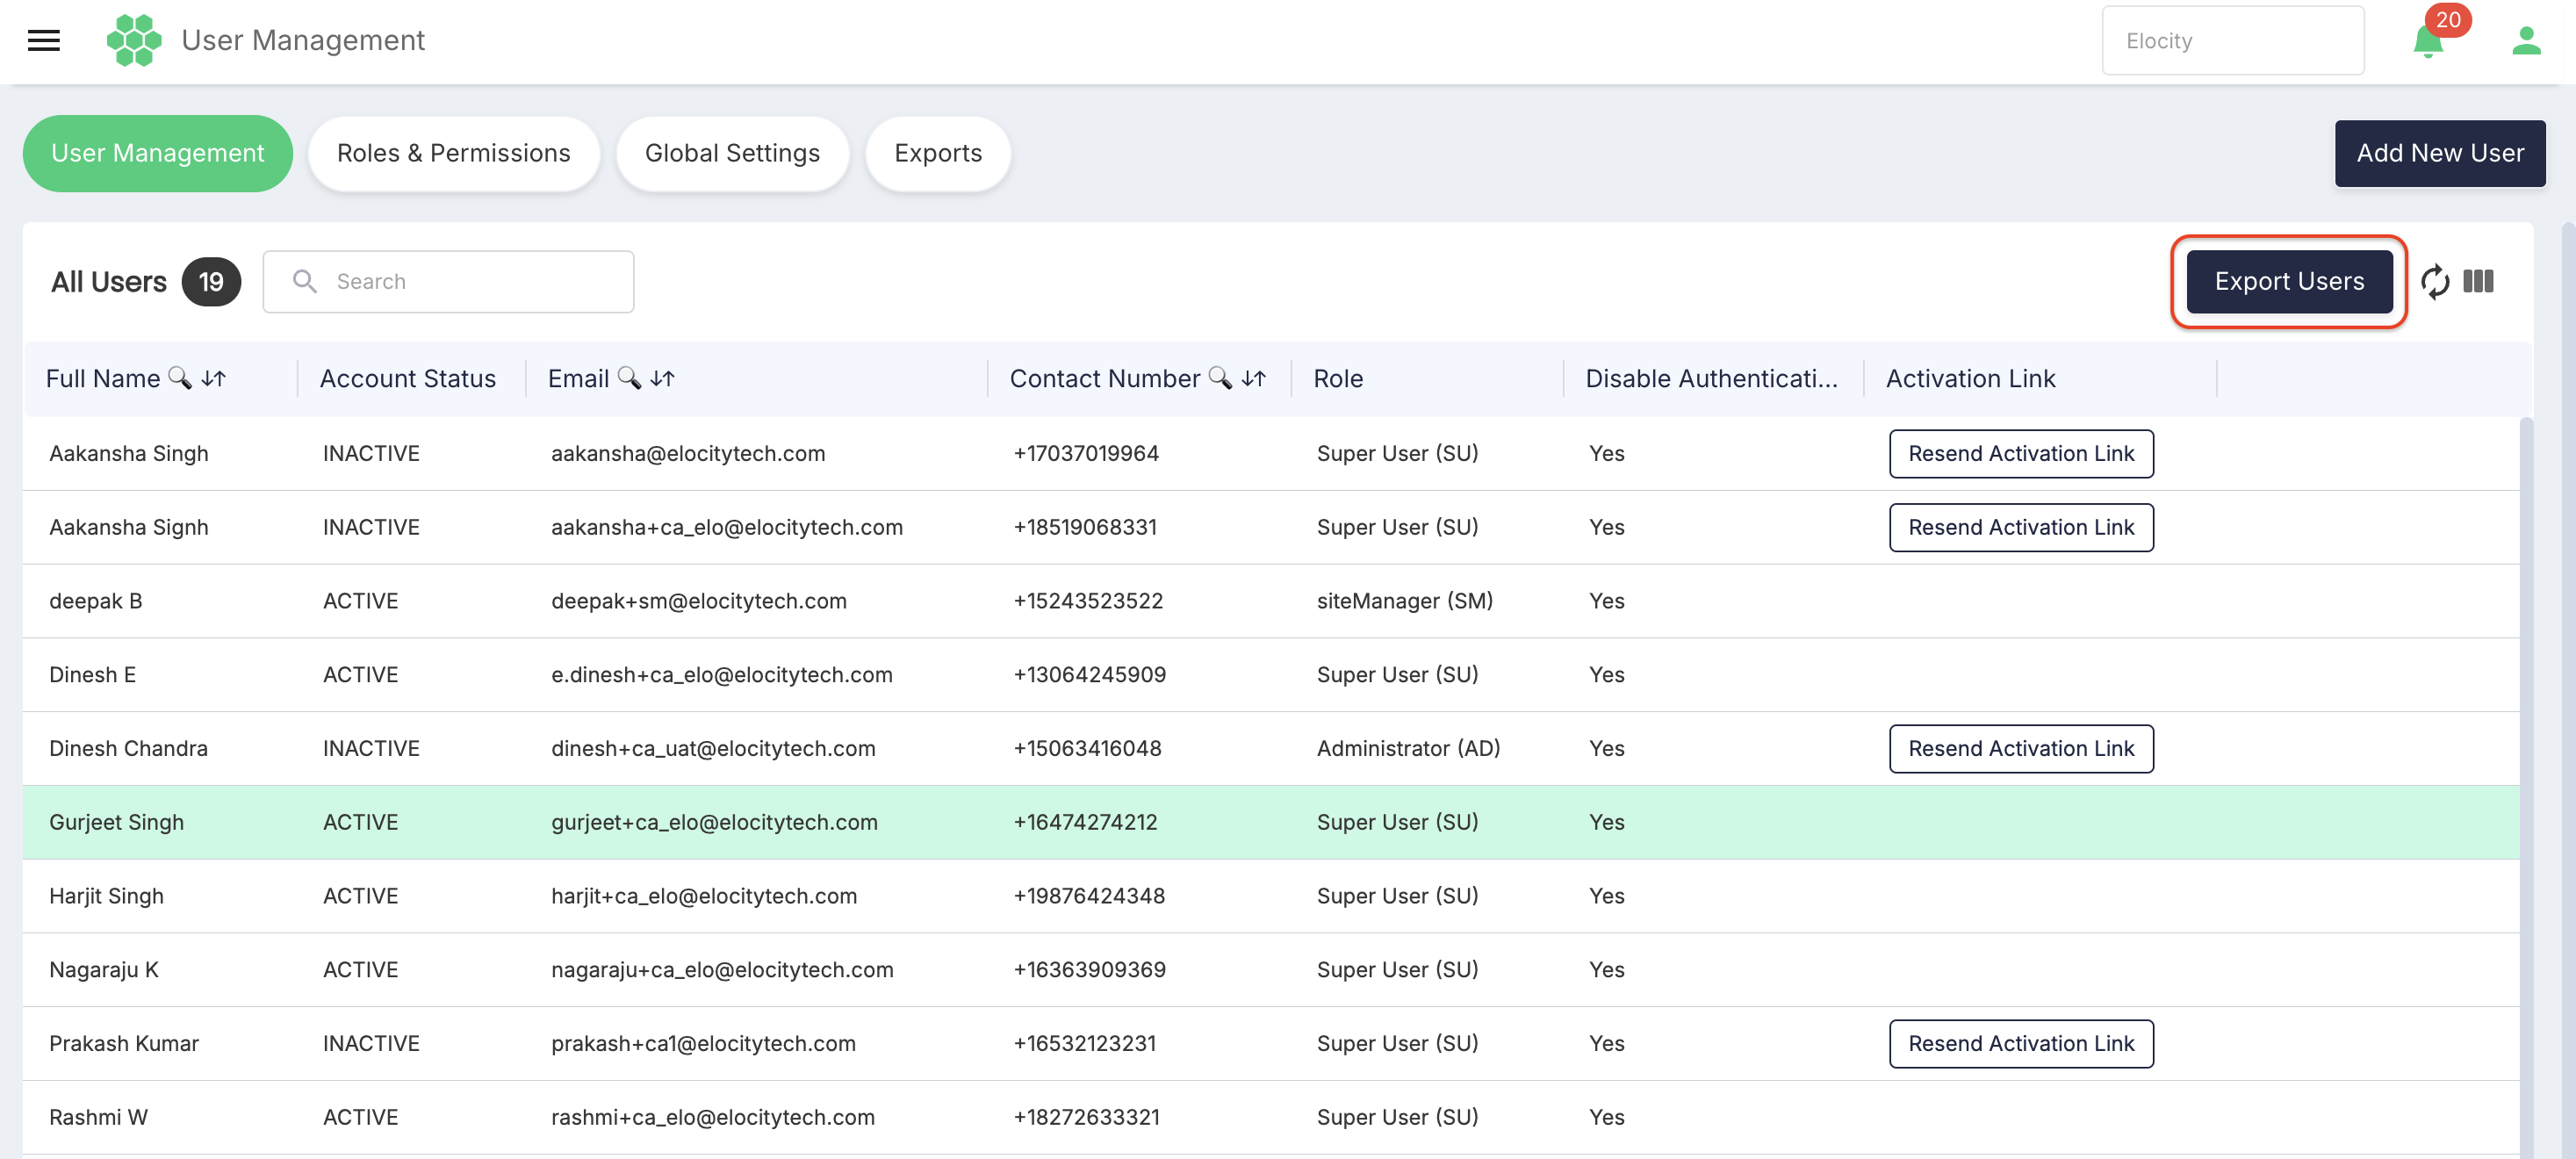
4.5 Export Users
The live page provides Export Users. The export includes all columns from the user grid. The legacy guide identifies the output as a CSV file; the current export was not executed during the live review because it can download personal information.
Confirm the selected business context before exporting. The current filename and file-format behavior still require confirmation.
5. Viewing User Details
- Locate the required user in the grid.
- Select the user's row.
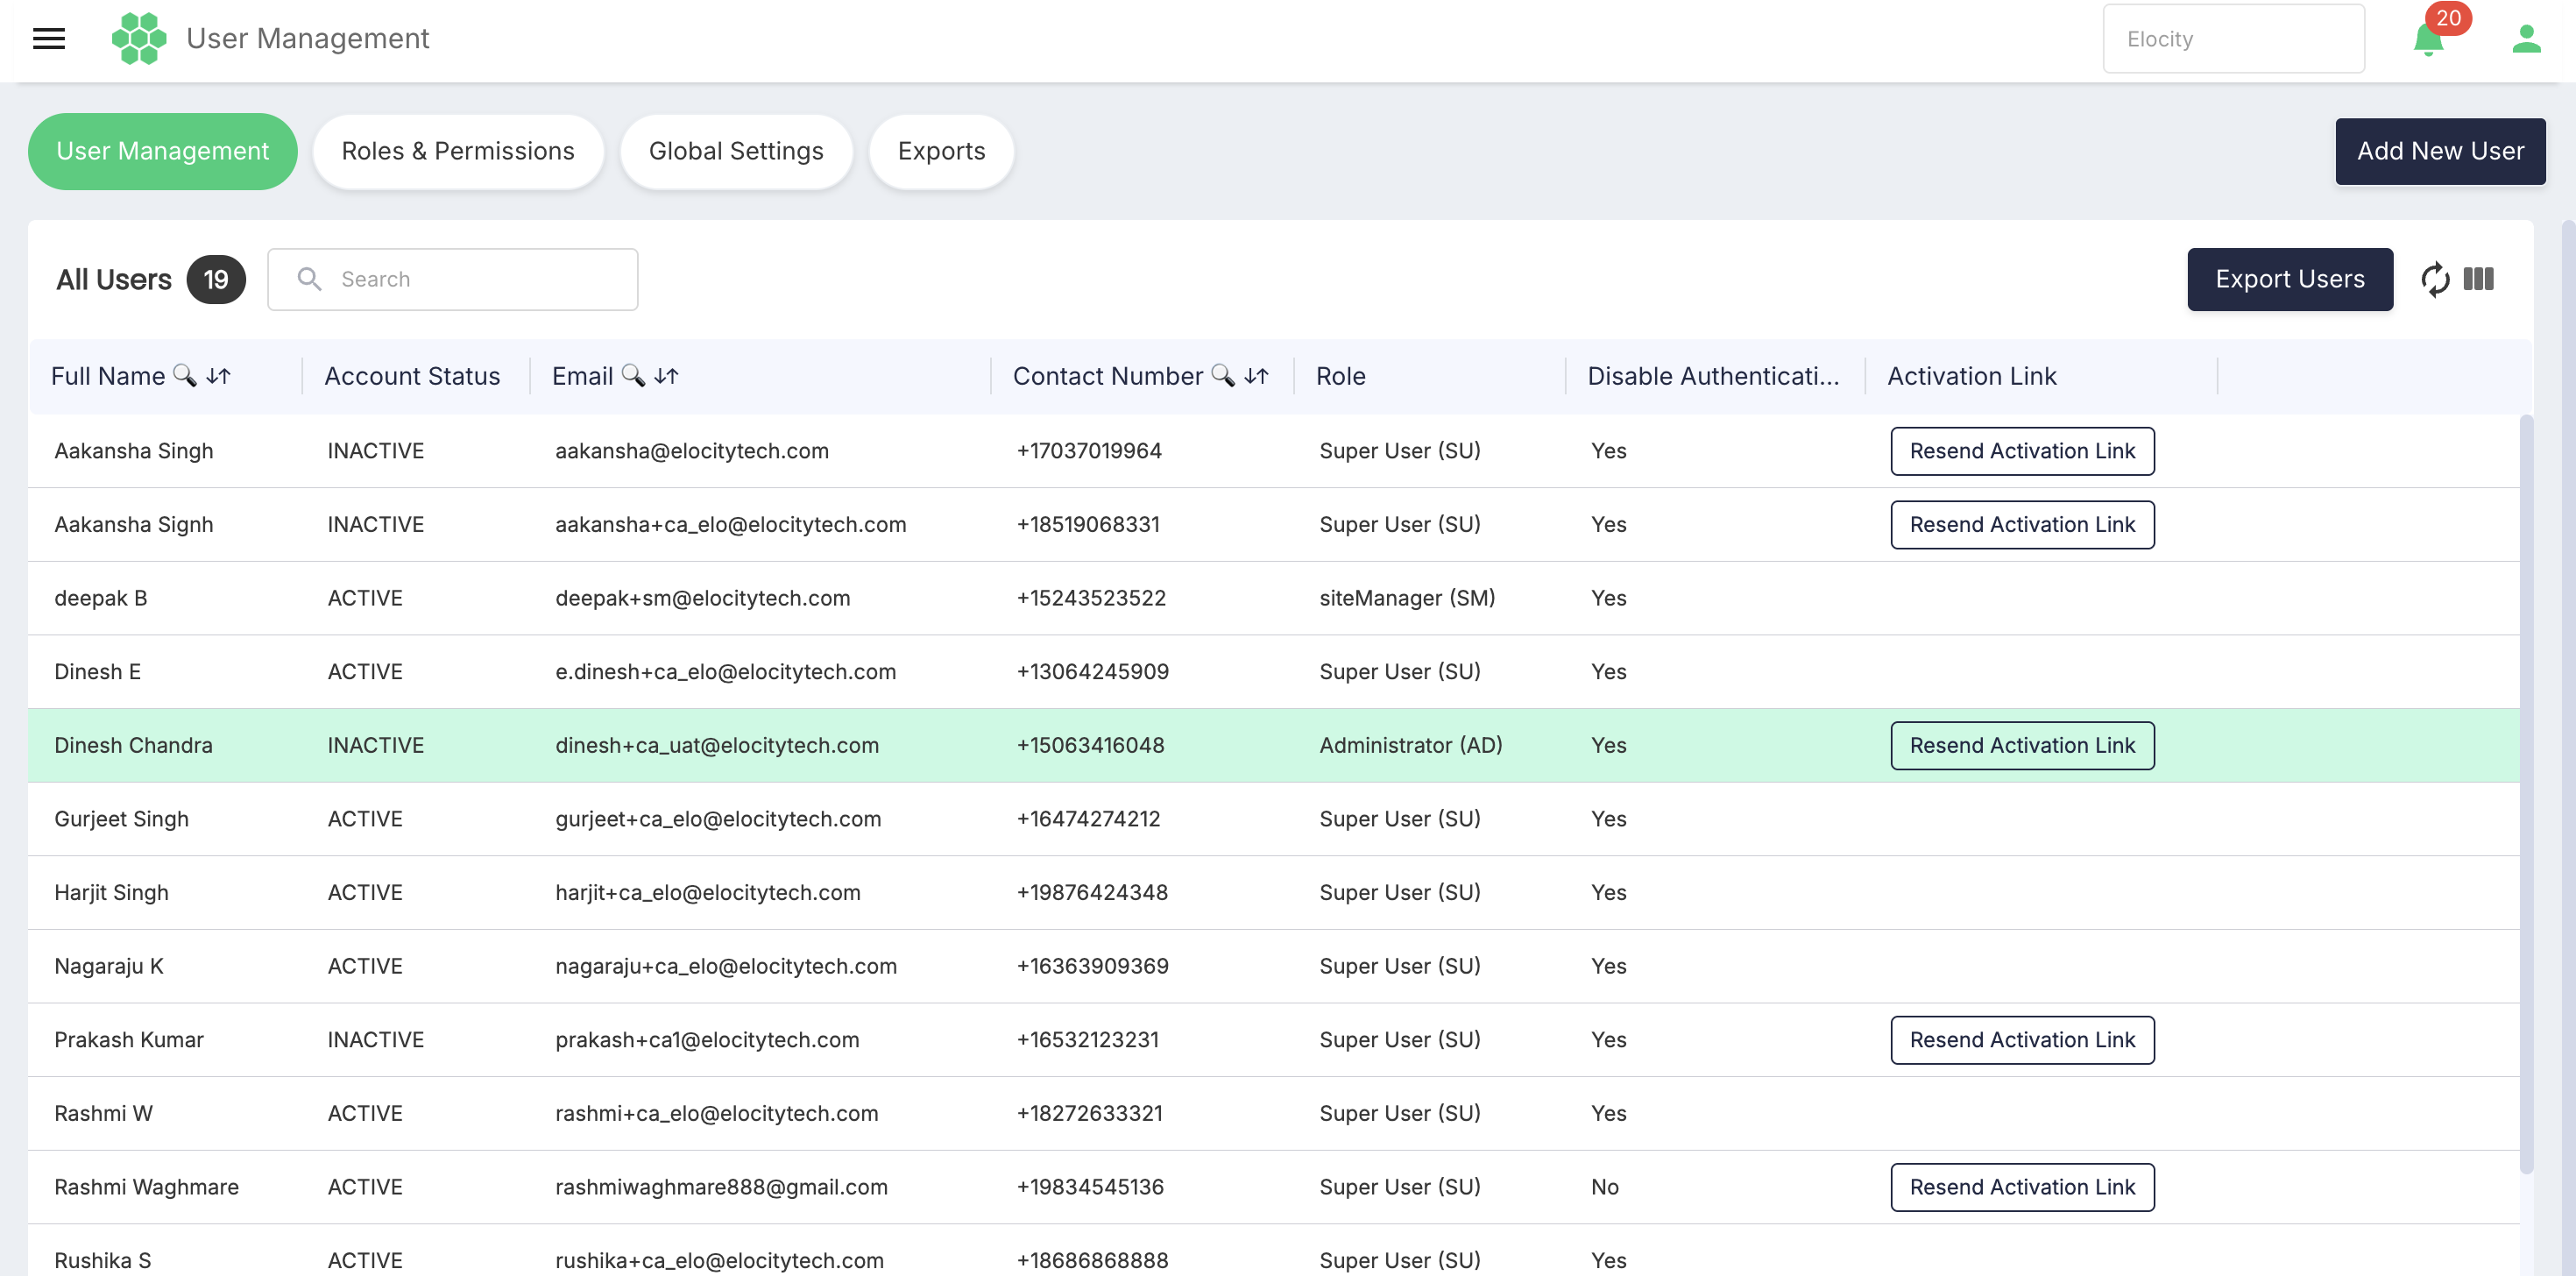
- The portal opens User Details.
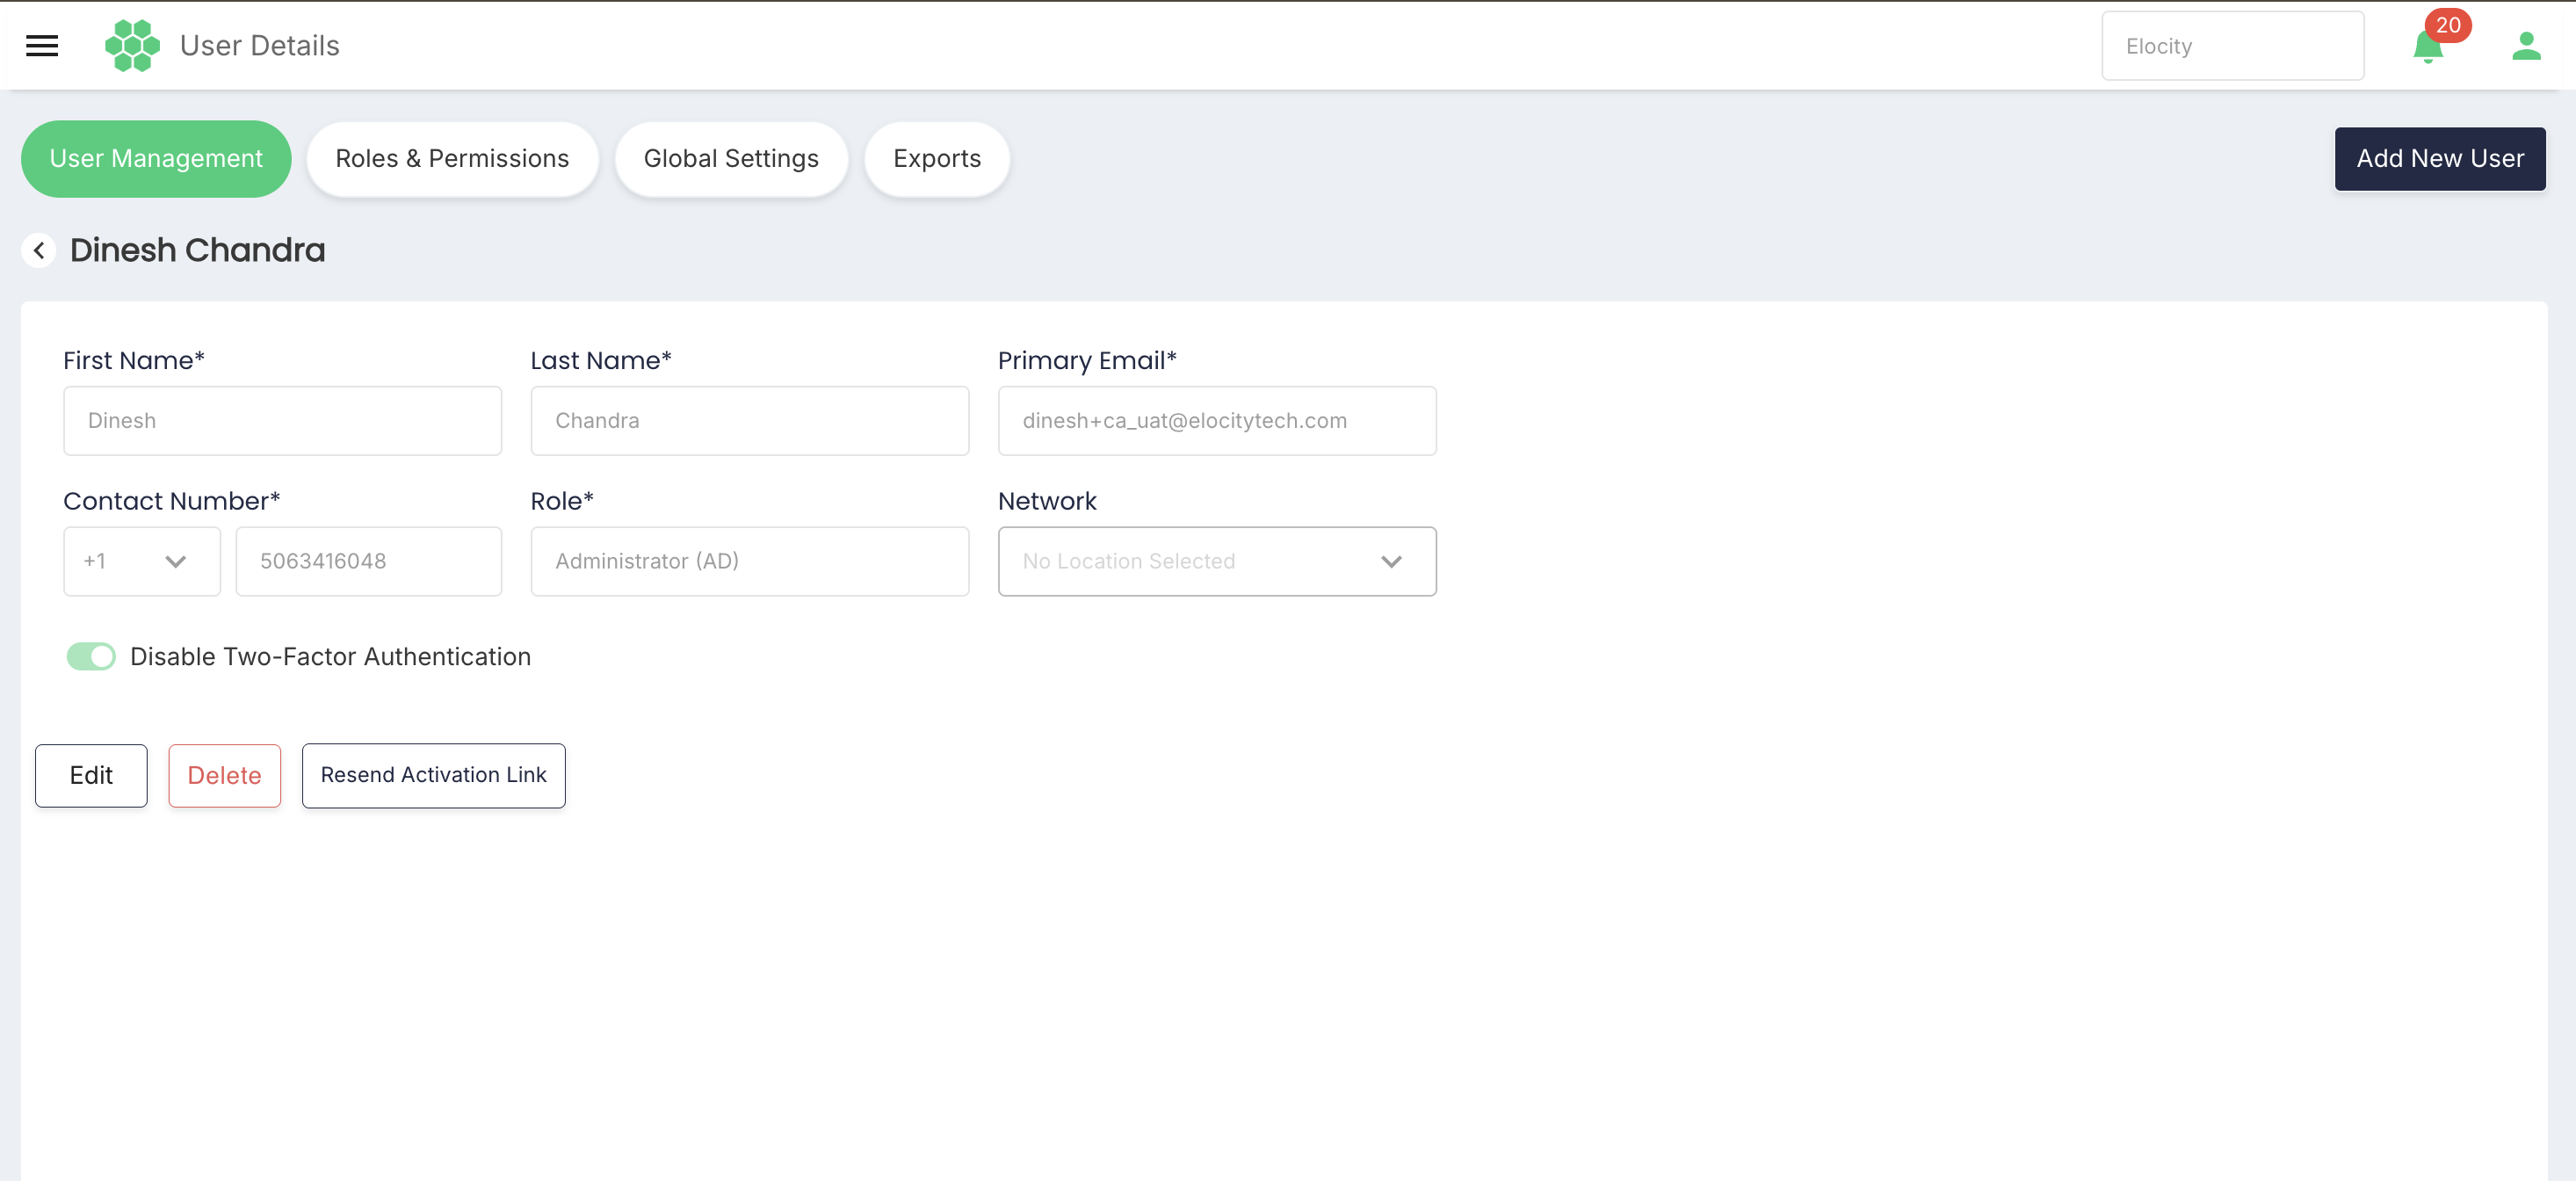
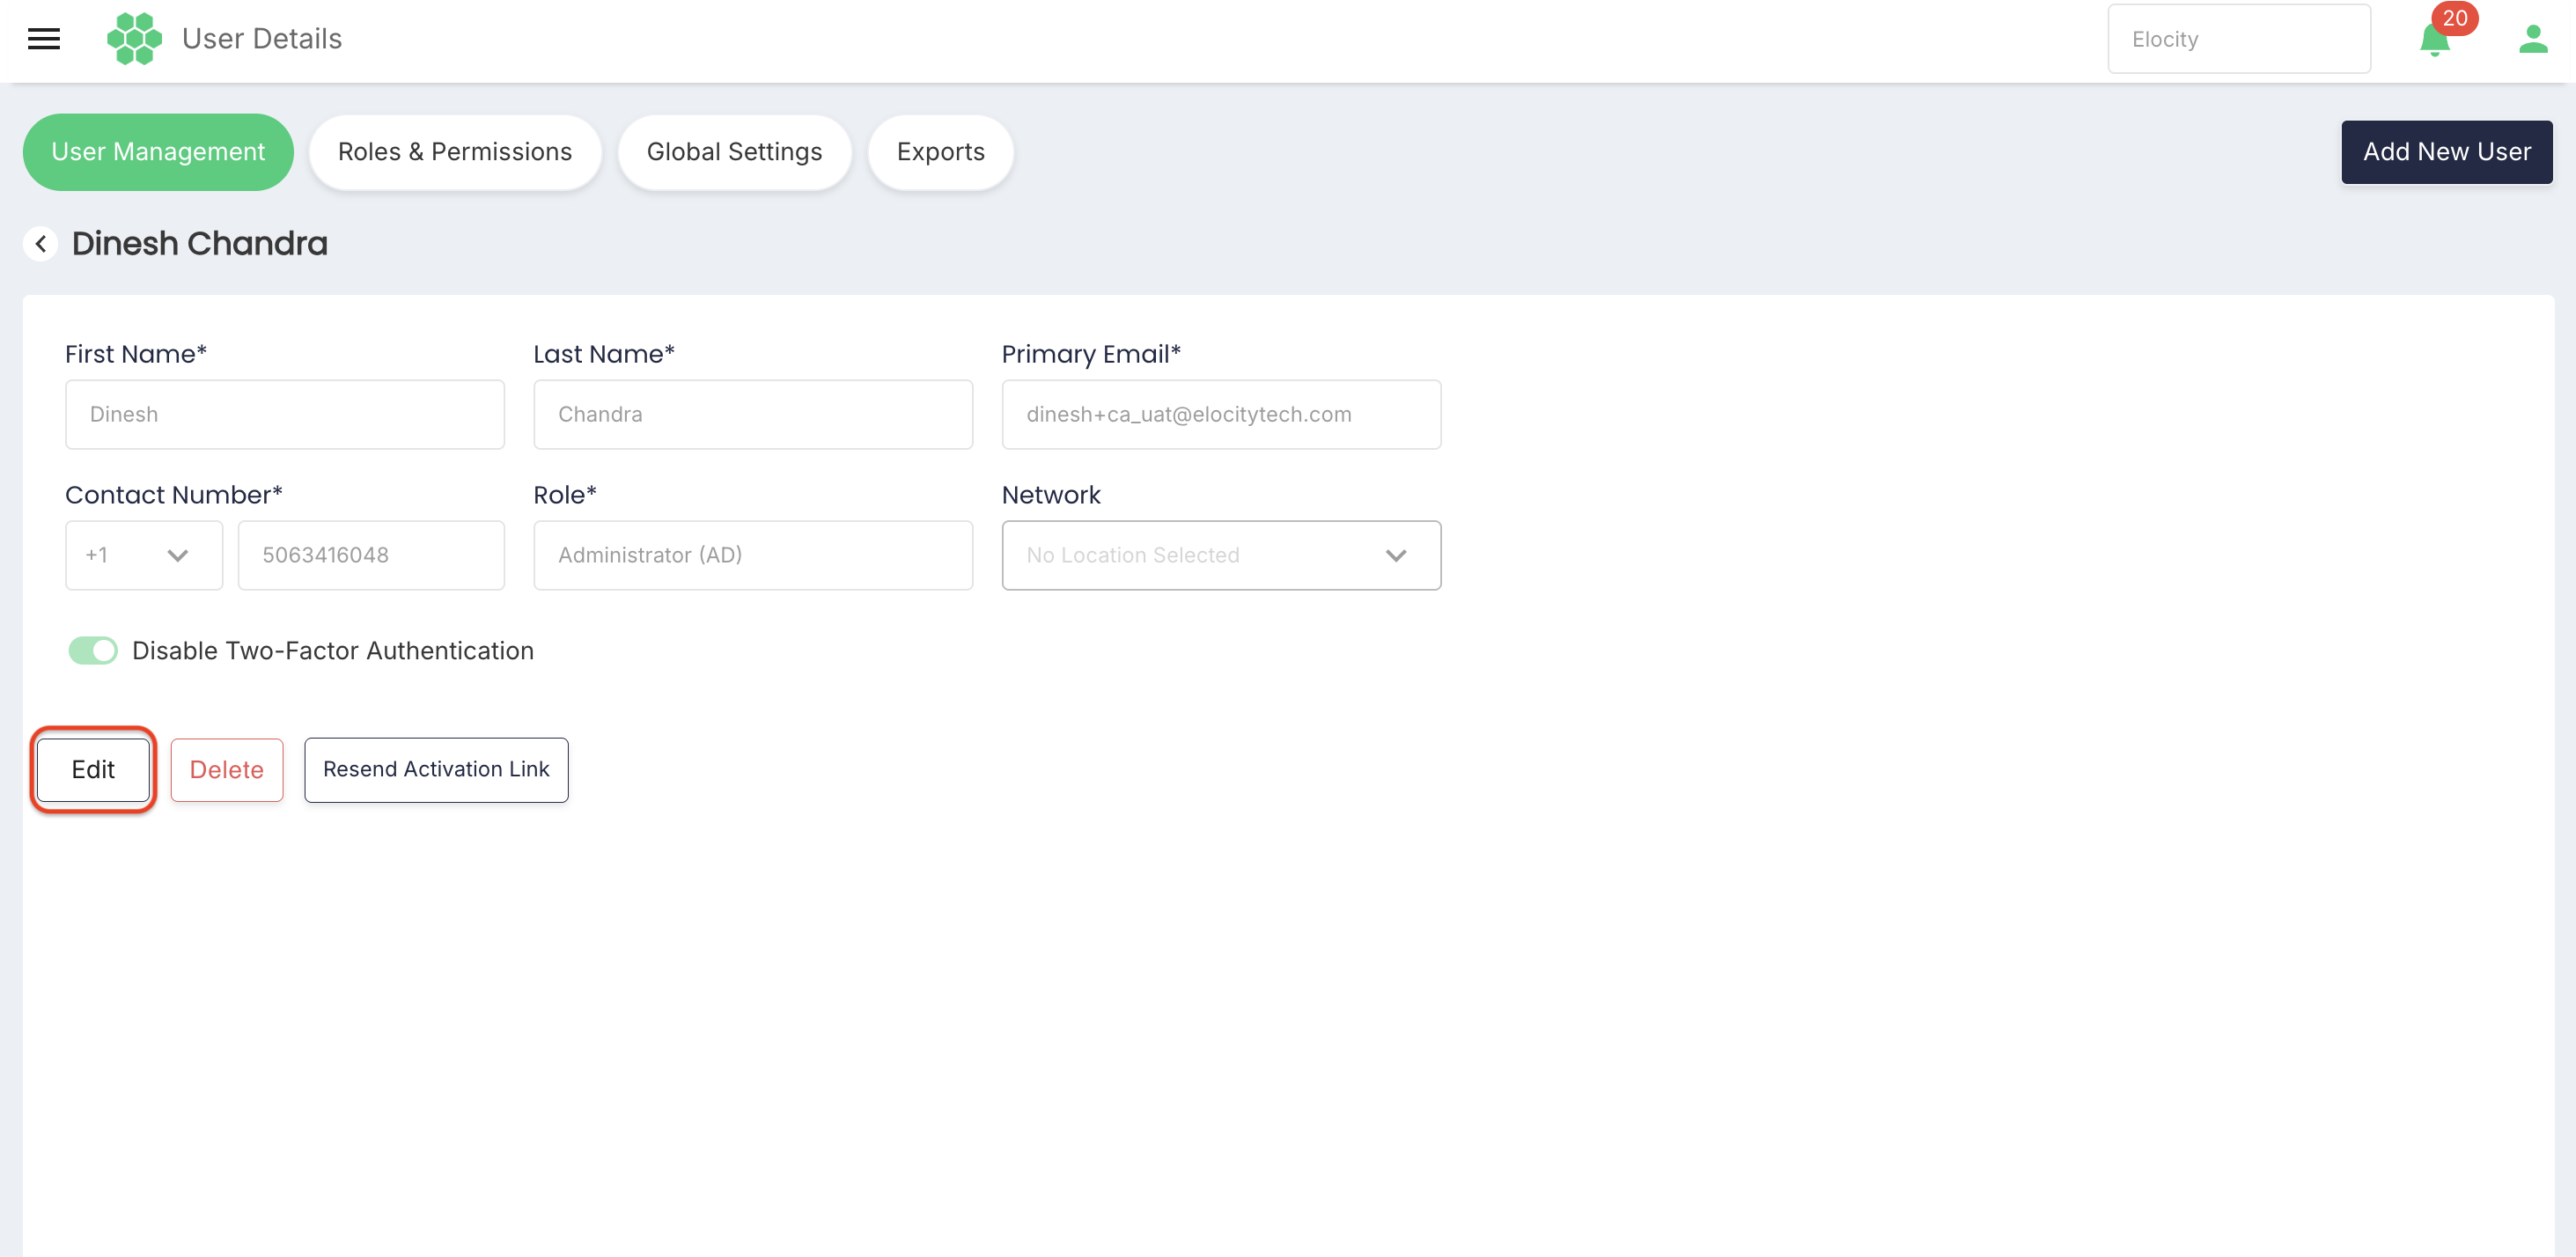
The reviewed User Details page displayed:
- First Name
- Last Name
- Primary Email
- Contact Number and country code
- Role
- Network assignment summary
- Disable Two-Factor Authentication setting
- Edit
- Delete
- Suspend for the reviewed active account
The fields are read-only until Edit is selected.
6. Adding a Single User
Open the form
- From User Management, select Add New User.
- Select SINGLE.
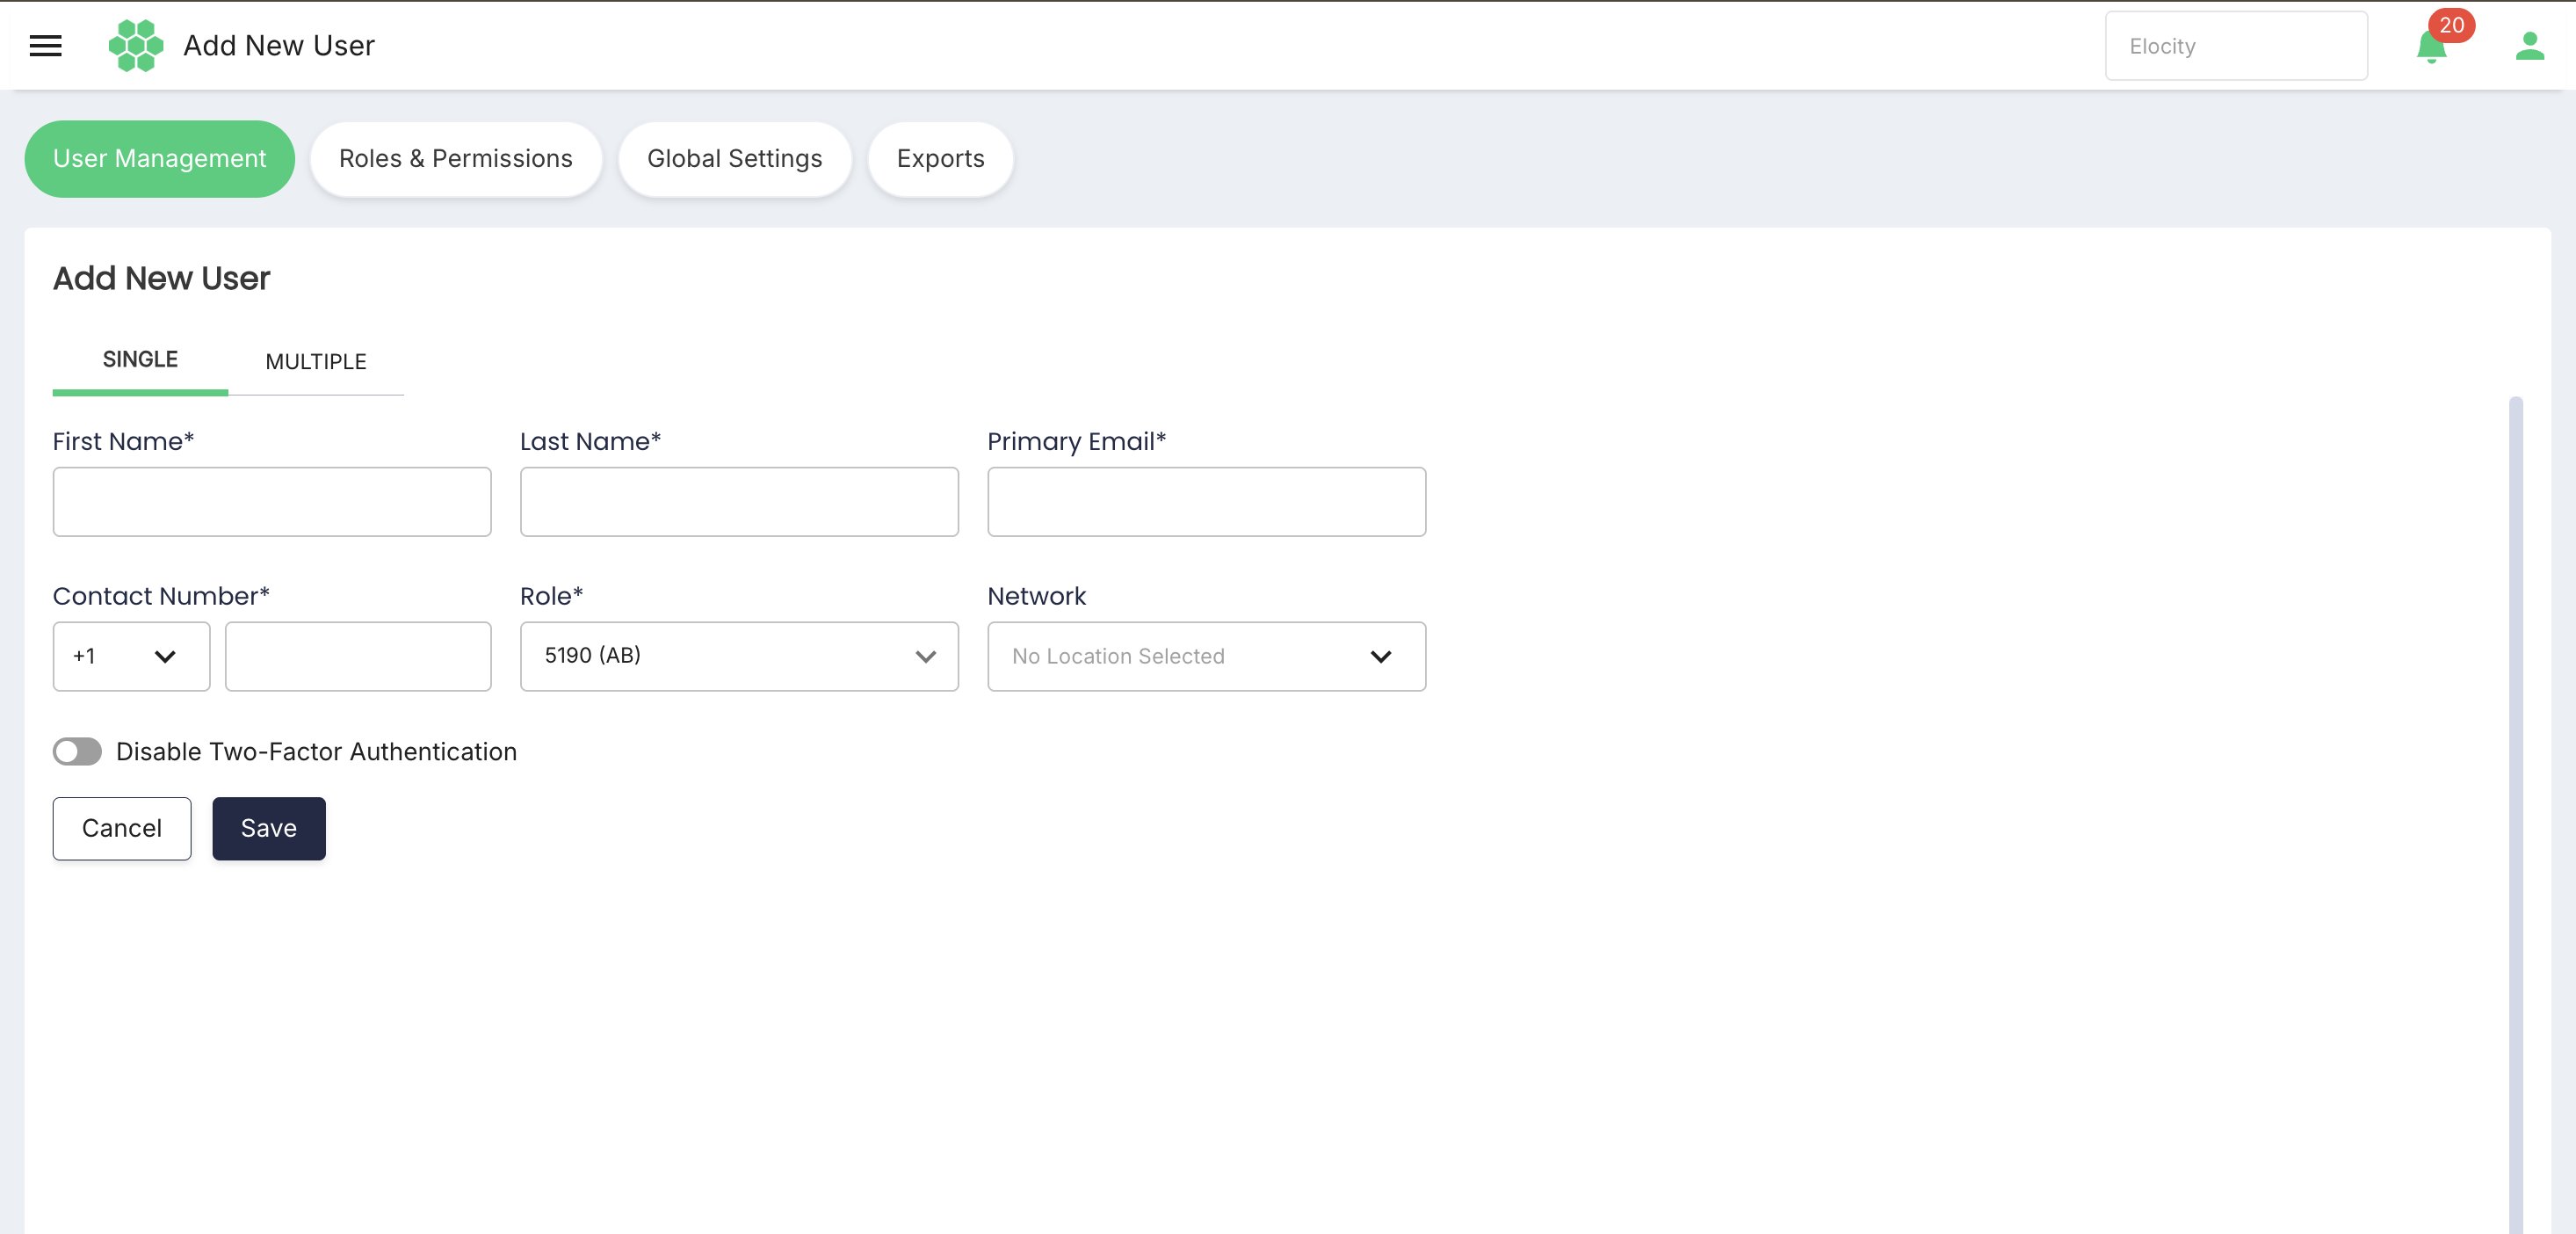
Single-user fields
| Field | Required | Description |
|---|---|---|
| First Name | Yes | User's given name. |
| Last Name | Yes | User's family name. |
| Primary Email | Yes | Unique email address associated with the user. The legacy guide describes it as the address used for communication and login. |
| Contact Number | Yes | Unique contact number, validated according to the selected country code. In the reviewed environment, the country-code menu displayed +1 — Canada. |
| Role | Yes | Role assigned to the user. There is no default role; the administrator must select one. |
| Network | Yes | Opens the Select Locations dialog for assigning charger access. |
| Disable Two-Factor Authentication | No visible asterisk | Switch that records whether two-factor authentication is disabled for the account. |
An asterisk (*) identifies a required field in the live form.
Assign network access
- Select the Network field.
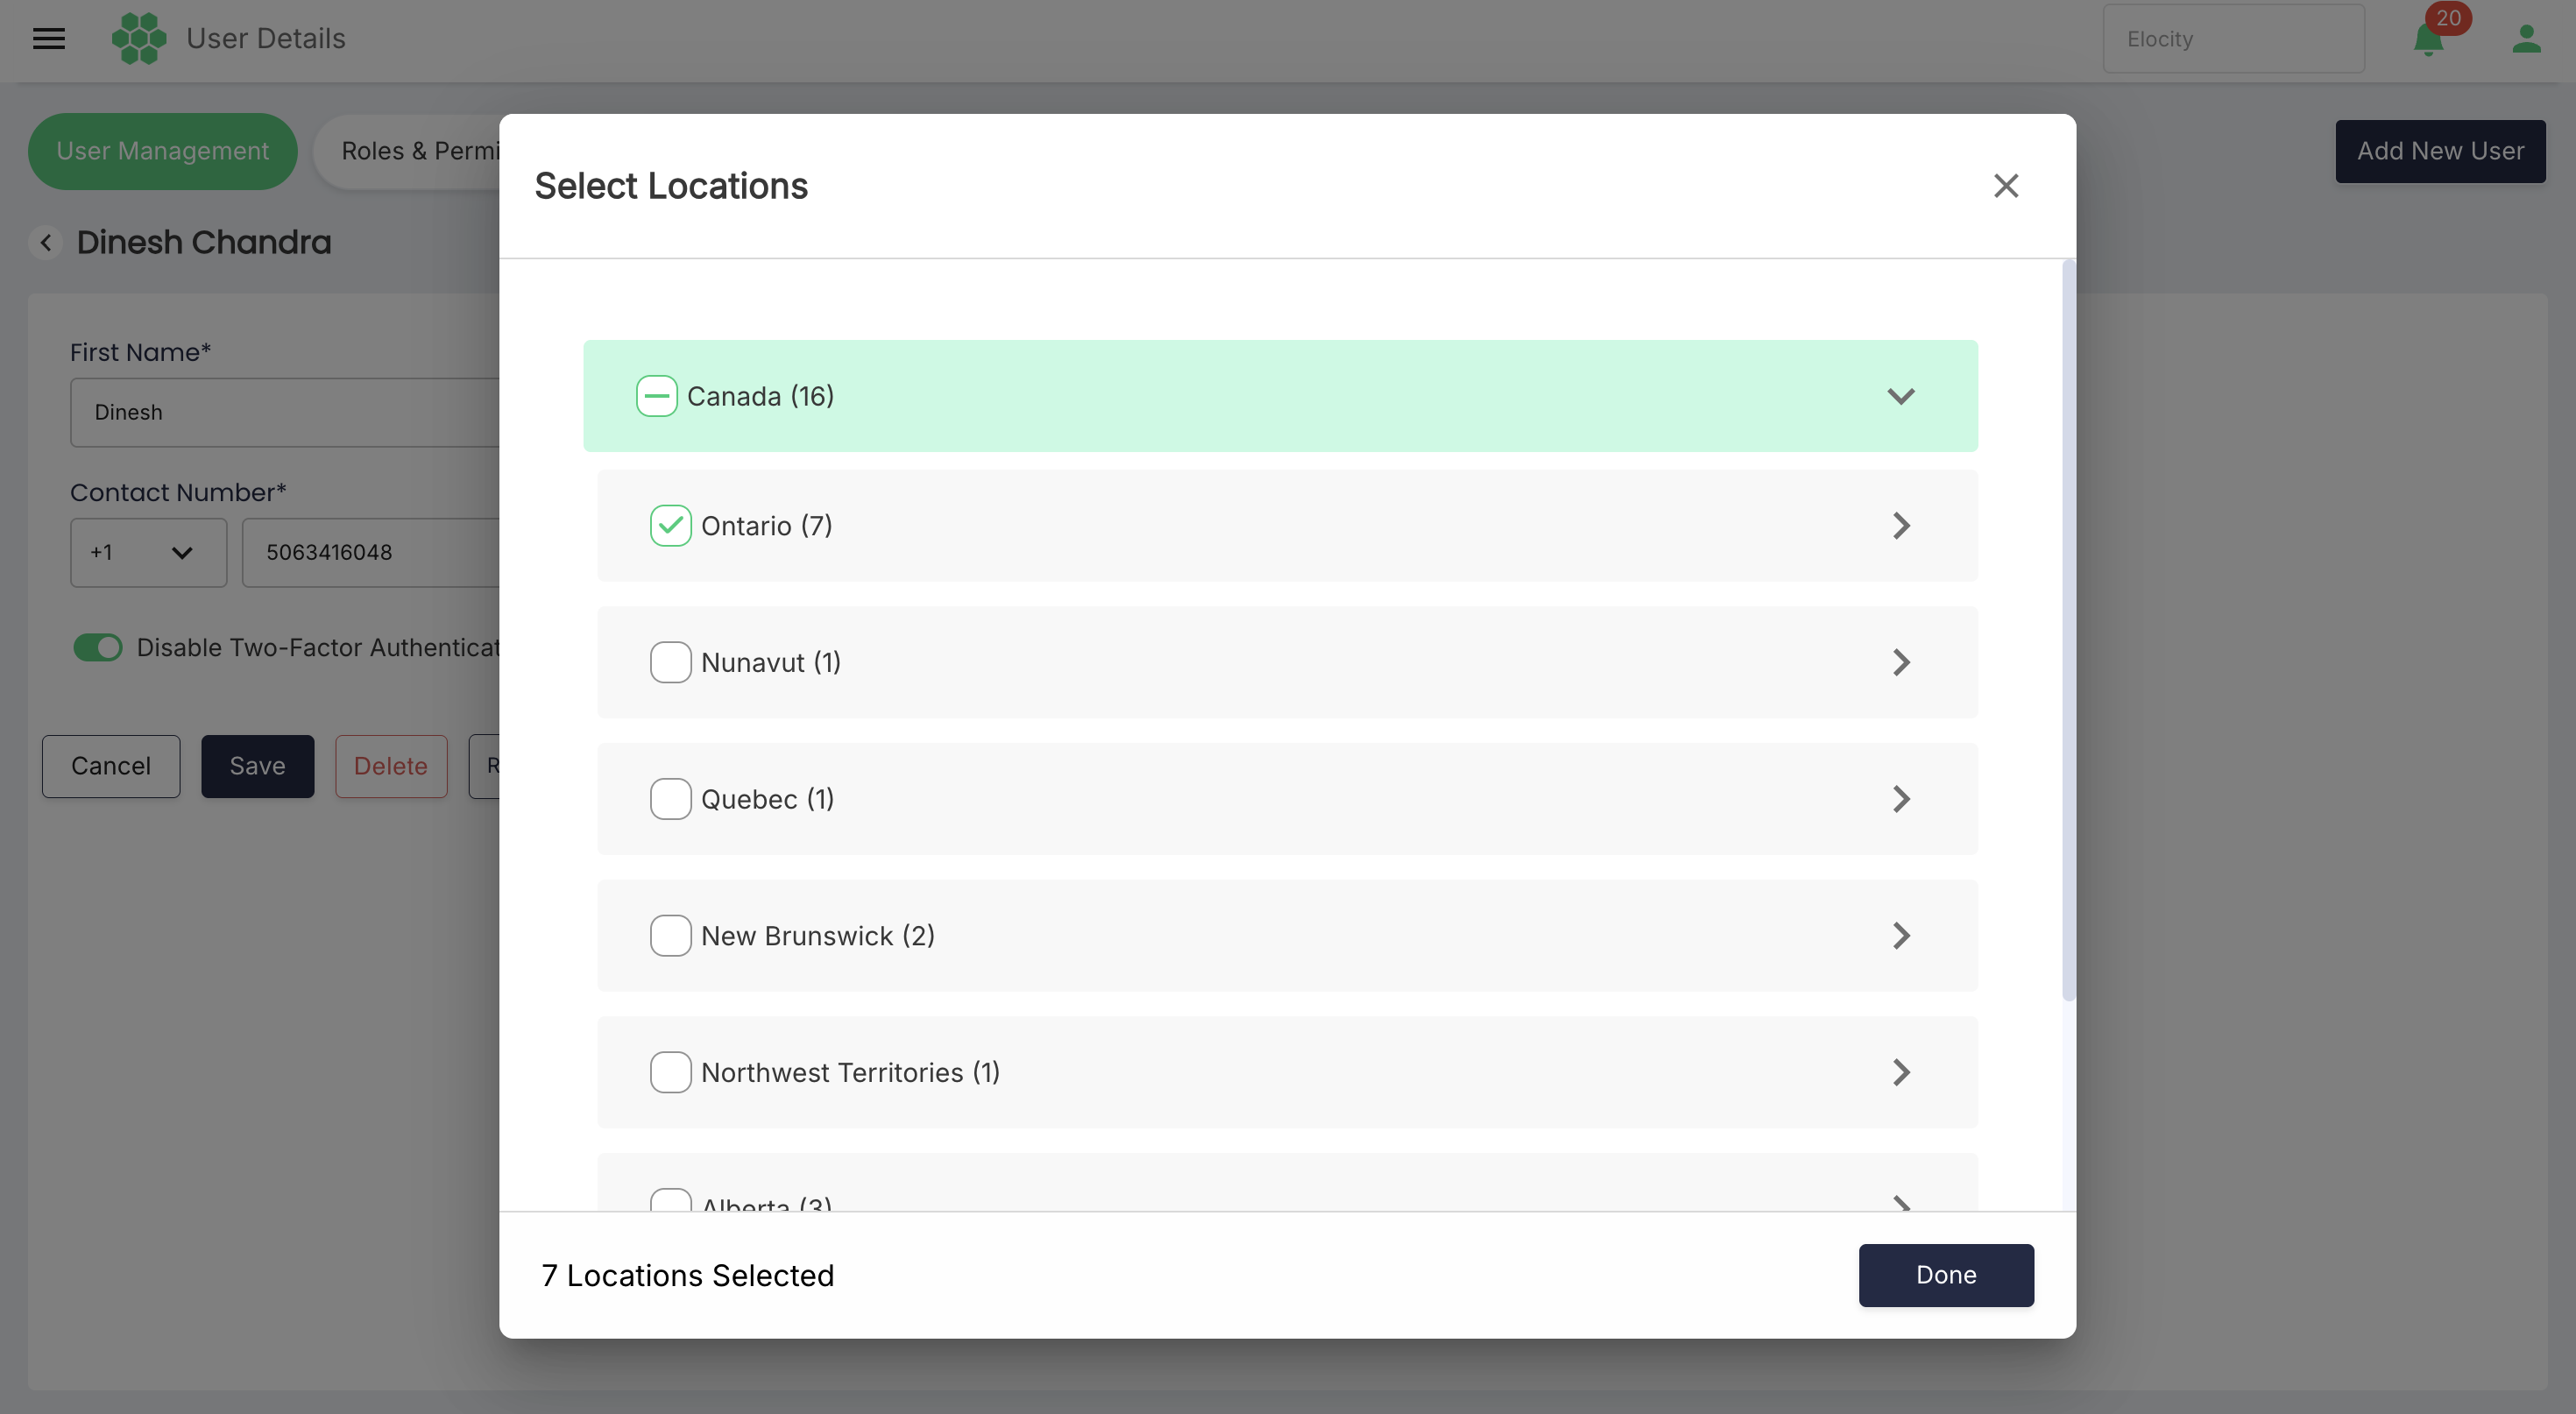
- In Select Locations, expand the geographic hierarchy with Toggle.
- Select the required checkbox or checkboxes.
- Review the selected-location count.
- Select Done.
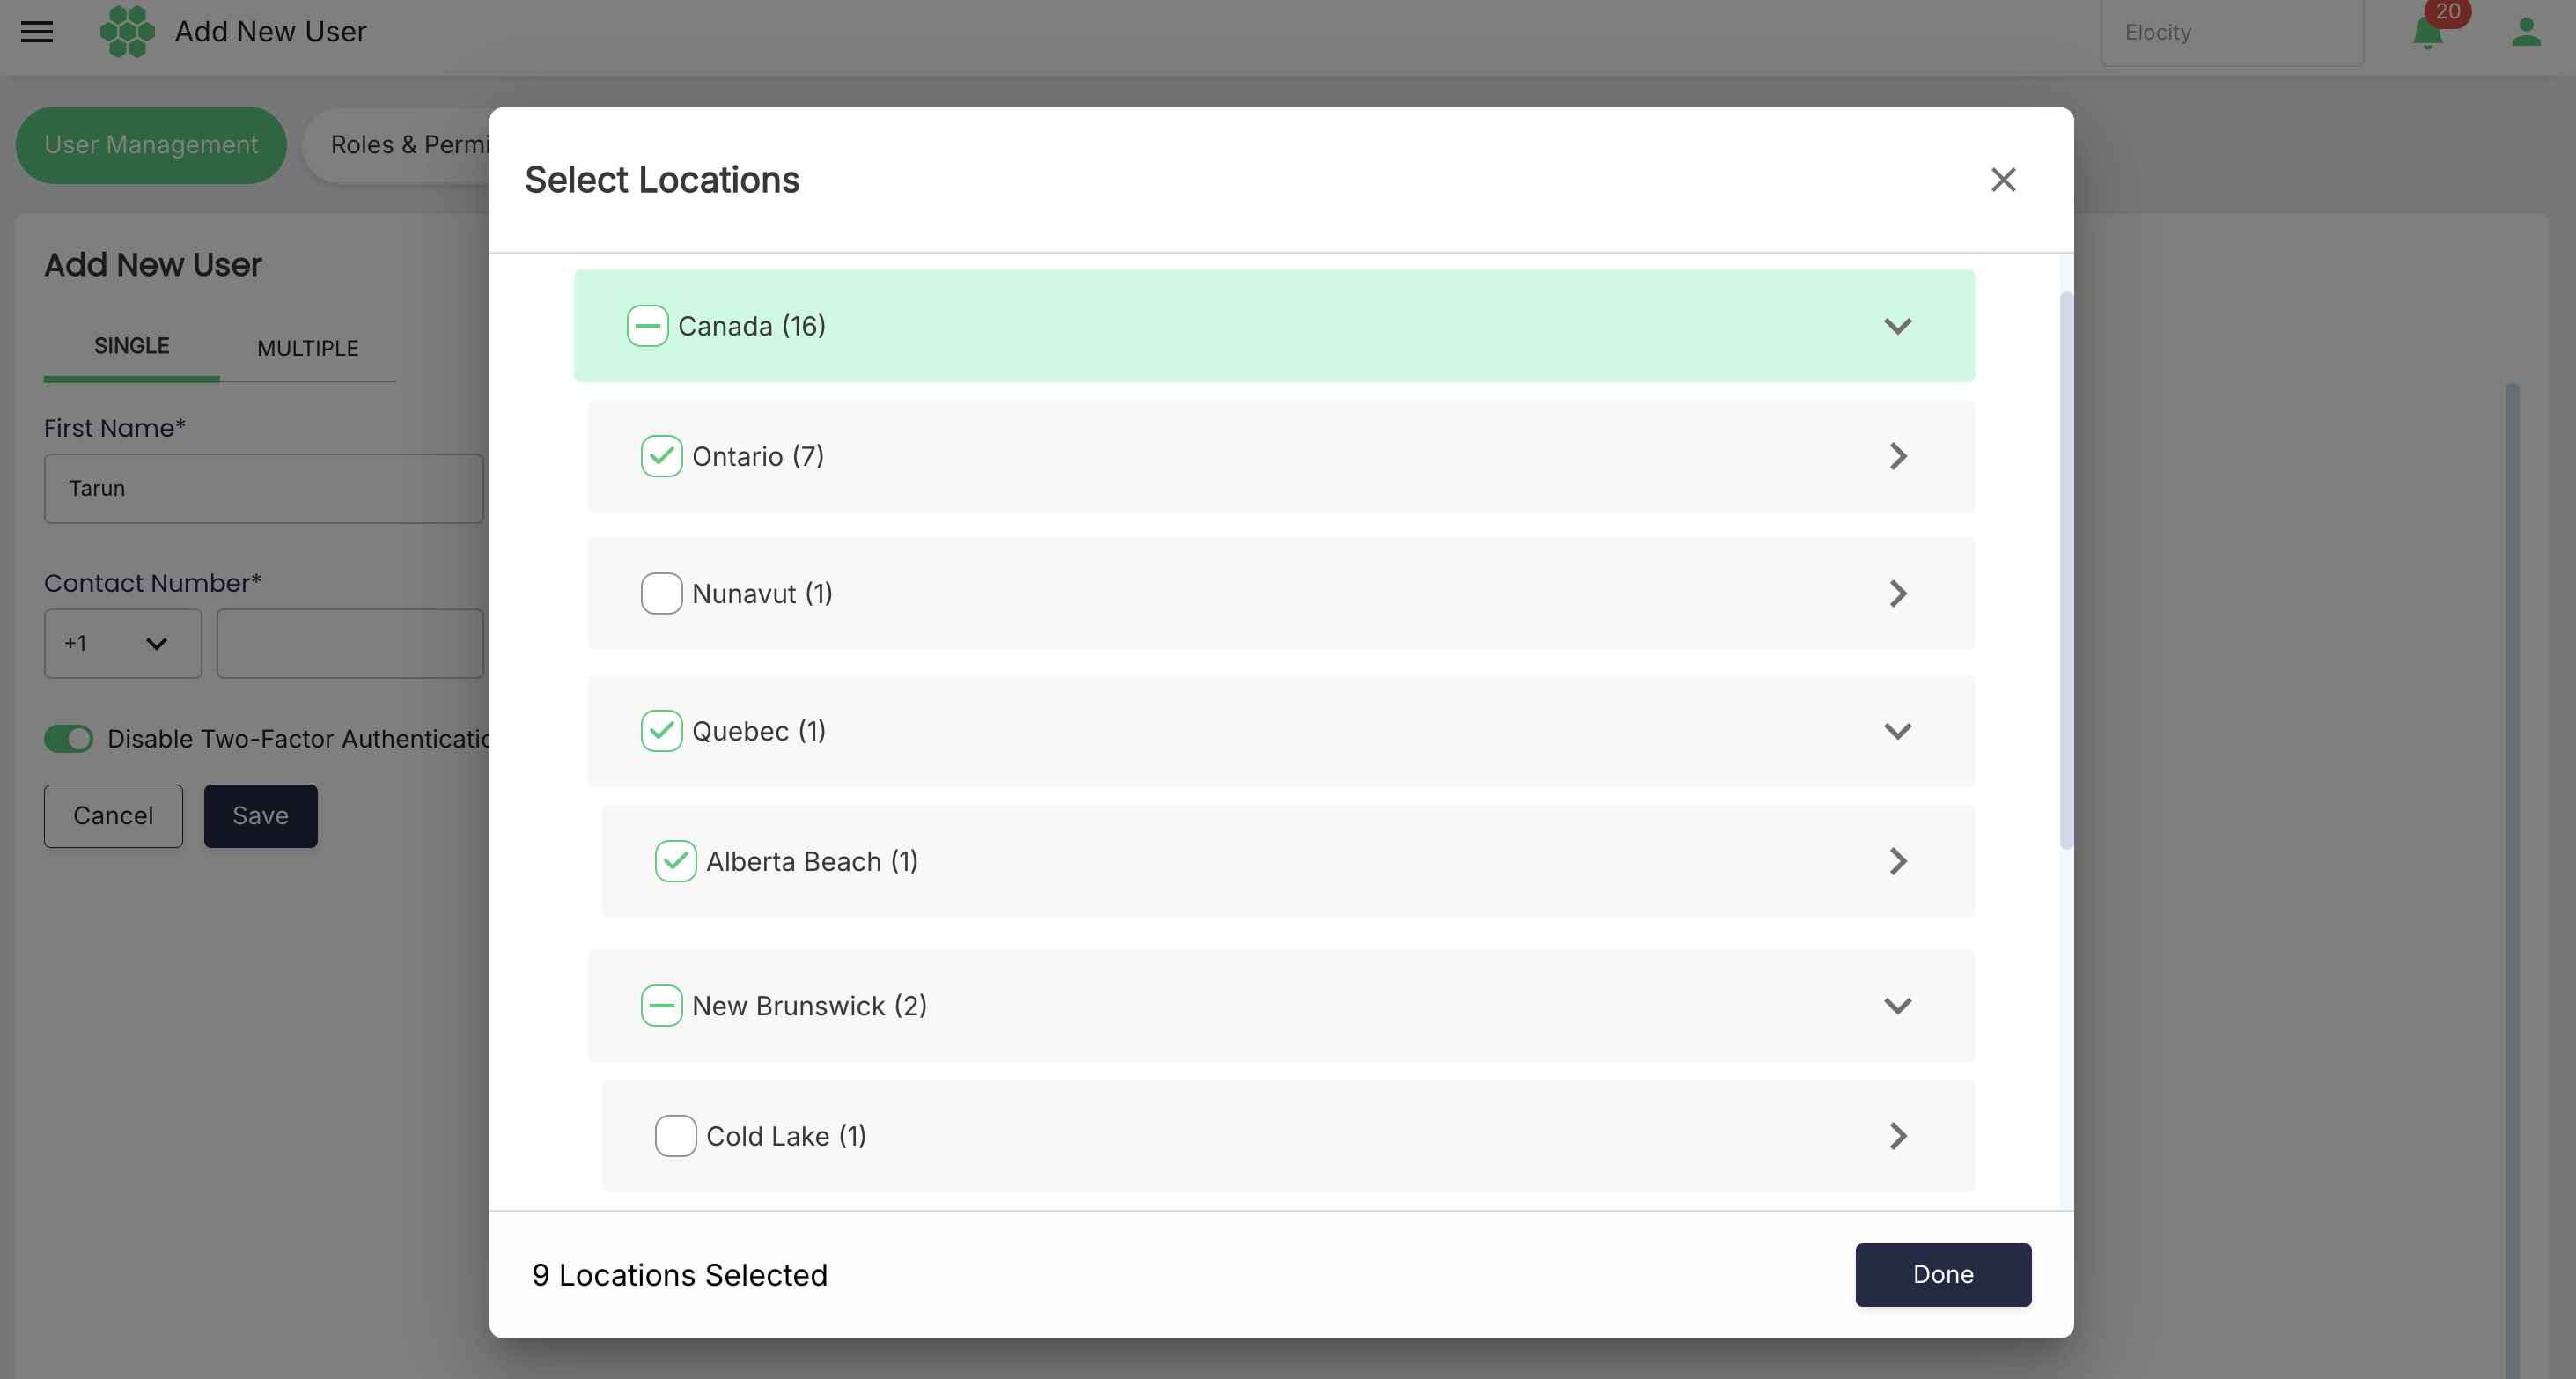
In the reviewed environment, the hierarchy began with Canada, followed by Ontario, and then the available locations. Done remained disabled while no location was selected.
Network selection is mandatory. The permissions inherited from the user's role apply to the chargers selected through Network.
Configure two-factor authentication
The switch is explicitly labelled Disable Two-Factor Authentication.
- Select the switch to record that two-factor authentication is disabled.
- Leave the switch clear when two-factor authentication should not be disabled.
When two-factor authentication is enabled, a one-time password is sent to the user's verified email address. OTP expiry, retry, lockout, and recovery rules still require confirmation.
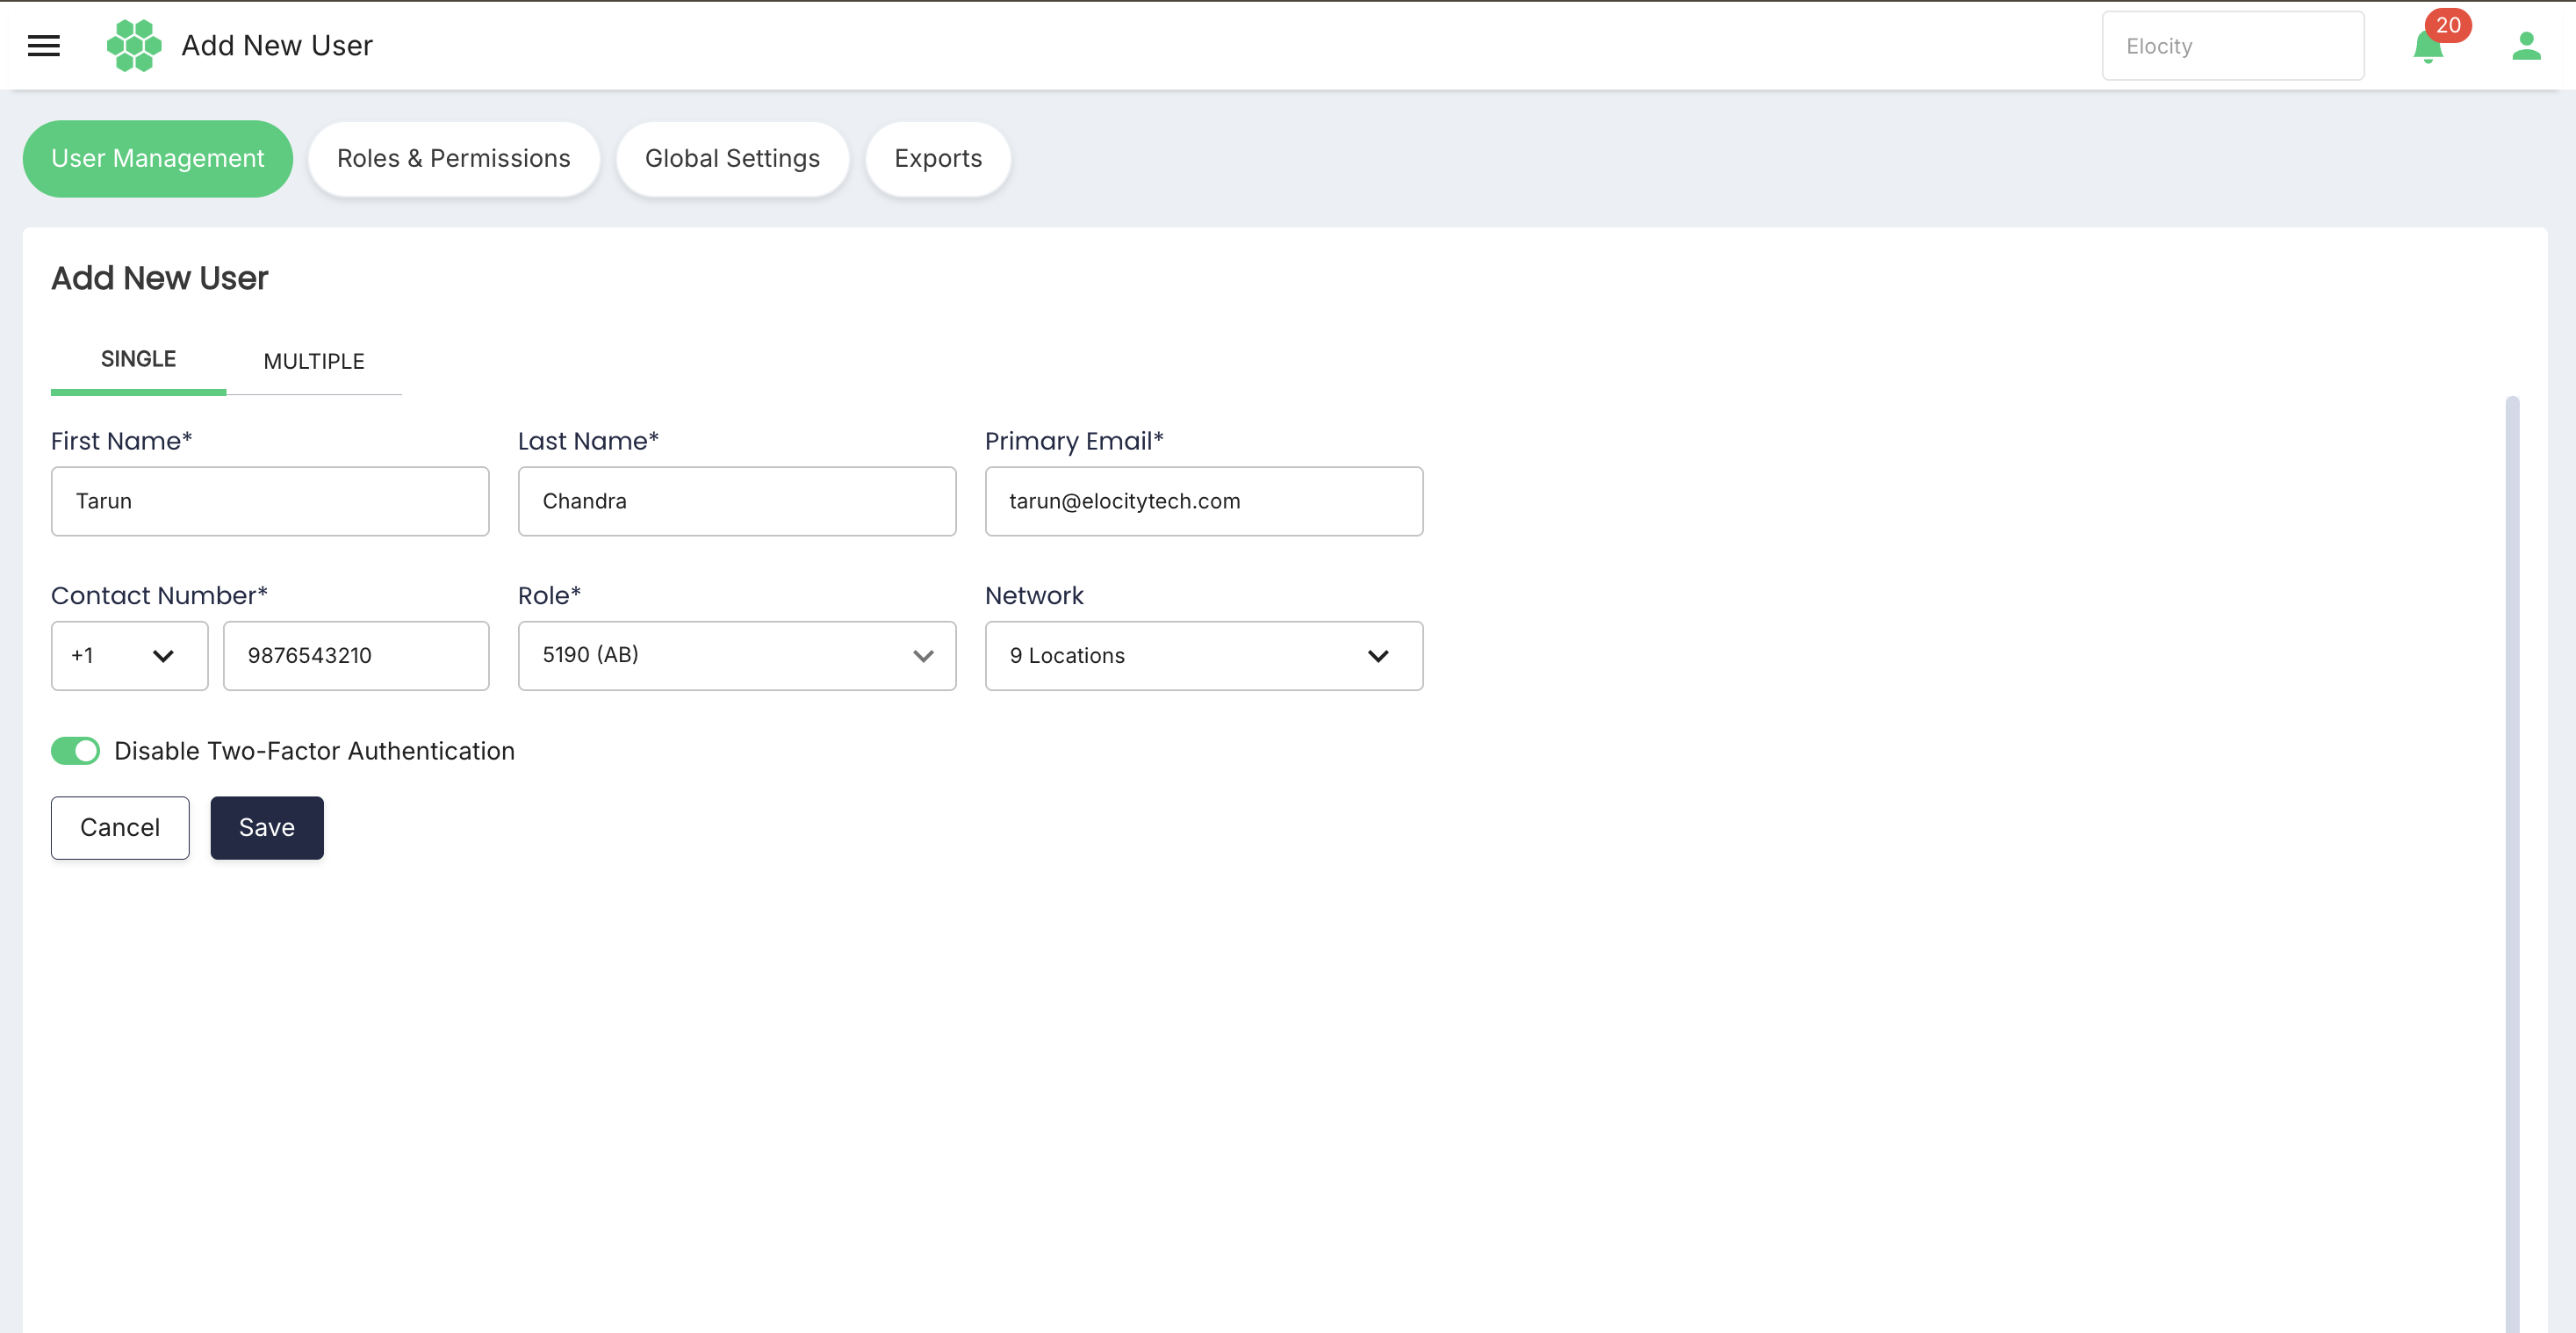
Save or cancel
- Review all entered identity, role, network, and authentication information.
- Select Save to submit the new user. The portal sends an invitation email immediately after the account is saved.
- Select Cancel to leave without saving.
The review used Cancel and did not create a user.
The new account remains inactive until the user verifies it through the emailed activation link. The link is typically valid for five days and the invitation email can be resent.
7. Adding Multiple Users
Bulk-add controls
The MULTIPLE view provides:
- Download Template
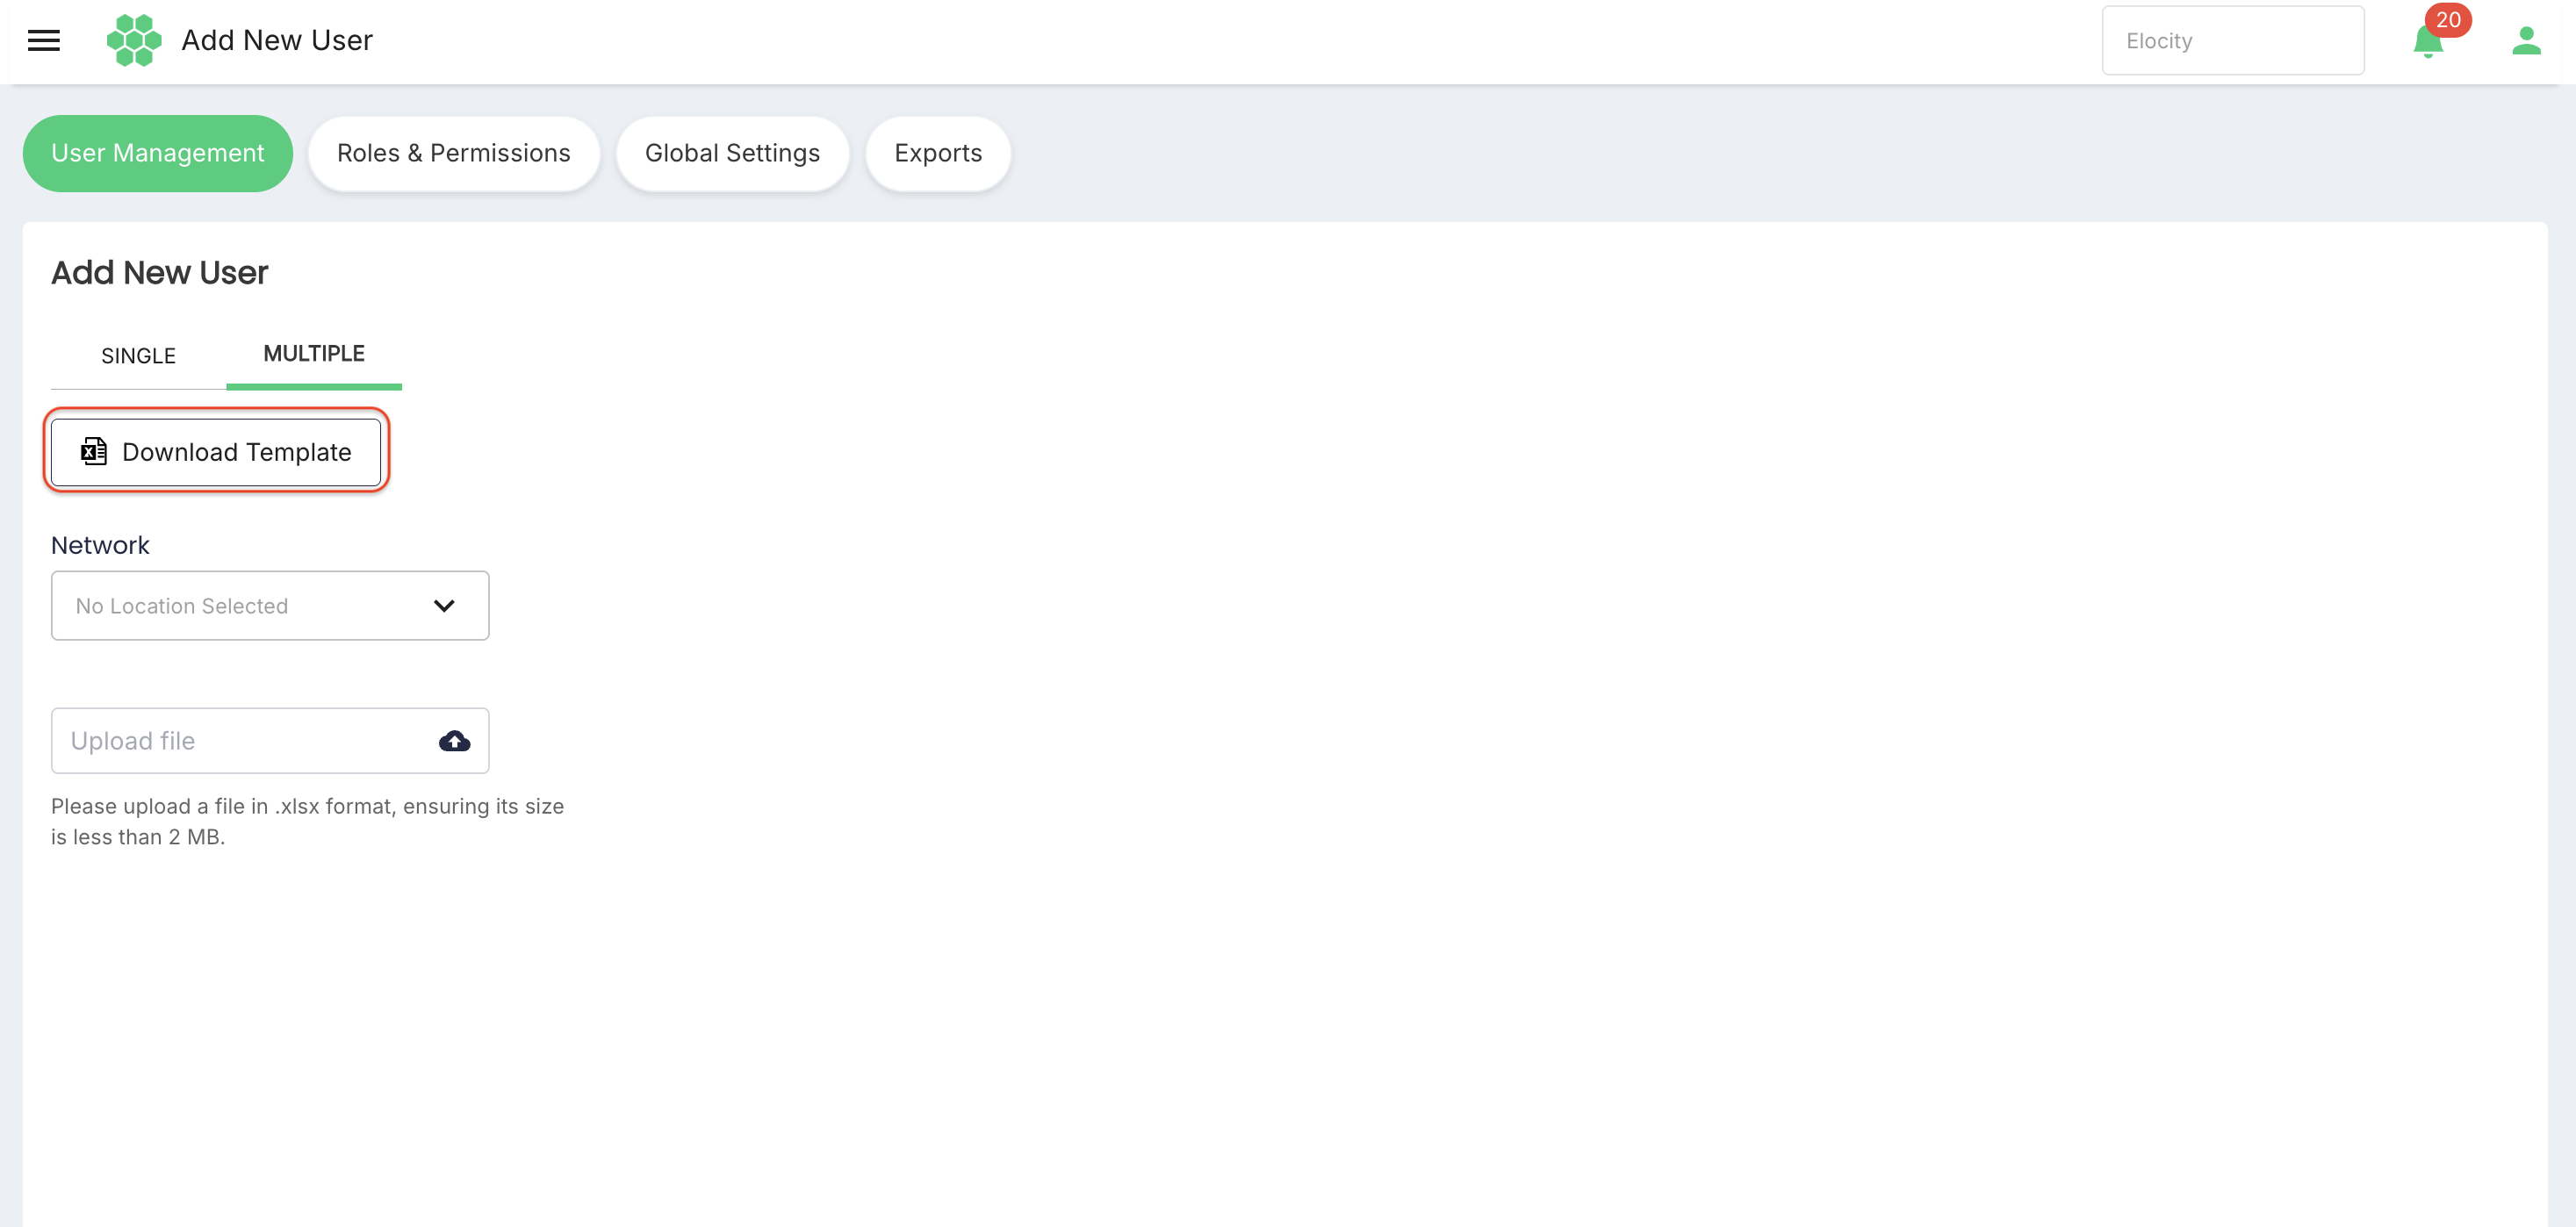
- A Network selector
- Upload file
- An instruction to upload an
.xlsxfile smaller than 2 MB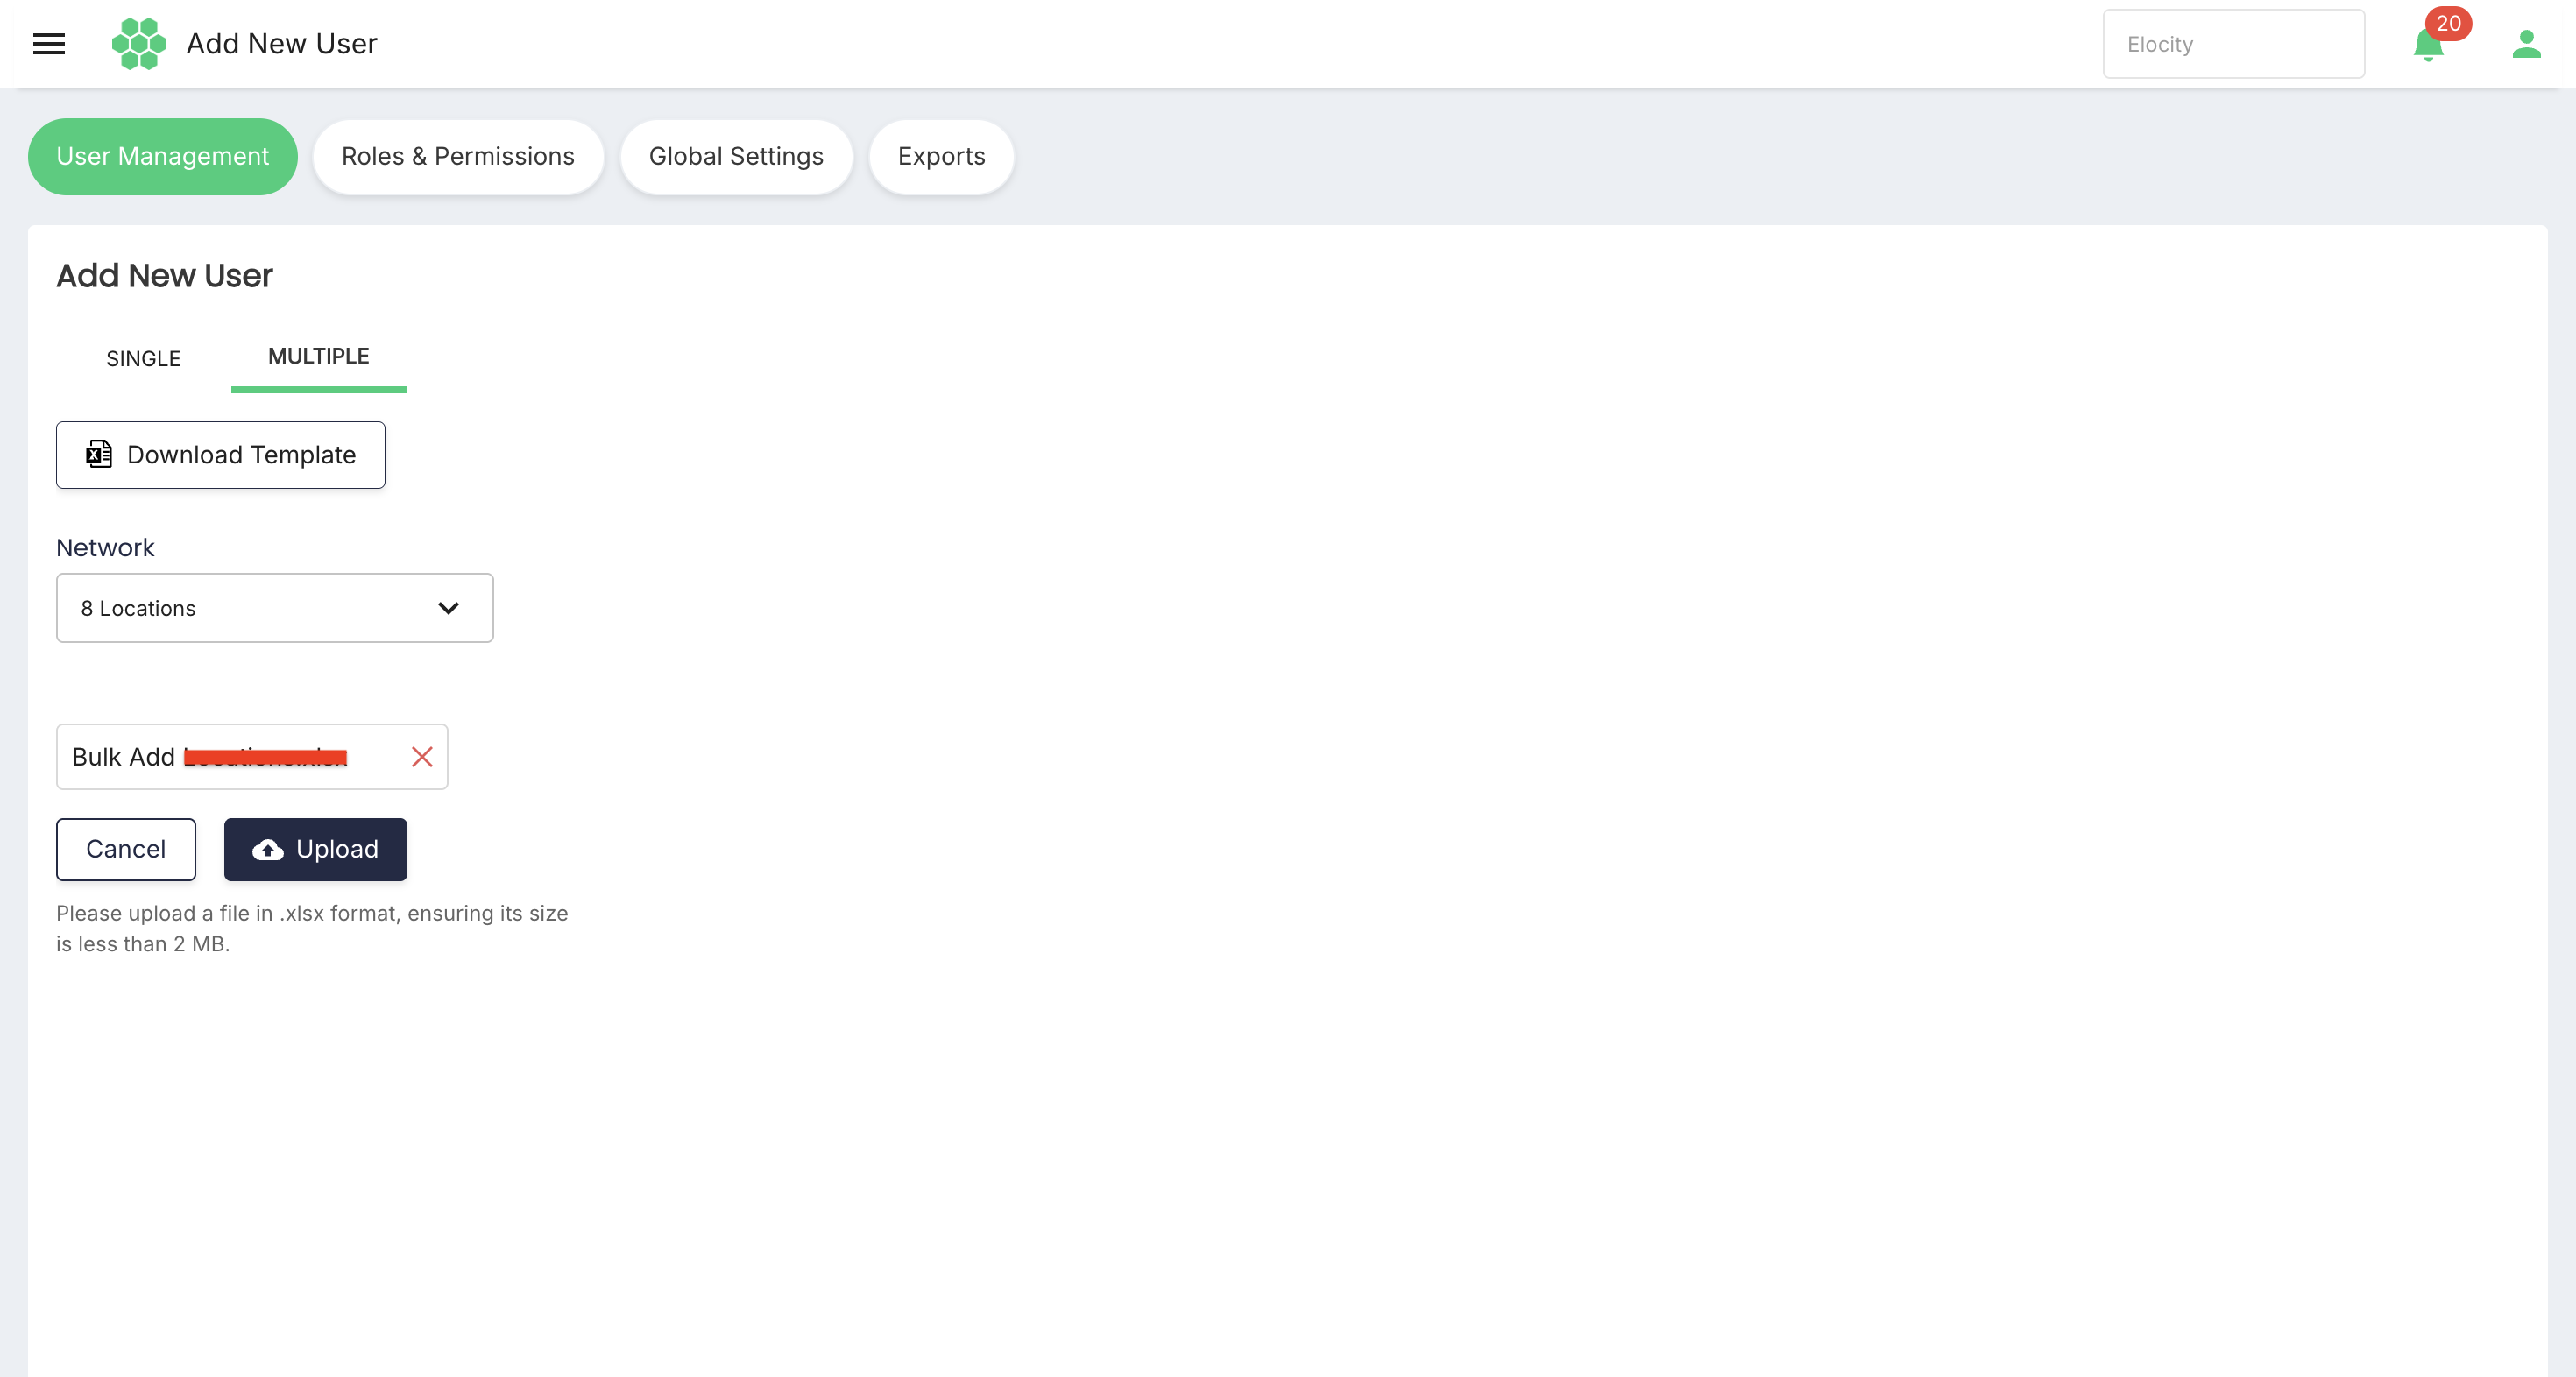
The file picker advertised Excel workbook content types. The visible instruction specifically required .xlsx.
Bulk-add workflow
- Select Add New User.
- Select MULTIPLE.
- Select Download Template.
- Complete the downloaded workbook with the required user information.
- Assign the required network to each user. The product clarification confirms that imported users can receive different network assignments; the exact template columns and the relationship between per-user assignments and the visible Network selector require confirmation.
- Select Upload file and choose the completed
.xlsxworkbook. - Review the validation results presented by the portal. Valid rows are processed independently; an invalid row does not prevent valid user accounts from being created. Row-level errors are presented in a modal.
- Complete the import using the action presented after file selection.
The legacy documentation names the workbook User Add Template.xlsx and states that an Upload action completes the process. The template was not downloaded and no workbook was uploaded during the live review, so the current template columns, allowed values, row limit, duplicate rules, and final Upload control still require confirmation.
8. Editing a User
- Select the user's row in the register.
- On User Details, select Edit.
- Update the required information.
- Select Save to submit the changes or Cancel to discard them.
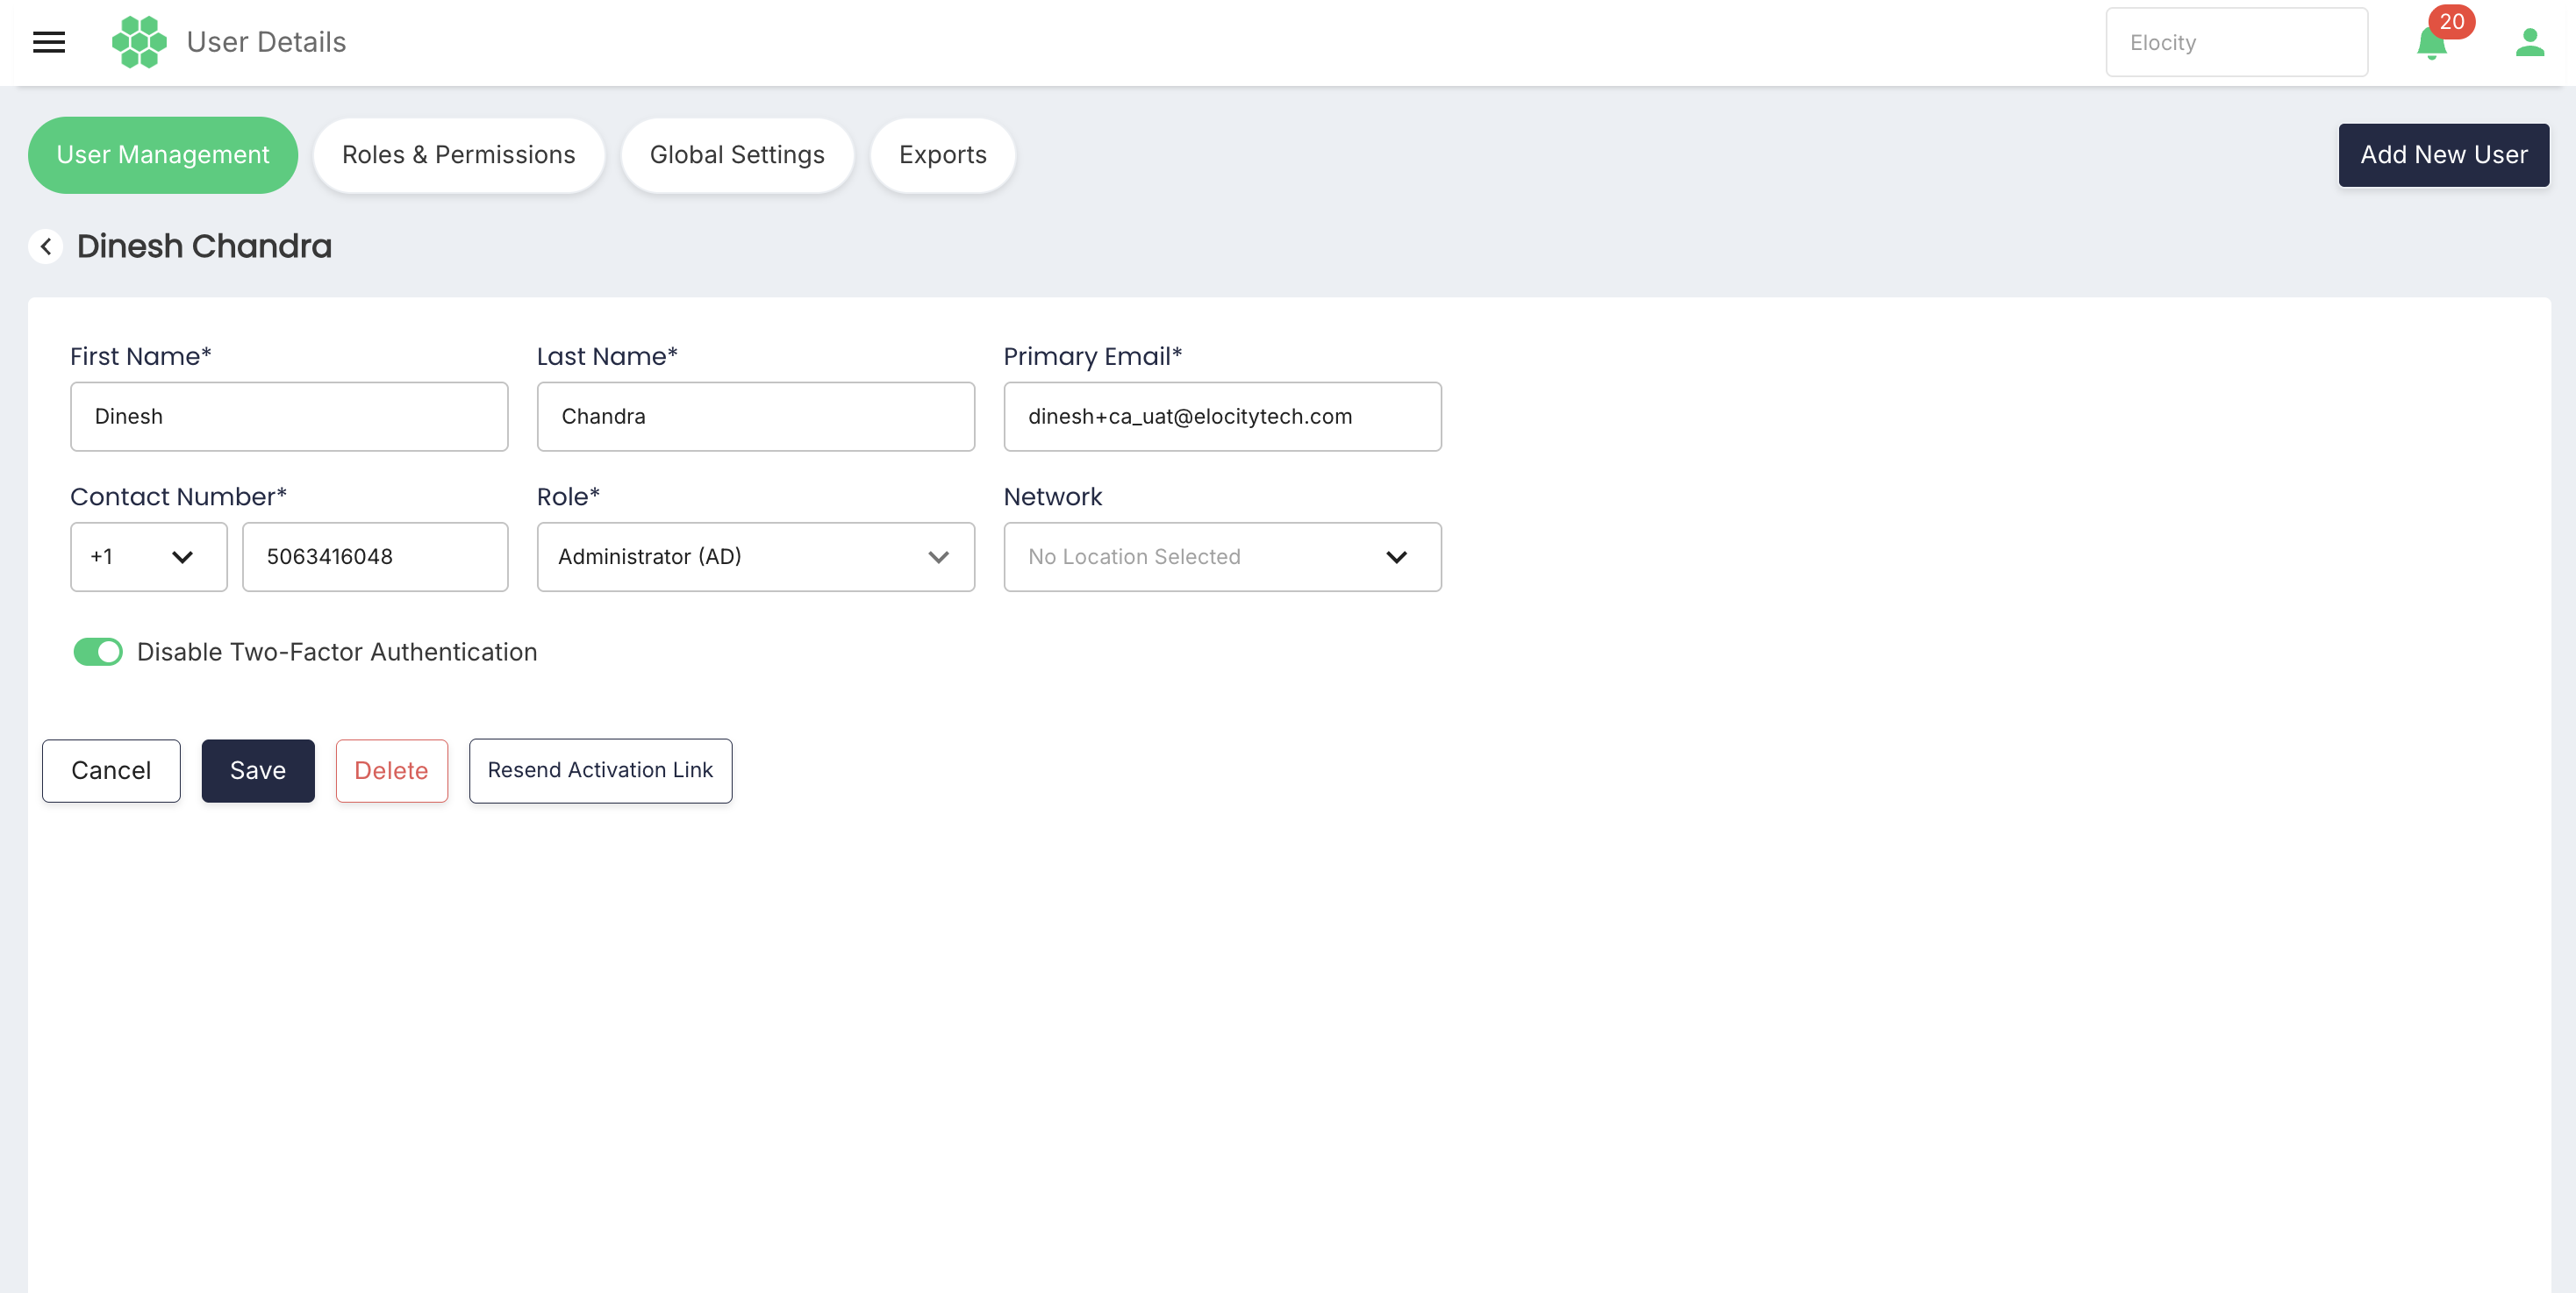
Editable fields confirmed in the live interface
- First Name
- Last Name
- Primary Email
- Contact Number and country code
- Role
- Network locations
- Disable Two-Factor Authentication
During editing, the Network field displays the number of assigned locations. The Select Locations dialog can be opened to review or change the hierarchical selection.
 Role changes take effect immediately. The behavior that follows a change to Primary Email or Contact Number still requires confirmation.
The live review used Cancel and did not change the selected user.
9. Suspending and Deleting Users
The reviewed active-user detail page displayed Suspend and Delete.
- Suspend revokes all account access immediately.
- Delete permanently deletes the user account. Audit data associated with the user remains in the system.
- An administrator cannot delete their own account or the last Super User account.
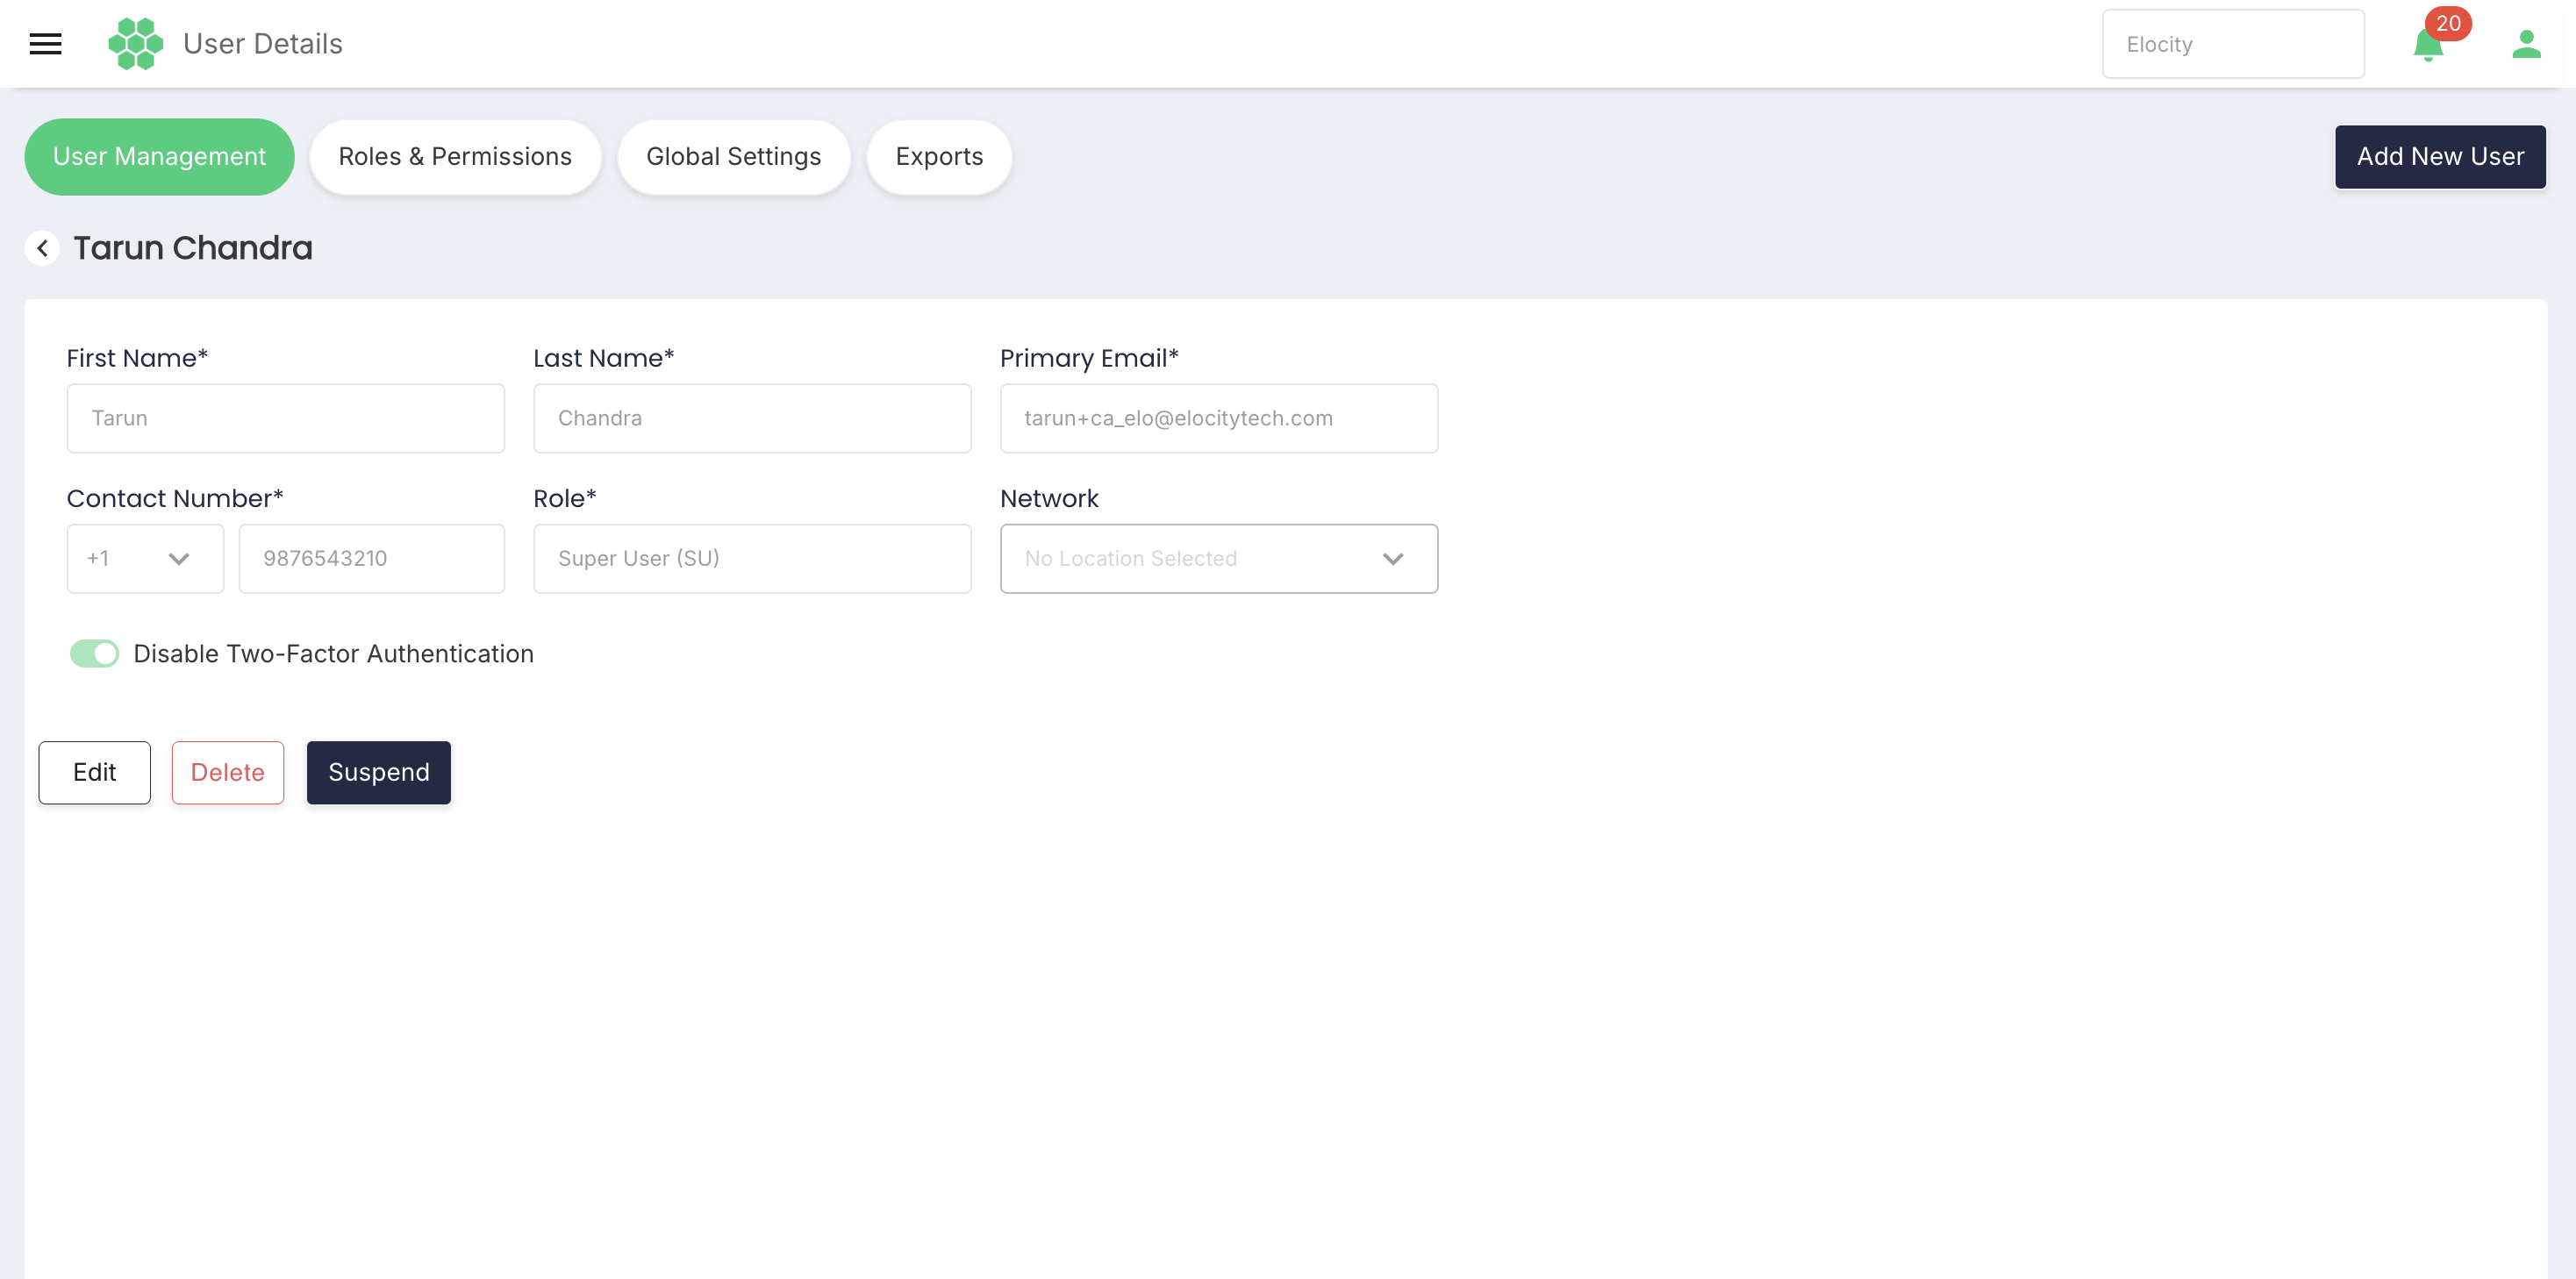
These actions were not selected during the review because they affect account access or remove user information. Confirm the target user and authorization before proceeding. The reactivation workflow and any confirmation or reason requirements still require clarification.
10. Account Status and Activation Link
The register contains Account Status and Activation Link columns. All users visible during the review were active, and their Activation Link cells were blank.
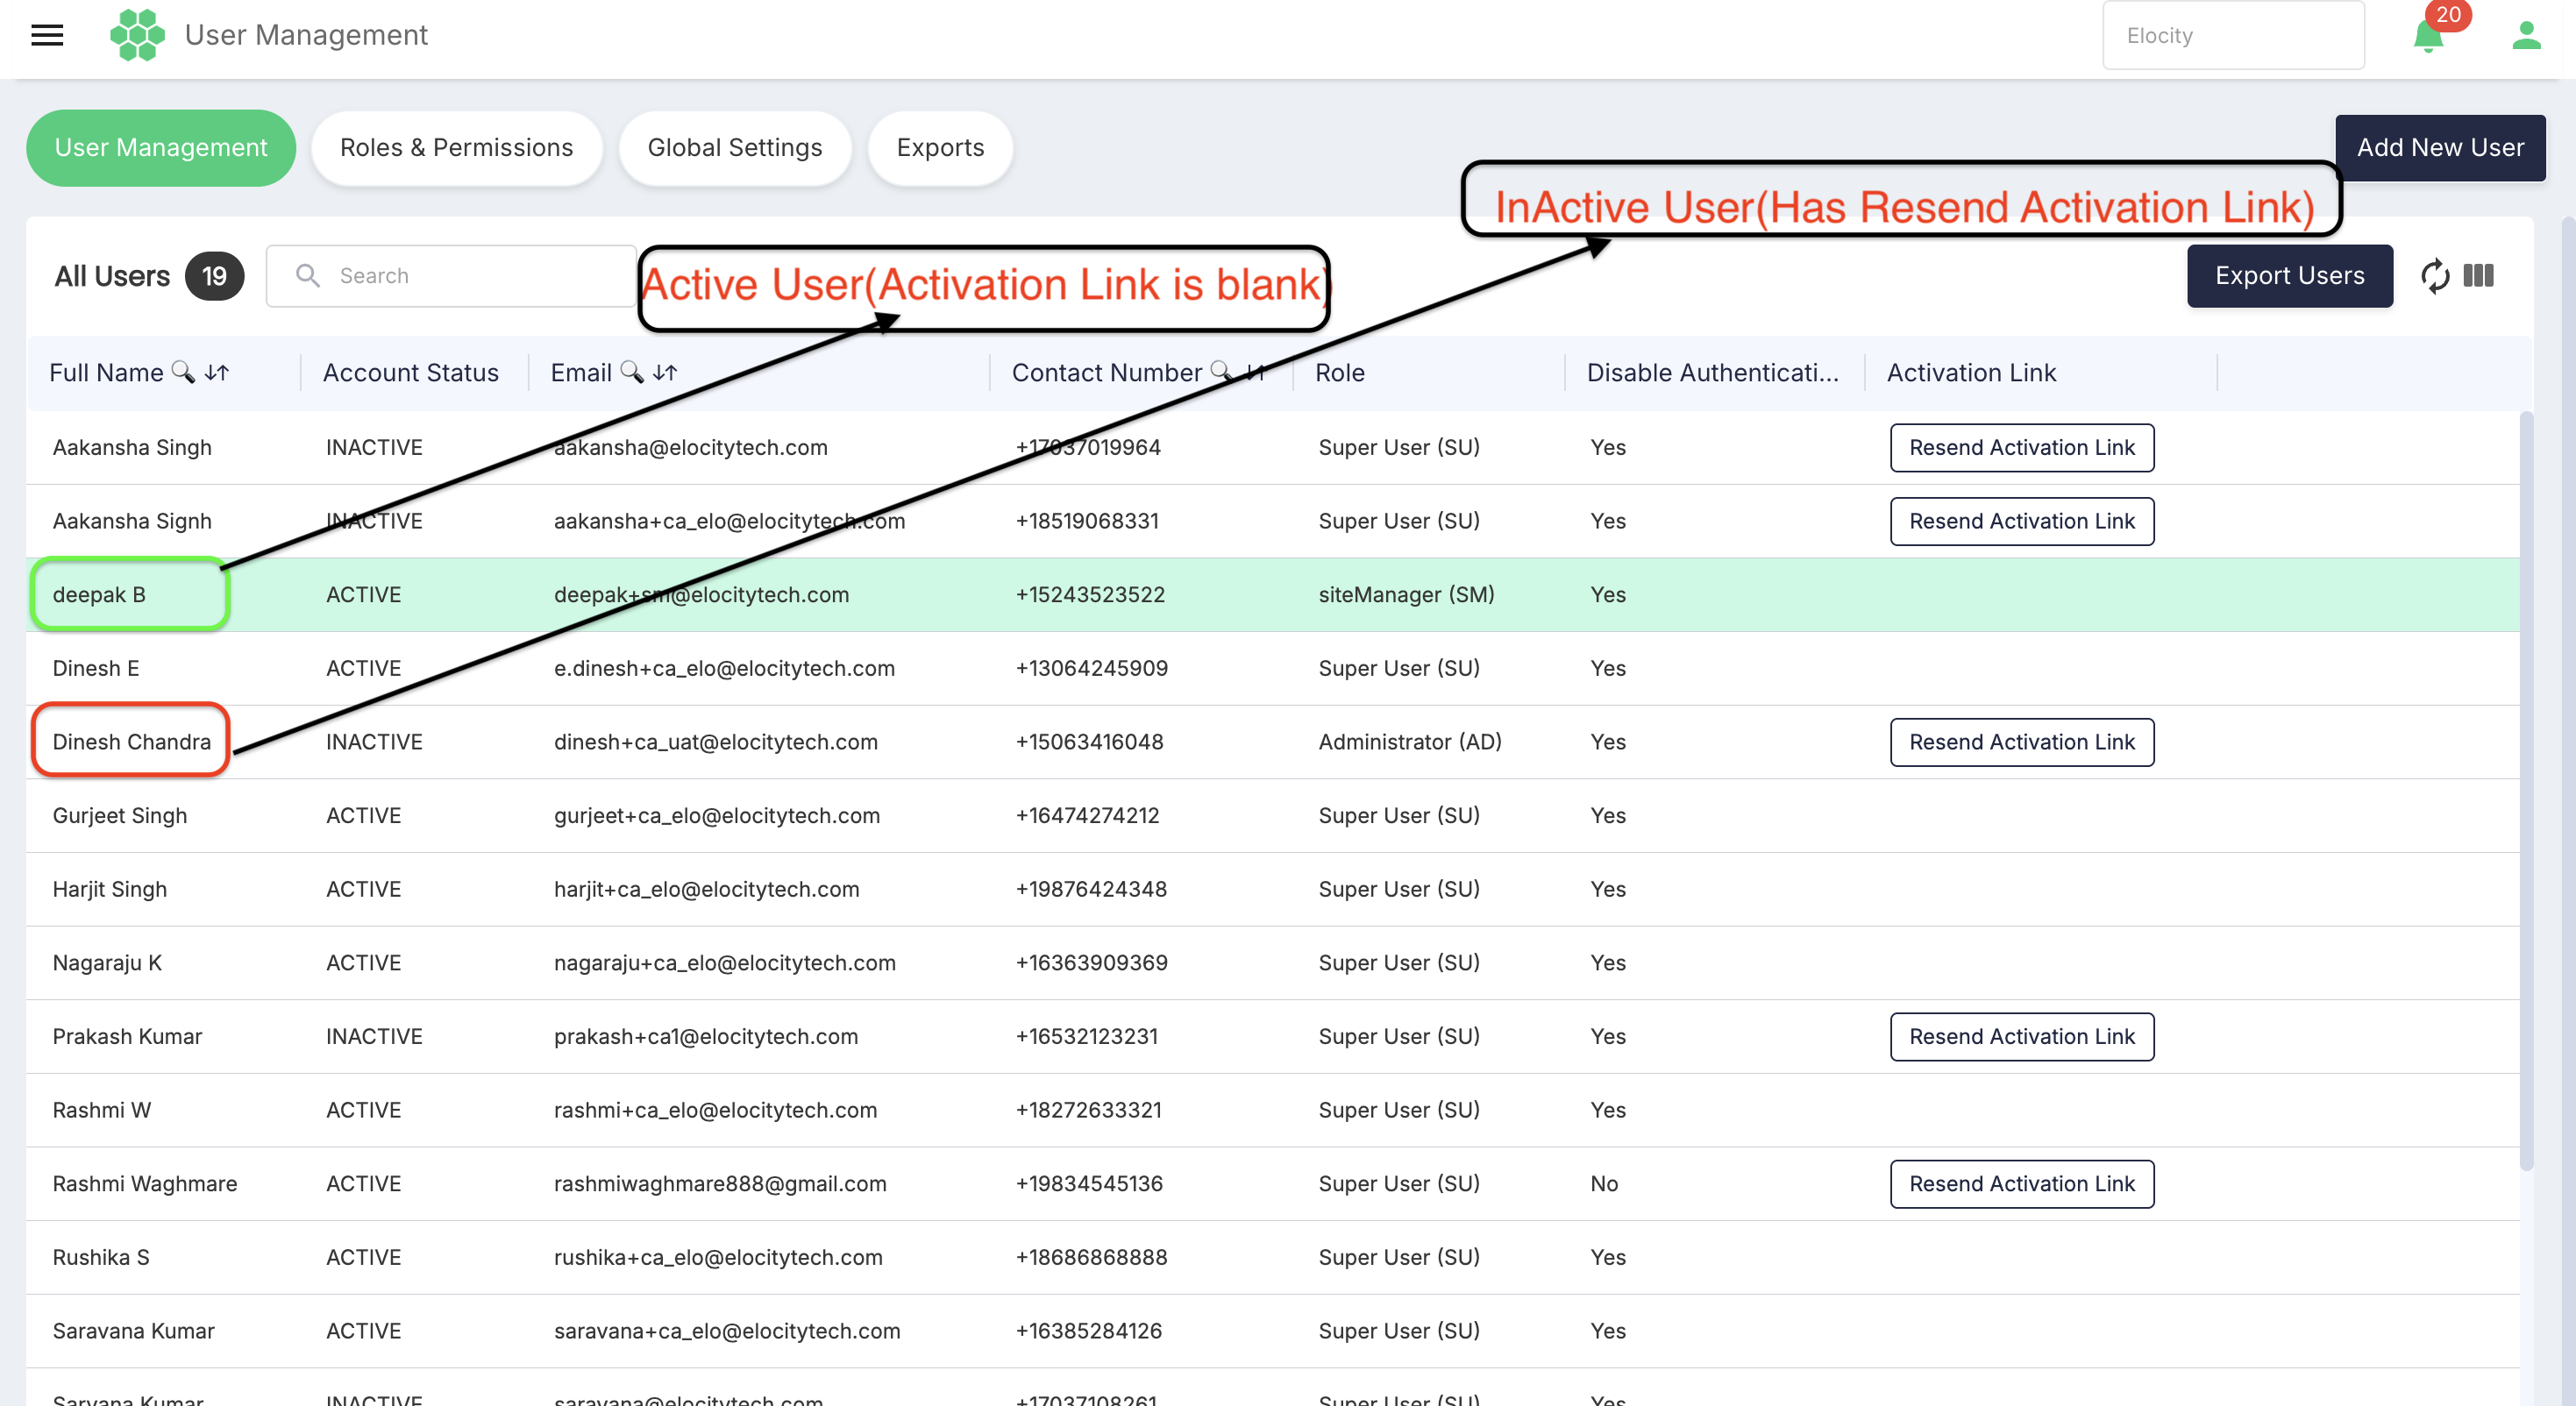 After a new account is saved:
- The portal sends an invitation email immediately.
- The account remains inactive until the user verifies the account through the emailed link.
- The activation link is typically valid for five days.
- The invitation email can be resent when required.
The complete list of account statuses and the conditions under which an Activation Link action appears in the grid still require confirmation.
11. Audit and Security Controls
- Dedicated create, view, edit, and delete permissions can be assigned to roles. Users inherit these capabilities from their assigned role.
- Create, edit, role, network, authentication, suspend, reactivate, and delete events are retained in the audit record.
- Suspension revokes all access immediately.
- Deletion is permanent, while audit data is retained.
- Two-factor-authentication OTPs are delivered to the user's verified email address.
12. Verified Limitations of This Draft
The live review did not:
- Create or edit a user.
- Download or upload the bulk-user template.
- Export personal data.
- Suspend or delete an account.
- Open an activation link.
- Test login or two-factor authentication.
Those workflows are described only to the point verified by the live interface and legacy guide. No success message, failure message, notification, or destructive confirmation is stated as fact unless it was visible.