Firmware Management
Application: HIEV Administration Portal
Page: Assets > Firmware Management
Page URL: https://hiev.ca/ca/firmware-management
Document status: Revised draft based on the live interface and product clarifications reviewed on 22 July 2026
1. Overview
Firmware Management provides the tools for maintaining charger firmware records and monitoring firmware-update jobs. From this area, an authorized user can:
- View uploaded firmware records.
- Upload a firmware file for an EVSE make and model.
- Schedule an uploaded firmware version for selected stations.
- Monitor aggregate job progress.
- Open a job to review station-level update results.
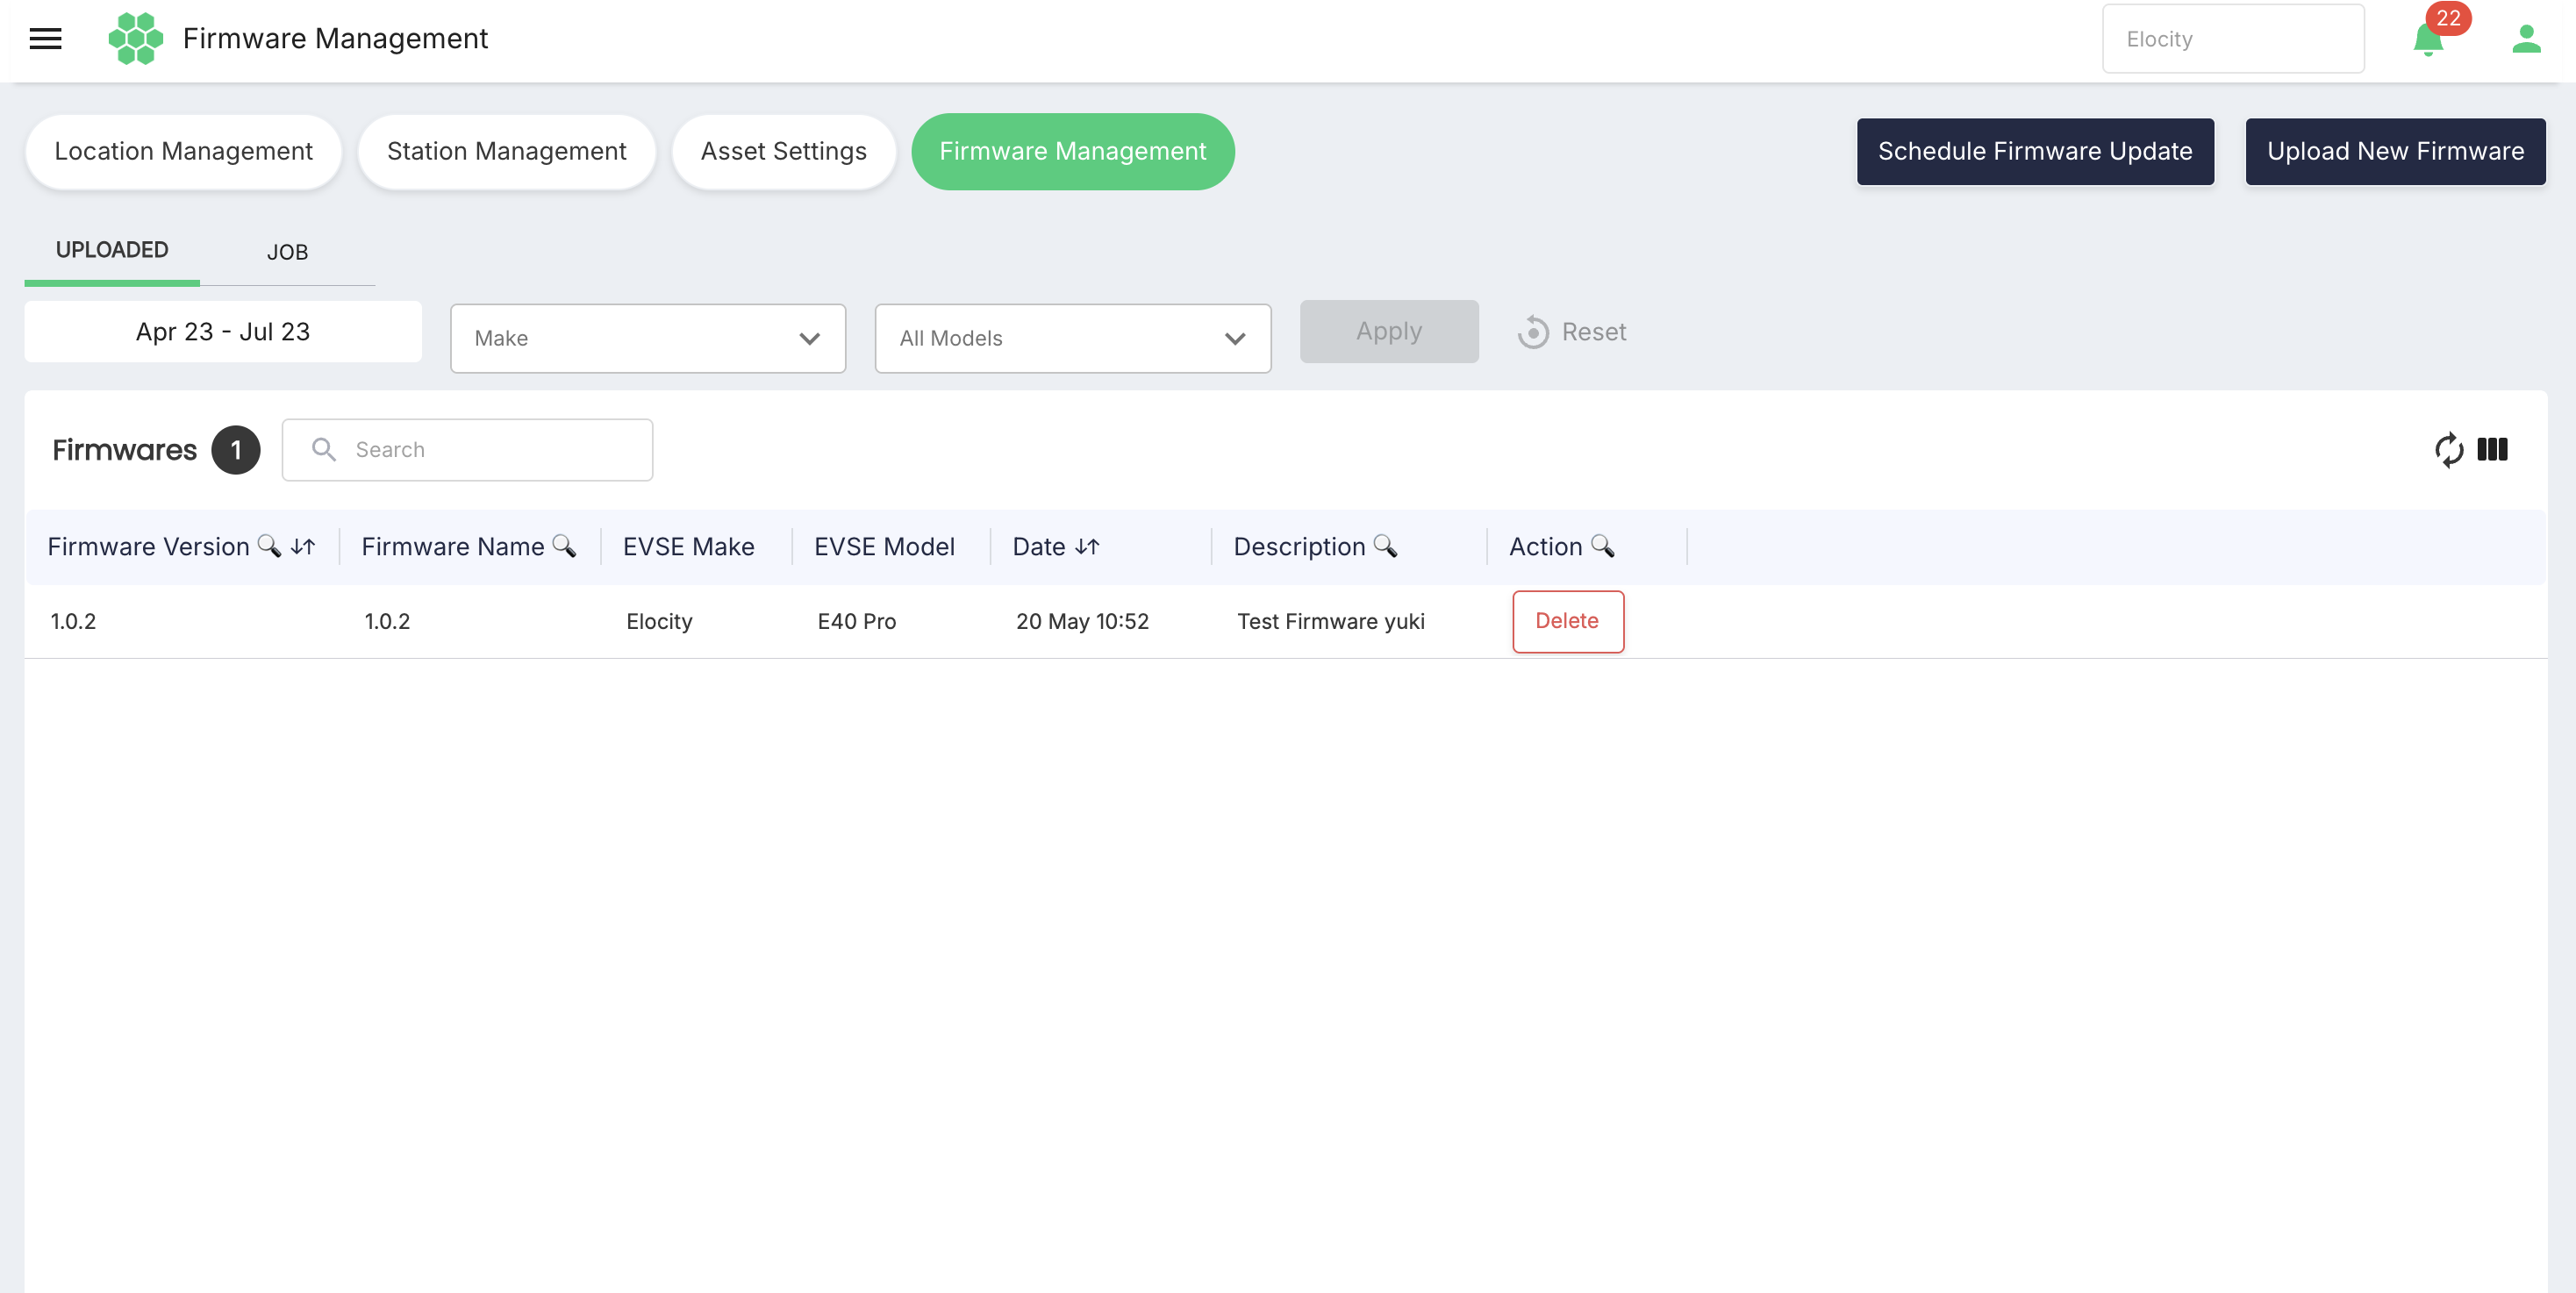
Firmware changes can affect charger operation. The portal does not perform a separate firmware-approval step and does not validate that a selected file is compatible with the mapped EVSE make and model. The user must therefore confirm the file, mapping, locations, stations, and schedule before saving a job.
2. Accessing Firmware Management
- Sign in to the HIEV Administration Portal.
- Open the Assets area.
- Select Firmware Management.
- Verify the business or site context displayed at the top of the portal.
- Select UPLOADED to work with firmware files or JOB to monitor scheduled update jobs.
Access is controlled through the system's custom role-based access control (RBAC). The business selector applies to Firmware Management: a user can see firmware uploads and schedules for businesses that the user is authorized to access.
3. Page Layout
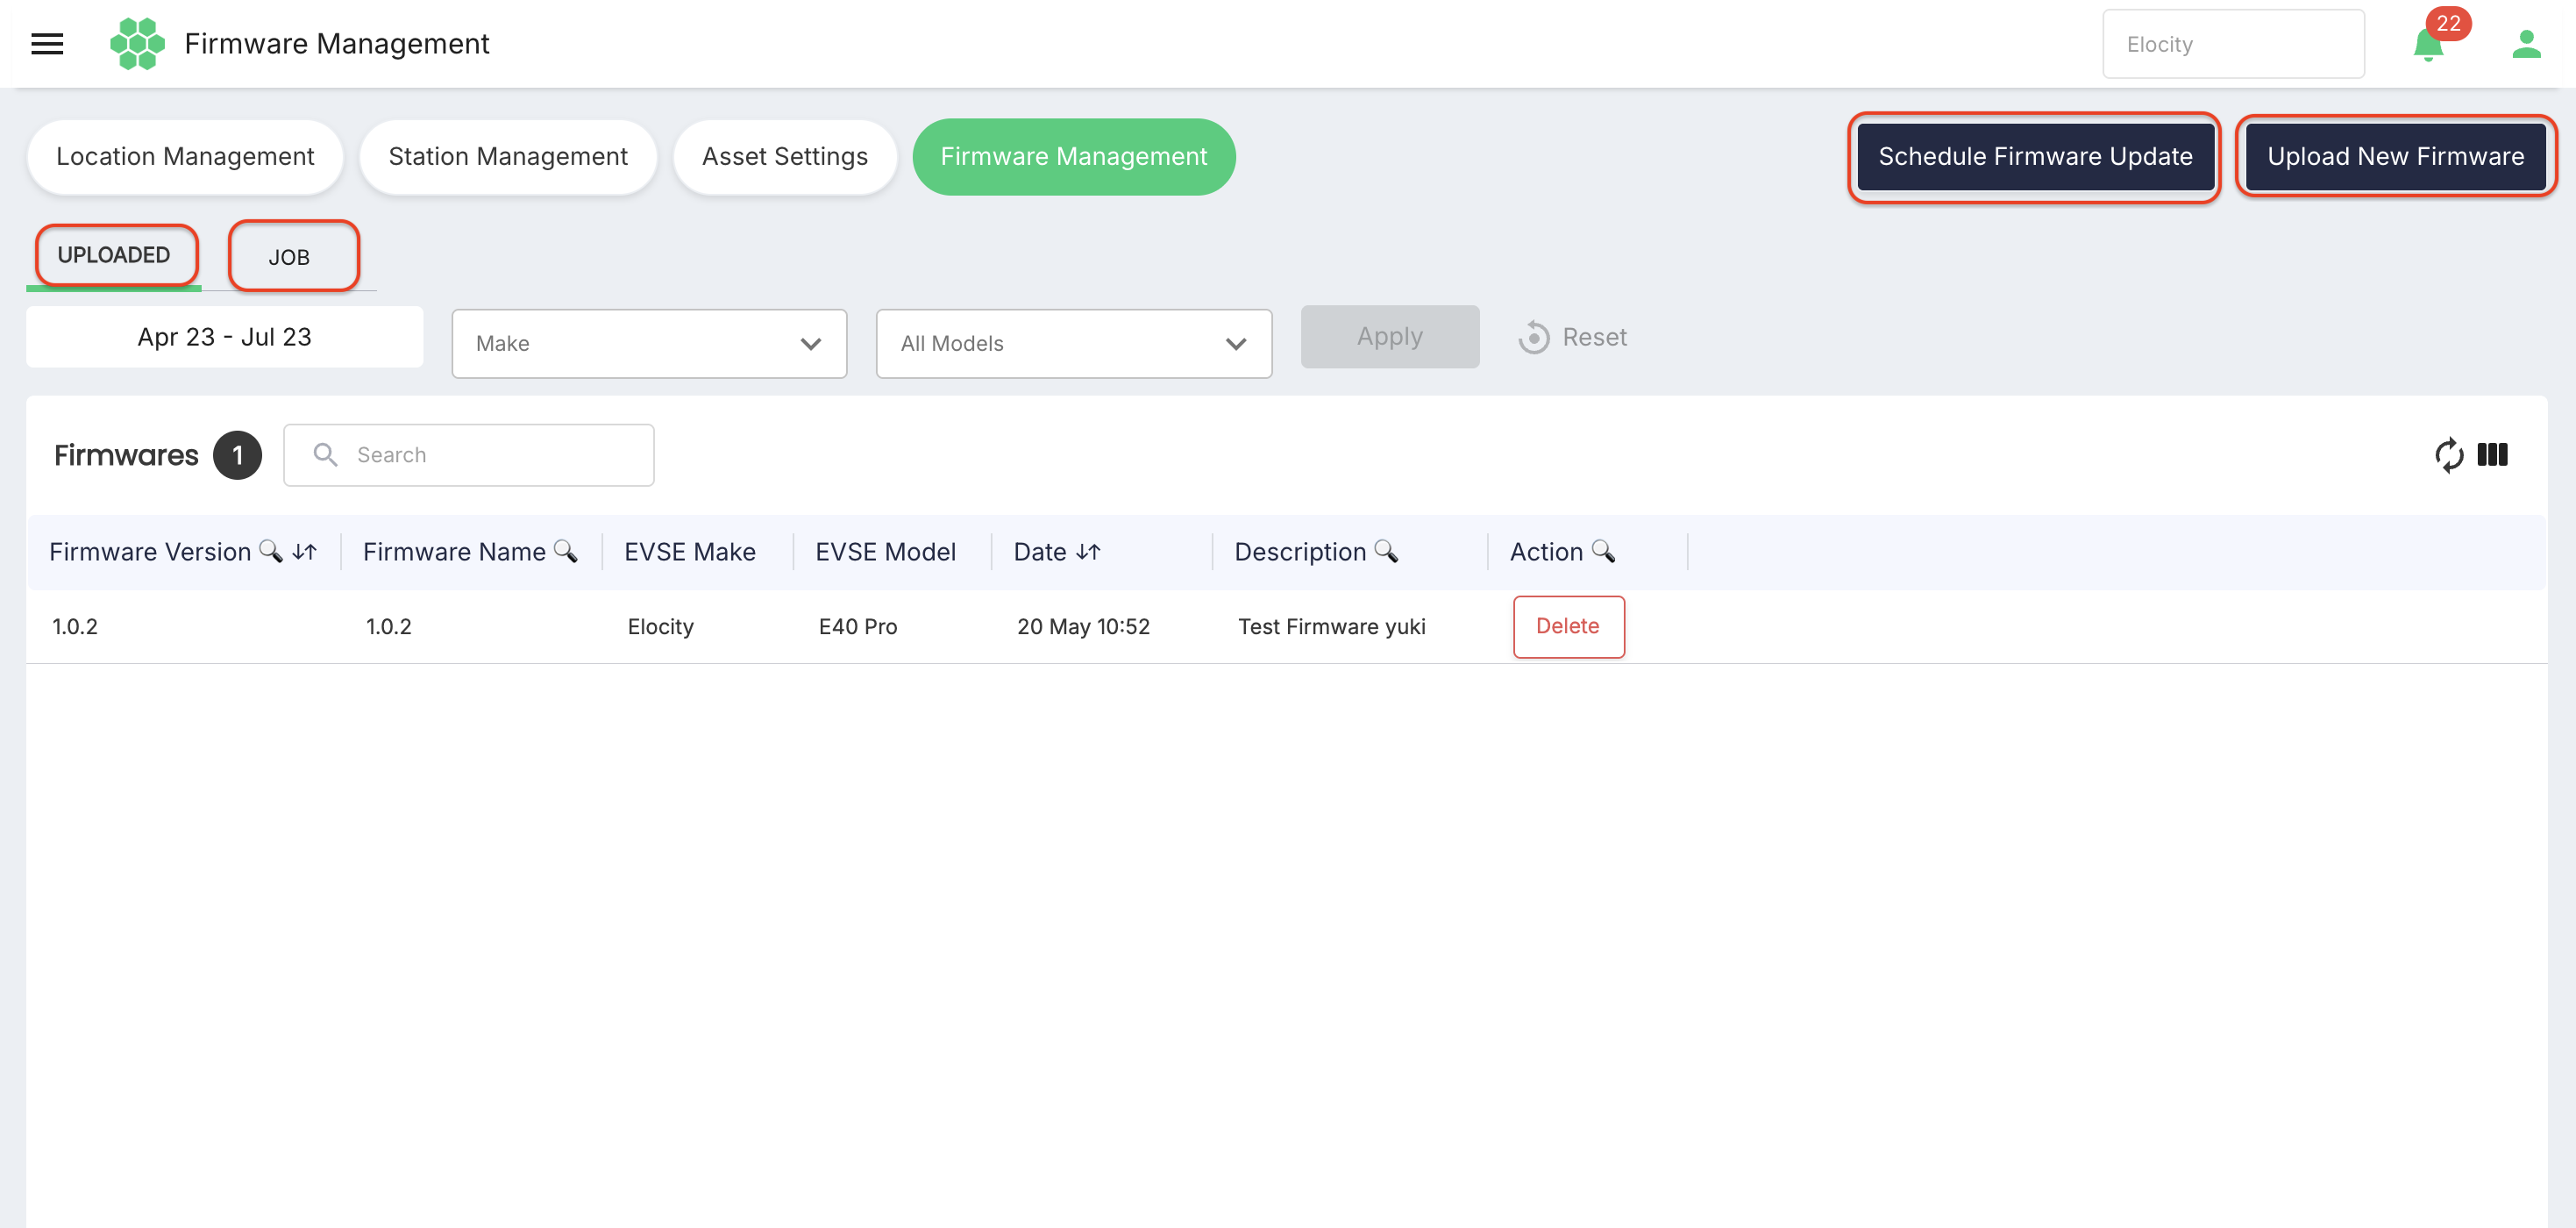
The page provides two primary actions:
- Schedule Firmware Update — opens the form used to prepare a firmware-update job.
- Upload New Firmware — opens the form used to register and select a firmware file.
The page also contains two tabs:
- UPLOADED — lists firmware files already registered in the portal.
- JOB — lists firmware-update jobs and their aggregate station results.
Each tab displays a record count above its grid. The count reflects the currently displayed result set.
4. Common Grid Functions
4.1 Date range
Select the date-range control to choose a start and end date. The live date picker also provided these presets:
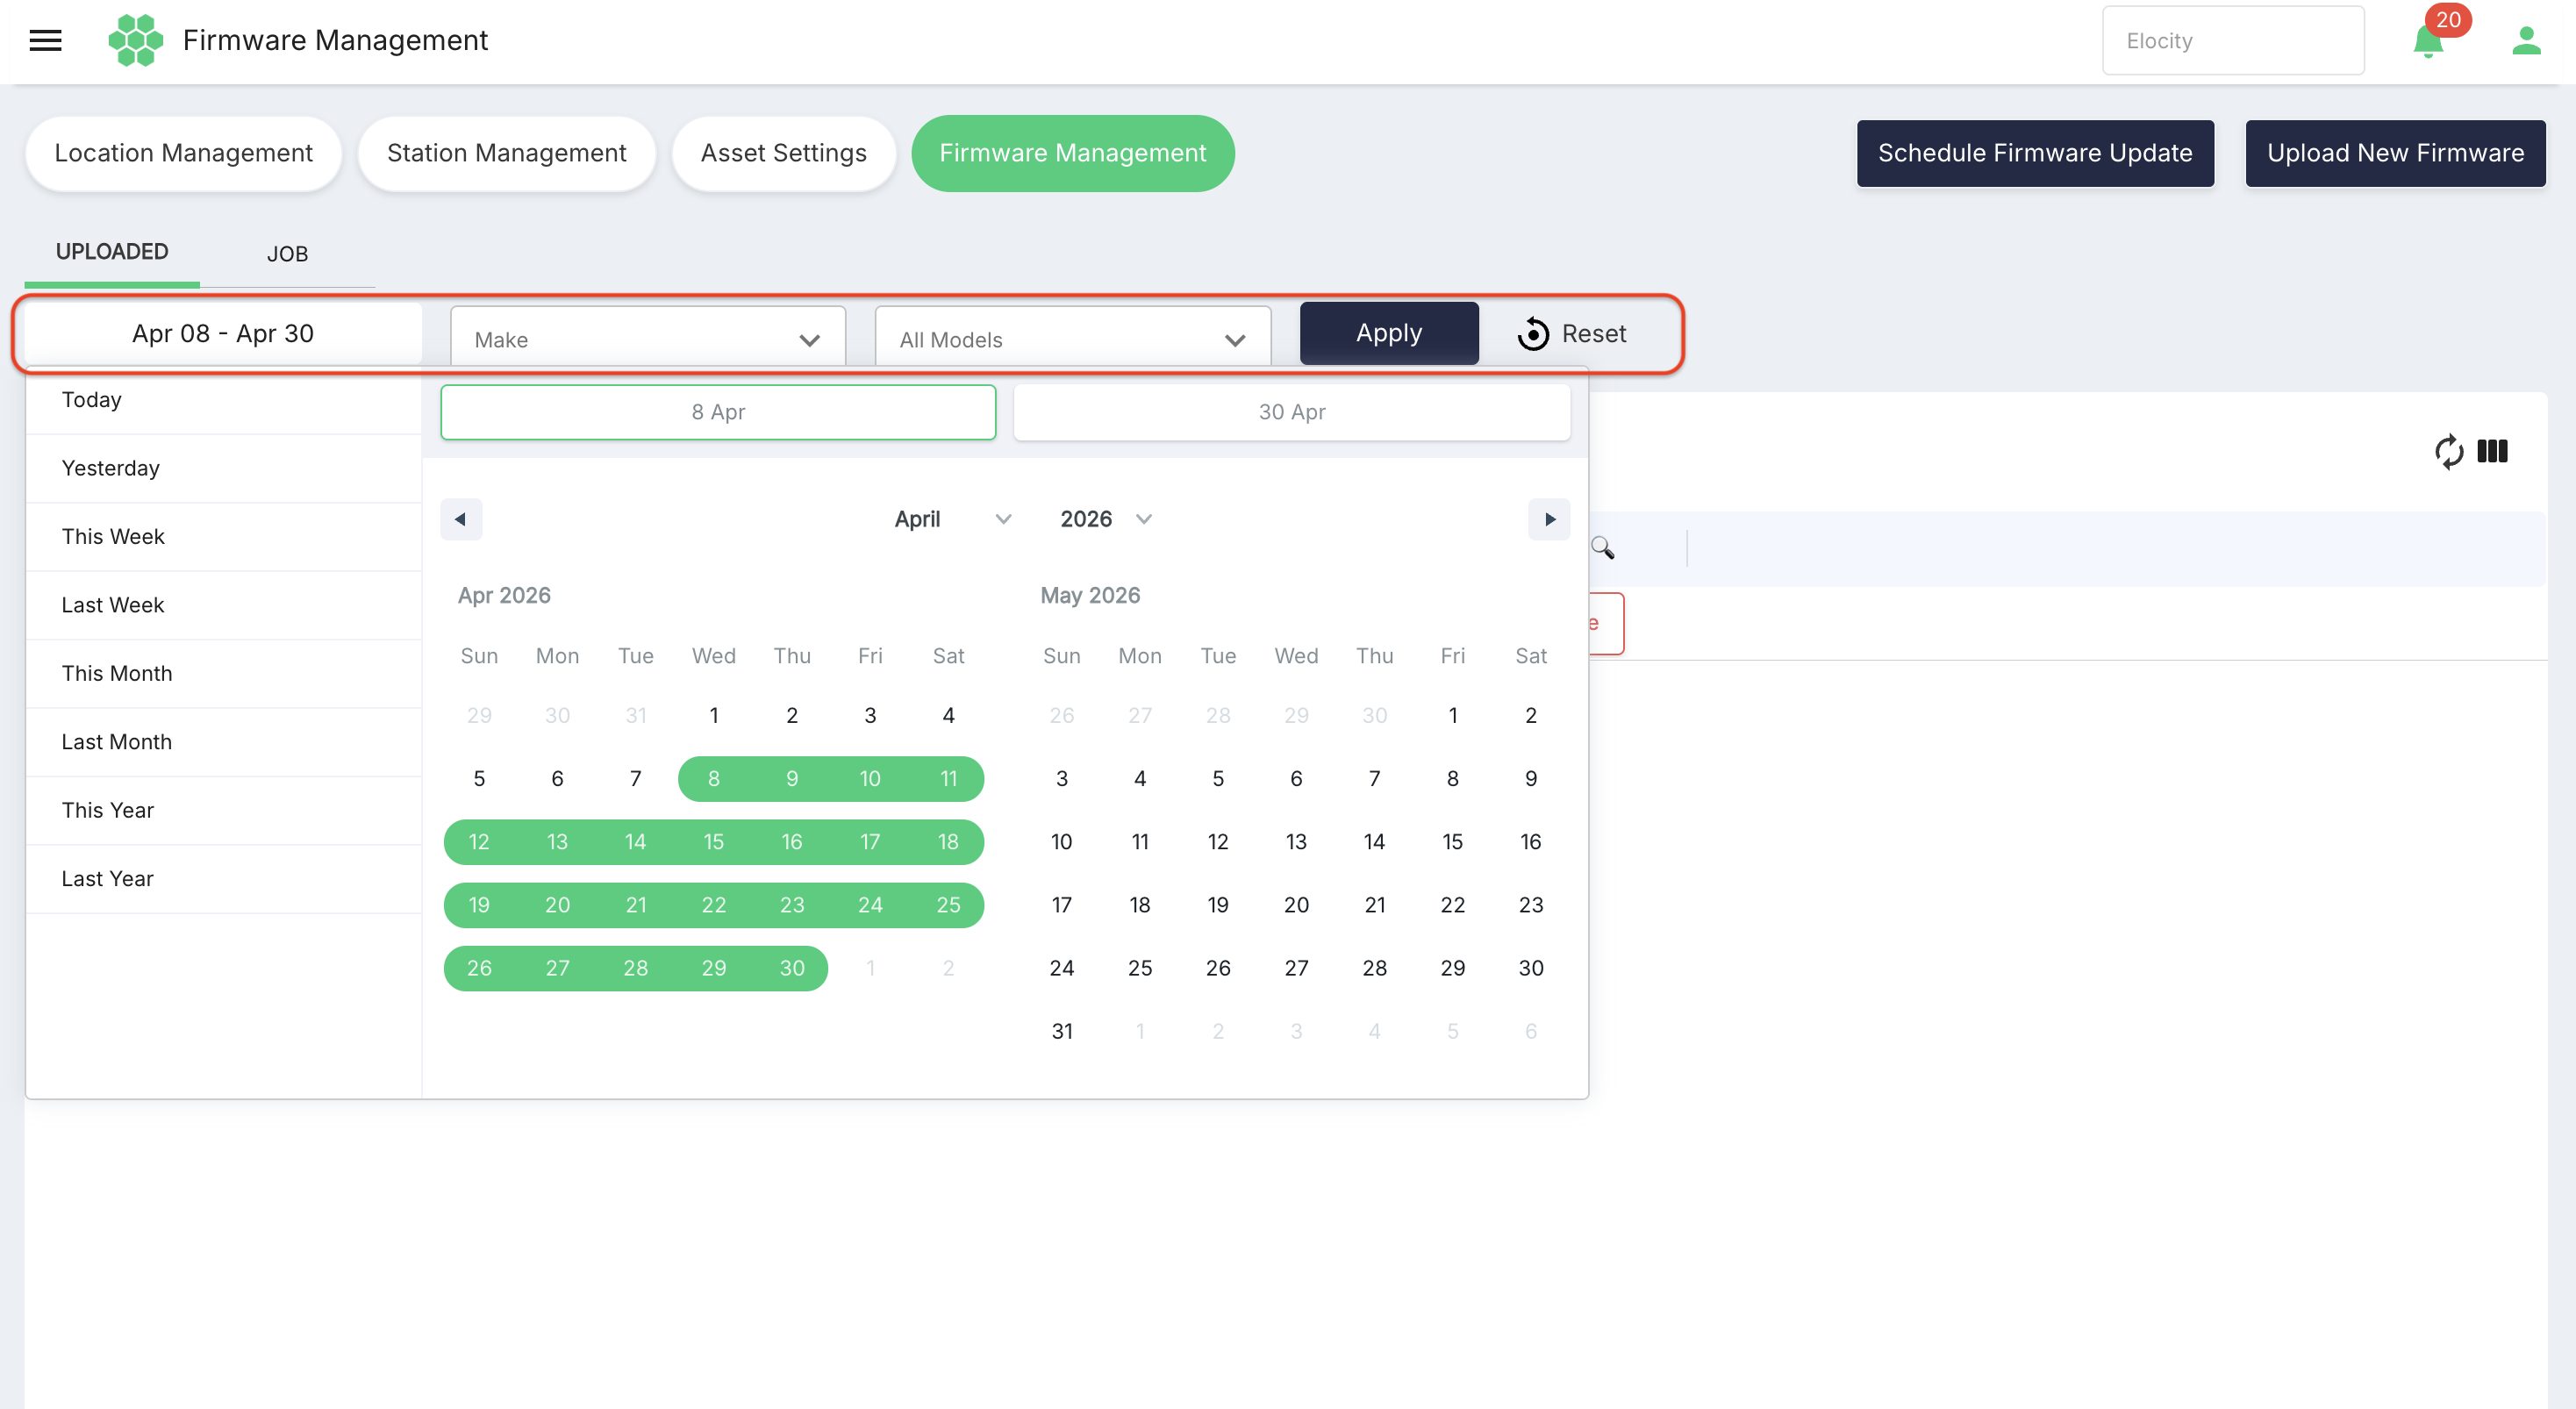
- Today
- Yesterday
- This Week
- Last Week
- This Month
- Last Month
- This Year
- Last Year
4.2 Apply and Reset
- Select one or more filter values.
- Select Apply to update the grid.
- Select Reset to remove the selected filters.
The Apply button remains disabled until a filter value changes.
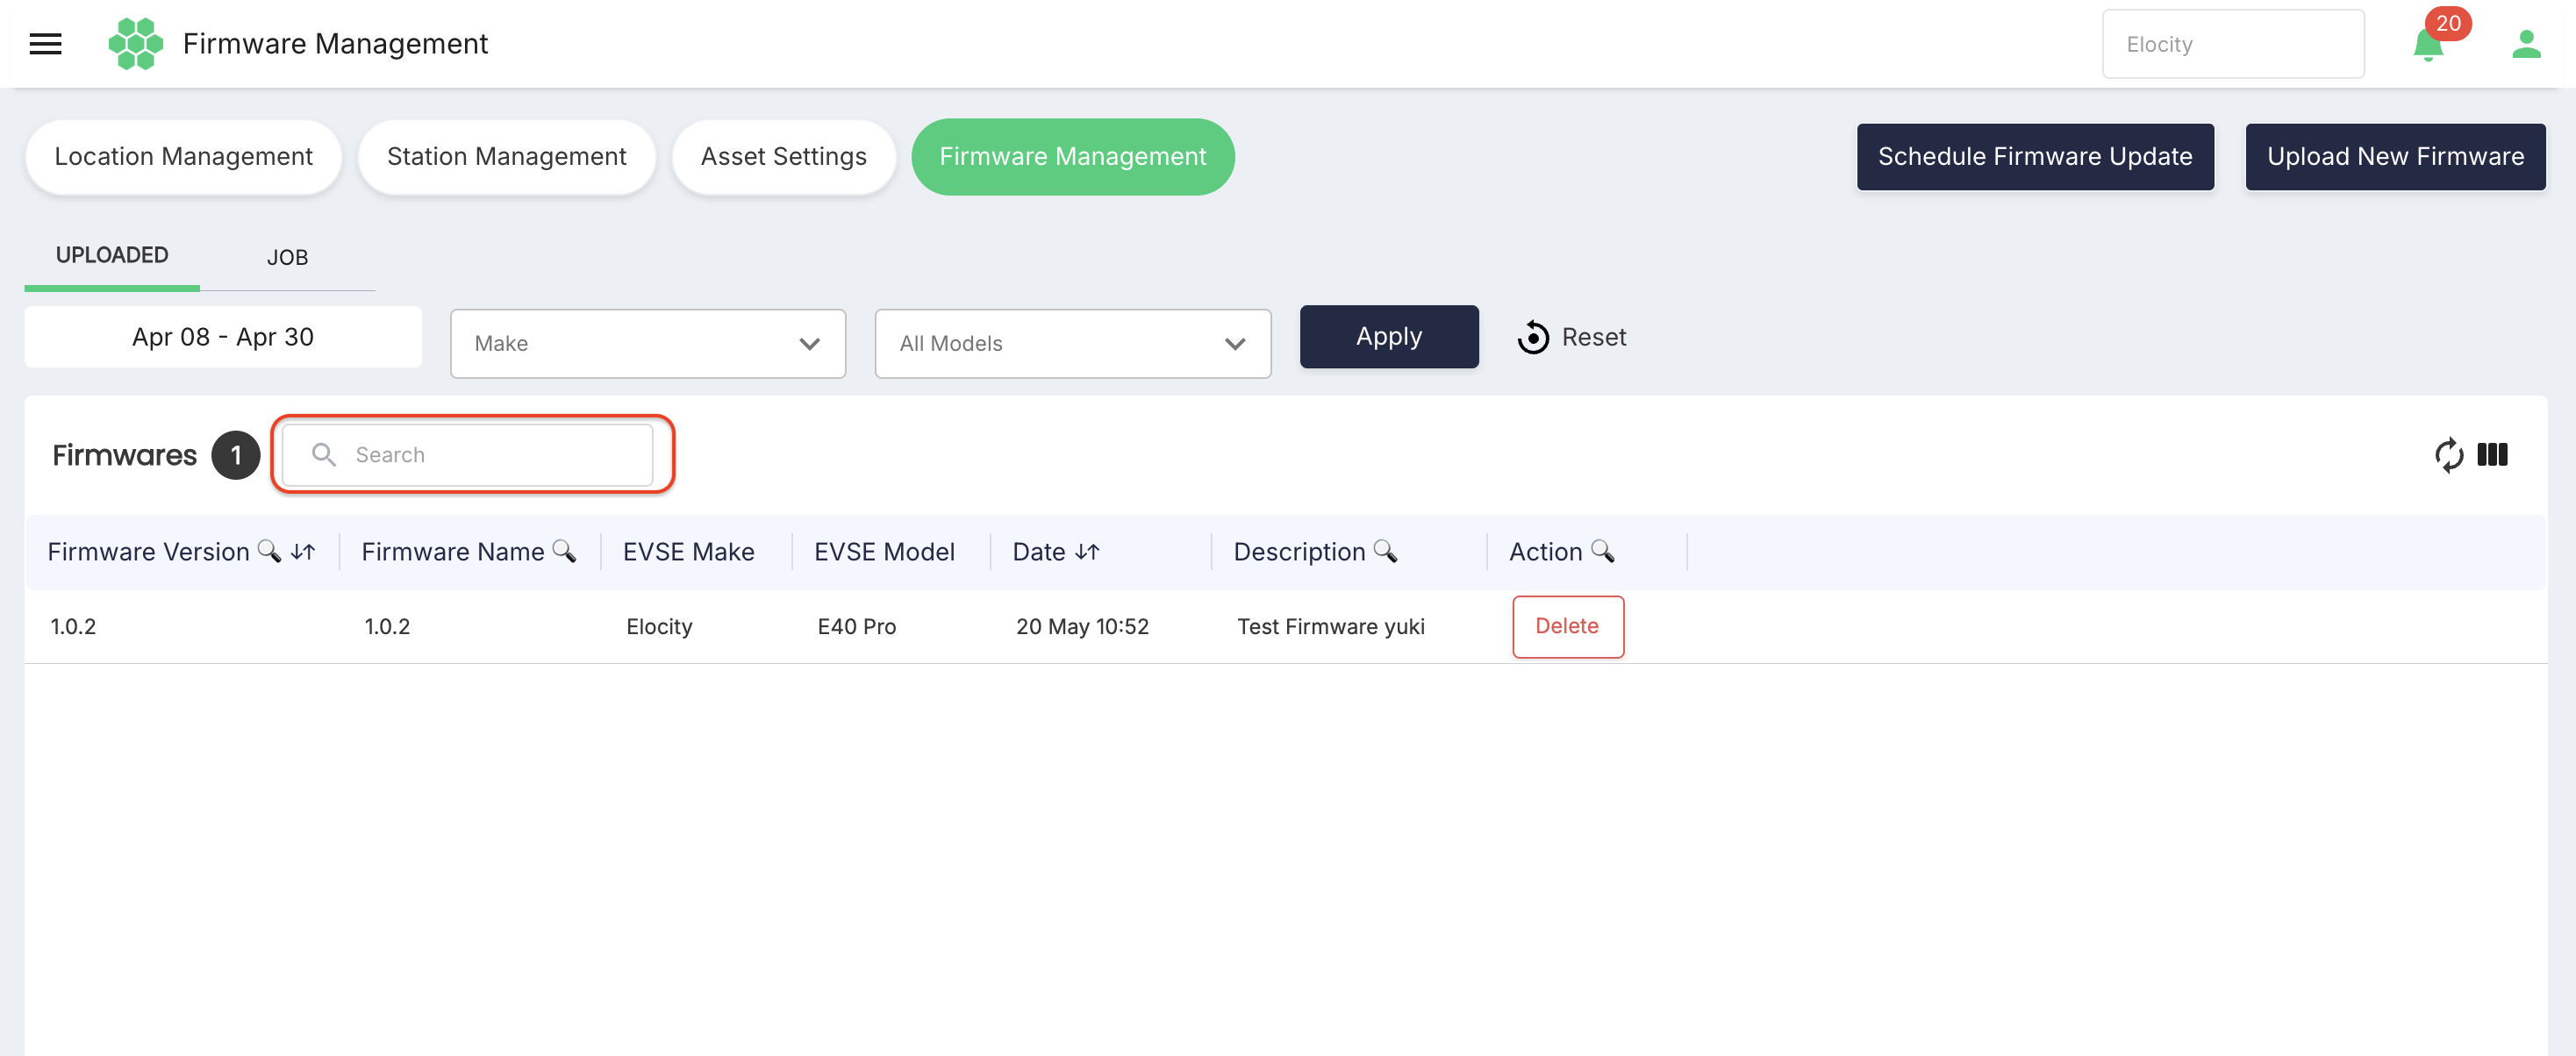
4.3 Search
Use the Search box to filter the grid on the active page. Columns marked with a magnifying-glass symbol are presented as searchable columns.
Clear the Search box to restore the unfiltered list.
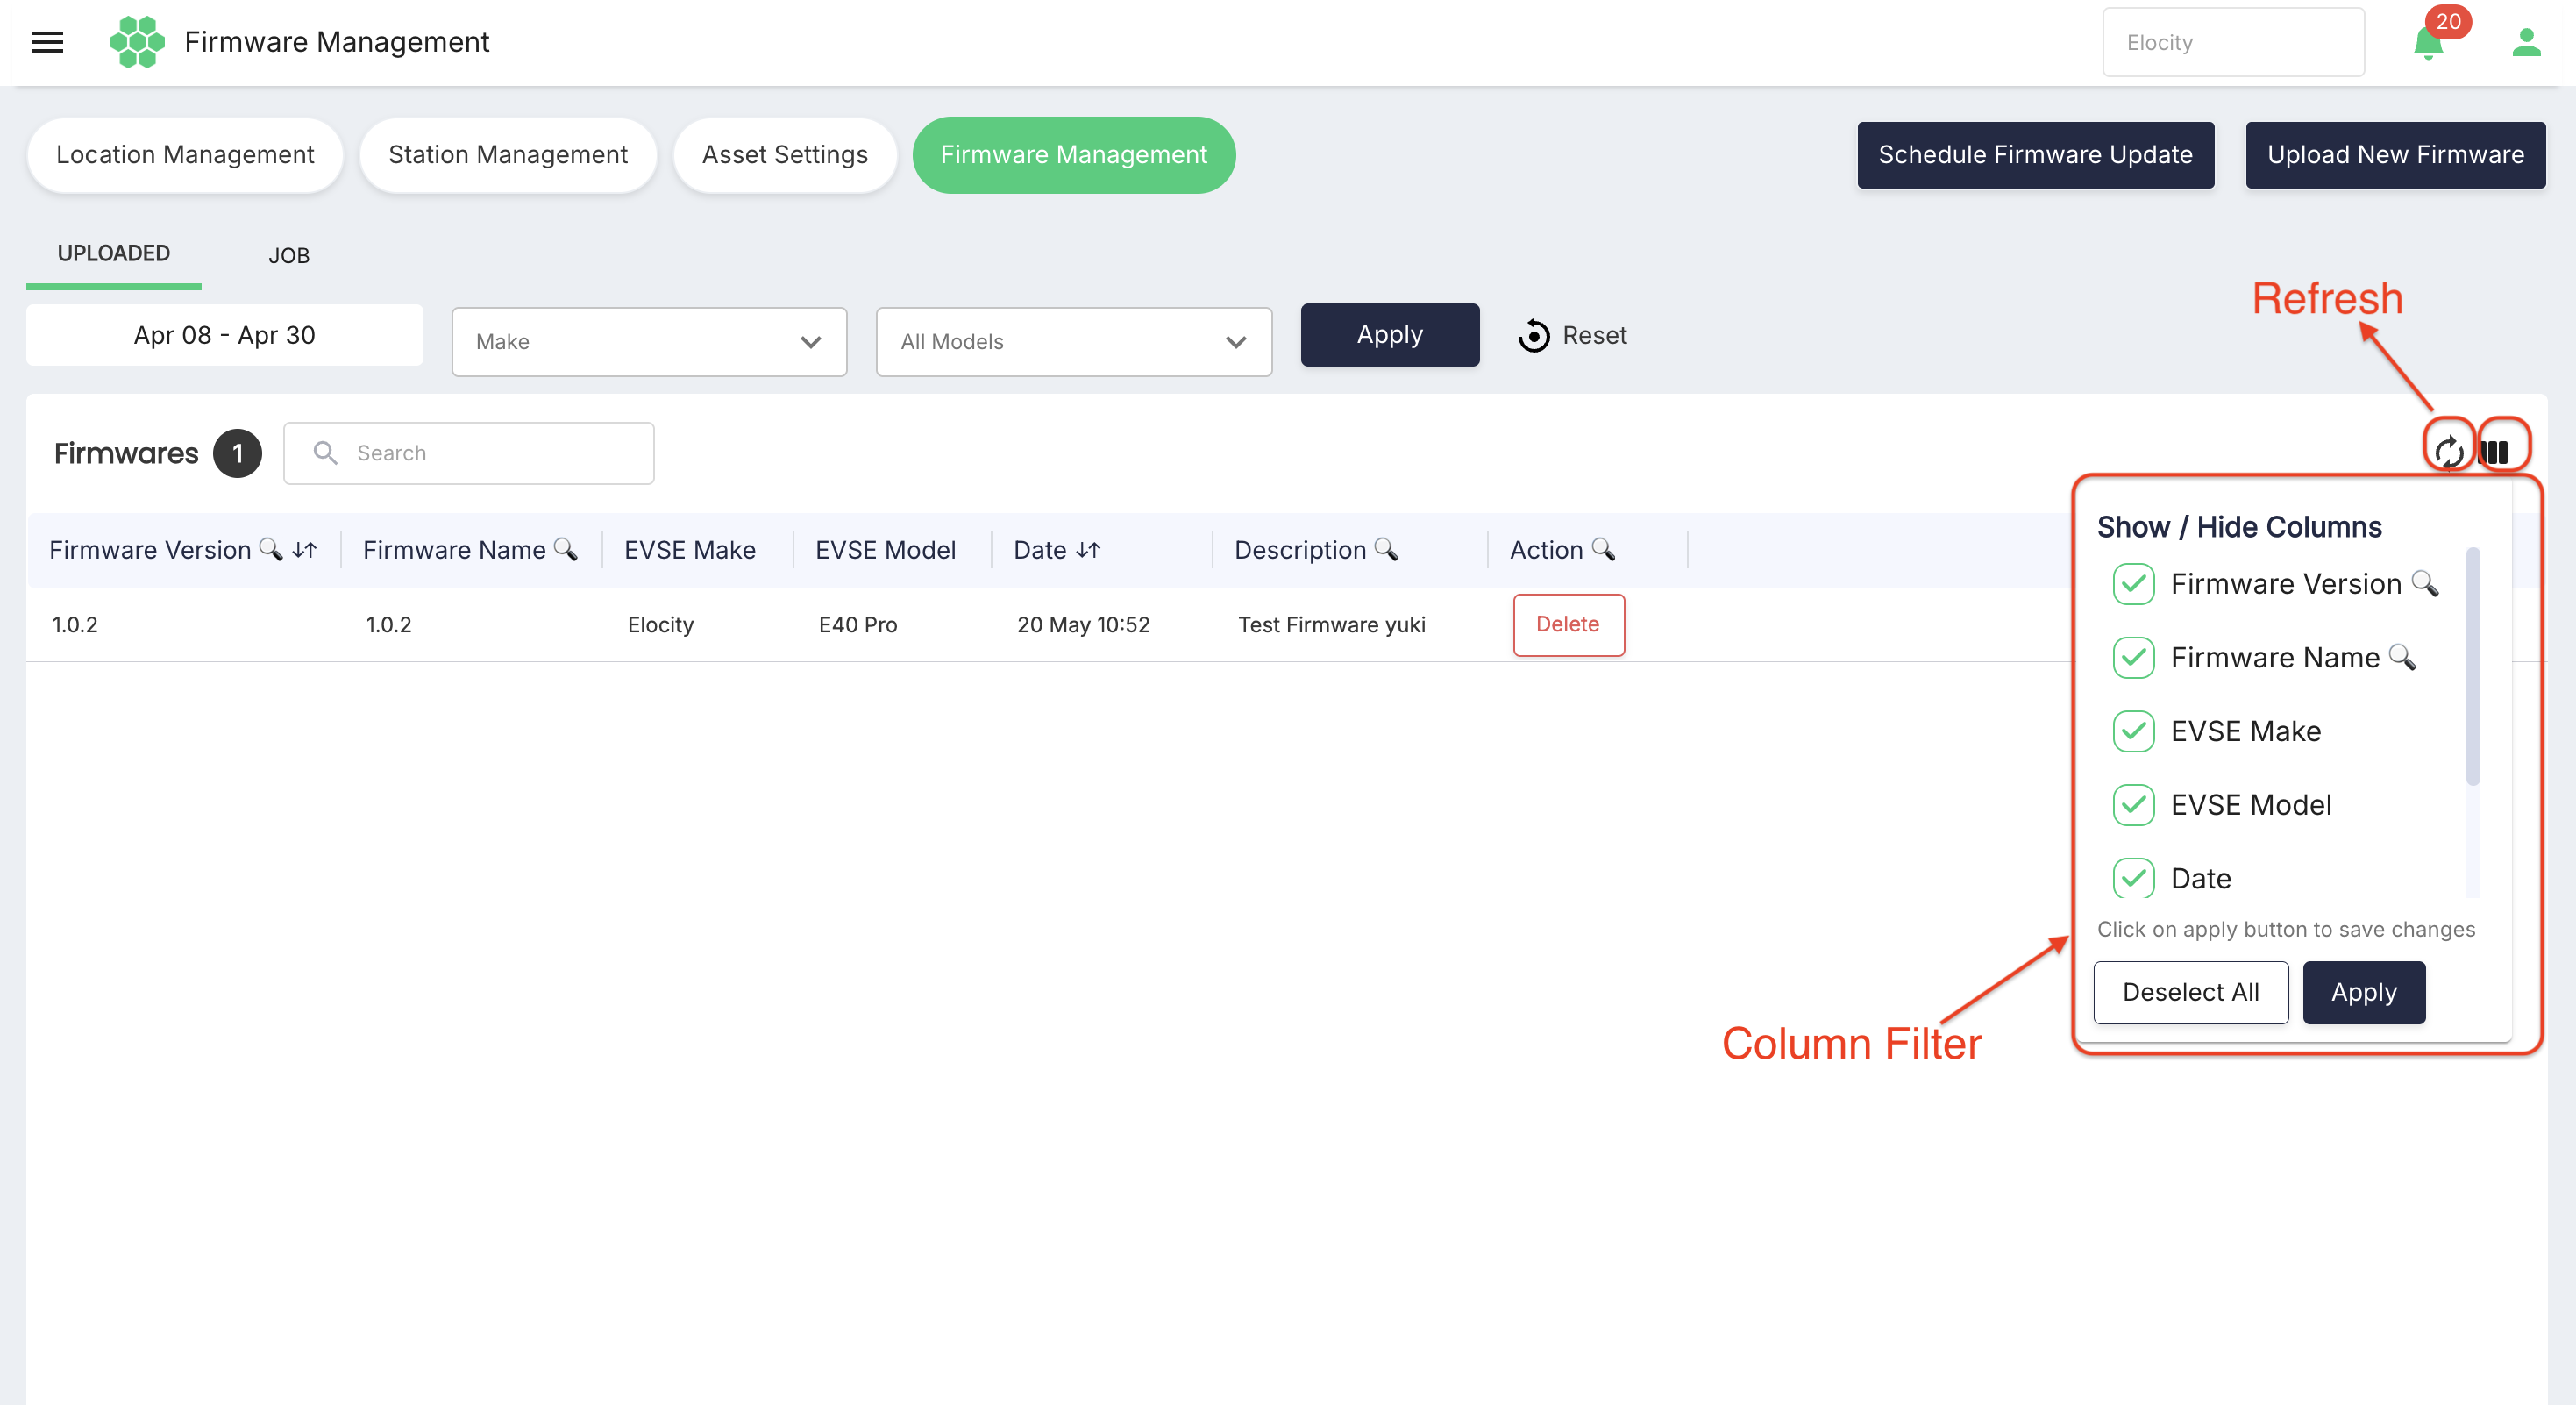
4.4 Refresh
Select Refresh to request the latest records for the active grid. The control can be temporarily disabled while records are loading.
4.5 Column Filter
Use Column Filter to control which grid columns are visible.
- Select Column Filter.
- Select or clear the checkbox beside each column.
- To clear every selection, select Deselect All.
- Select Apply inside the column panel to save the display change.
Changing column visibility affects the grid presentation; the underlying records are not deleted.
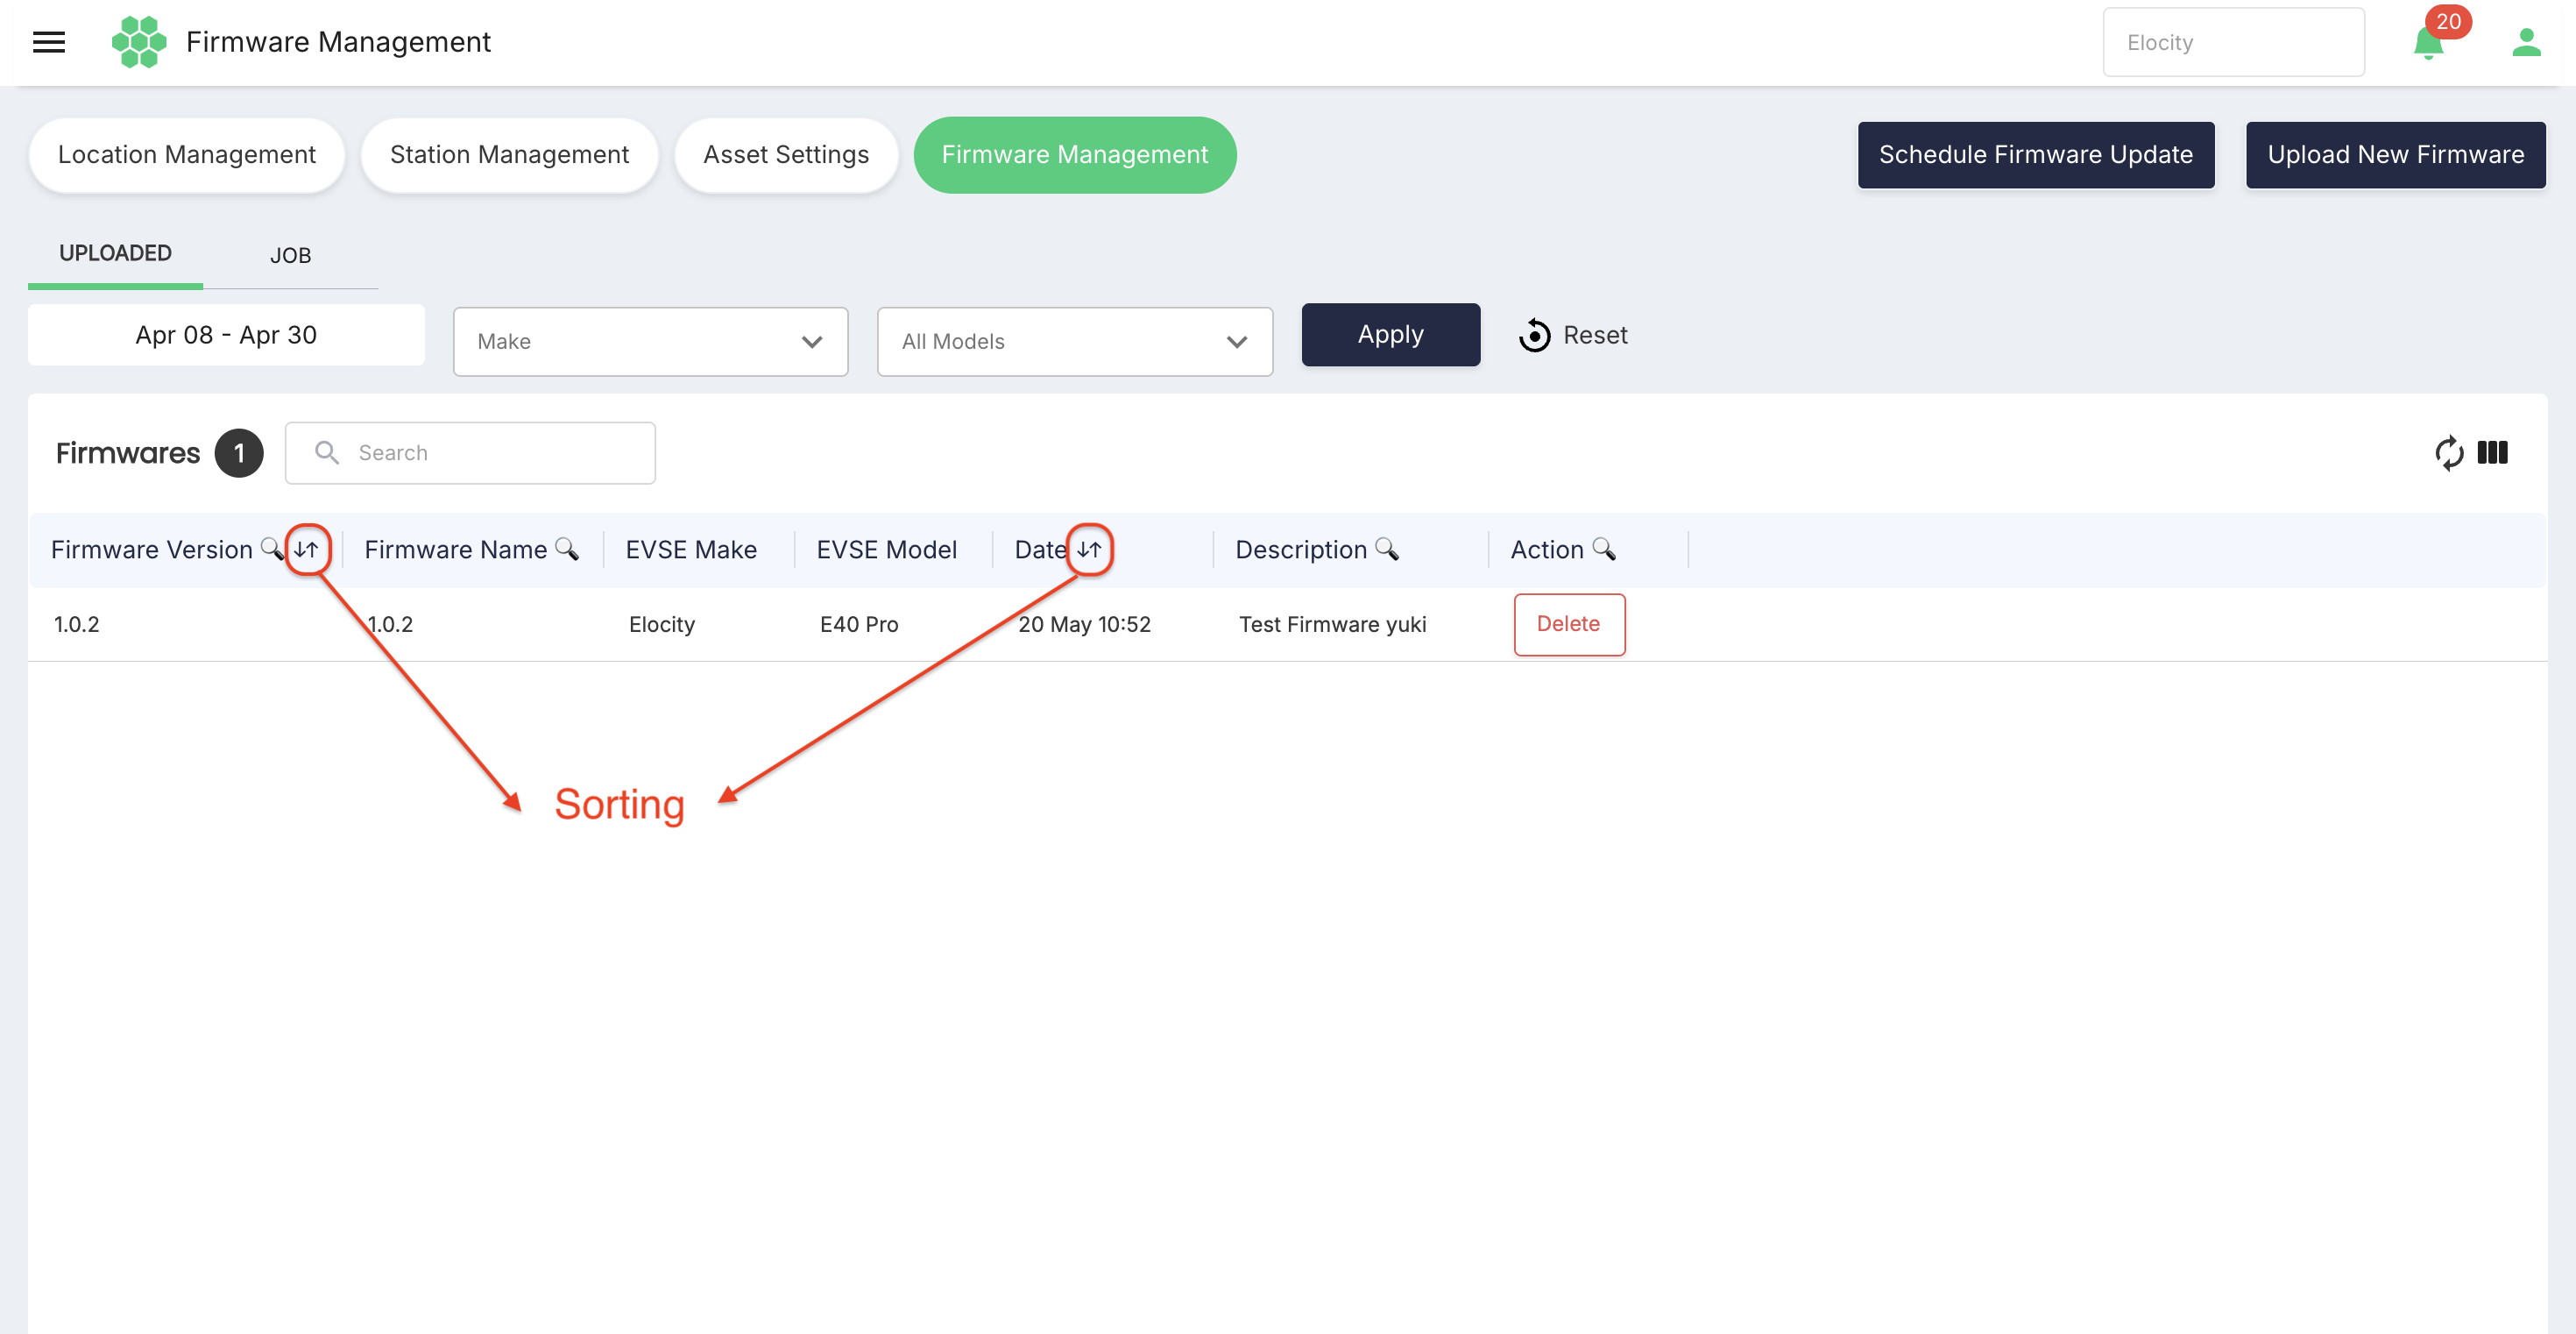
4.6 Sort
Only columns configured as sortable respond to heading selection.
- In the UPLOADED grid, Firmware Version and Date were sortable.
- In the JOB grid, Job ID and Date Created were presented with sorting controls.
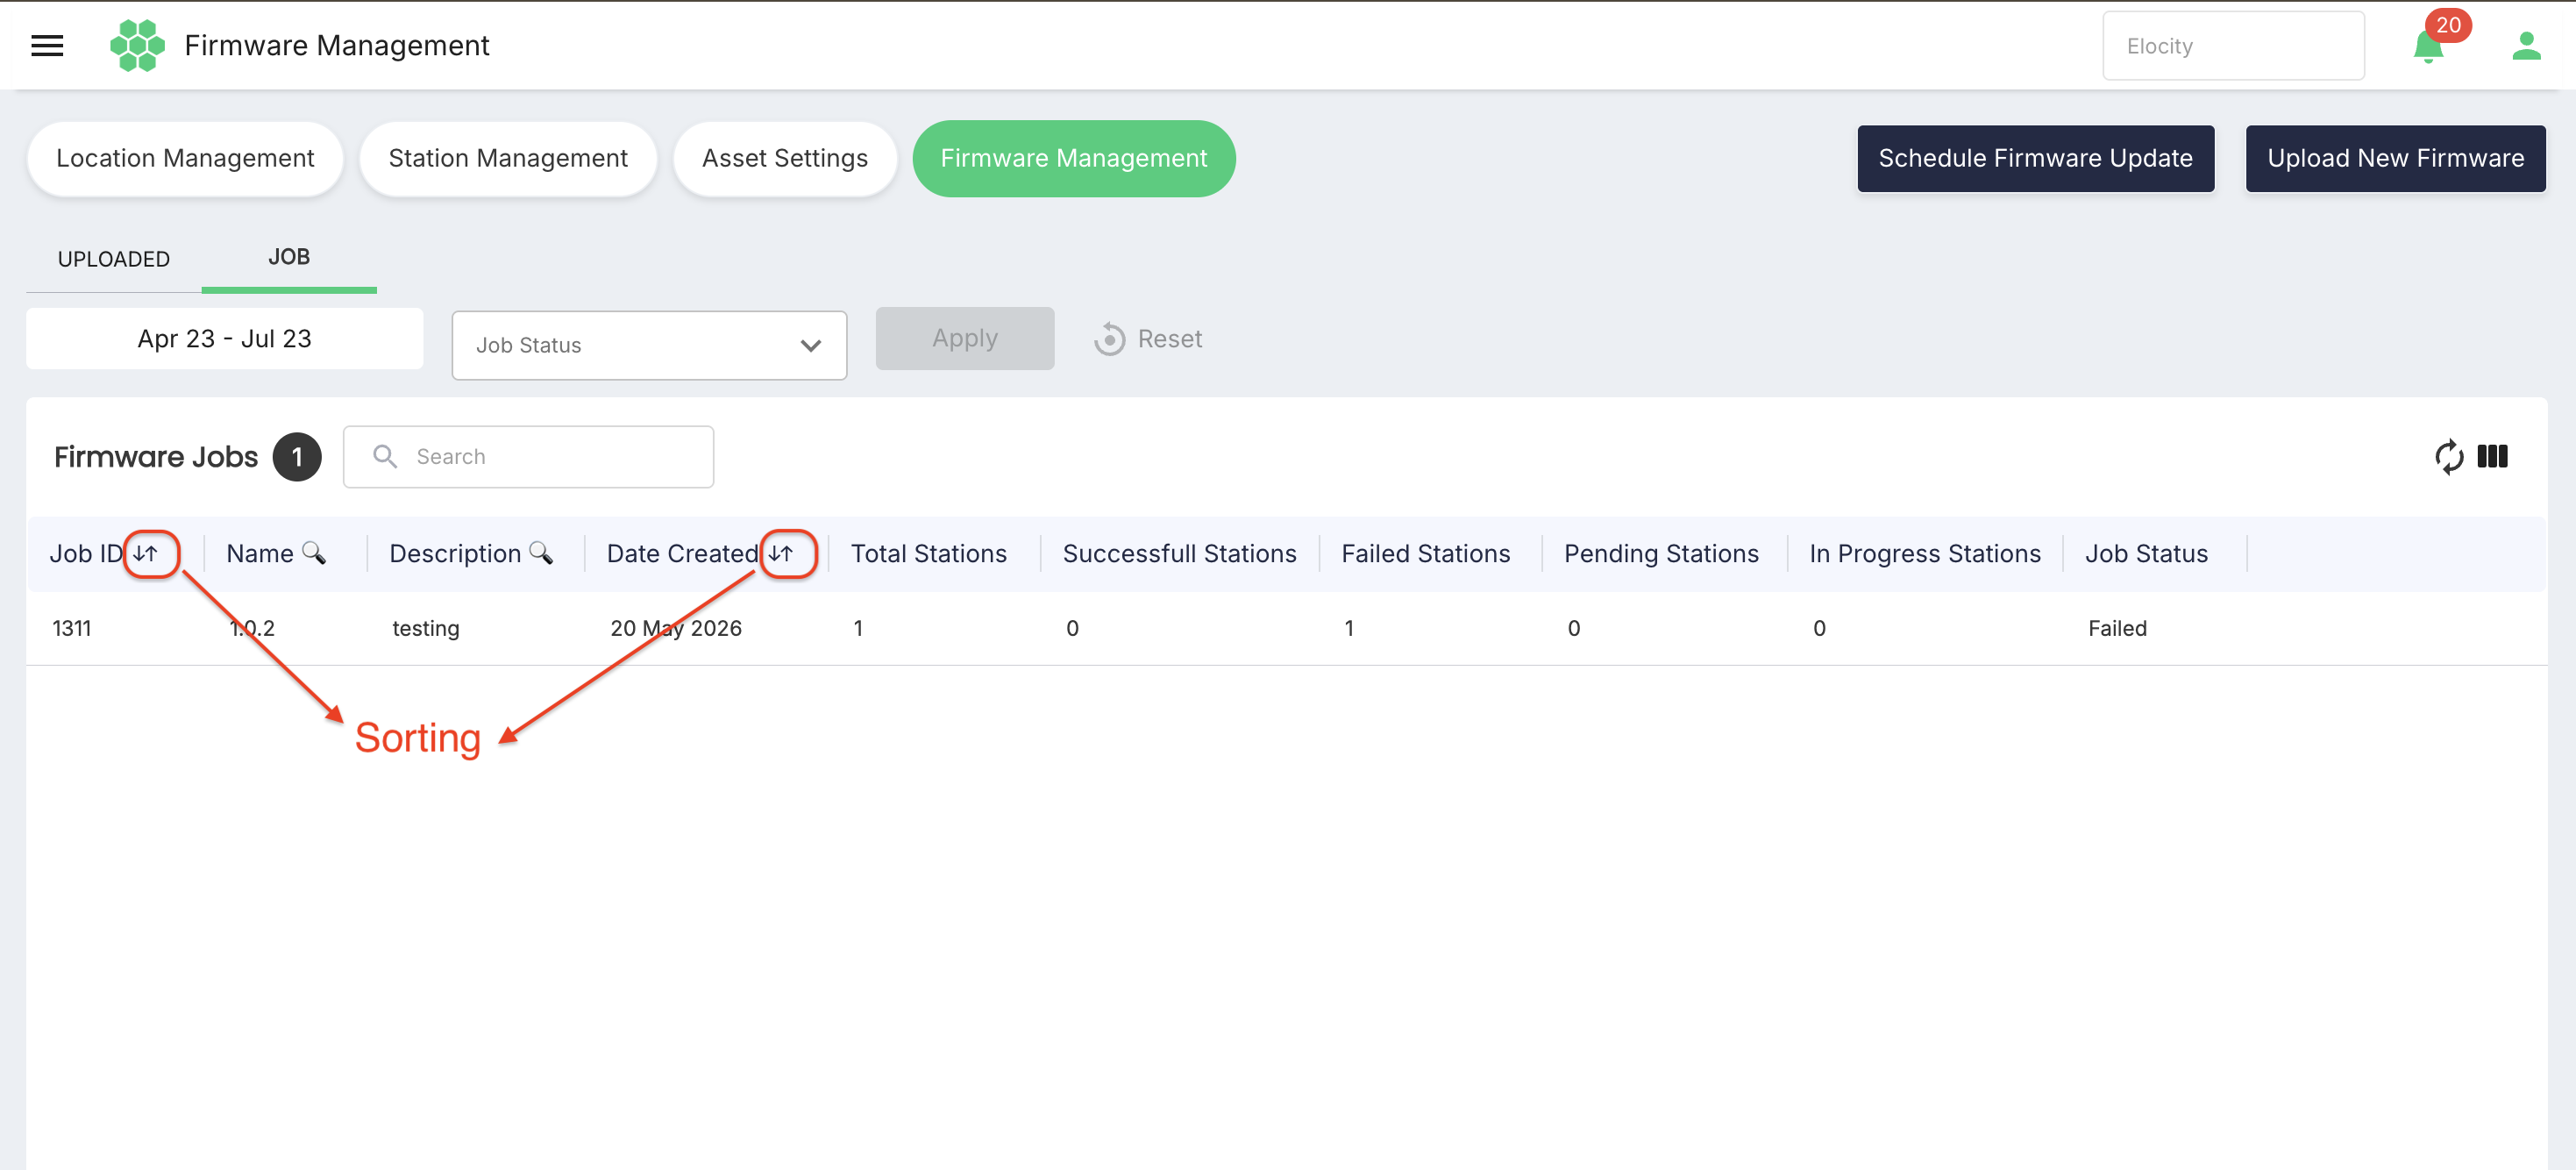
Select a sortable heading to cycle through ascending, descending, and no-sort states. Keyboard users can focus a sortable heading and press Enter.
5. Viewing Uploaded Firmware
- Open Assets > Firmware Management.
- Select the UPLOADED tab.
- Set a date range, if required.
- Select one or more values in Make.
- Set the All Models filter as required.
- Select Apply.
- Use Search, sorting, Refresh, or Column Filter to refine the grid presentation.
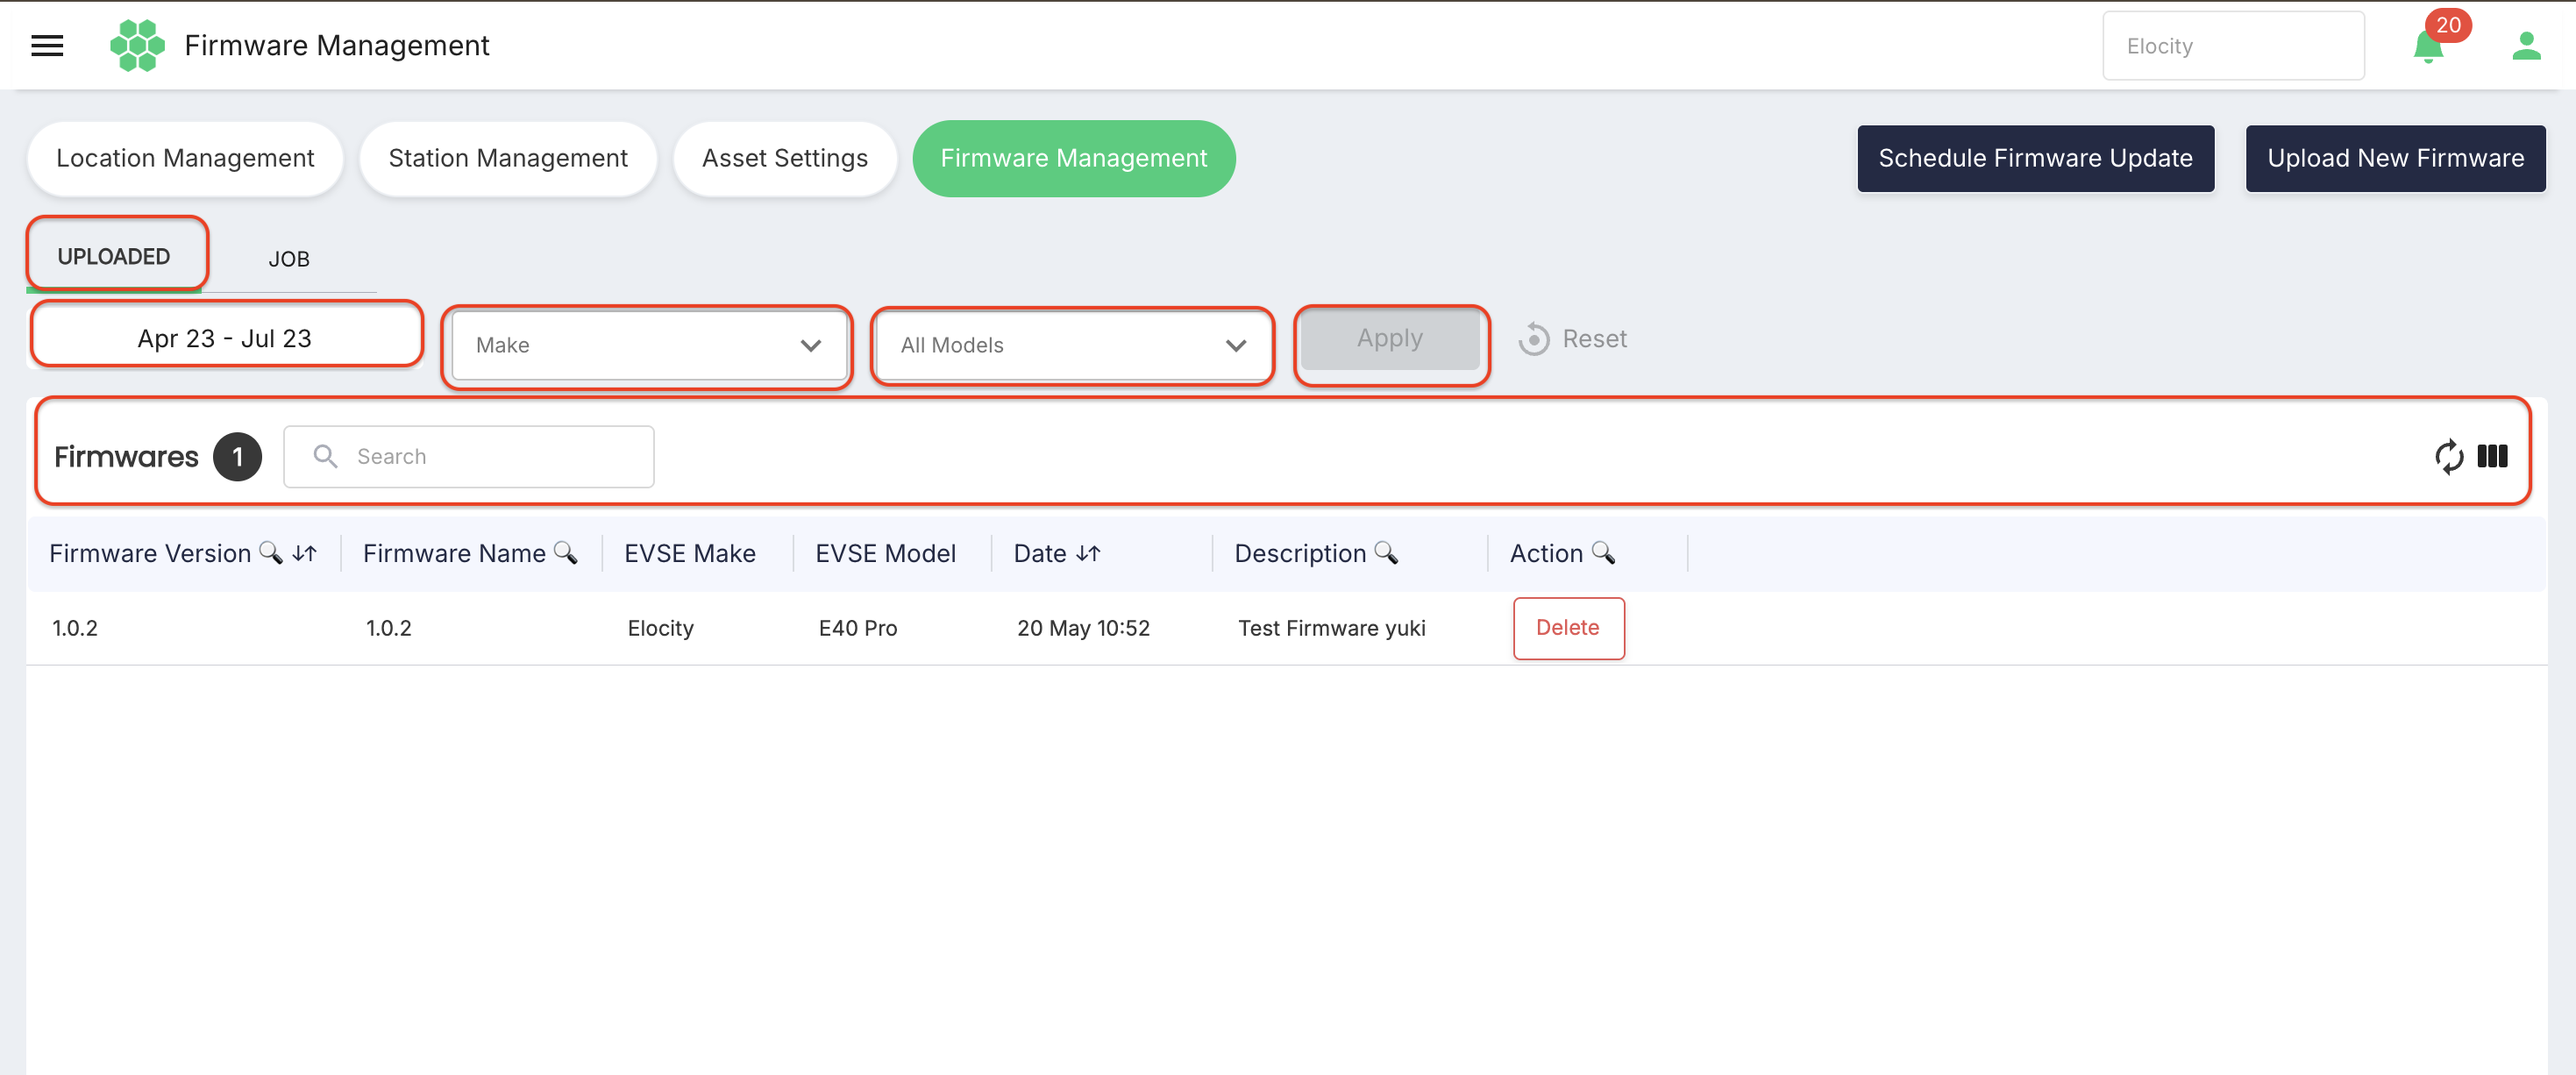
The Make filter is a multi-select list and includes a Select all option.
Uploaded firmware columns
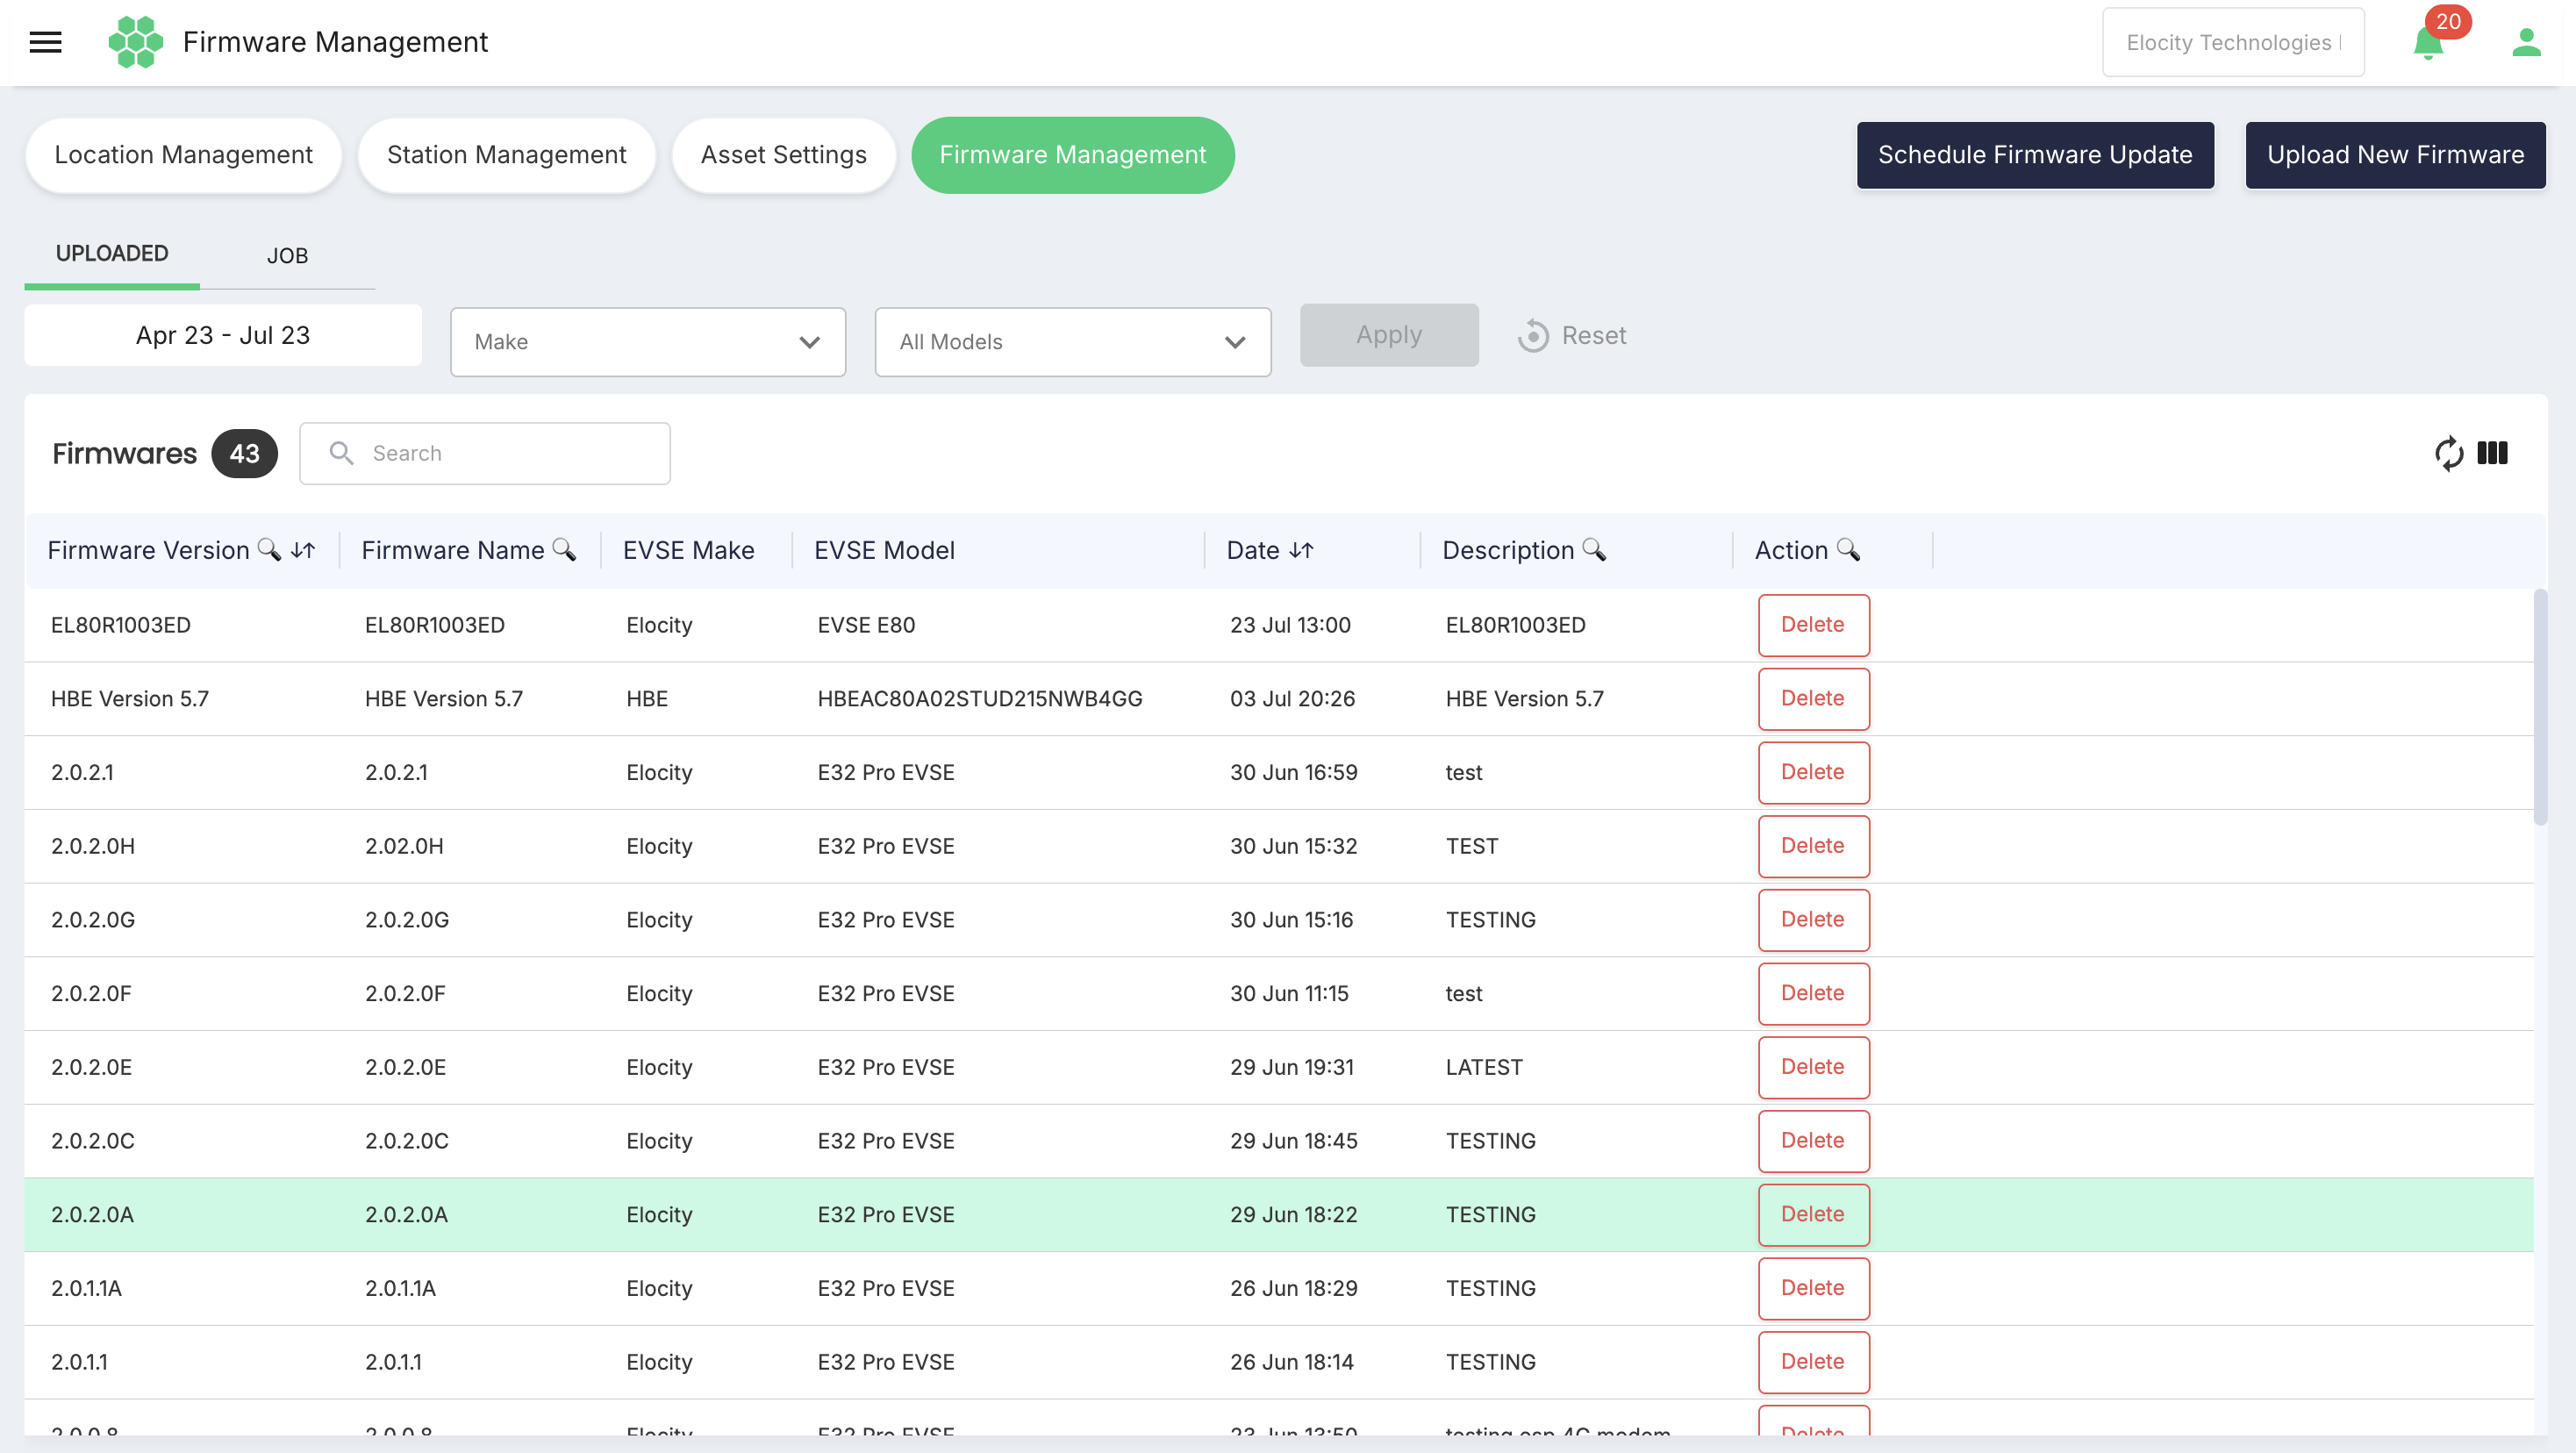
| Column | Description |
|---|---|
| Firmware Version | Firmware version identifier entered during upload. |
| Firmware Name | Code or name assigned to the particular firmware update. |
| EVSE Make | Charging-equipment manufacturer associated with the firmware. |
| EVSE Model | Charging-equipment model associated with the firmware. |
| Date | Date and time shown for the uploaded record. |
| Description | Value stored in the Description column. In the reviewed record, this column displayed 16 MB; its intended content requires confirmation. |
| Action | Contains the available row action, currently Delete. |
6. Uploading New Firmware
Open the upload form
- From Firmware Management, select Upload New Firmware.
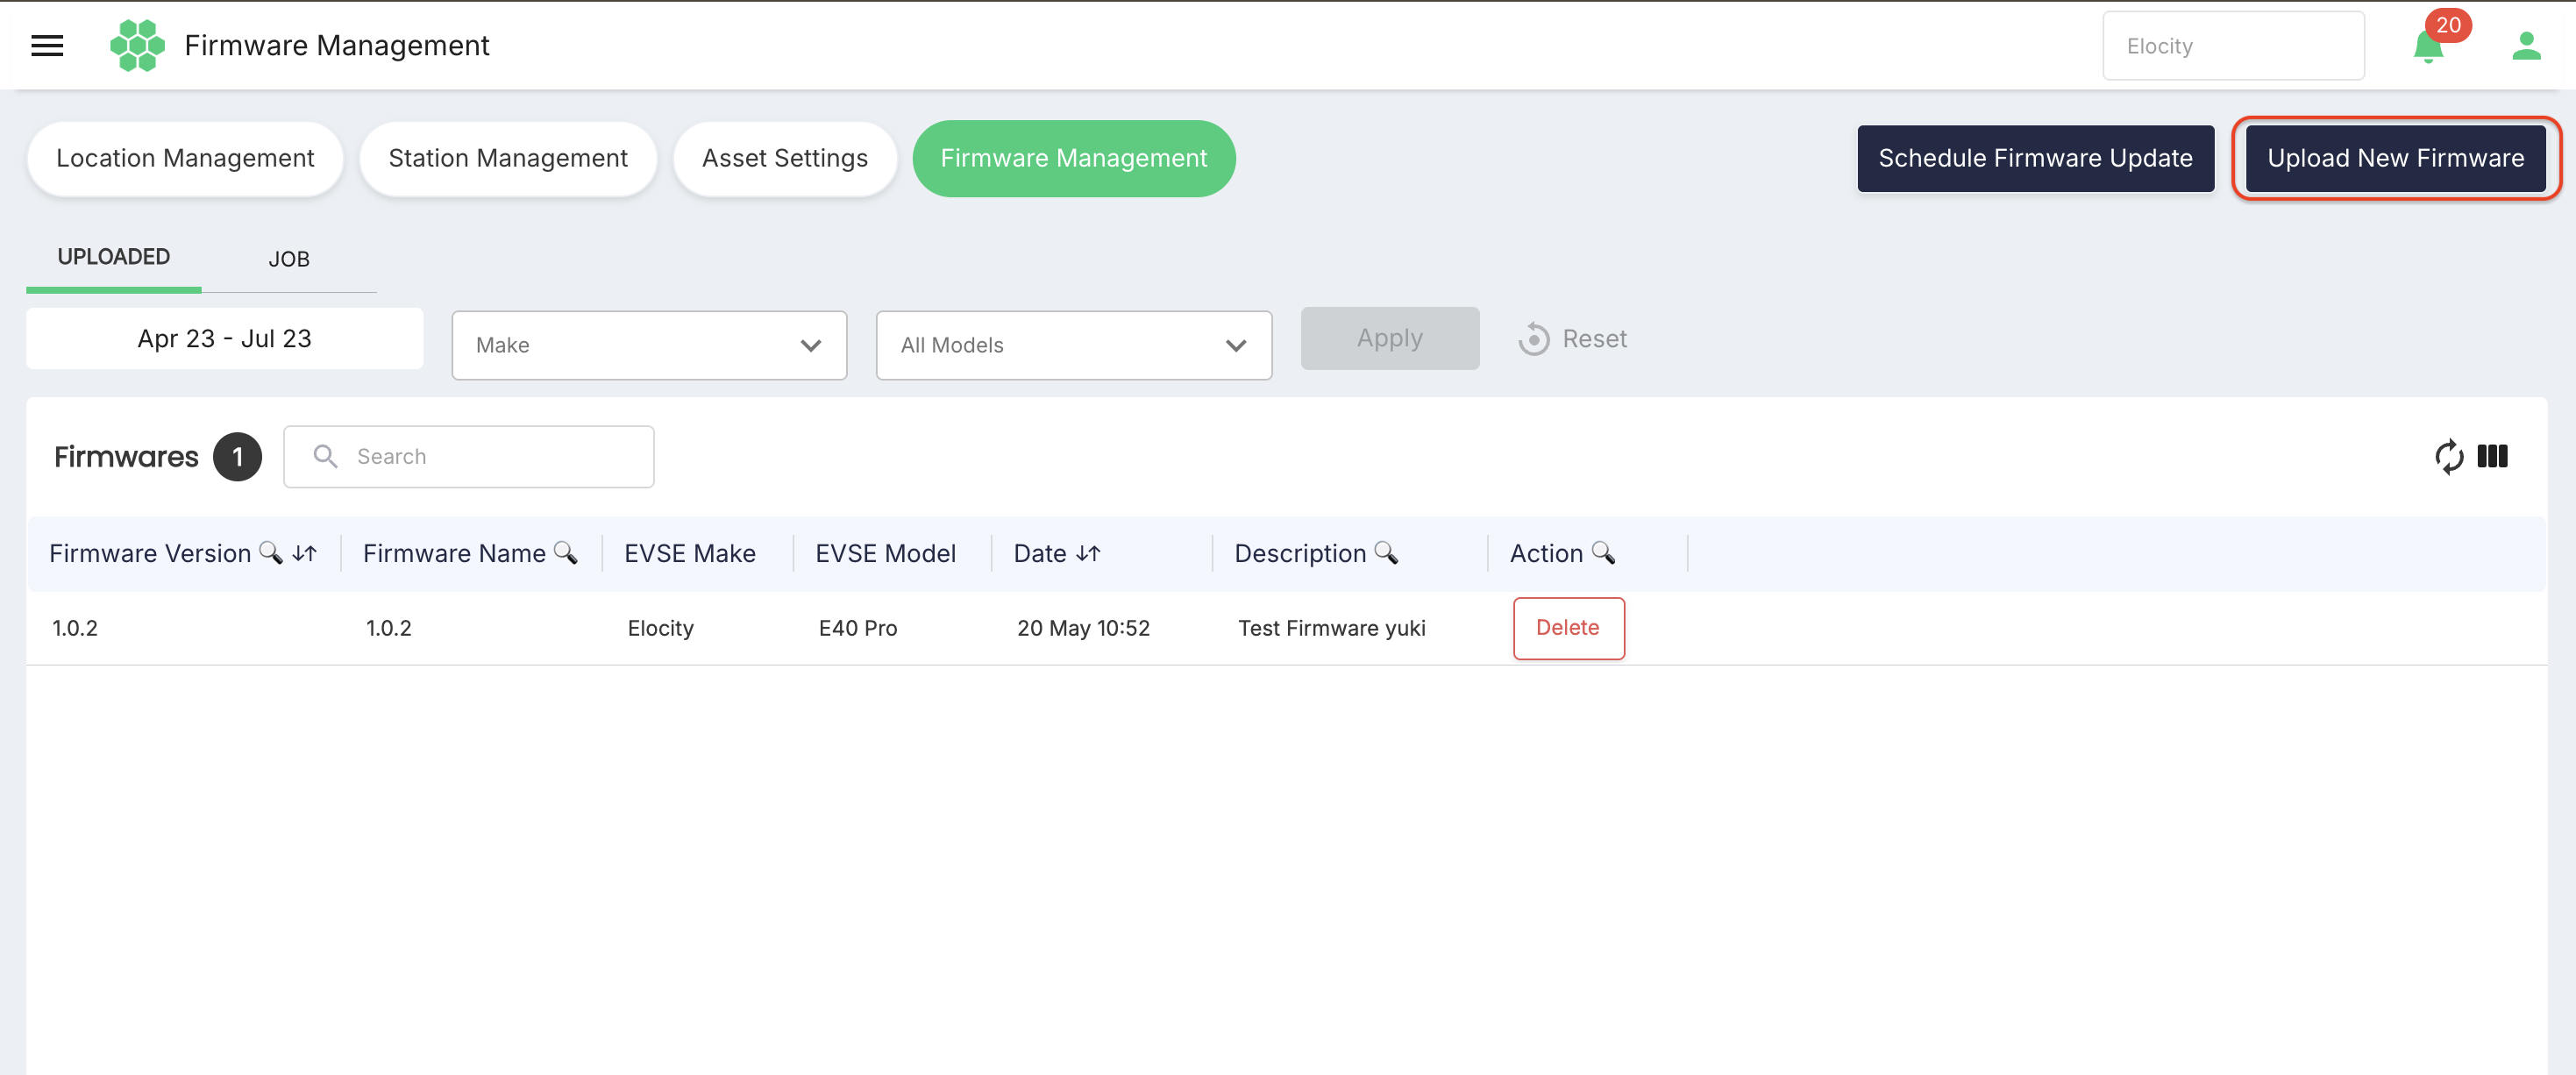
- The portal opens the Upload New Firmware page.
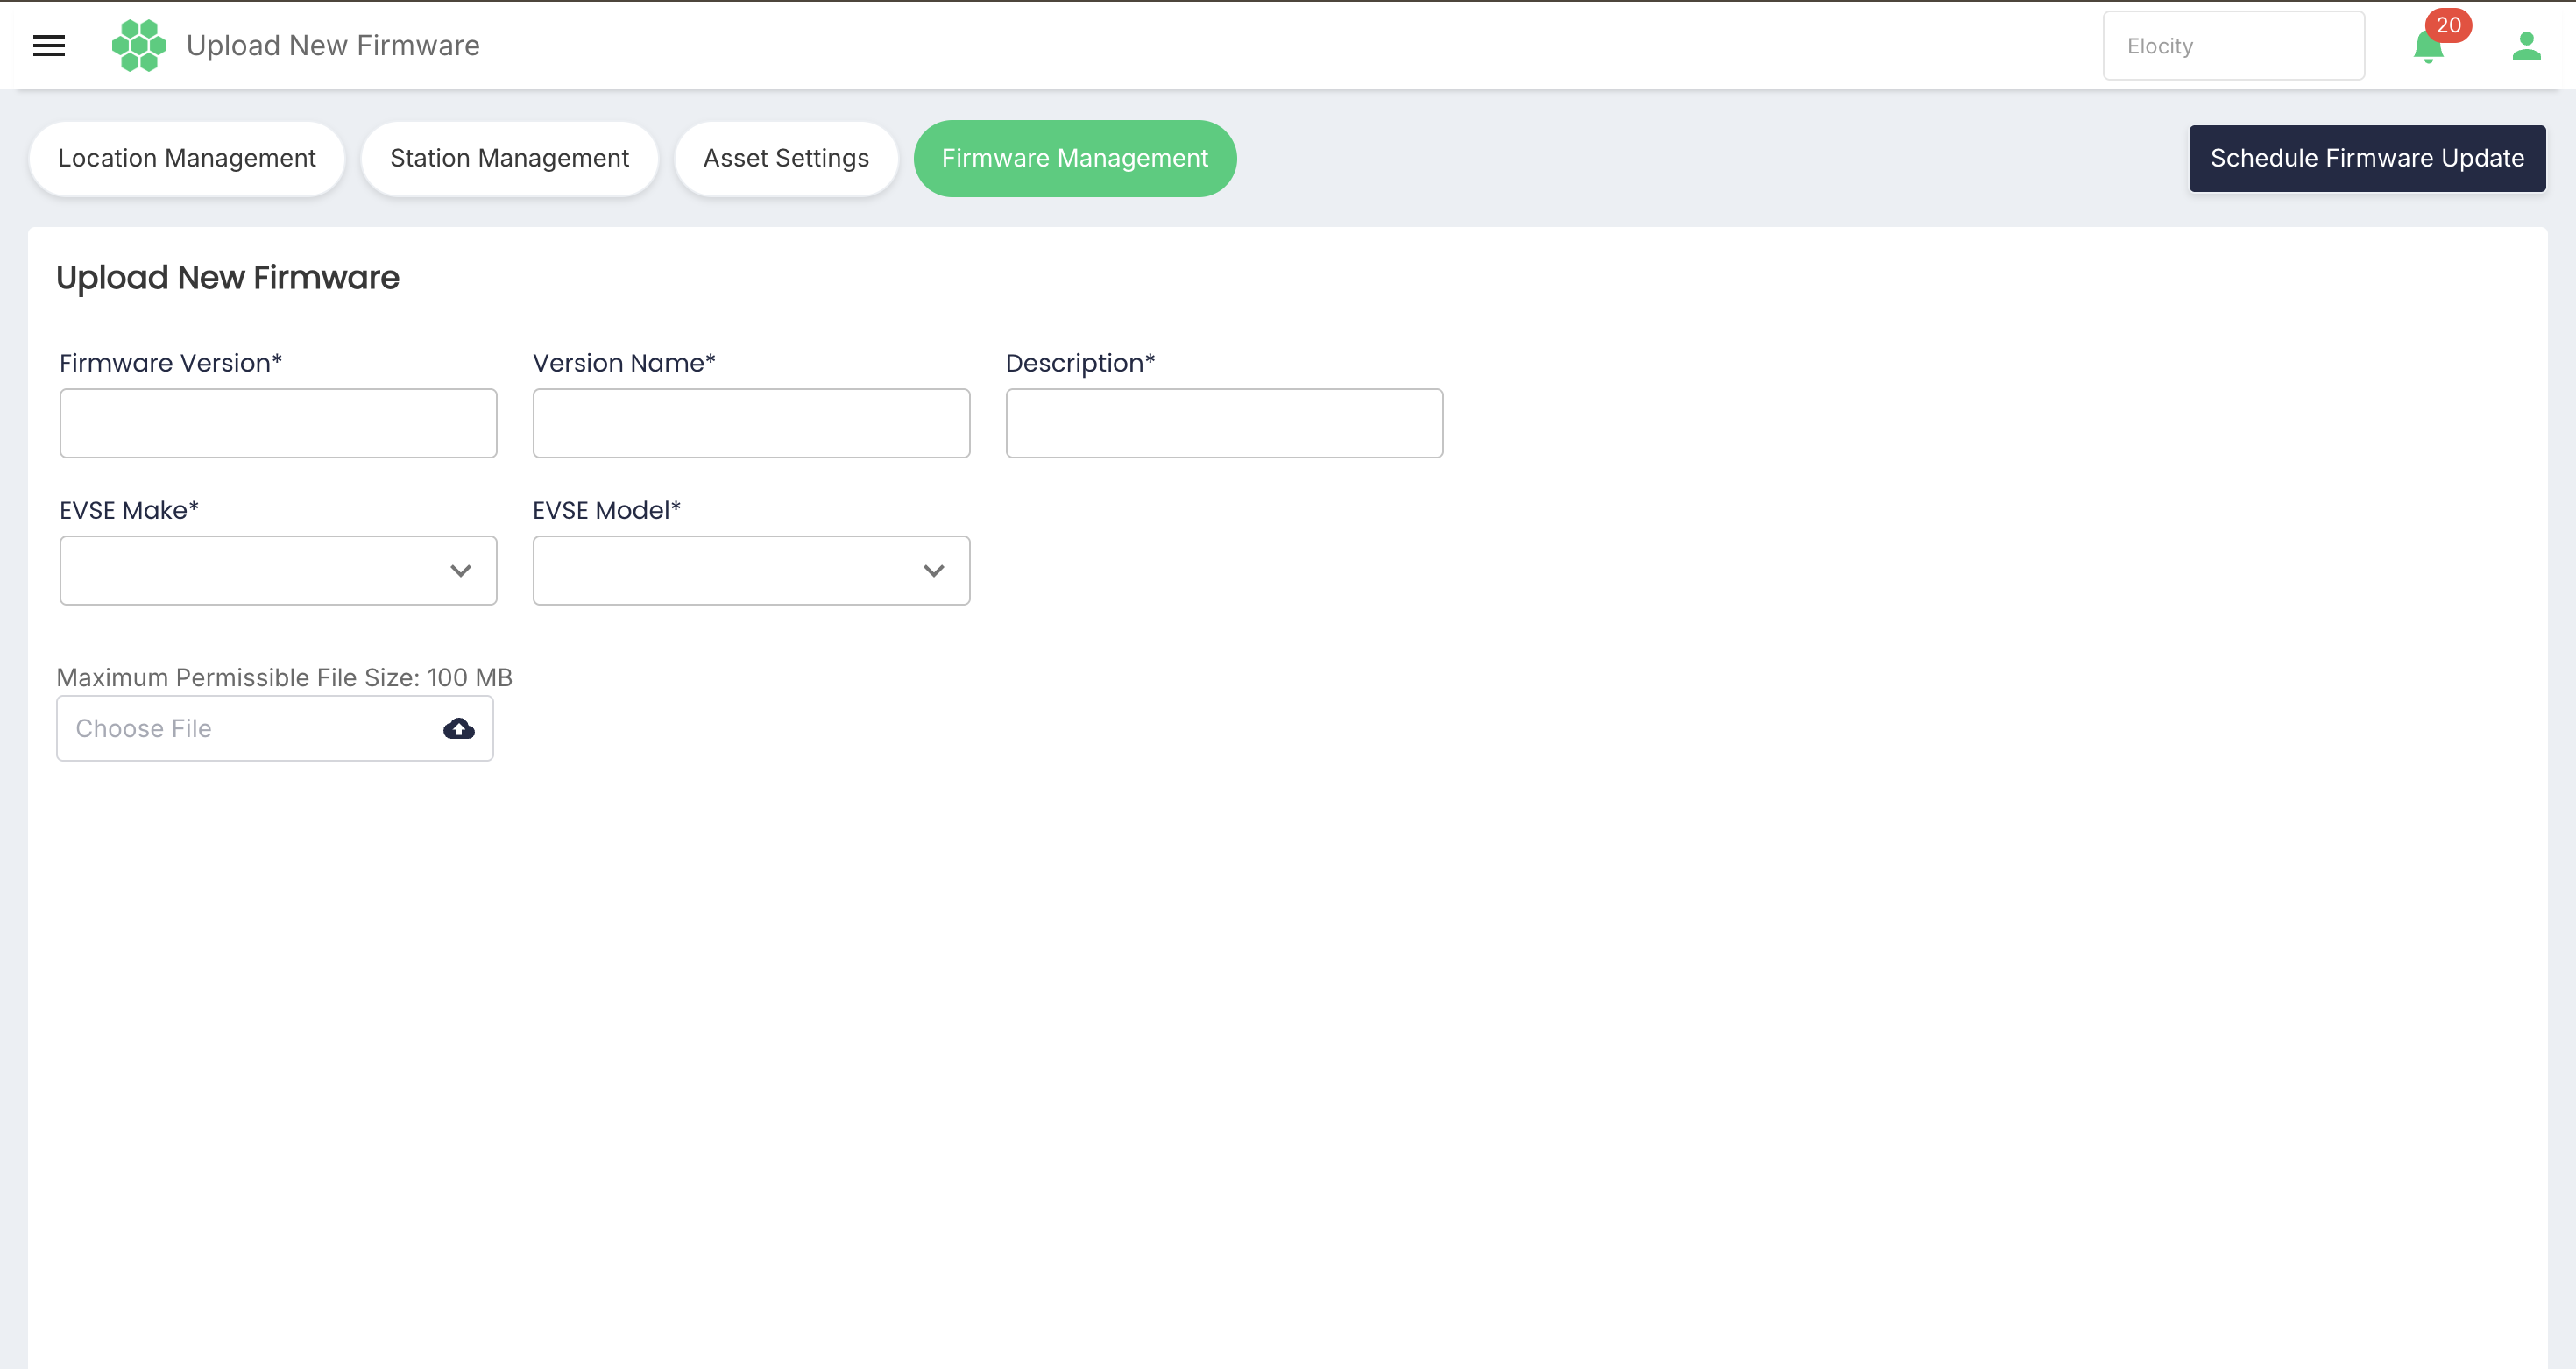
Upload form fields
| Field | Required | Description |
|---|---|---|
| Firmware Version | Yes | Software version number for the firmware package. |
| Version Name | Yes | Code or name assigned to the particular firmware update. |
| Description | Yes | Details of the changes or content covered by the firmware version. |
| EVSE Make | Yes | EVSE manufacturer associated with the firmware. |
| EVSE Model | Yes | EVSE model associated with the firmware. |
| Choose File | Required to upload | Opens the local file selector. Supported executable and ZIP-based files are accepted. The portal enforces a 100 MB binary size limit. Exact supported extensions still require confirmation. |
Verified upload steps
- Enter Firmware Version.
- Enter Version Name.
- Enter Description.
- Select EVSE Make.
- Select EVSE Model.
- Select Choose File and choose the approved firmware file.
If the selected file exceeds the limit, the system instructs the user to upload a file smaller than 100 MB. After an upload completes, the portal displays a completion modal. The review intentionally stopped before selecting a production file, so the exact post-selection Upload control, progress behavior, and failure actions still require confirmation.
The application rejects reuse of the same Firmware Version or Version Name. The exact scope of this uniqueness rule—global, business-specific, or EVSE make/model-specific—still requires confirmation.
7. Scheduling a Firmware Update
Open the scheduling form
- From Firmware Management, select Schedule Firmware Update.
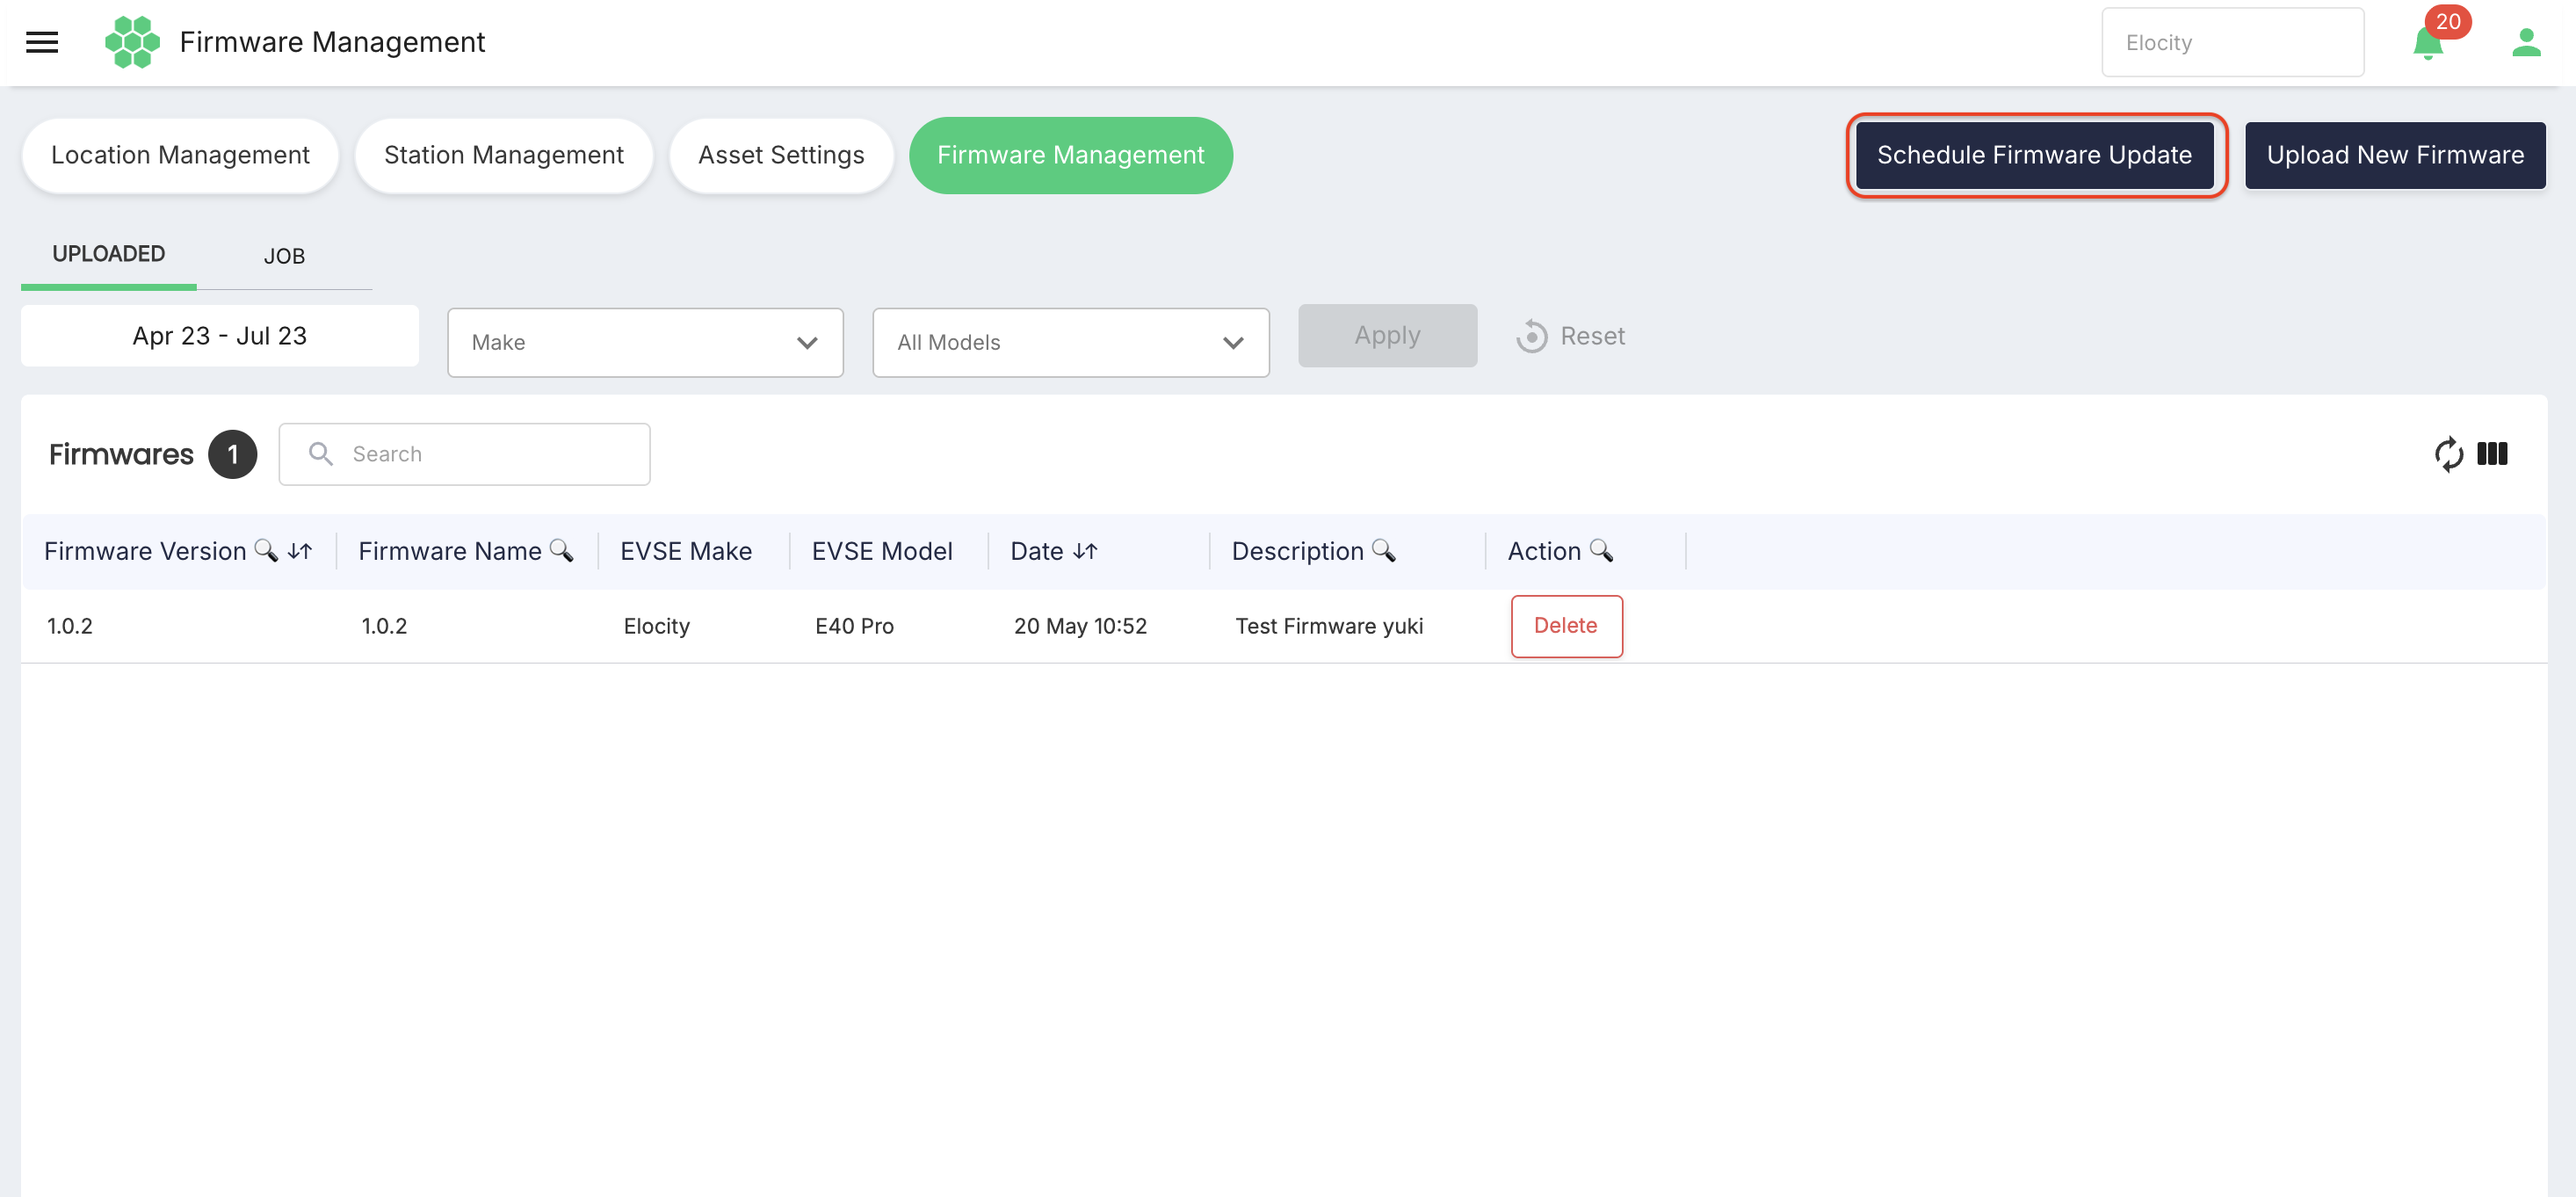
- The portal opens the Schedule Firmware Update page.
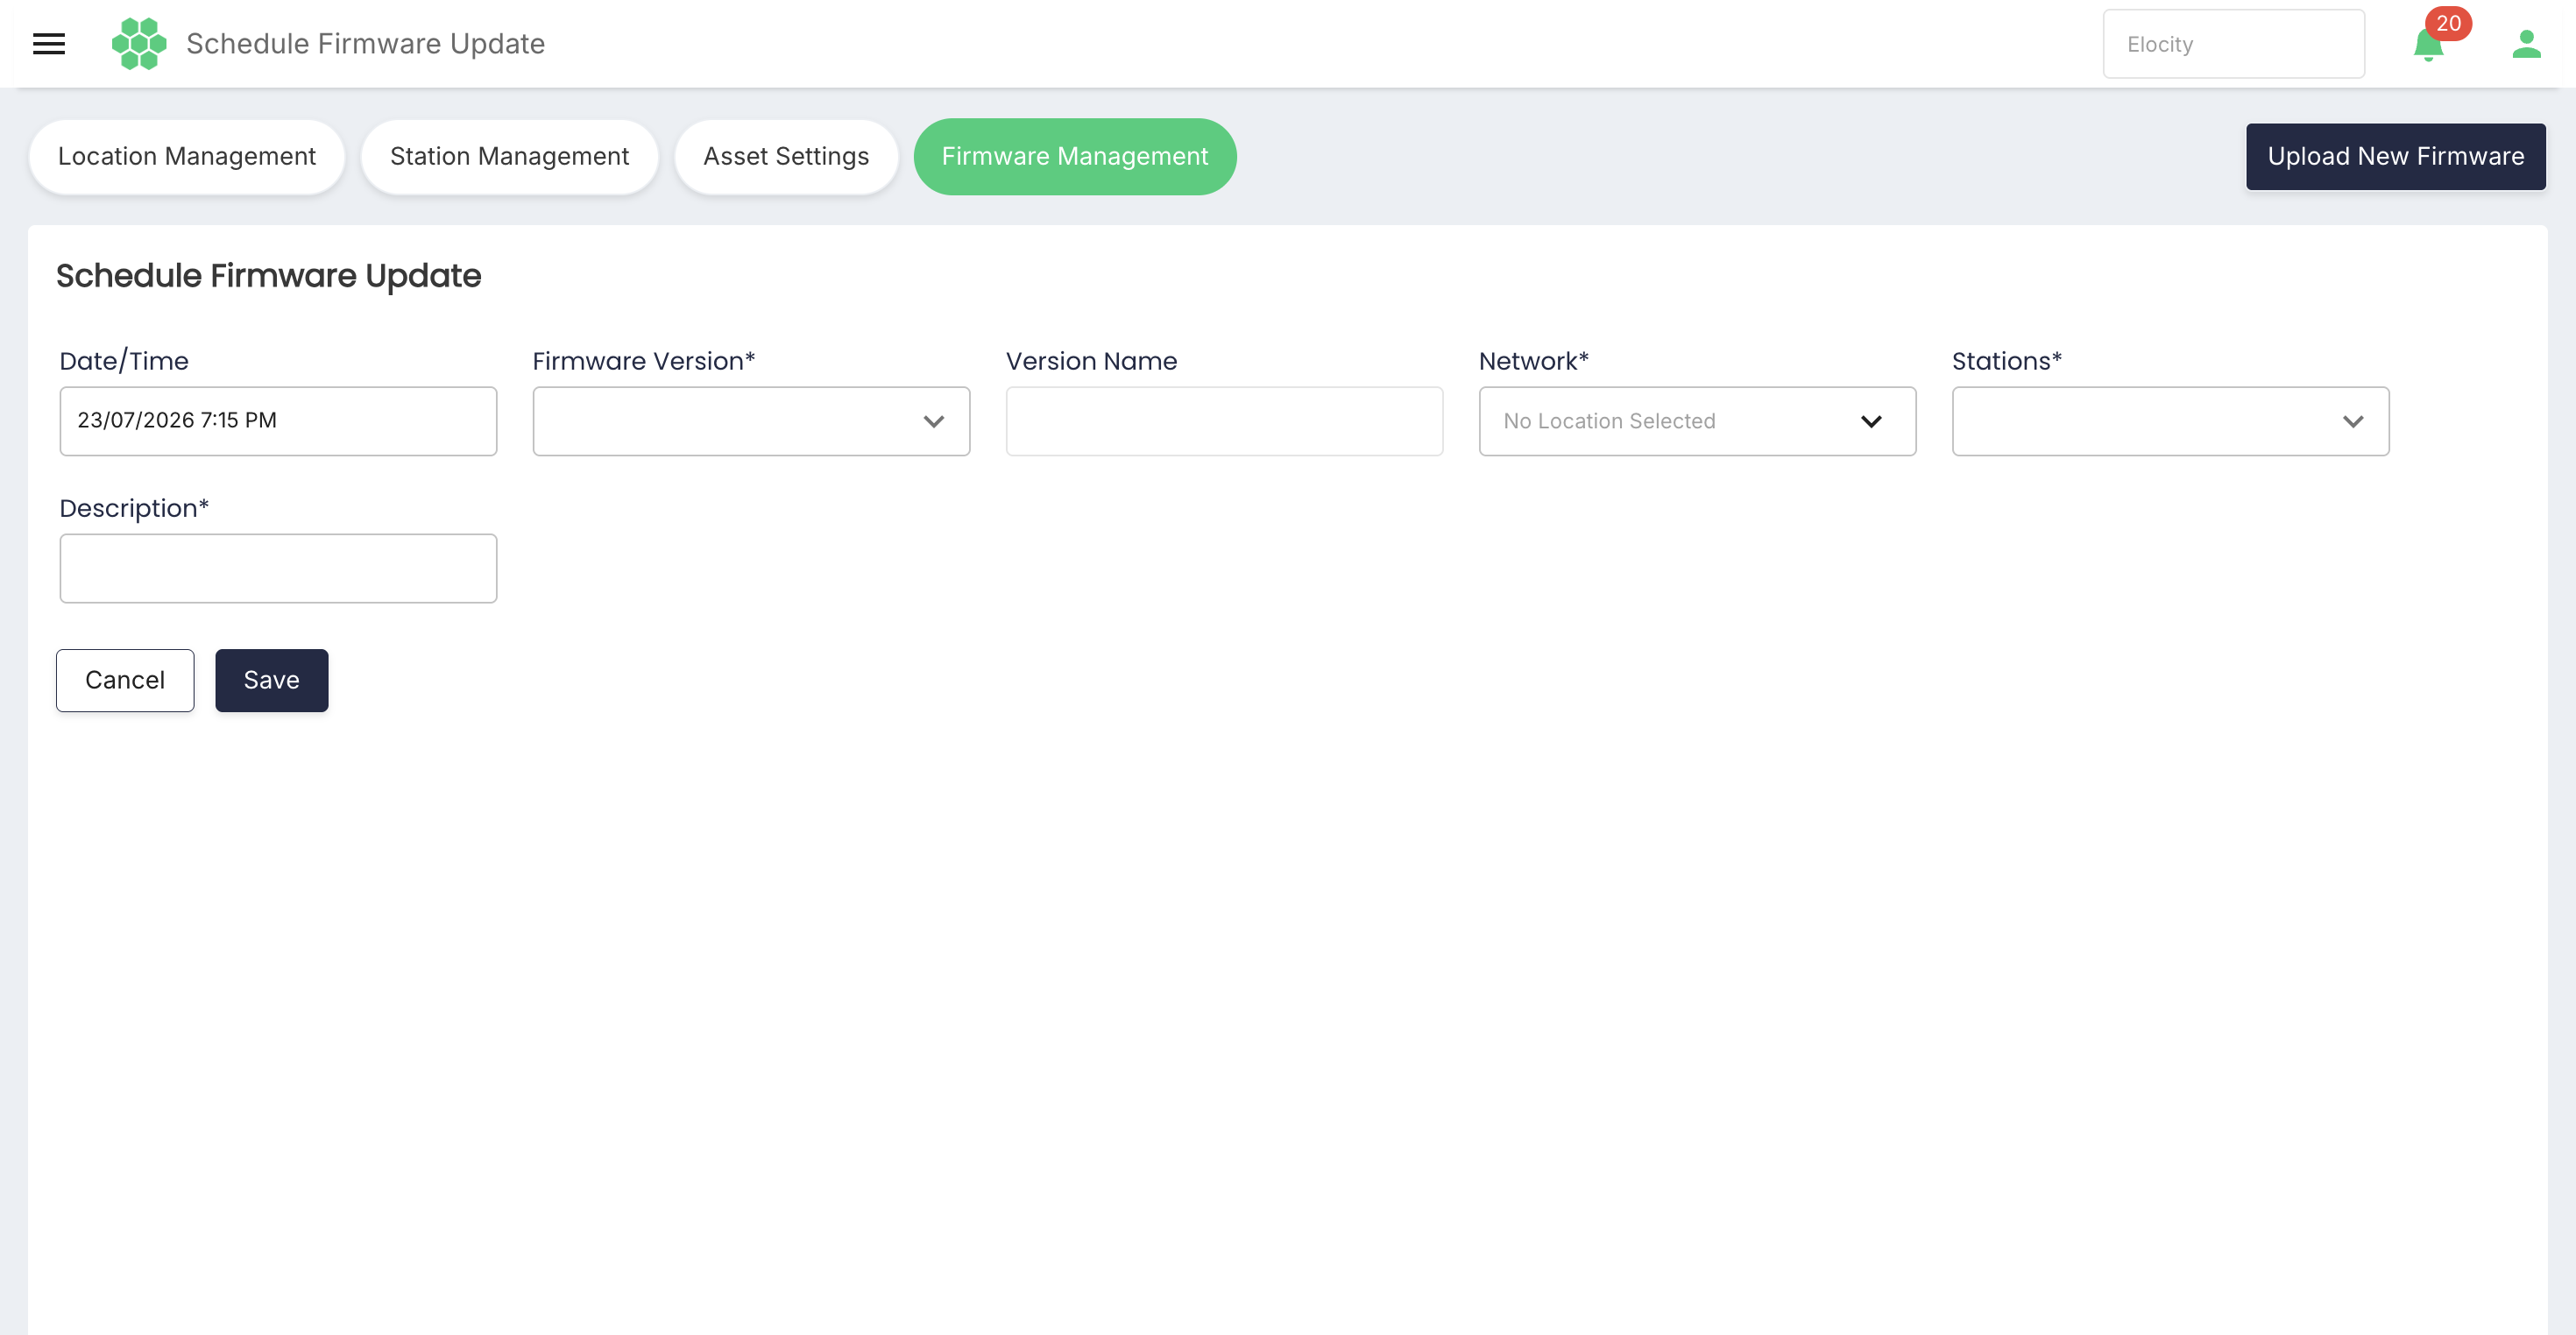
Scheduling fields
| Field | Required | Description |
|---|---|---|
| Date/Time | No visible asterisk | Date and time displayed for the job. The portal uses the browser's timezone. Rules for past, immediate, or recurring schedules still require confirmation. |
| Firmware Version | Yes | Uploaded firmware version to schedule. The visible option combined a version identifier with an EVSE model. |
| Version Name | Read-only | Disabled field displayed below Firmware Version. Its population behavior was not changed during the review. |
| Network | Yes | Opens the Select Locations dialog. |
| Stations | Yes | Station selector. After the network selection, the portal shows stations that support the selected firmware, regardless of station status. With no network location selected, the list showed No options exist. |
| Description | Yes | Description for the firmware-update job. |
Select network locations
- Select the Network field.
- In Select Locations, expand the location hierarchy with Toggle.
- Select the required checkbox or checkboxes.
- Review the selected-location summary.
- Select Done.
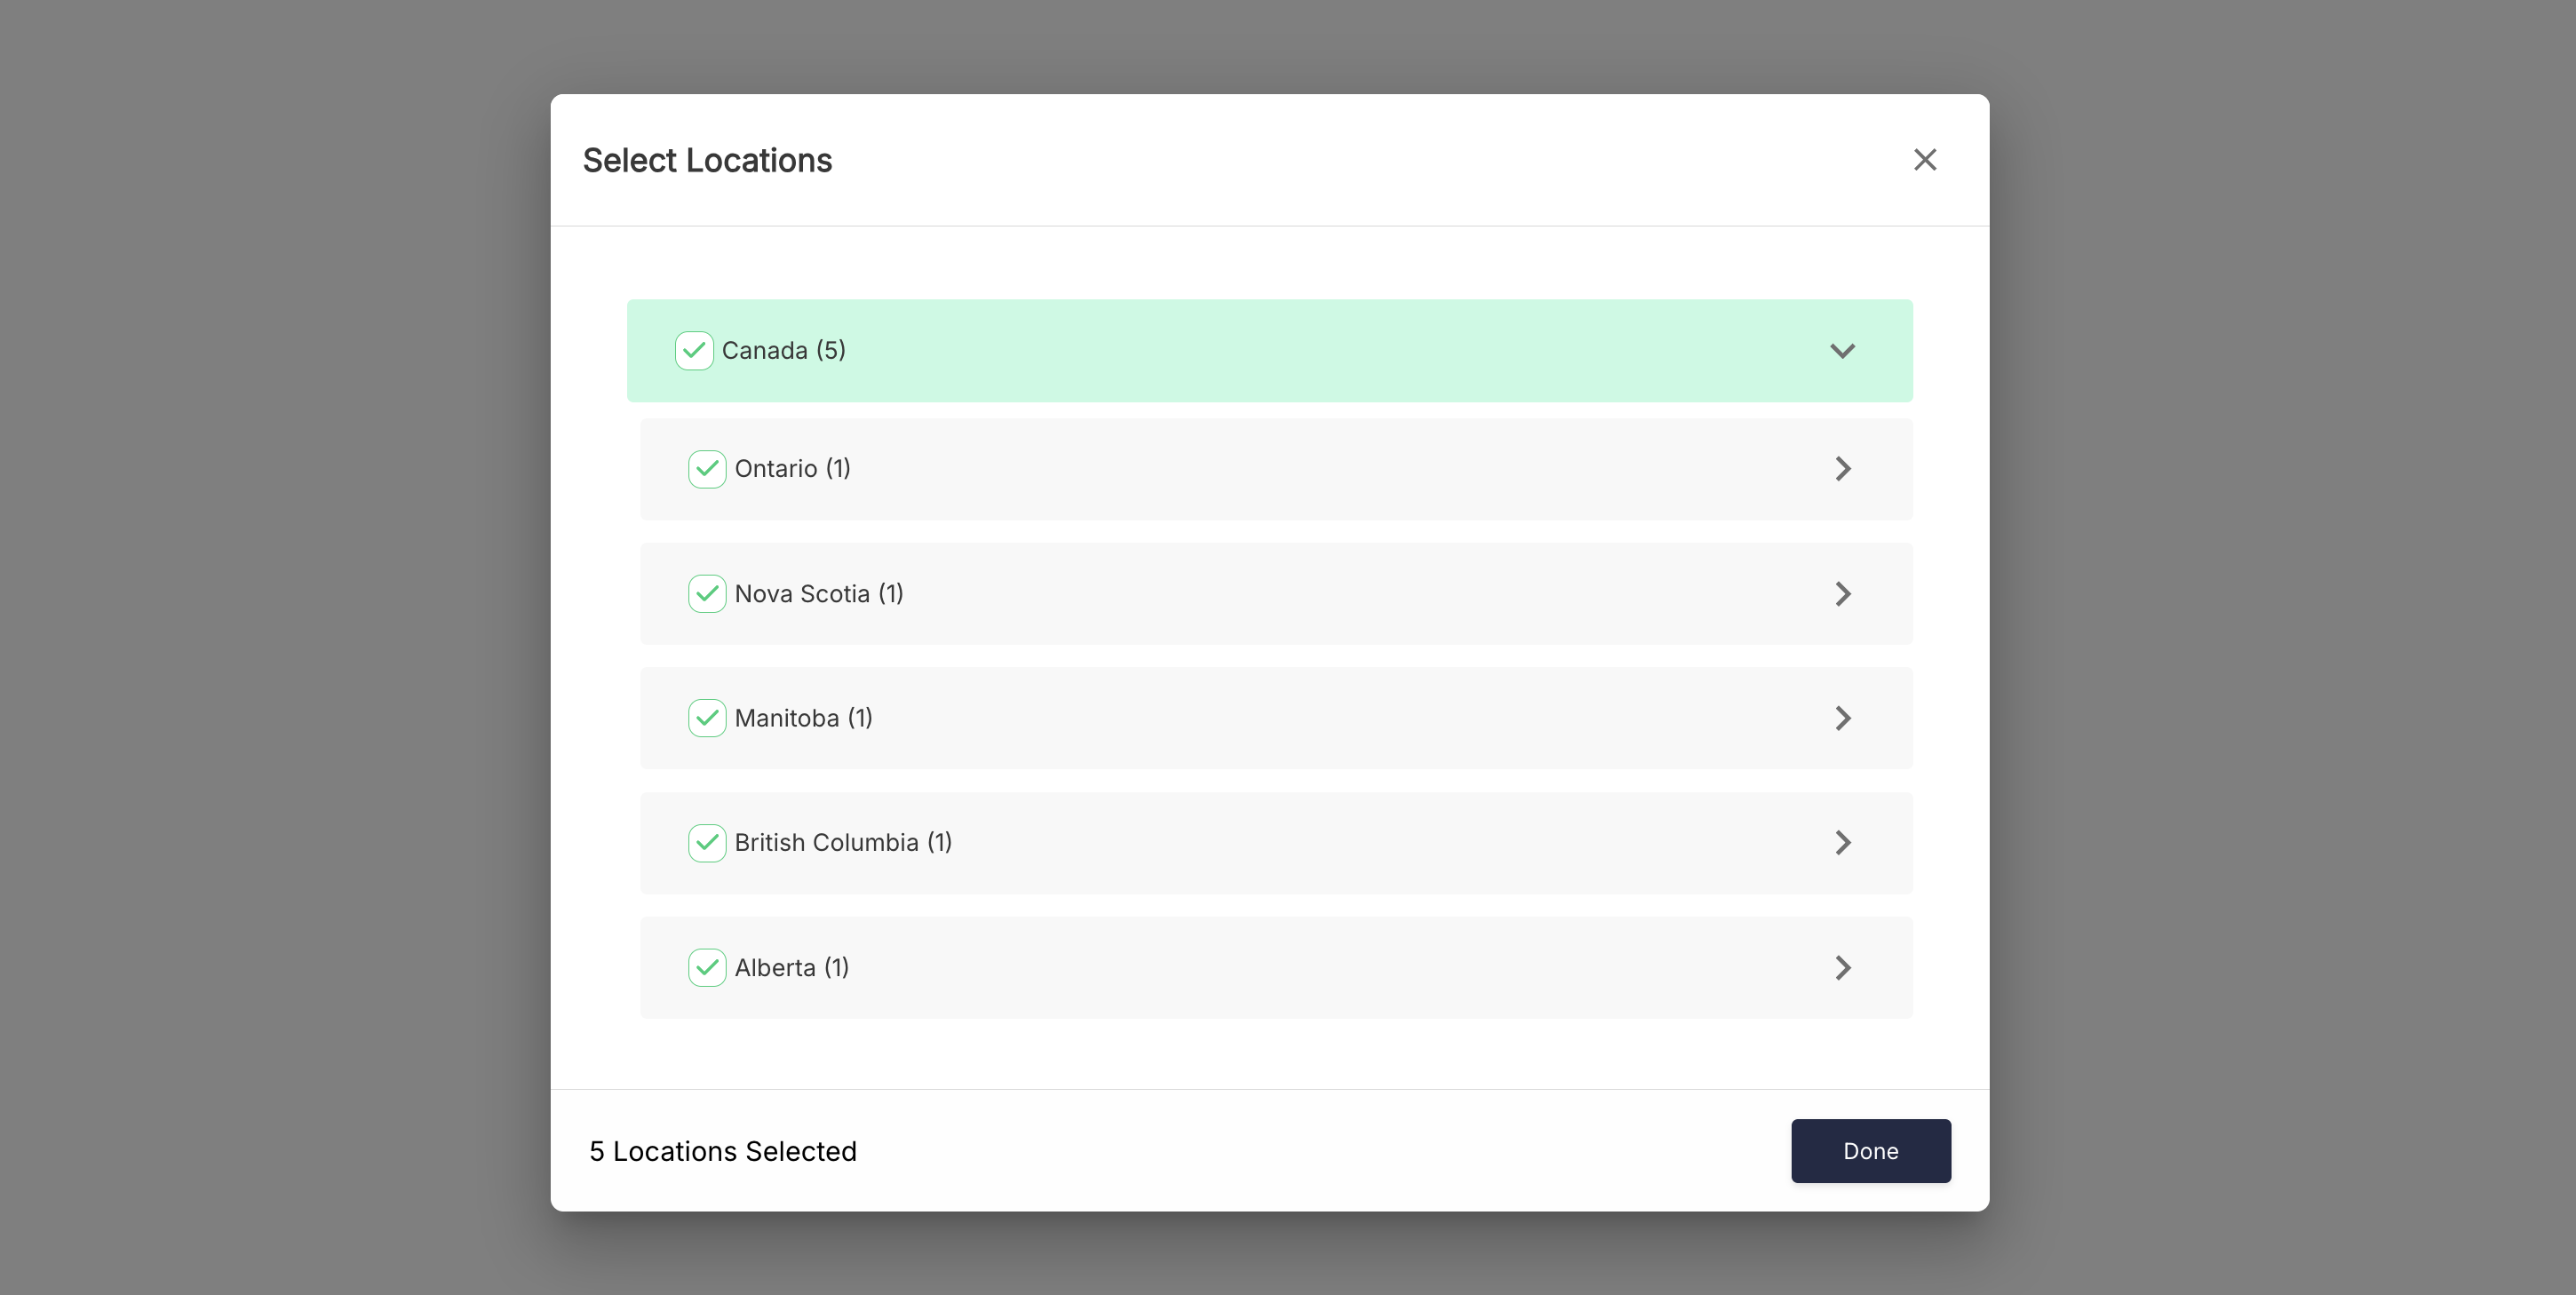
In the reviewed account, the hierarchy began with Canada, followed by Ontario. Done remained disabled while no location was selected.
Prepare the update job
- Verify the displayed Date/Time.
- Select the required Firmware Version.
- Review the read-only Version Name.
- Select one or more network locations.
- Select the required station or stations.
- Enter a Description.
- Review every field carefully.
- Select Save to create the job, or Cancel to leave without saving.
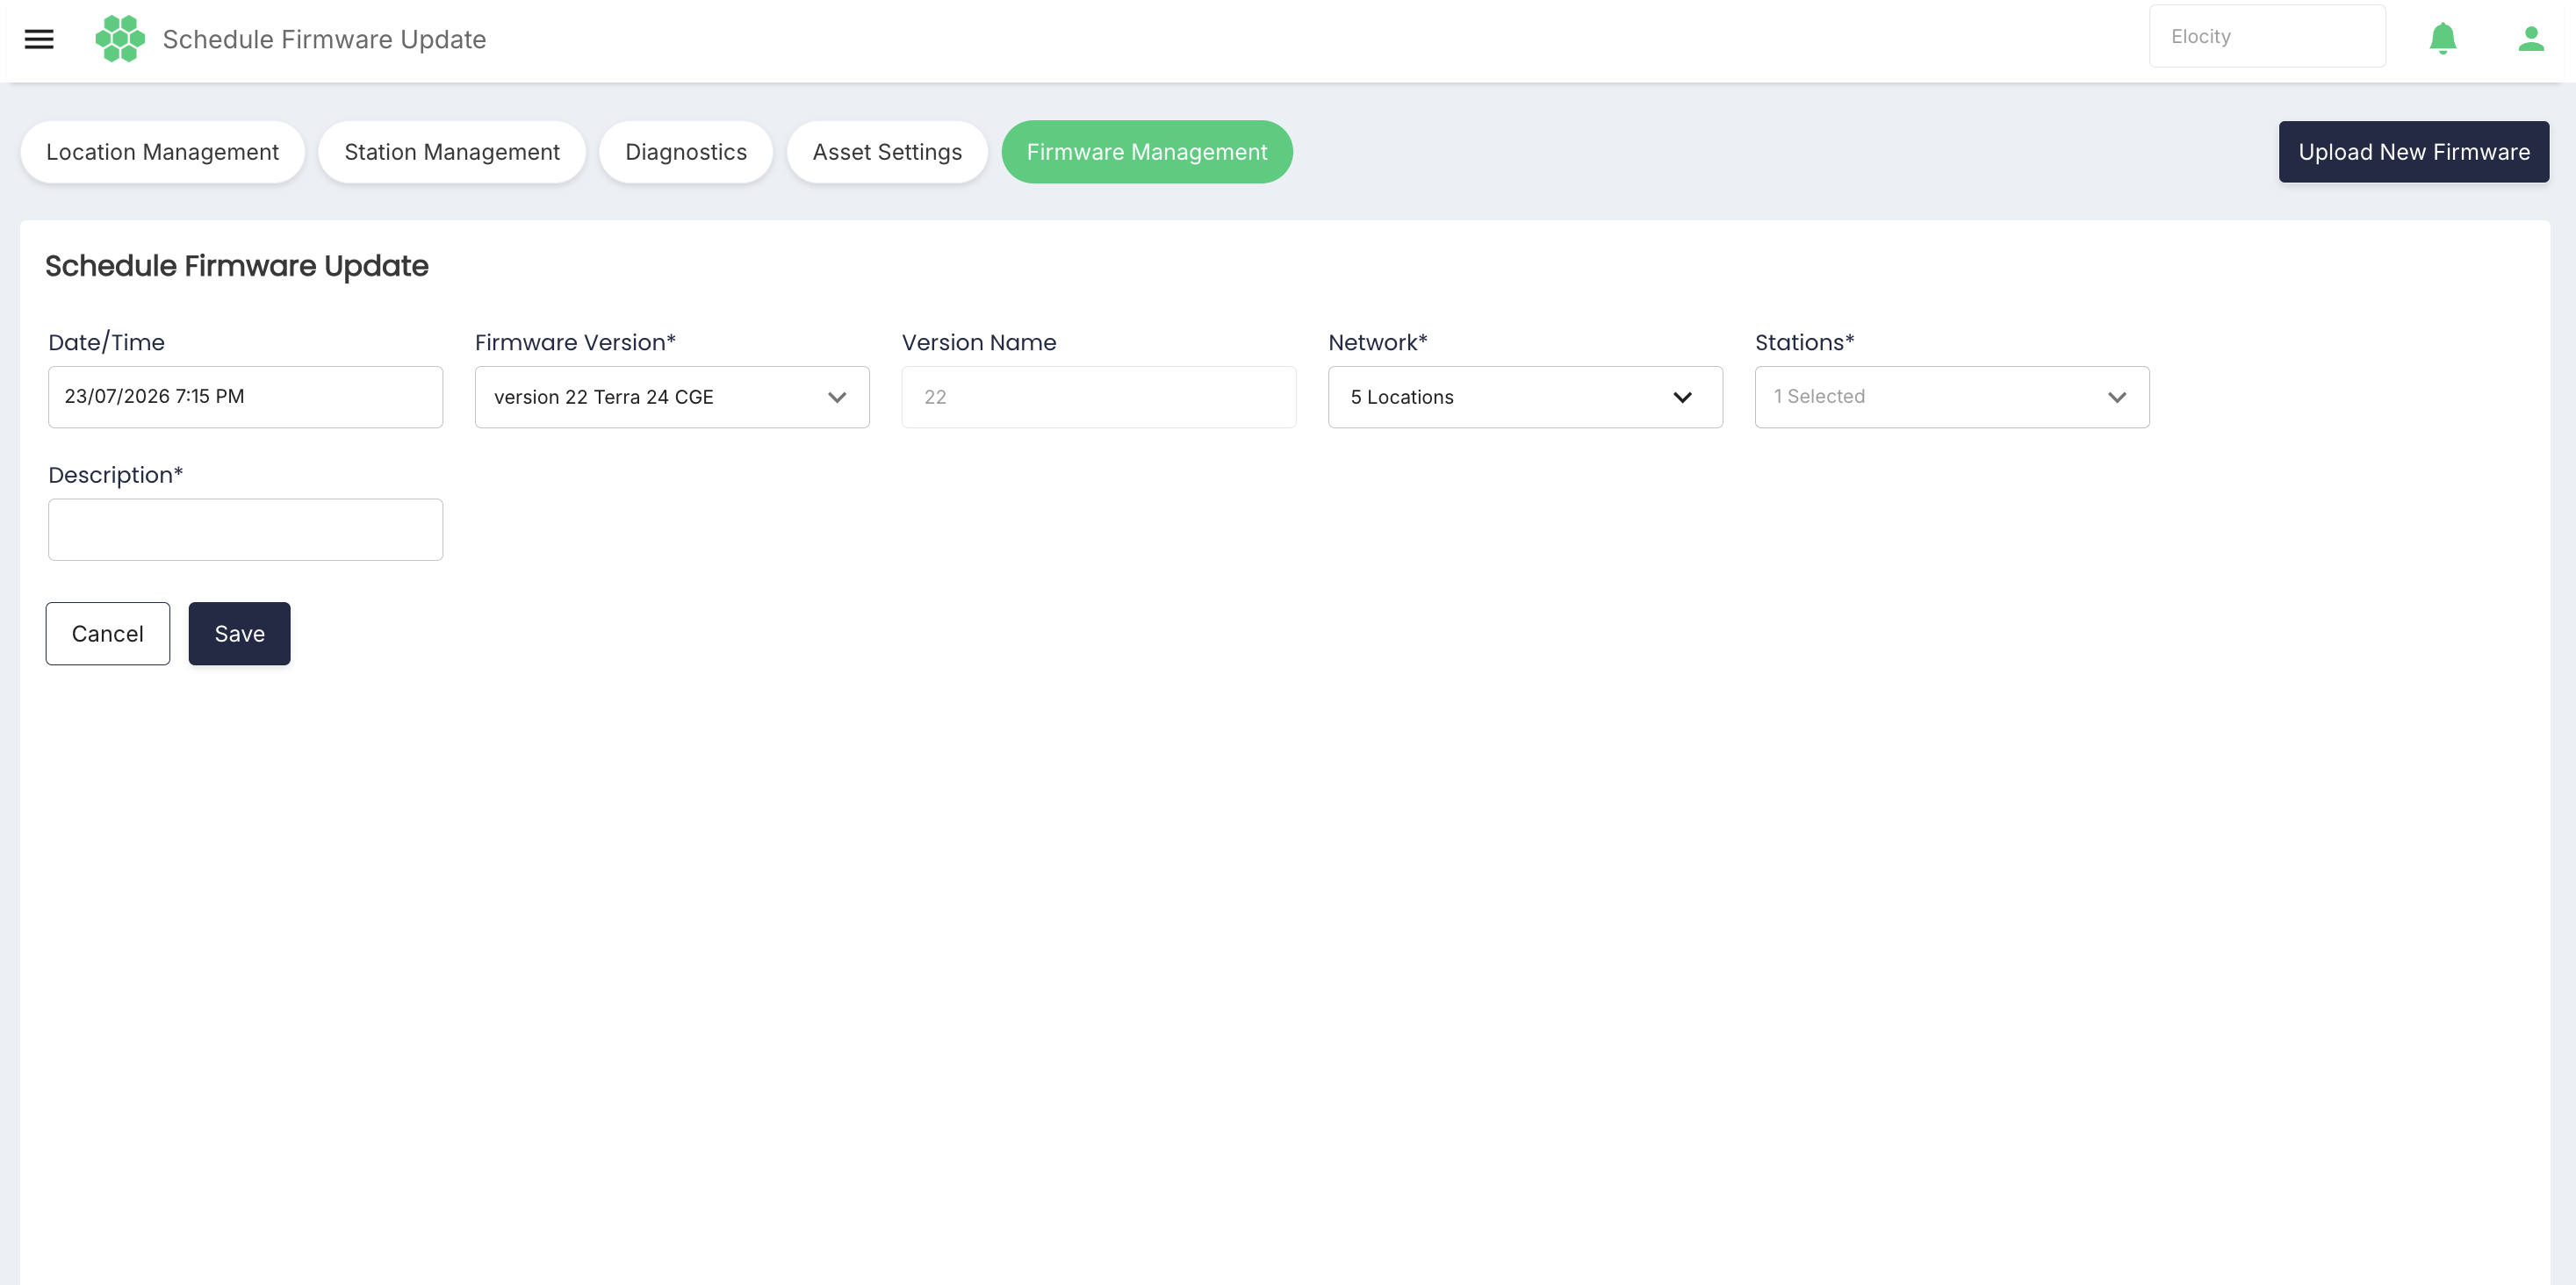
The live review used Cancel and did not create a firmware job.
The portal does not provide edit, cancel, pause, or reschedule controls for a Pending or In Progress job. For a Partially Successful job, retry is available only for the failed stations.
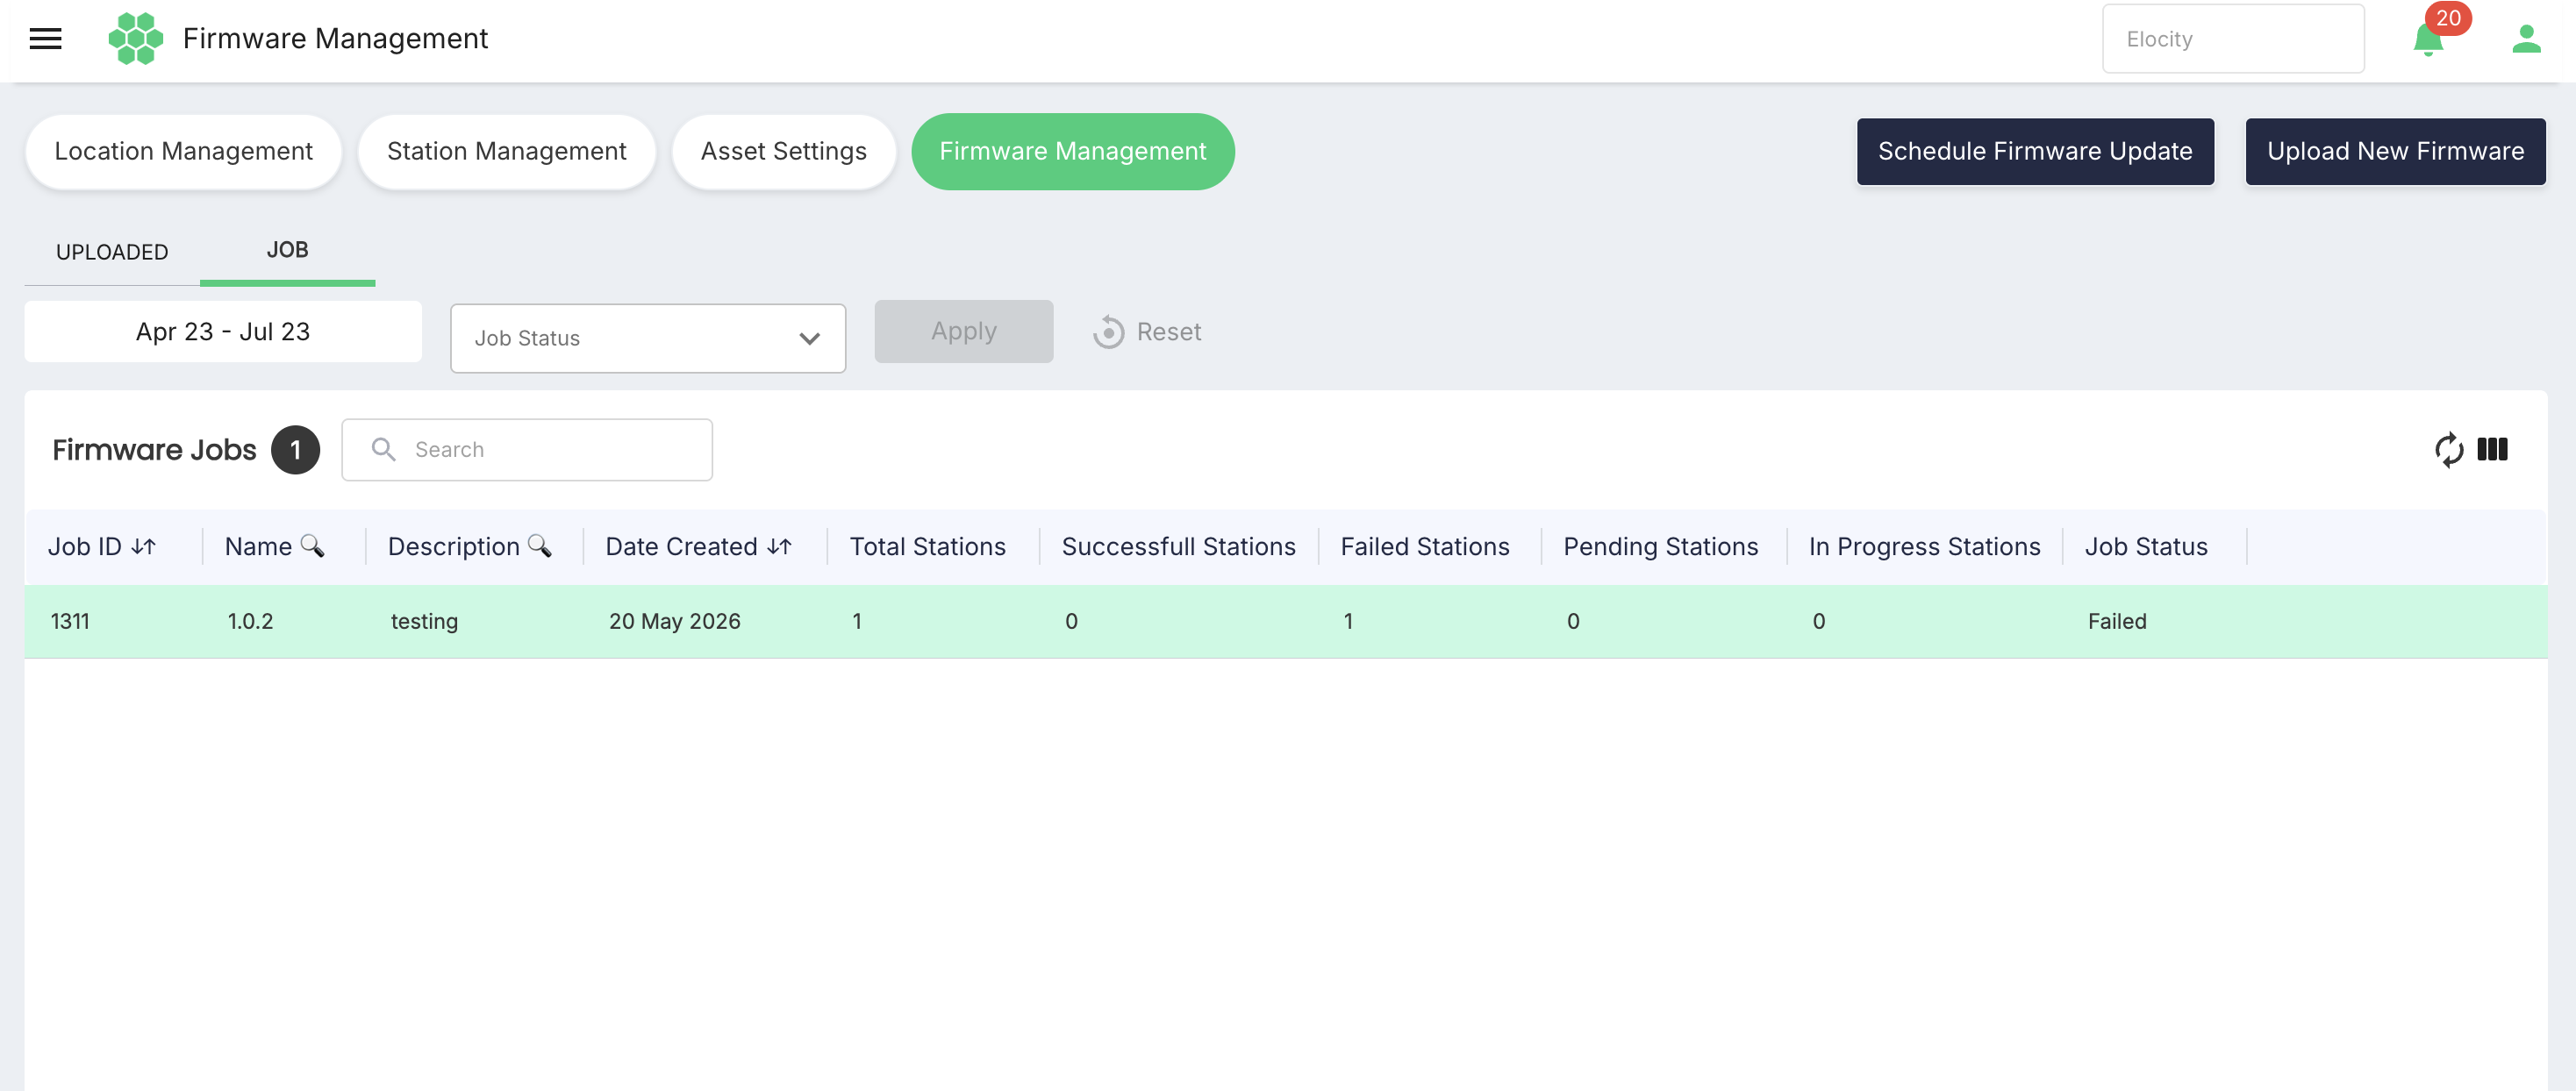
8. Viewing Firmware Jobs
- Open Firmware Management.
- Select the JOB tab.
- Set a date range, if required.
- Select one or more Job Status values.
- Select Apply.
- Use Search, sorting, Refresh, or Column Filter as required.
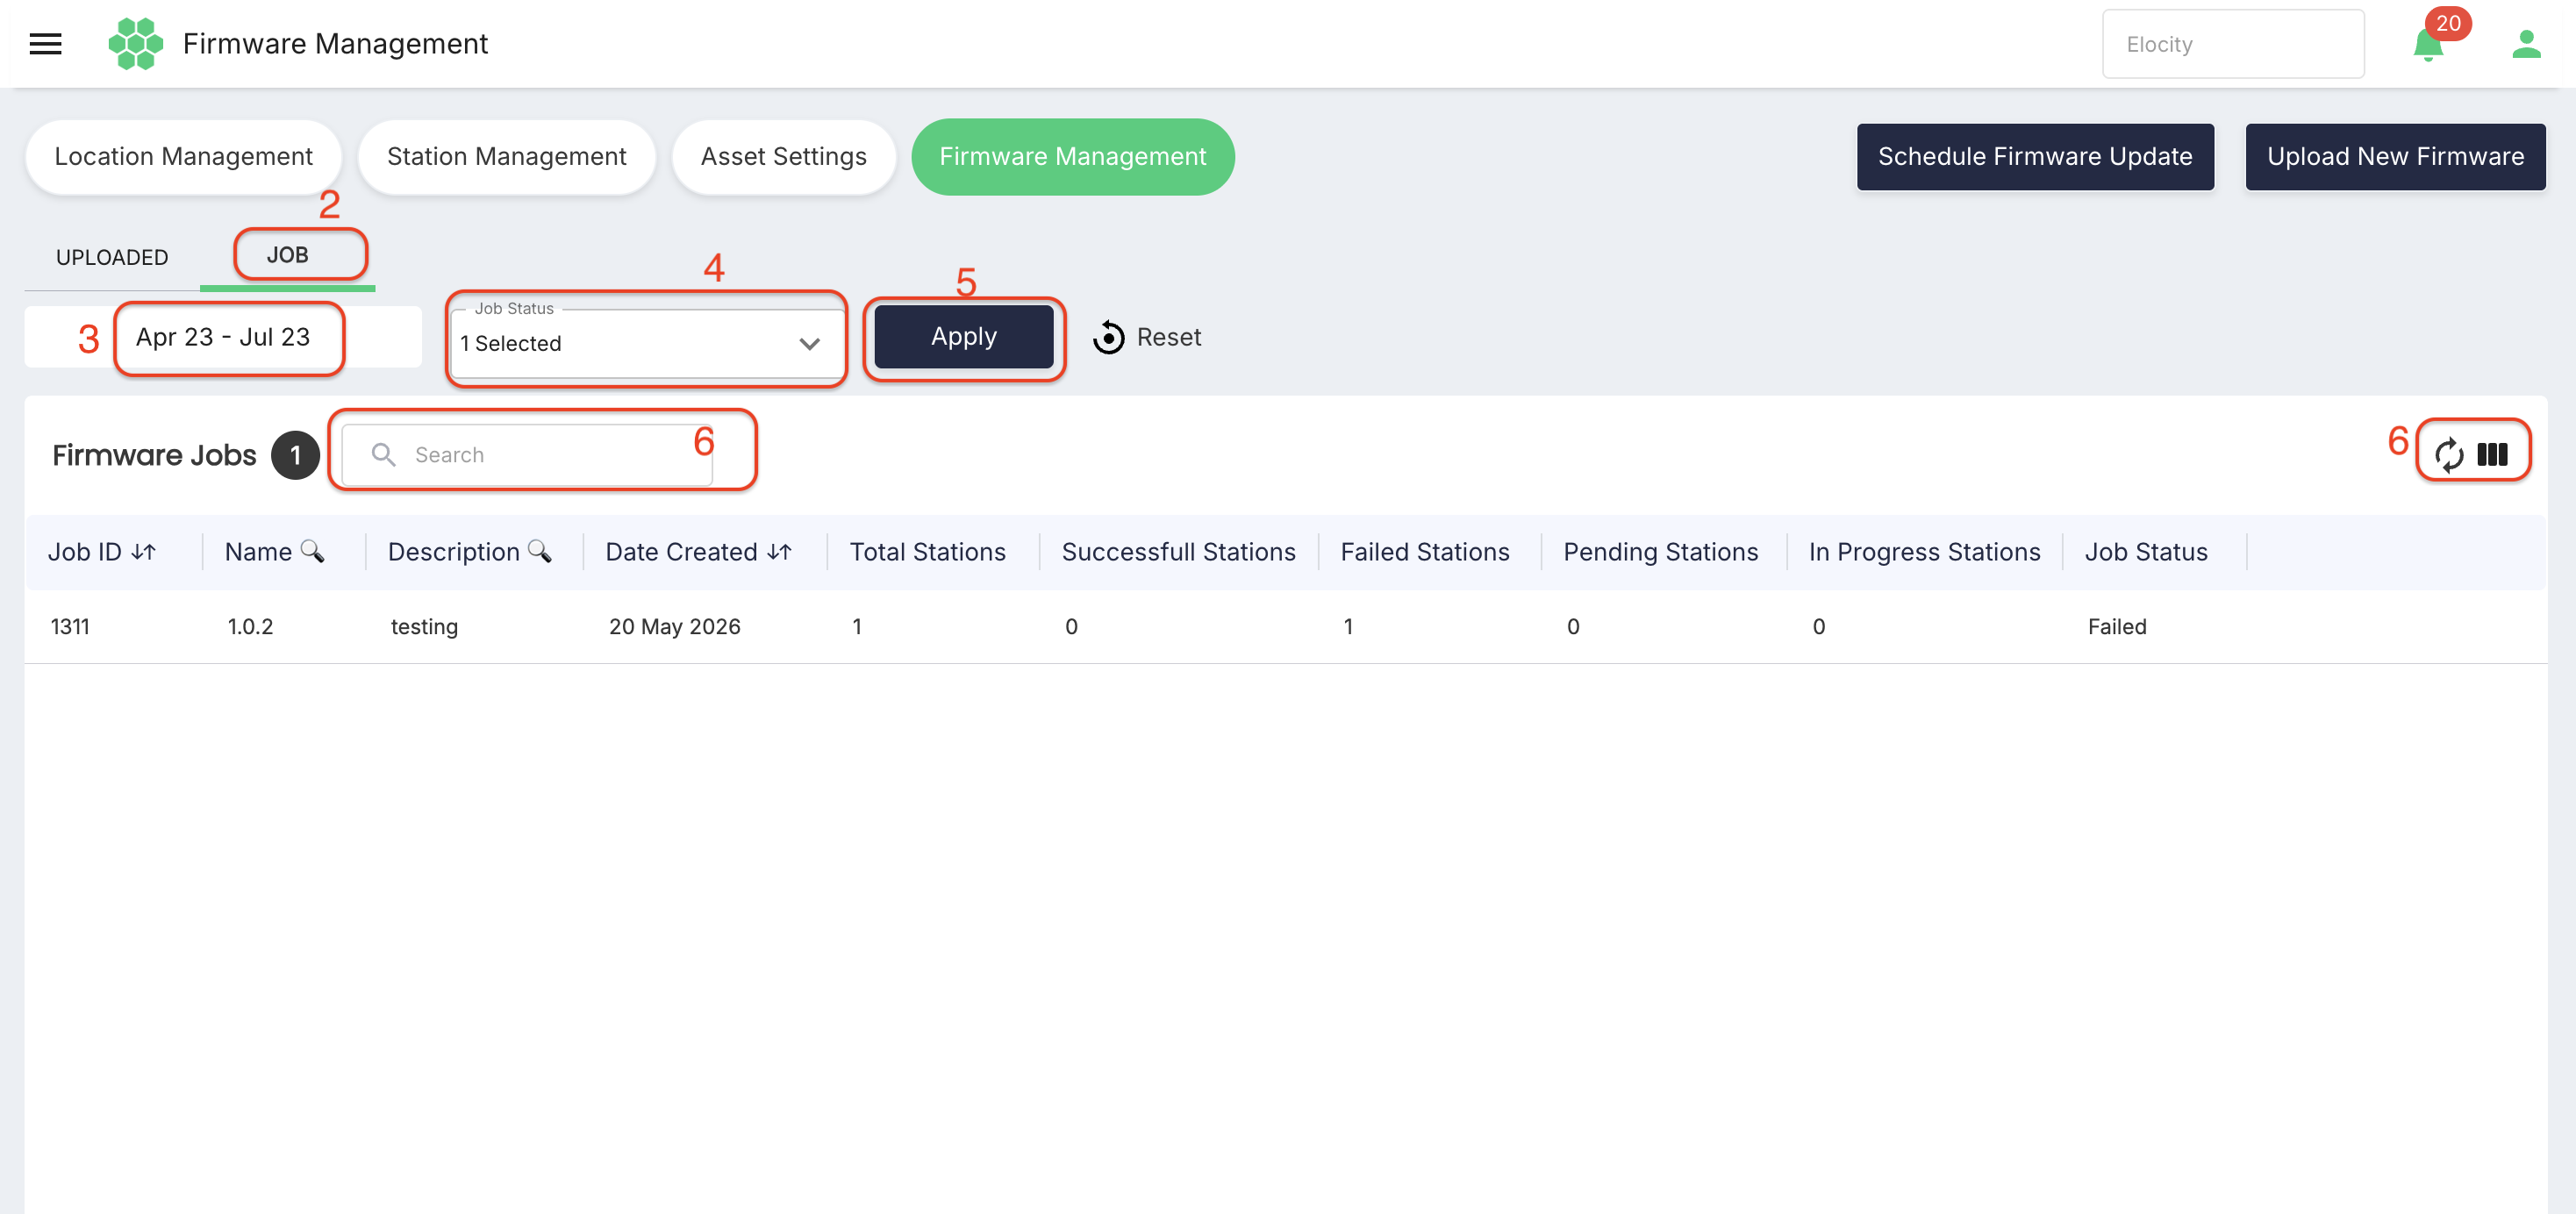
Job Status filter values
The live Job Status filter contained:
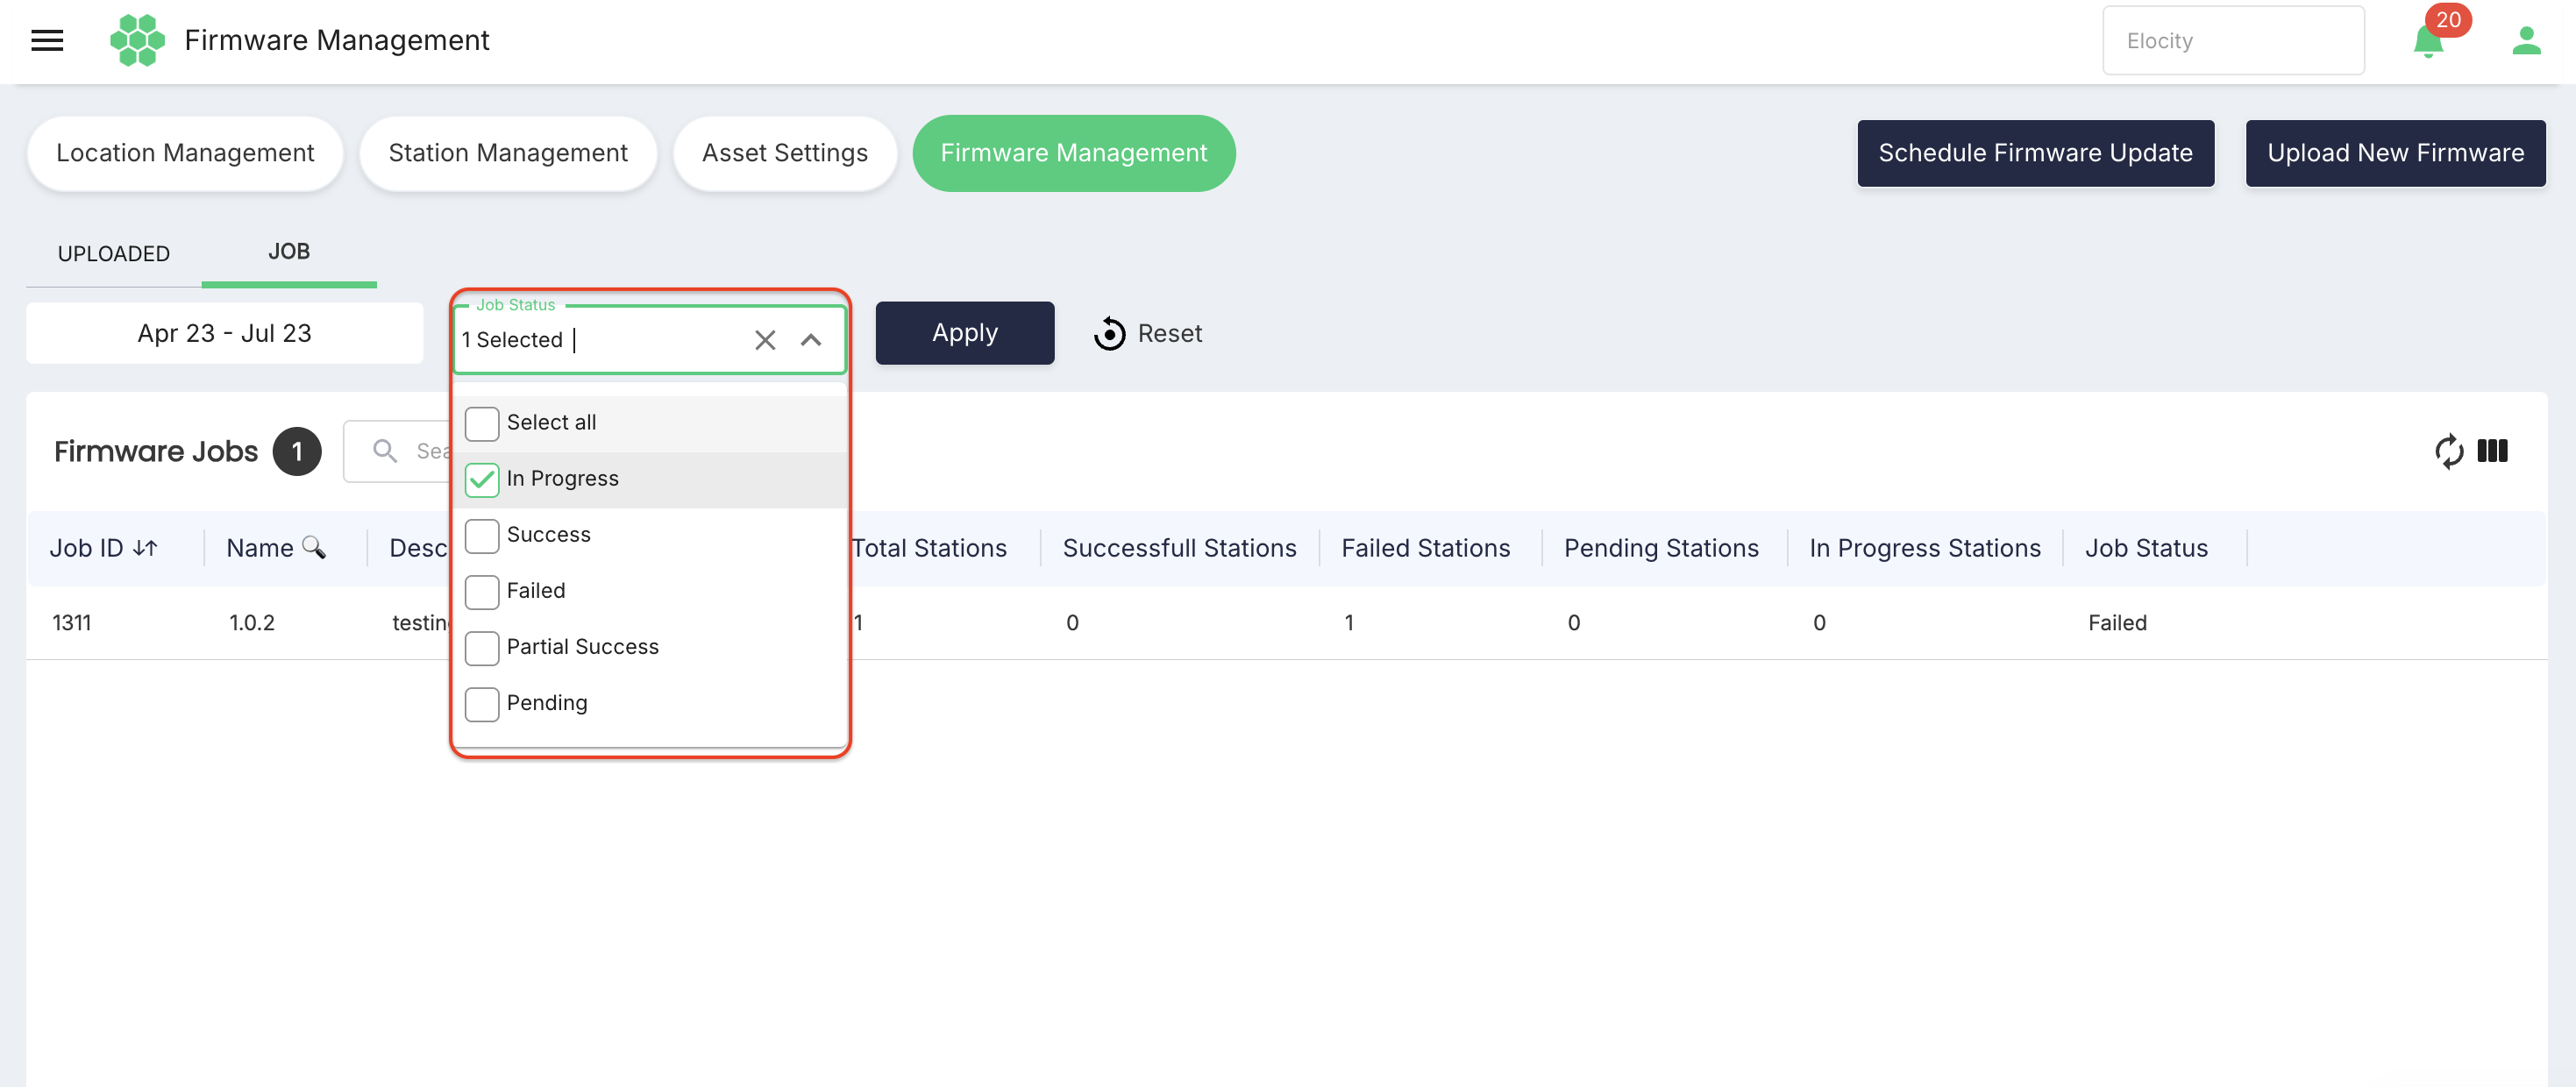
- In Progress
- Success
- Failed
- Partial Success
- Pending
The filter also provided Select all.
The overall and station-level status values are updated from status information reported by the EVSE. The portal does not derive them from a separate application event.
Firmware job columns
| Column | Description |
|---|---|
| Job ID | System-generated job identifier. |
| Name | Firmware-job name displayed in the grid. |
| Description | Description recorded for the job. |
| Date Created | Job creation date. |
| Total Stations | Total number of stations included in the job. |
| Successfull Stations | Number displayed by the interface for successful stations. The spelling shown here matches the live column label. |
| Failed Stations | Number of stations displayed as failed. |
| Pending Stations | Number of stations displayed as pending. |
| In Progress Stations | Number of stations displayed as in progress. |
| Job Status | Overall status assigned to the job. |
9. Viewing Job Details
Select a firmware-job row to open Firmware Job Details. The page displays the job's firmware name or version and a station-level results grid.
Job Details filters
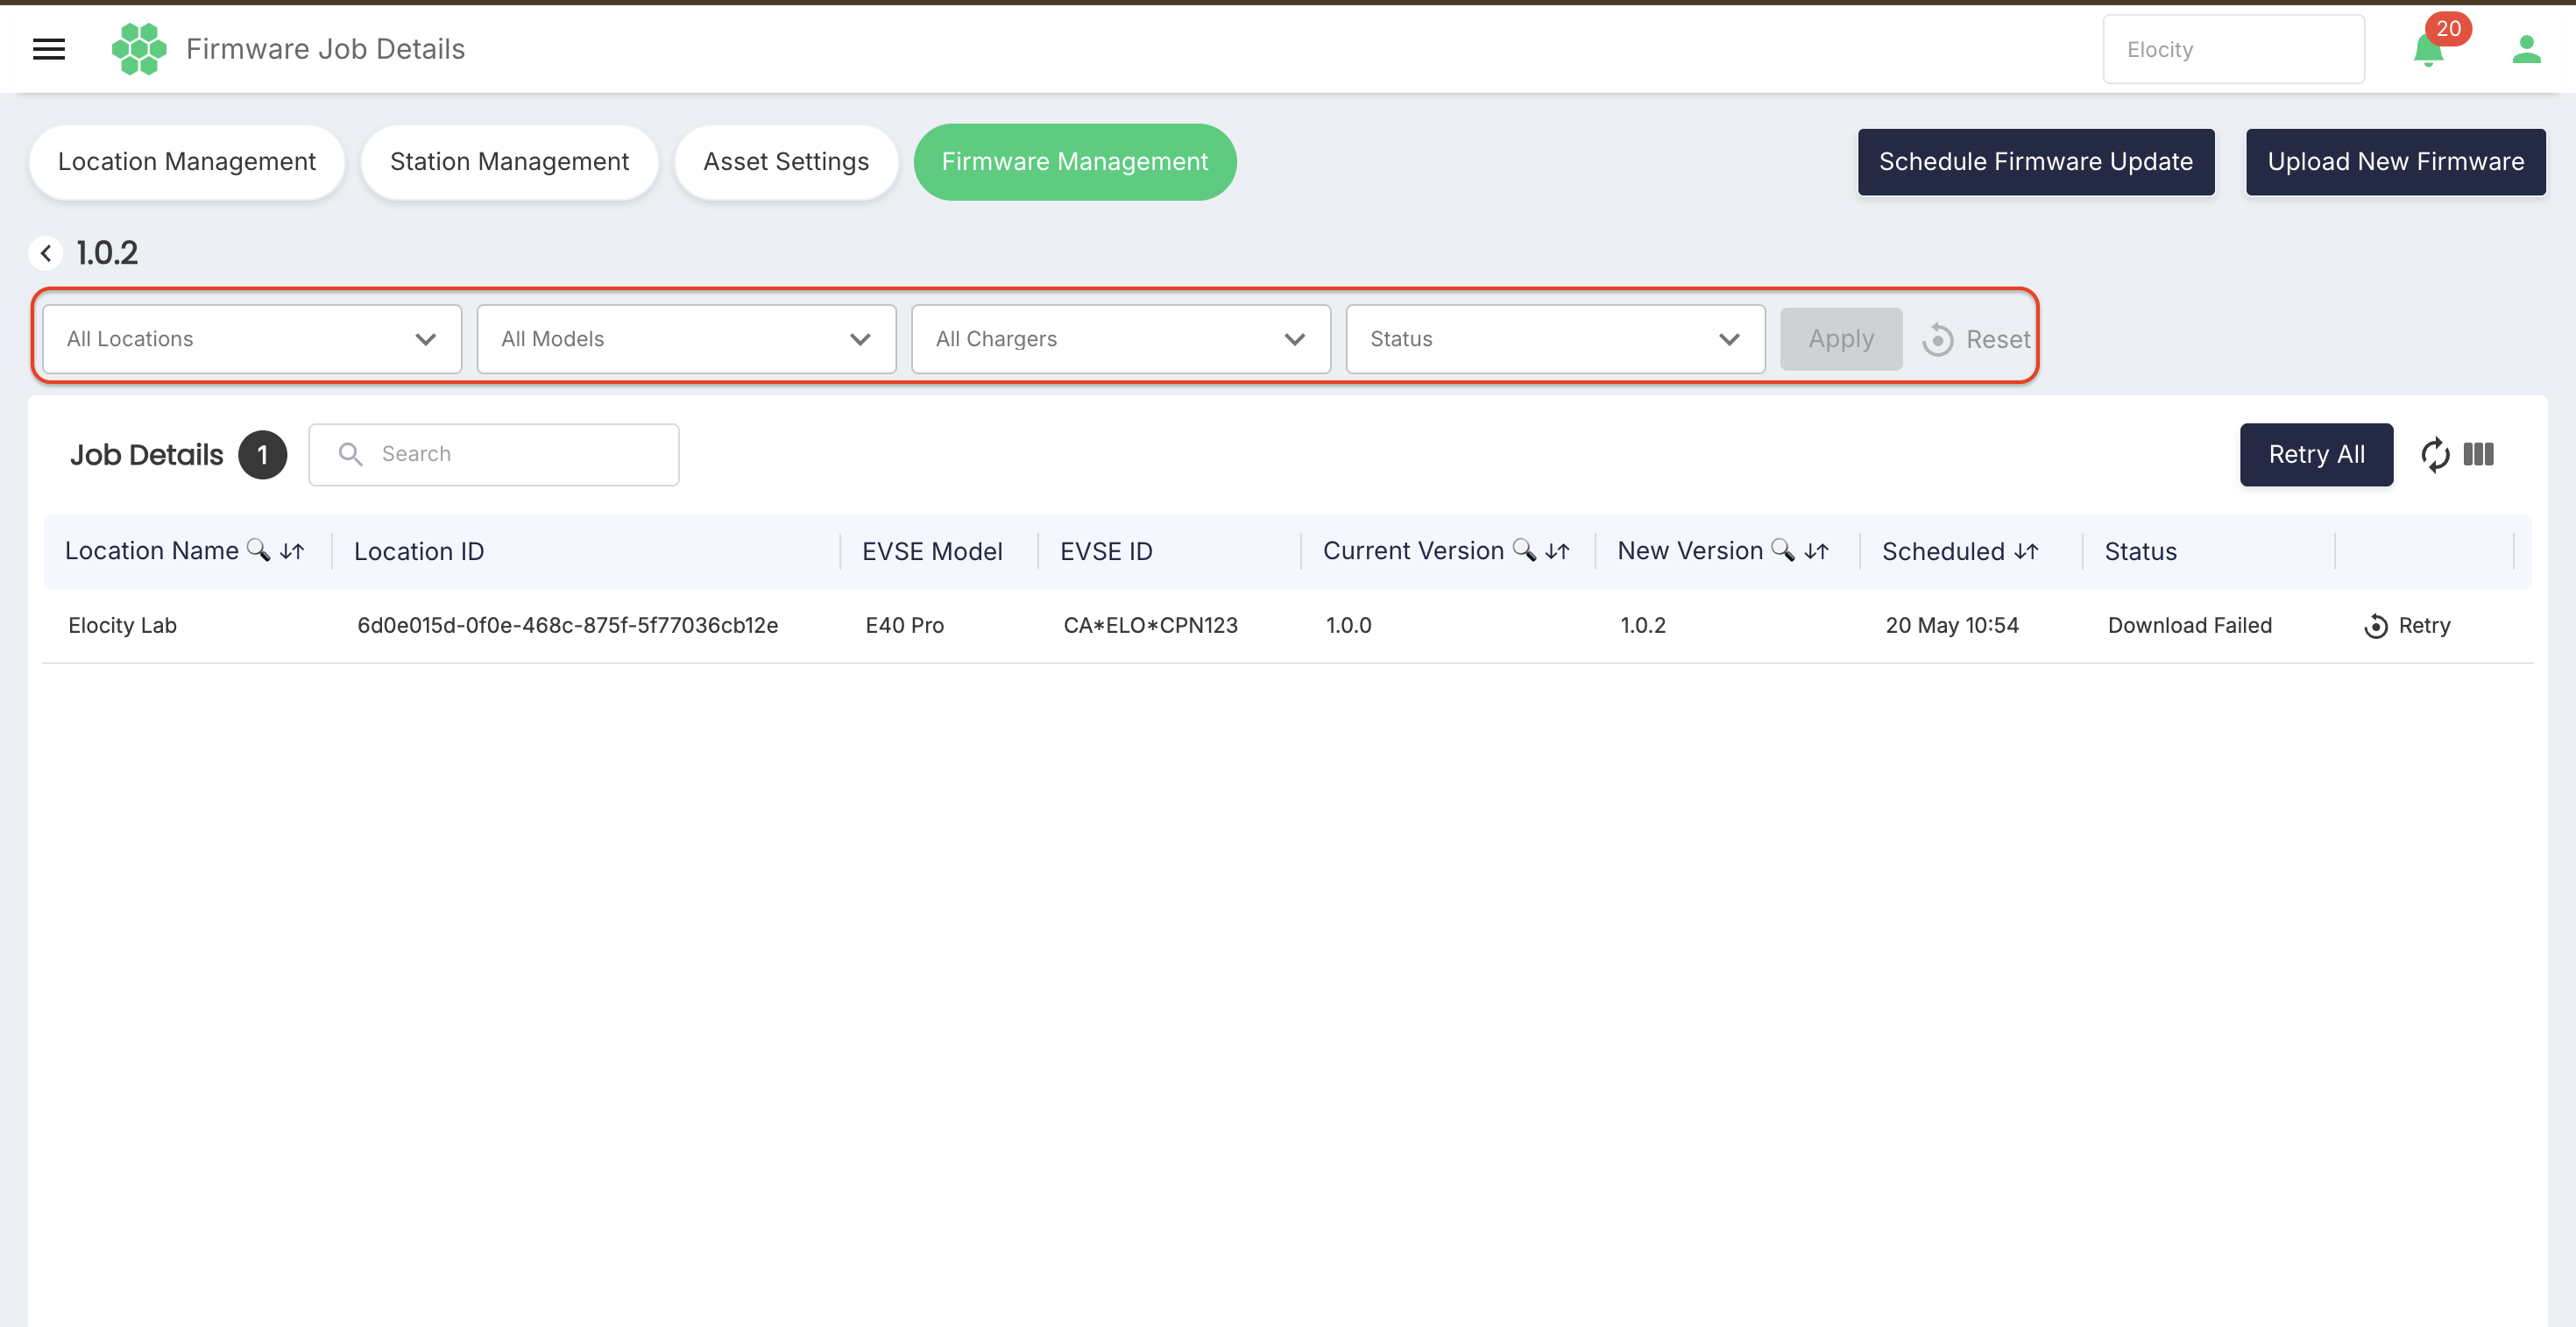
- All Locations
- All Models
- All Chargers
- Status
- Apply
- Reset
The page also provides Search, Refresh, and Column Filter.
Station update status values
The live Status filter contained:
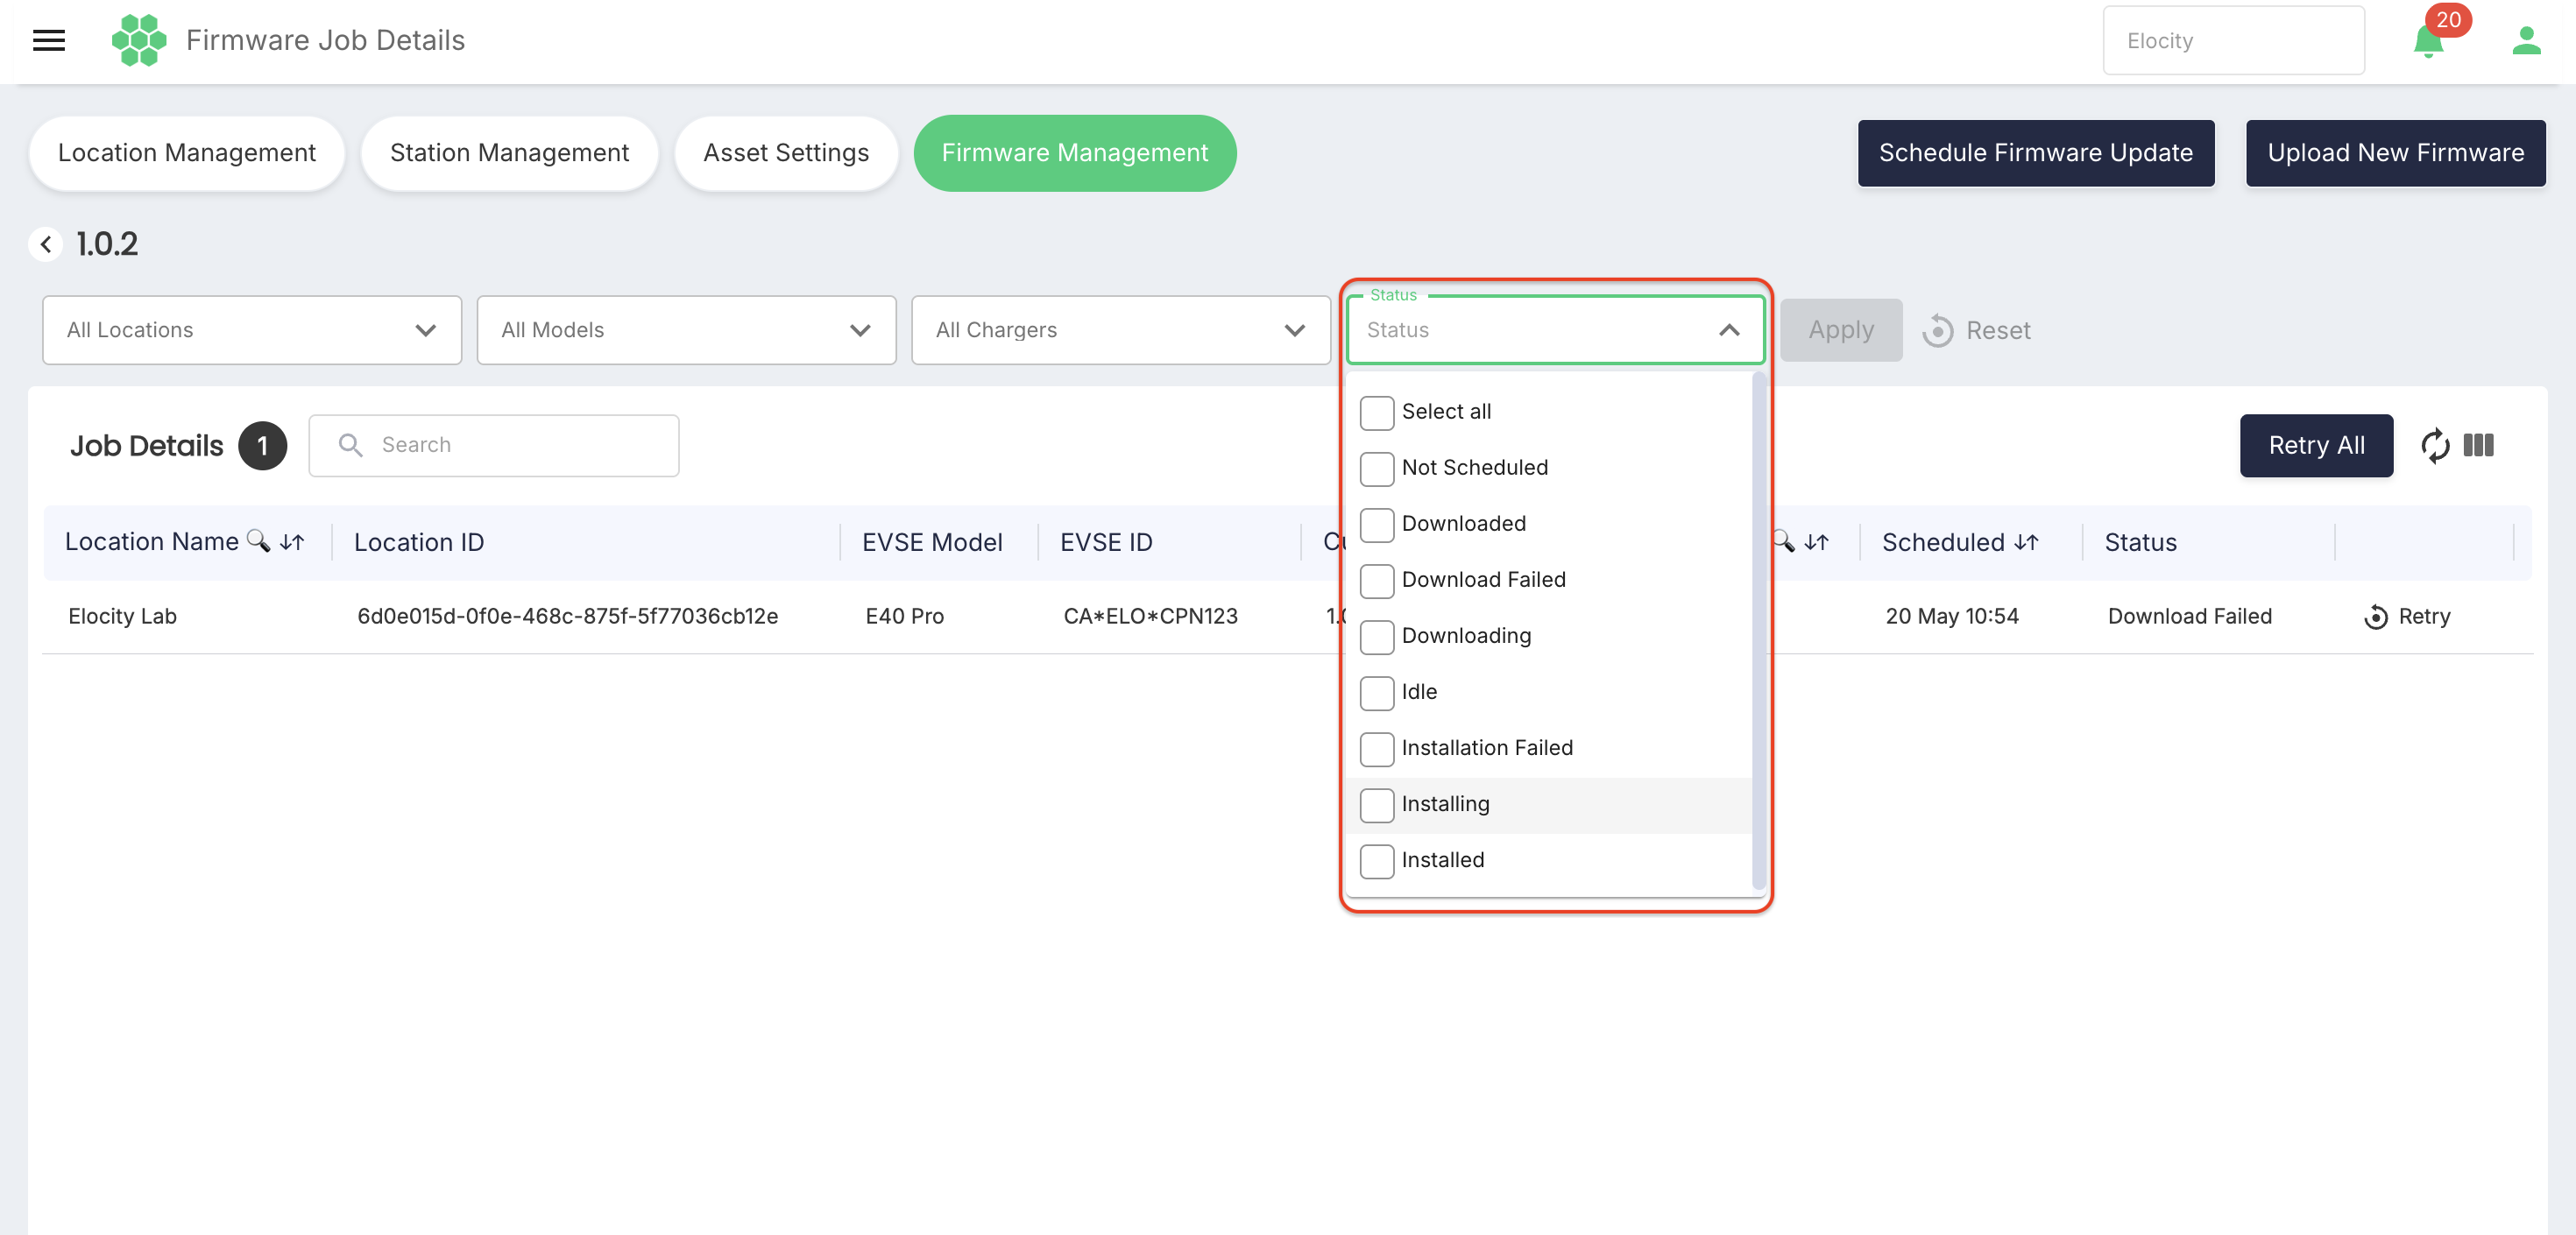
- Not Scheduled
- Downloaded
- Download Failed
- Downloading
- Idle
- Installation Failed
- Installing
- Installed
The filter also provided Select all.
Station-level status values are reported by the EVSE. The exact transition and timeout rules require confirmation.
Job Details columns
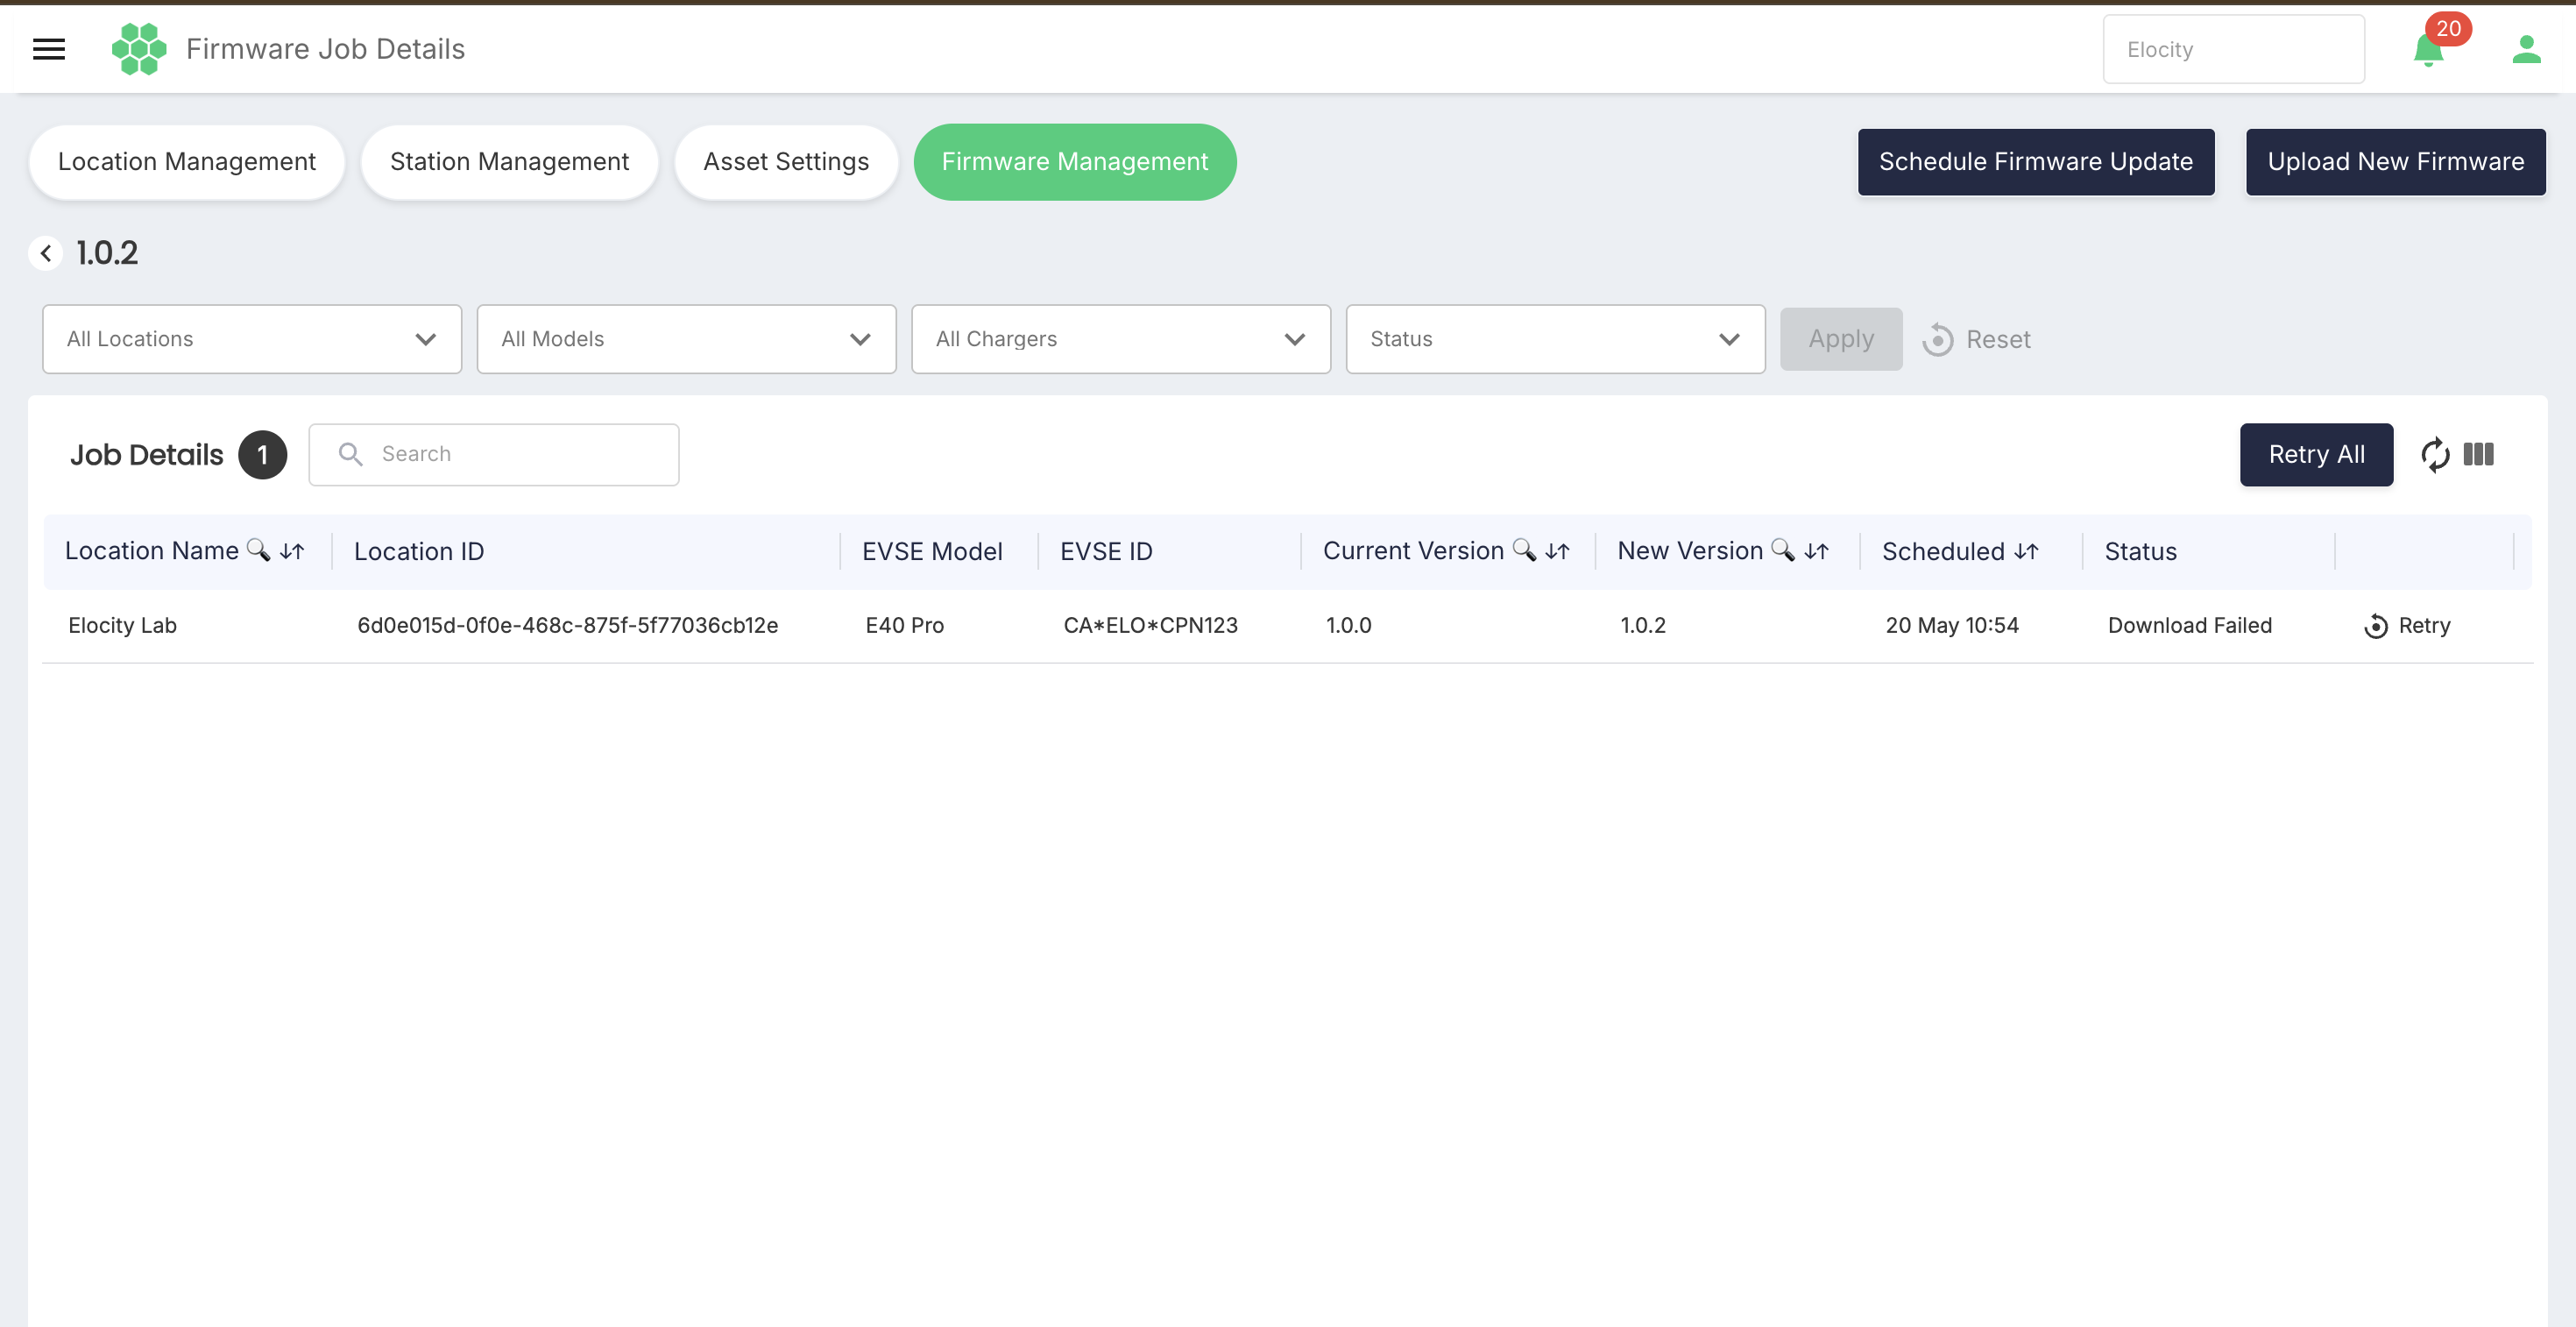
| Column | Description |
|---|---|
| Location ID | Location identifier displayed for the station result. |
| EVSE Model | Charger model. |
| EVSE ID | Charger identifier. |
| Status | Station-level firmware-update status. |
| Location Name | Location name. |
| Current Version | Firmware version or versions currently reported by the charger. |
| New Version | Firmware version targeted by the job. |
| Scheduled | Scheduled date and time displayed for the station update. |
10. Deleting Uploaded Firmware
Each uploaded-firmware row displayed a Delete action. Deletion was not tested because it can remove production data.
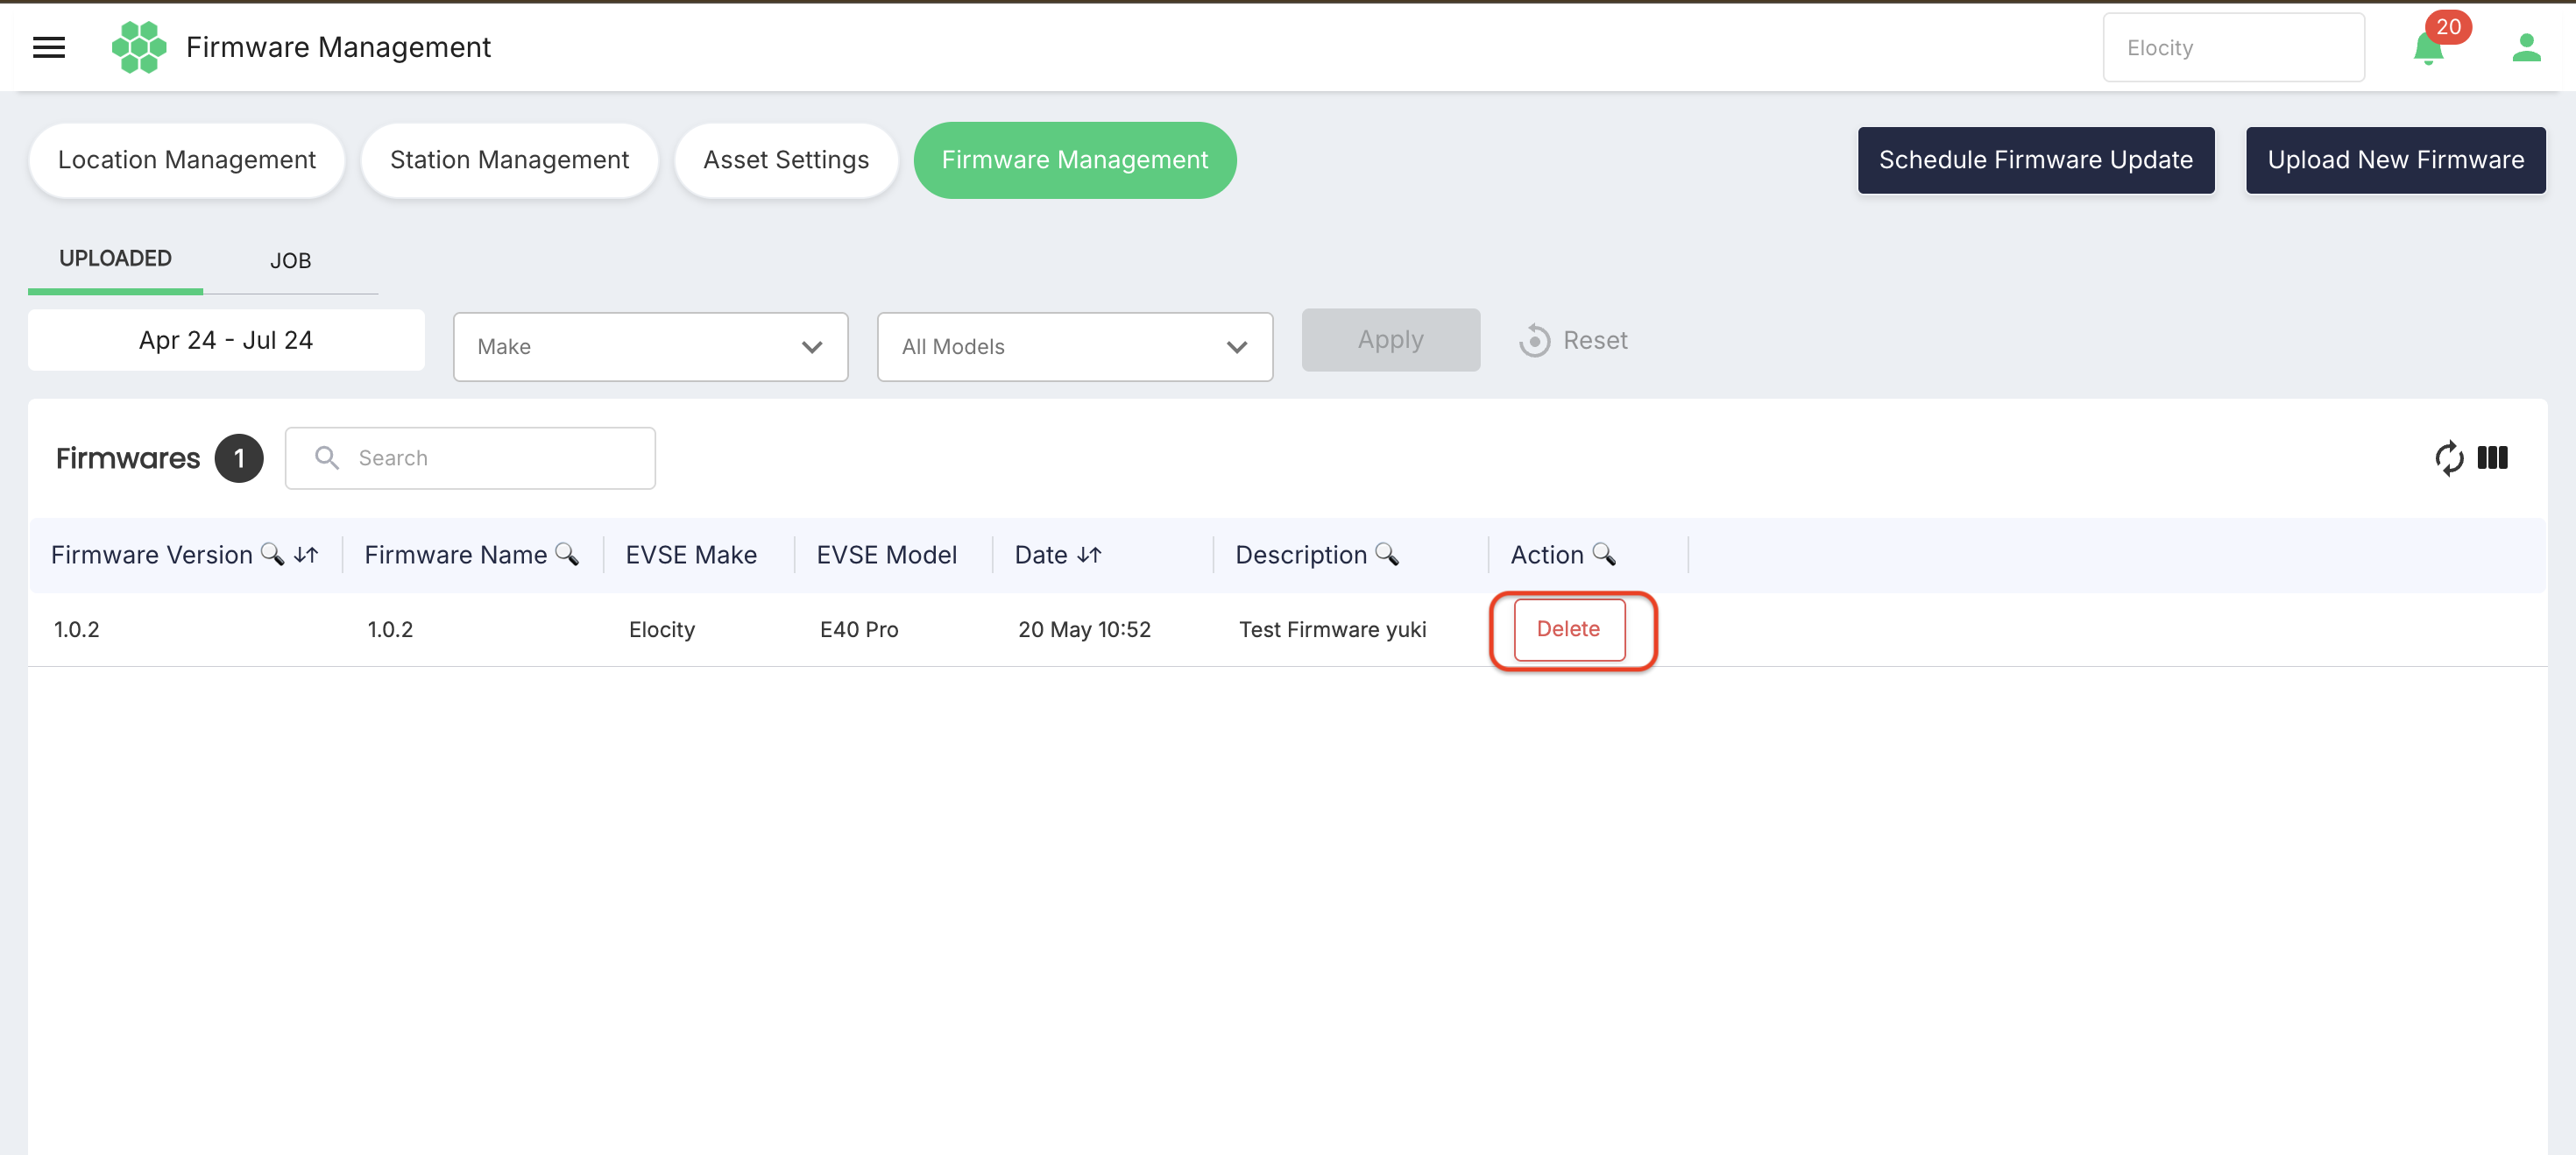 Deleting a firmware record also deletes associated scheduled and failed jobs. Do not select Delete unless the user is authorized and has confirmed that both the firmware and the affected jobs are no longer required. The confirmation prompt, recoverability, and behavior for other job states still require verification.
11. Operational Guidance
- Confirm the firmware package and EVSE make/model mapping before upload; the portal does not validate compatibility.
- Check the selected business or site context before uploading or scheduling.
- Review the schedule, locations, and station selection immediately before saving.
- Use the JOB tab to monitor aggregate progress.
- Open Job Details to identify station-level download or installation failures.
- Remember that job and station statuses originate from the EVSE.
- Use the failed-station retry for a Partially Successful job when appropriate.
- Do not delete a firmware record until its dependencies and recovery requirements are understood.
The application currently sends no notifications for firmware upload, scheduling, completion, or failure events.
12. Confirmed Business Rules
- Access is governed by custom RBAC.
- The business selector limits firmware uploads and schedules to businesses the user can access.
- The portal has no additional firmware-approval workflow beyond RBAC.
- The portal does not validate firmware-file compatibility with the selected EVSE make and model.
- Supported executable and ZIP-based files are accepted, subject to a 100 MB binary size limit.
- Reusing the same Firmware Version or Version Name produces an error.
- Scheduling uses the browser's timezone.
- Stations that support the firmware are shown regardless of their current station status.
- Pending and In Progress jobs cannot be edited, cancelled, paused, or rescheduled.
- A Partially Successful job can retry only its failed stations.
- Firmware job and station statuses are reported by the EVSE.
- Deleting firmware also deletes associated scheduled and failed jobs.
- The application currently sends no firmware-event notifications.