Location Management
Purpose
The Location Management module provides a central place to view and maintain charging locations belonging to the selected business. It presents location-level operational information, including address, station and connector counts, access type, payment type, site rating, maximum power supply, and reservation availability.
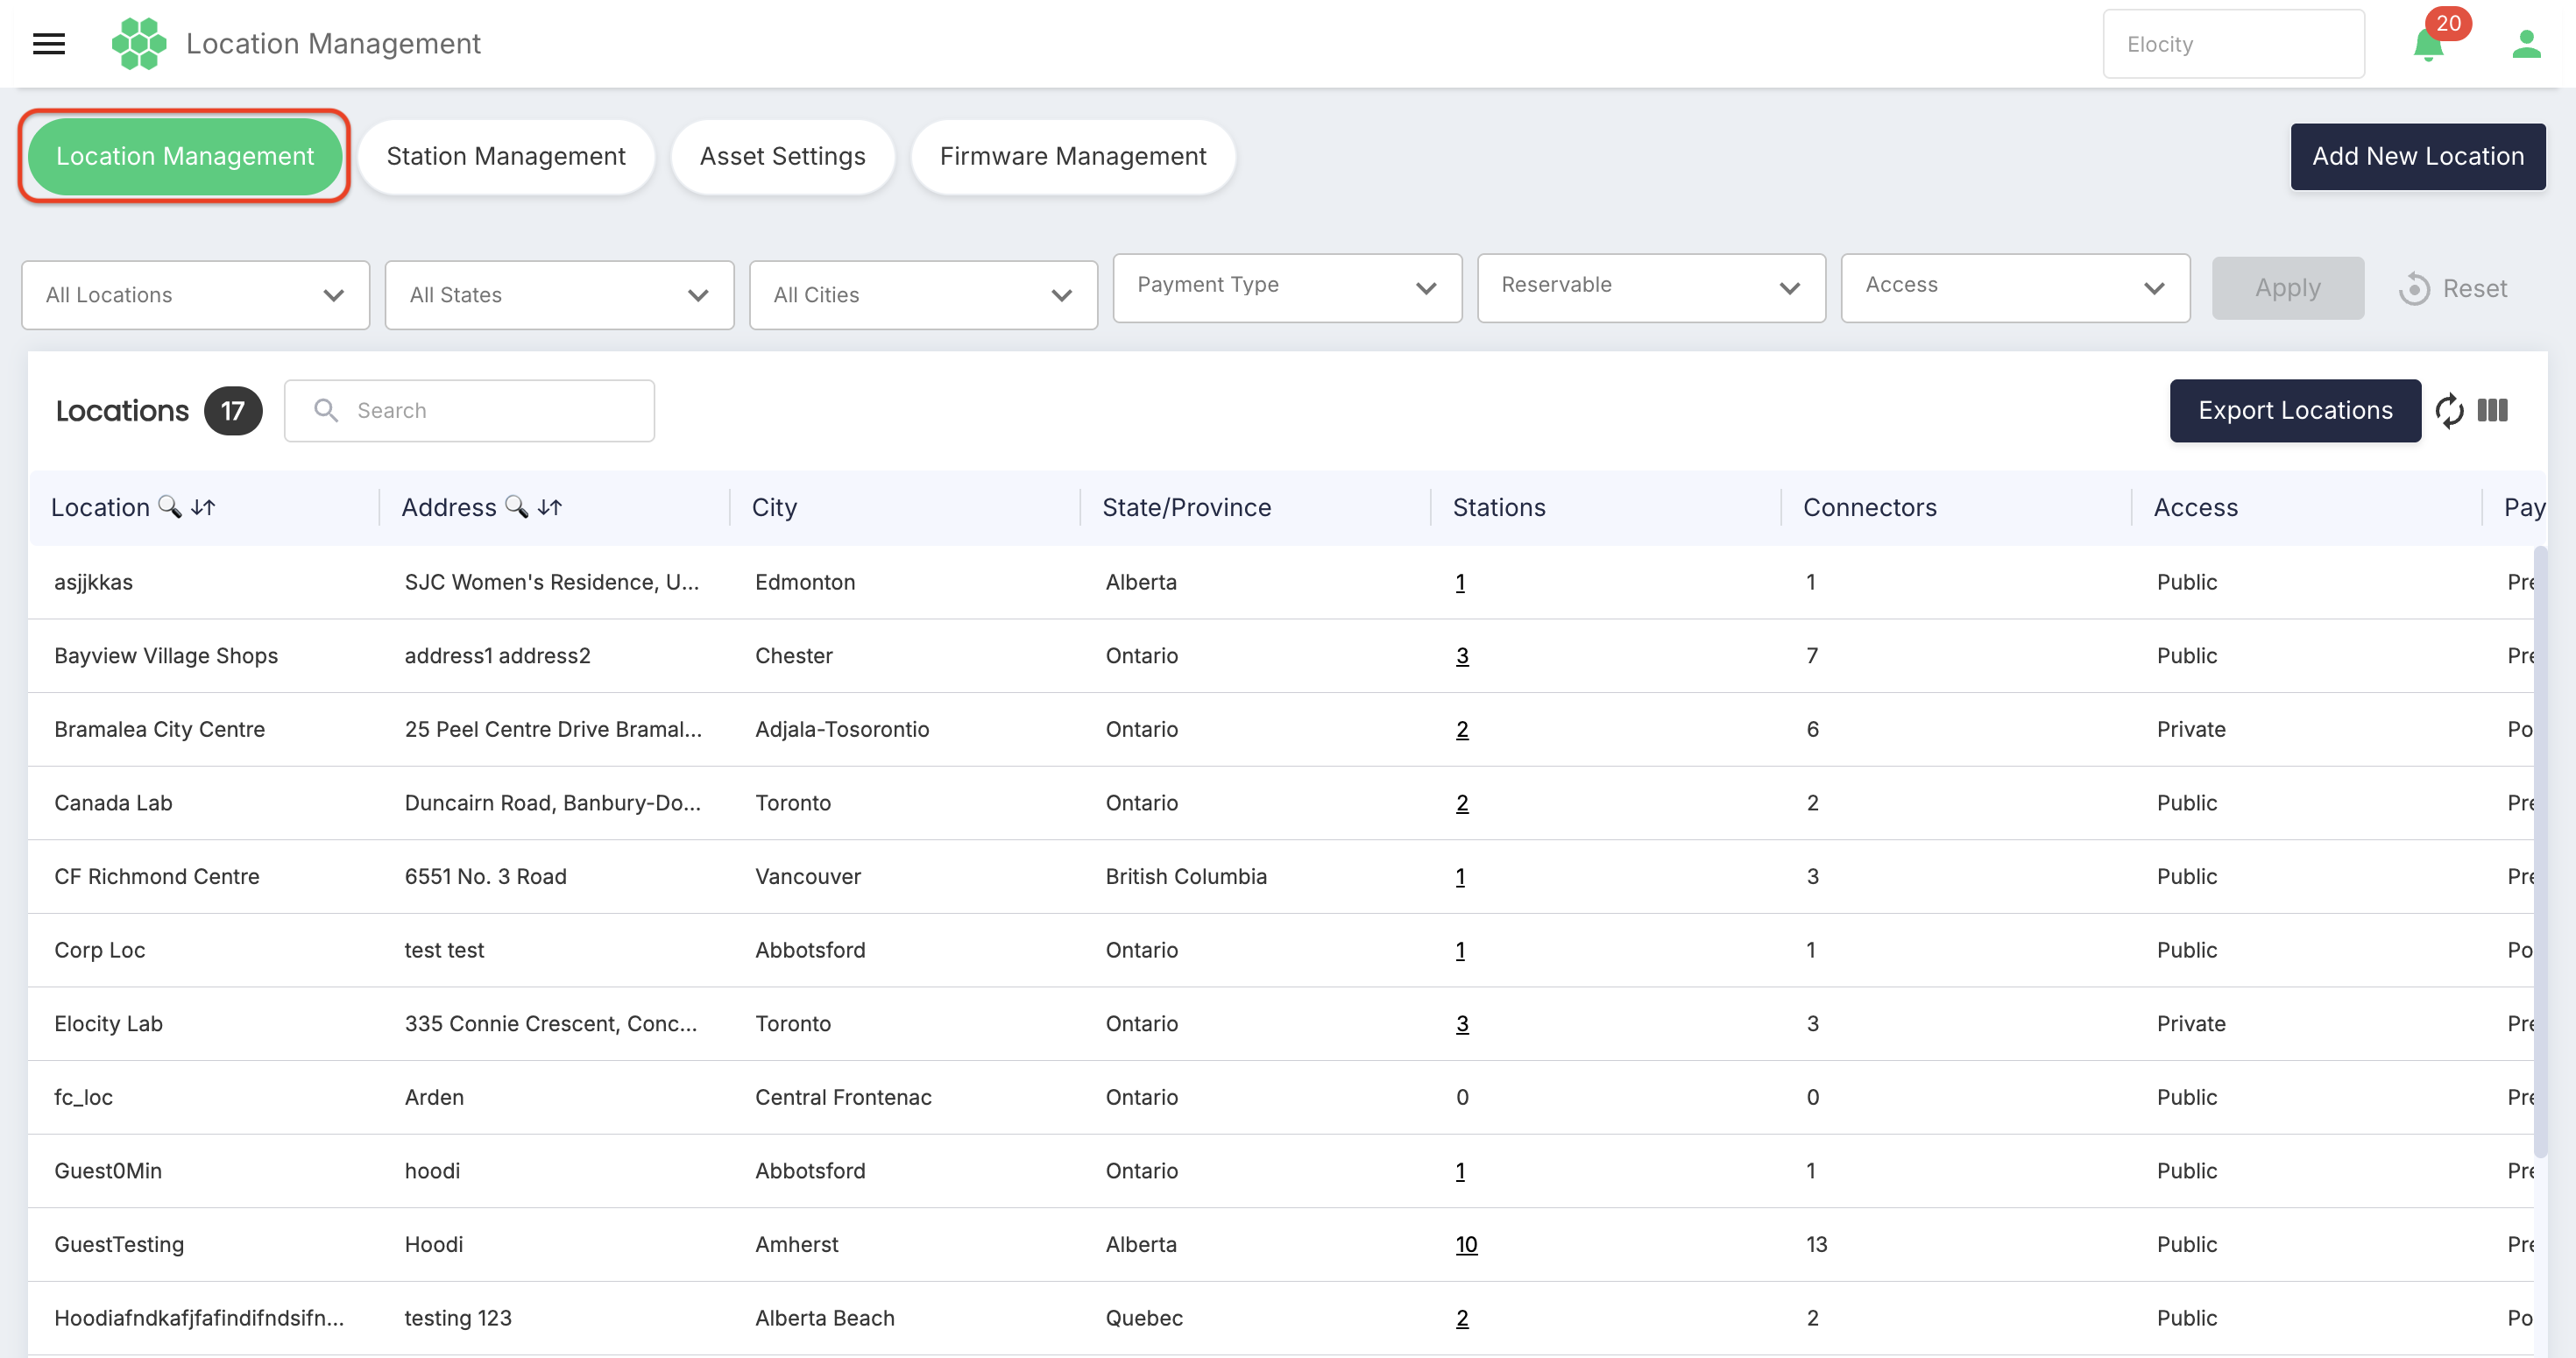 From this module, an authorized user can:
- Filter and search the location inventory.
- Export the displayed location data.
- Open a location record and review its complete configuration.
- Open the stations associated with a location.
- Add a new location.
- Edit location information, facilities, operating hours, and other supported location content.
- Maintain notes and photos.
- Review customer reviews when review data is available.
- Configure whether a location is public or private.
Accessing Location Management
- Sign in to the HIEV portal.
- Confirm the required business in the business selector.
- Open the management area and select Location Management.
The management navigation also provides access to Station Management, Asset Settings, and Firmware Management. These are separate modules and are not described in this guide.
Application access is controlled through role-to-permission mapping. A user's assigned role must contain the permissions required for each Location Management page and action.
Page layout
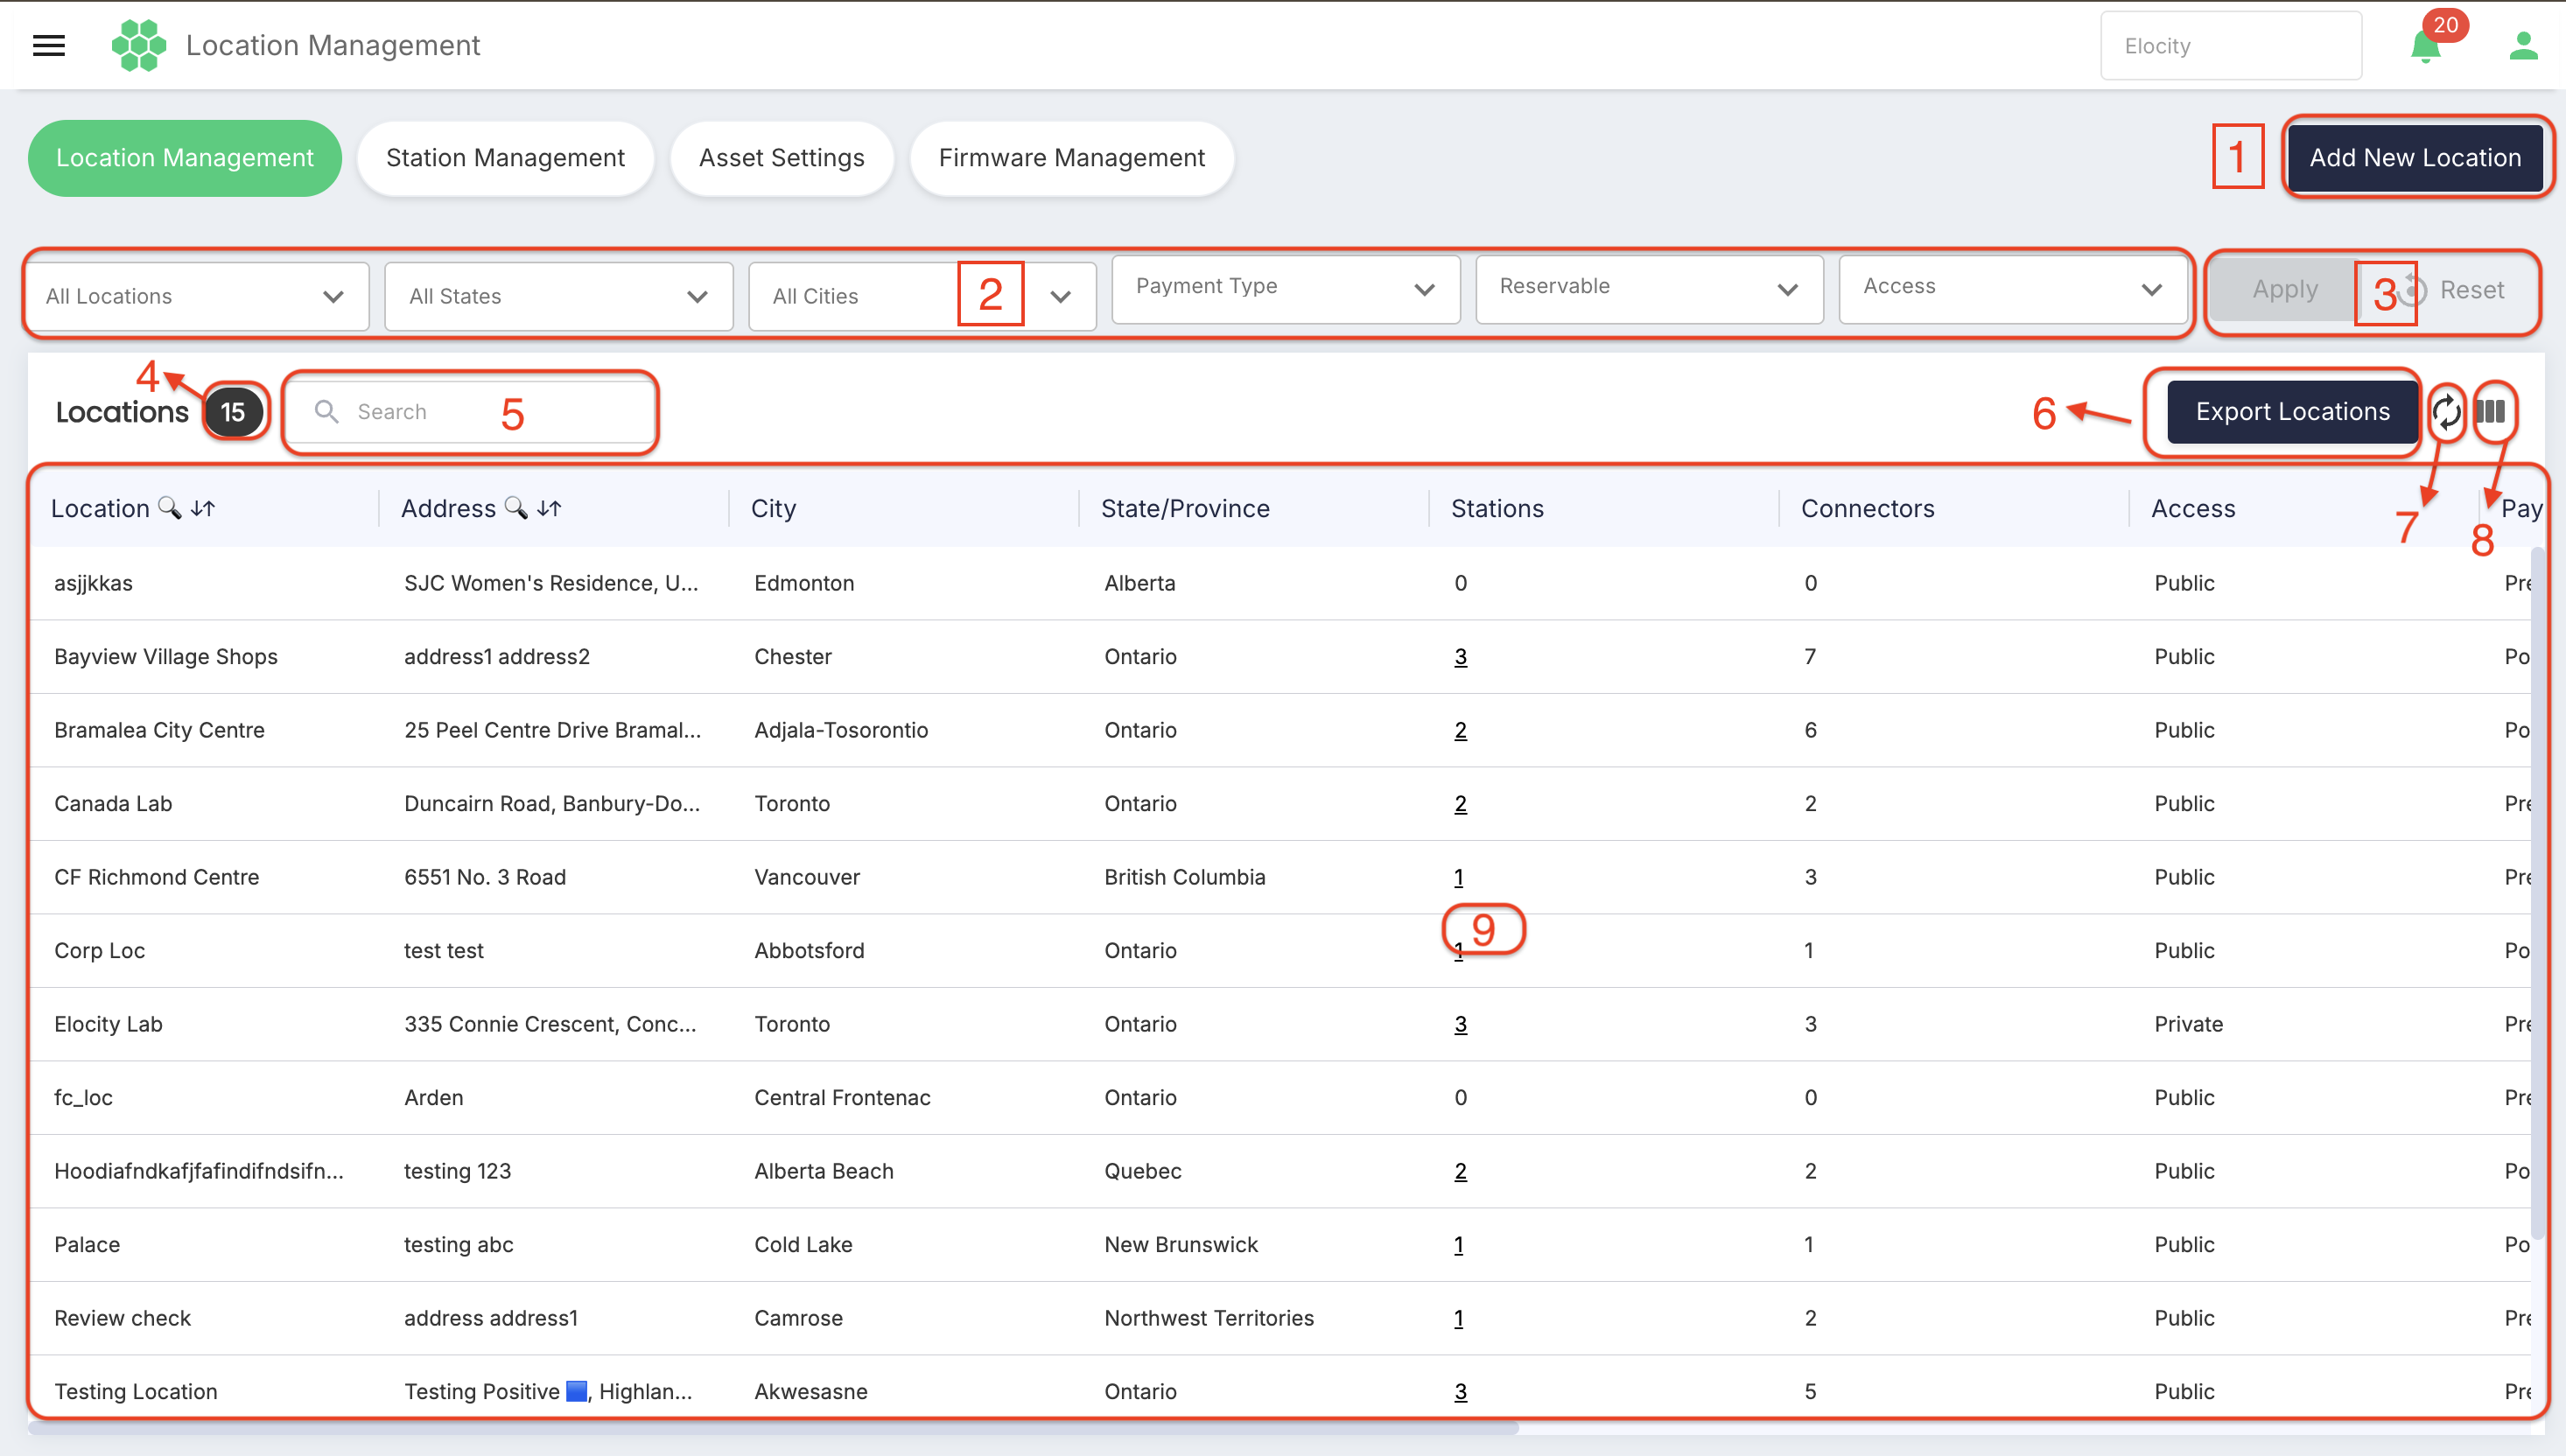
The Location Management page contains:
- Add New Location – opens the location creation form.
- Location filters – limits the displayed locations by location, state/province, city, payment type, reservation capability, and access type.
- Apply and Reset – applies or clears the selected page filters.
- Locations count – displays the number of location records returned for the current business and filter context.
- Search – searches the location grid using entered text.
- Export Locations – opens an export dialog and requests a file name.
- Refresh – requests the latest location information.
- Column Filter – controls which grid columns are visible.
- Locations grid – displays one row for each returned location.
Filtering locations
The filter area contains six controls.
| Filter | Available values and behavior |
|---|---|
| All Locations | Multi-select list of locations available to the selected business. Select all is available. |
| All States | Multi-select list of Canadian provinces and territories. Select all is available. |
| All Cities | Multi-select city list. The list is empty until a state/province is selected, after which cities belonging to the selected state/province are available. Select all is available when city options are present. |
| Payment Type | Select Prepaid or Postpaid. |
| Reservable | Select Yes or No. |
| Access | Select Public or Private. |
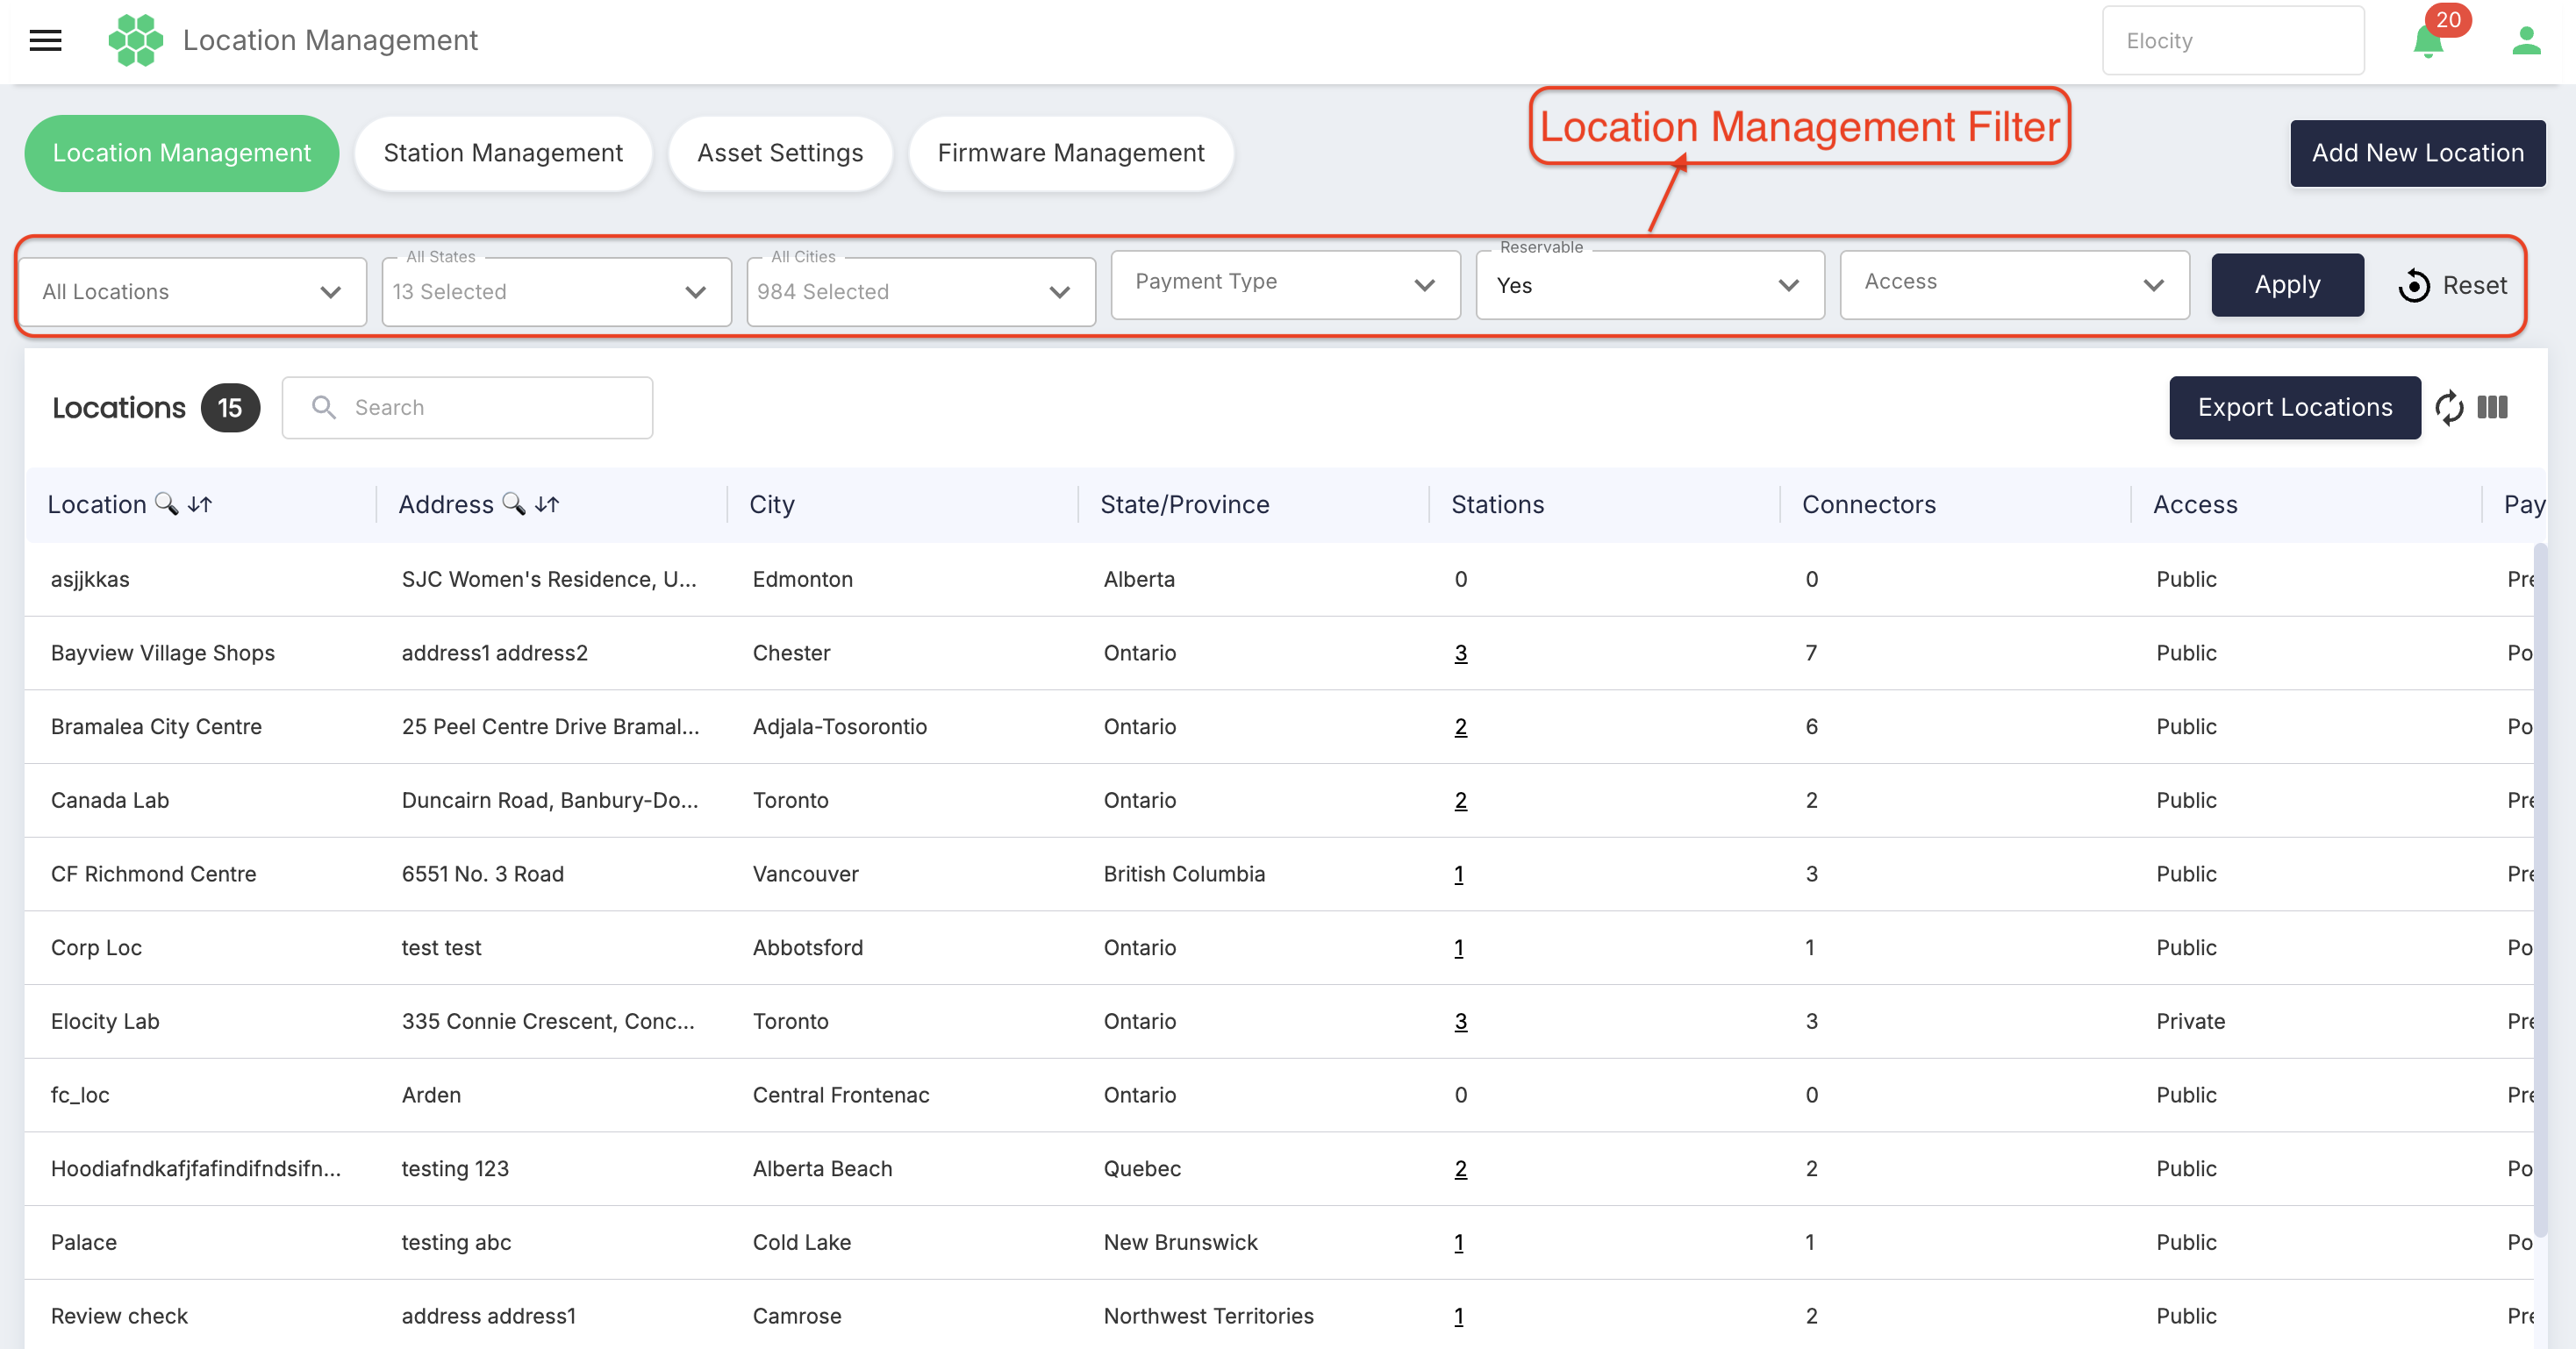
Applying filters
- Open one or more filter controls.
- Select the required values.
- Select Apply.
The Apply button remains disabled until a filter selection is changed.
Resetting filters
Select Reset to clear the page-level filter selections and restore the unfiltered location list.

State and city dependency
The City filter depends on the State/Province selection. For example, selecting Ontario populates the City control with Ontario municipalities. Clear or change the state selection before choosing cities from another province or territory.
Searching the location grid
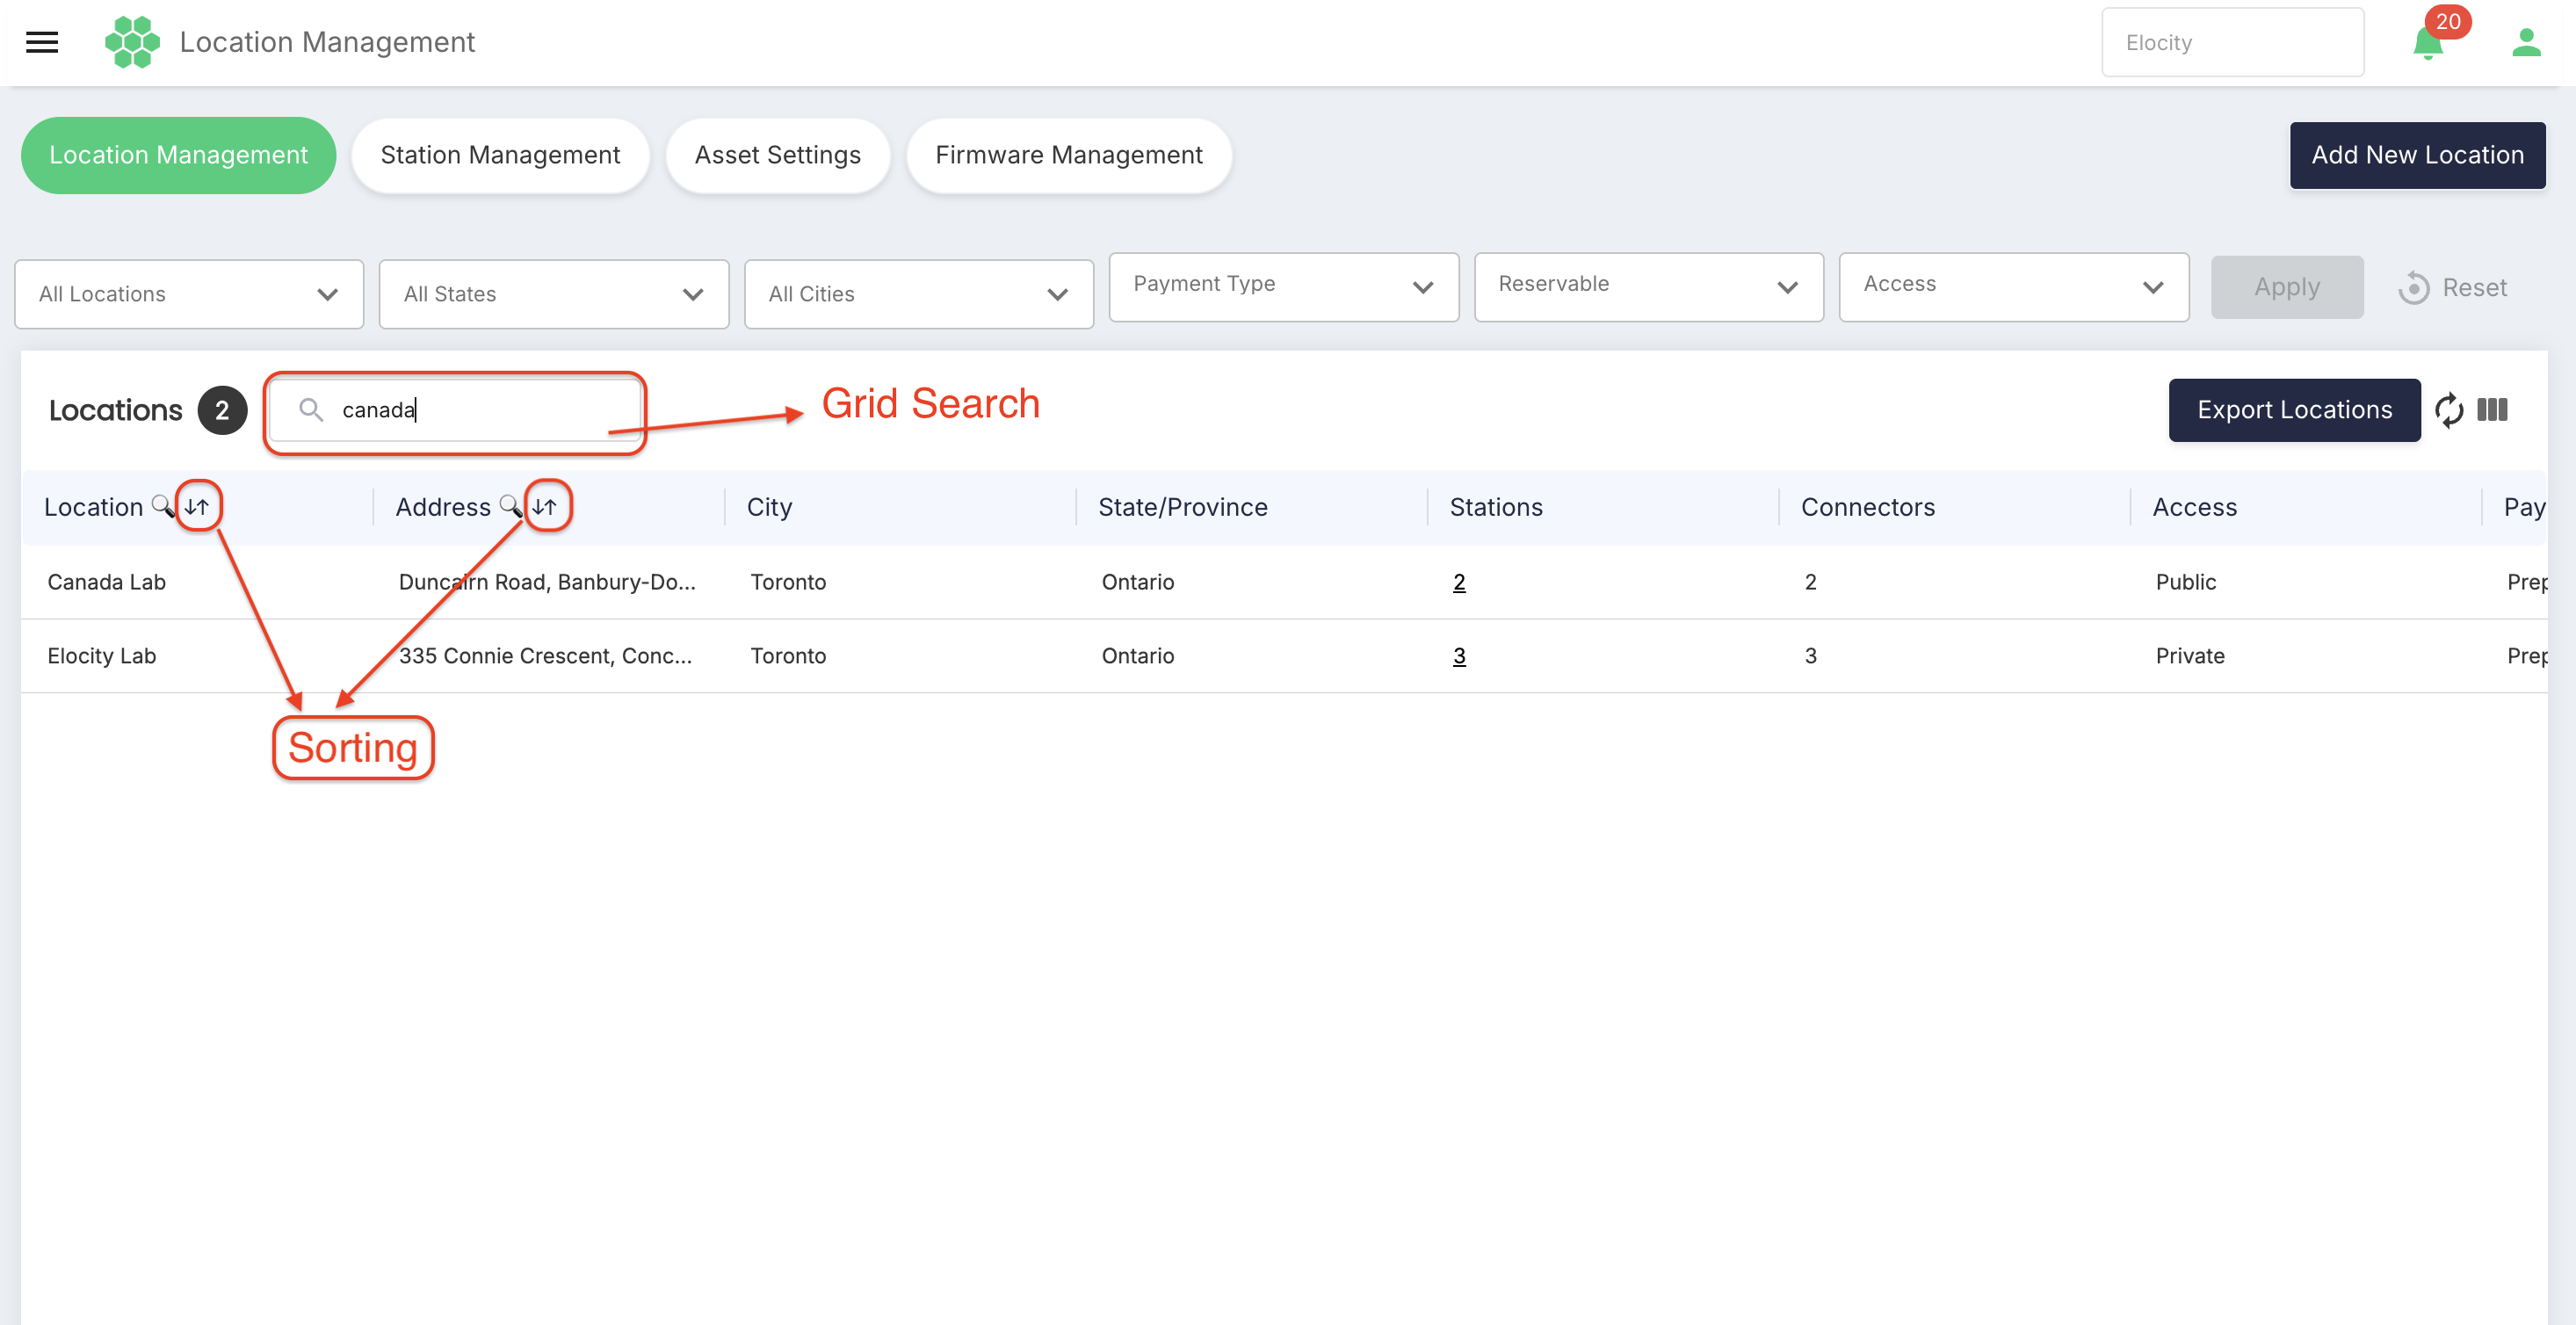
Enter text in Search to narrow the displayed grid records. The grid updates while search text is present. Clear the search field to restore the records allowed by the page-level filters.
The Location and Address column headers support sorting. Select either header to change the sort order.
Grid tools
Refresh
Select Refresh to request the latest location data from the system.
Column Filter
Select Column Filter to open Show / Hide Columns. The menu contains all eleven grid columns:
- Location
- Address
- City
- State/Province
- Stations
- Connectors
- Access
- Payment Type
- Site Rating
- Max Power Supply (kW)
- Reservable
Select or clear individual columns, then select Apply inside the menu to save the visible-column selection. Select Deselect All to clear all column selections before choosing a new set.
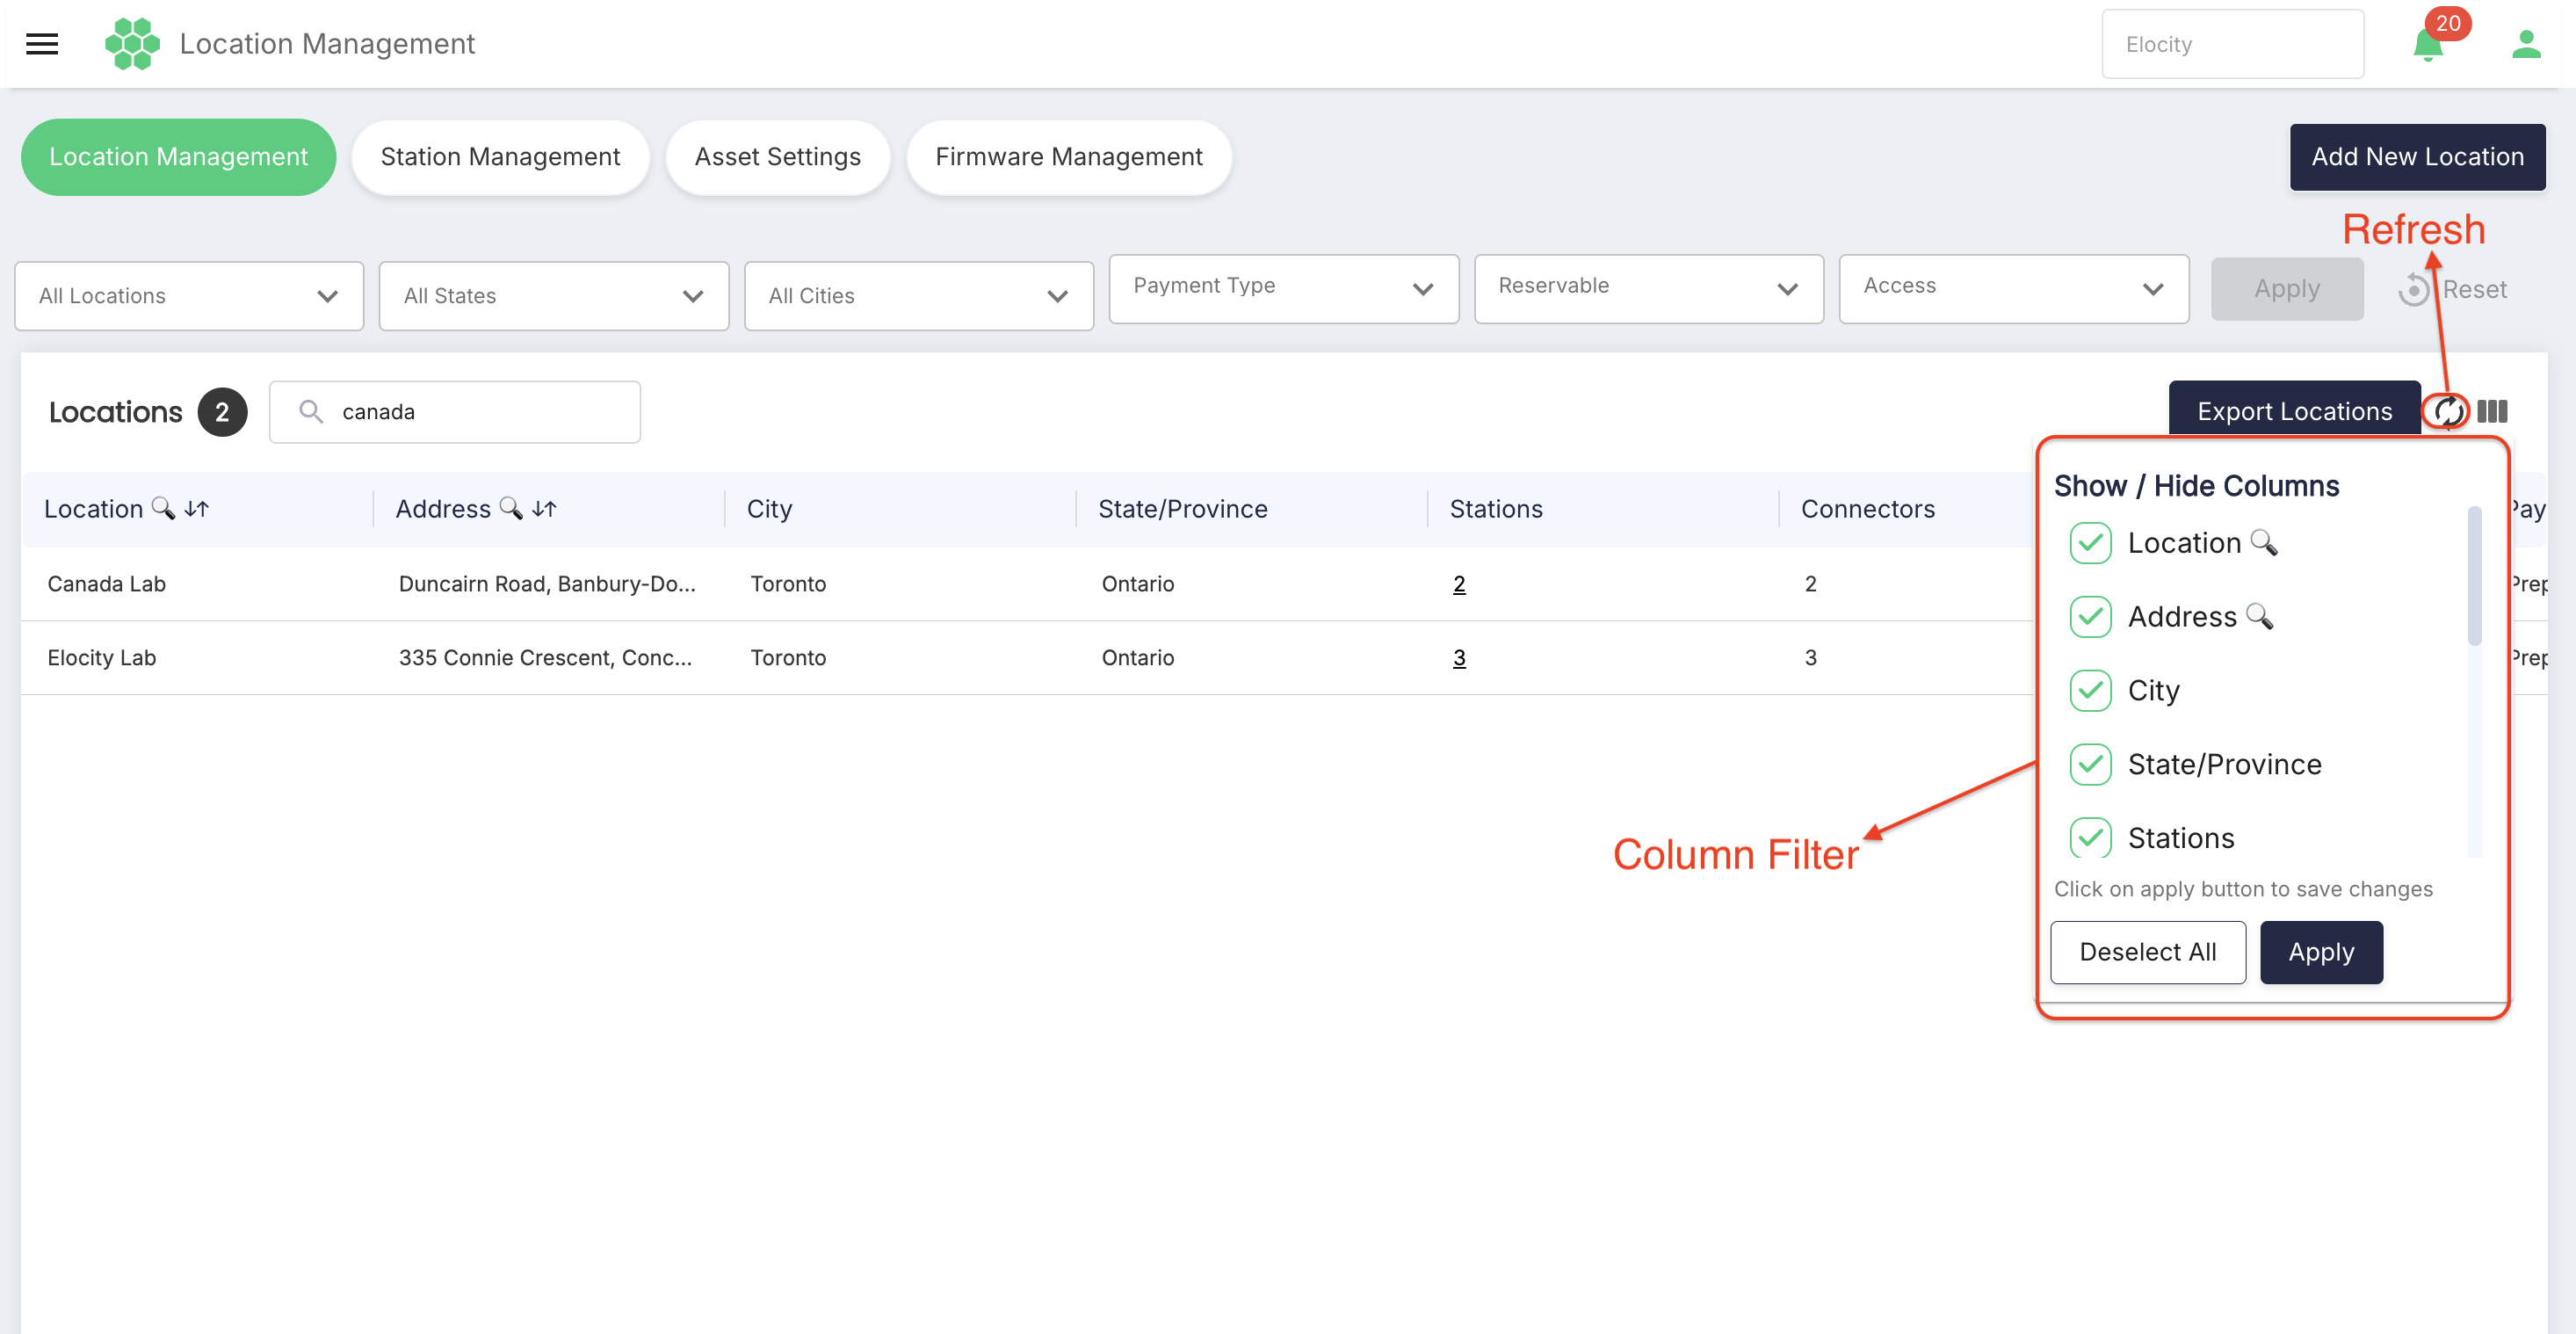
Column visibility changes the on-screen grid layout; it does not change the underlying location records.
Export Locations
- Apply the required filters.
- Select Export Locations.
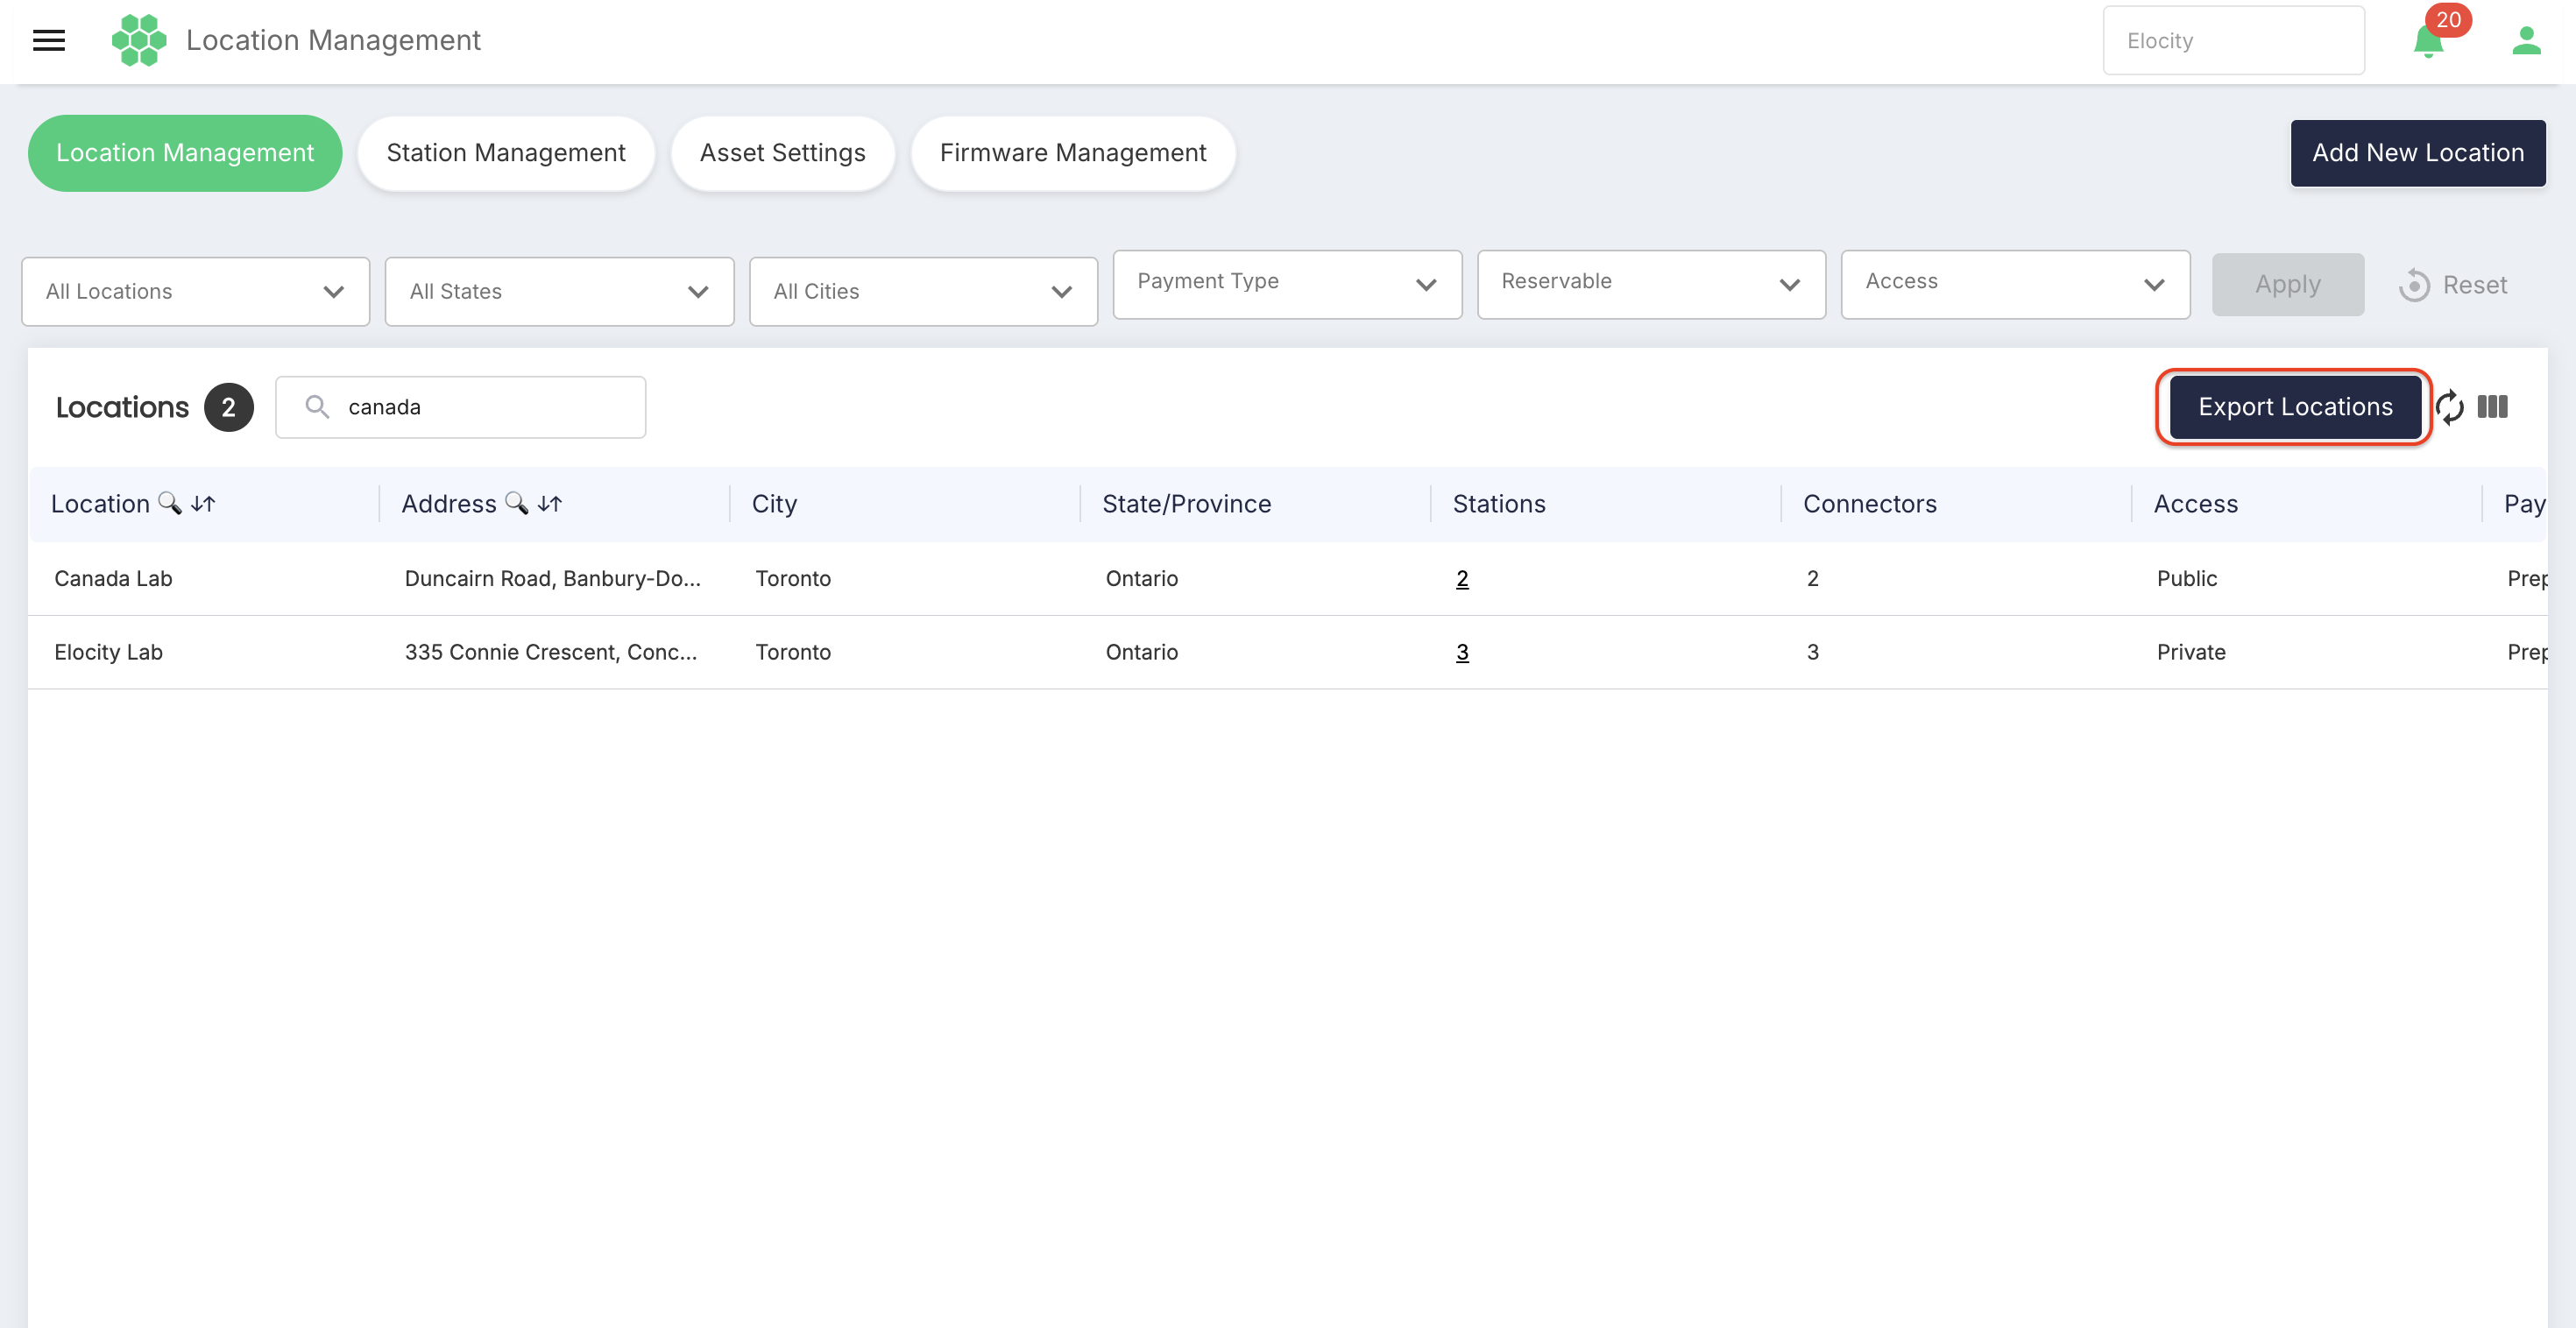
- Enter a file name in the export dialog.
- Select OK to generate the export, or Cancel to close the dialog.
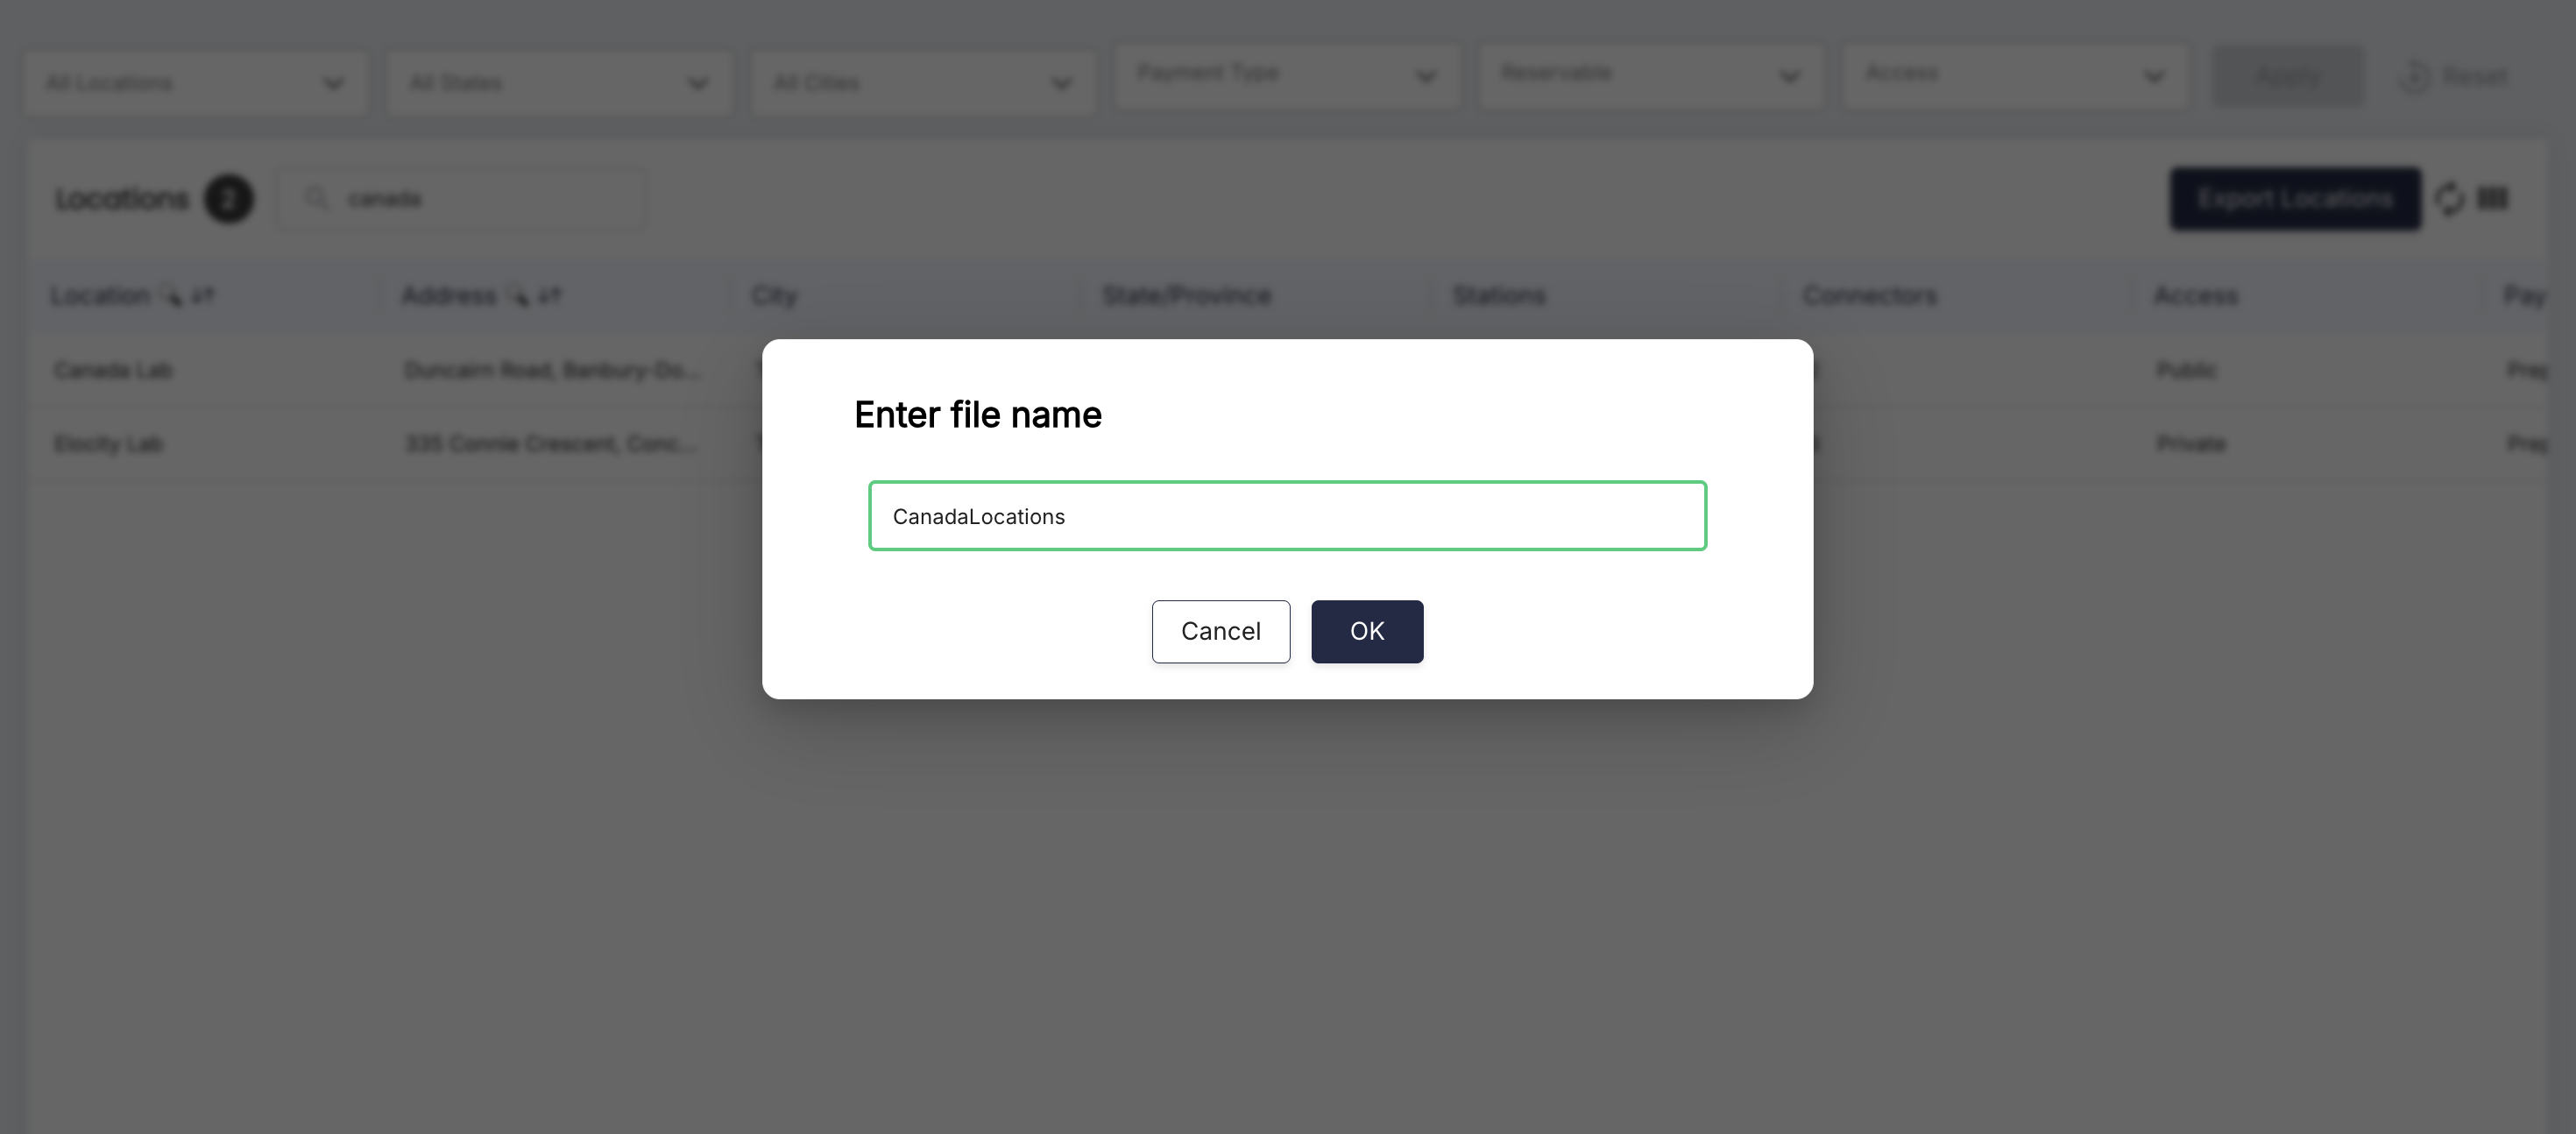
The export is generated in CSV format and contains the columns currently visible in the grid. Configure Column Filter before exporting when a specific set of columns is required.
Location grid columns
Each grid row represents one charging location.
| Column | Description | Interaction |
|---|---|---|
| Location | Name assigned to the charging location. | Selecting the row opens the Location Details page for that location. The Location header supports sorting. |
| Address | Stored street address and any additional location directions or descriptive address text. | Selecting the row opens Location Details. The Address header supports sorting. |
| City | City or municipality recorded for the location. | Display only. |
| State/Province | Province, territory, or state recorded for the location. | Display only. |
| Stations | Number of active charging stations assigned to the location. Decommissioned stations are excluded. | The number is a link. Selecting it opens Station Management filtered to the selected location. A banner identifies the location and returned station count, and Reset Location Filter removes that location restriction. |
| Connectors | Number of active connectors associated with the location's active stations. | Display only on the inspected grid. |
| Access | Displays Public or Private for the location. | Display only. Access configuration is available on the Location Details Access tab. |
| Payment Type | Displays the configured Prepaid or Postpaid charging-payment model. | Display only. The value is maintained on the Location Details Info tab. |
| Site Rating | User-satisfaction score from people who previously used the charging infrastructure at the location. Ratings use a 1-to-5 scale. | Display only. Review information is available on the Location Details Reviews tab when data exists. |
| Max Power Supply (kW) | Sum of the power that all connectors at the location can deliver at the same time. | Display only. |
| Reservable | Displays Yes when mobile-app users can reserve a connector at the location for a future charging period; otherwise displays No. | Display only. The setting is maintained on the Location Details Info tab. |
Opening Location Details
Select a location row to open its Location Details page. The page displays the location name and seven sub-tabs:
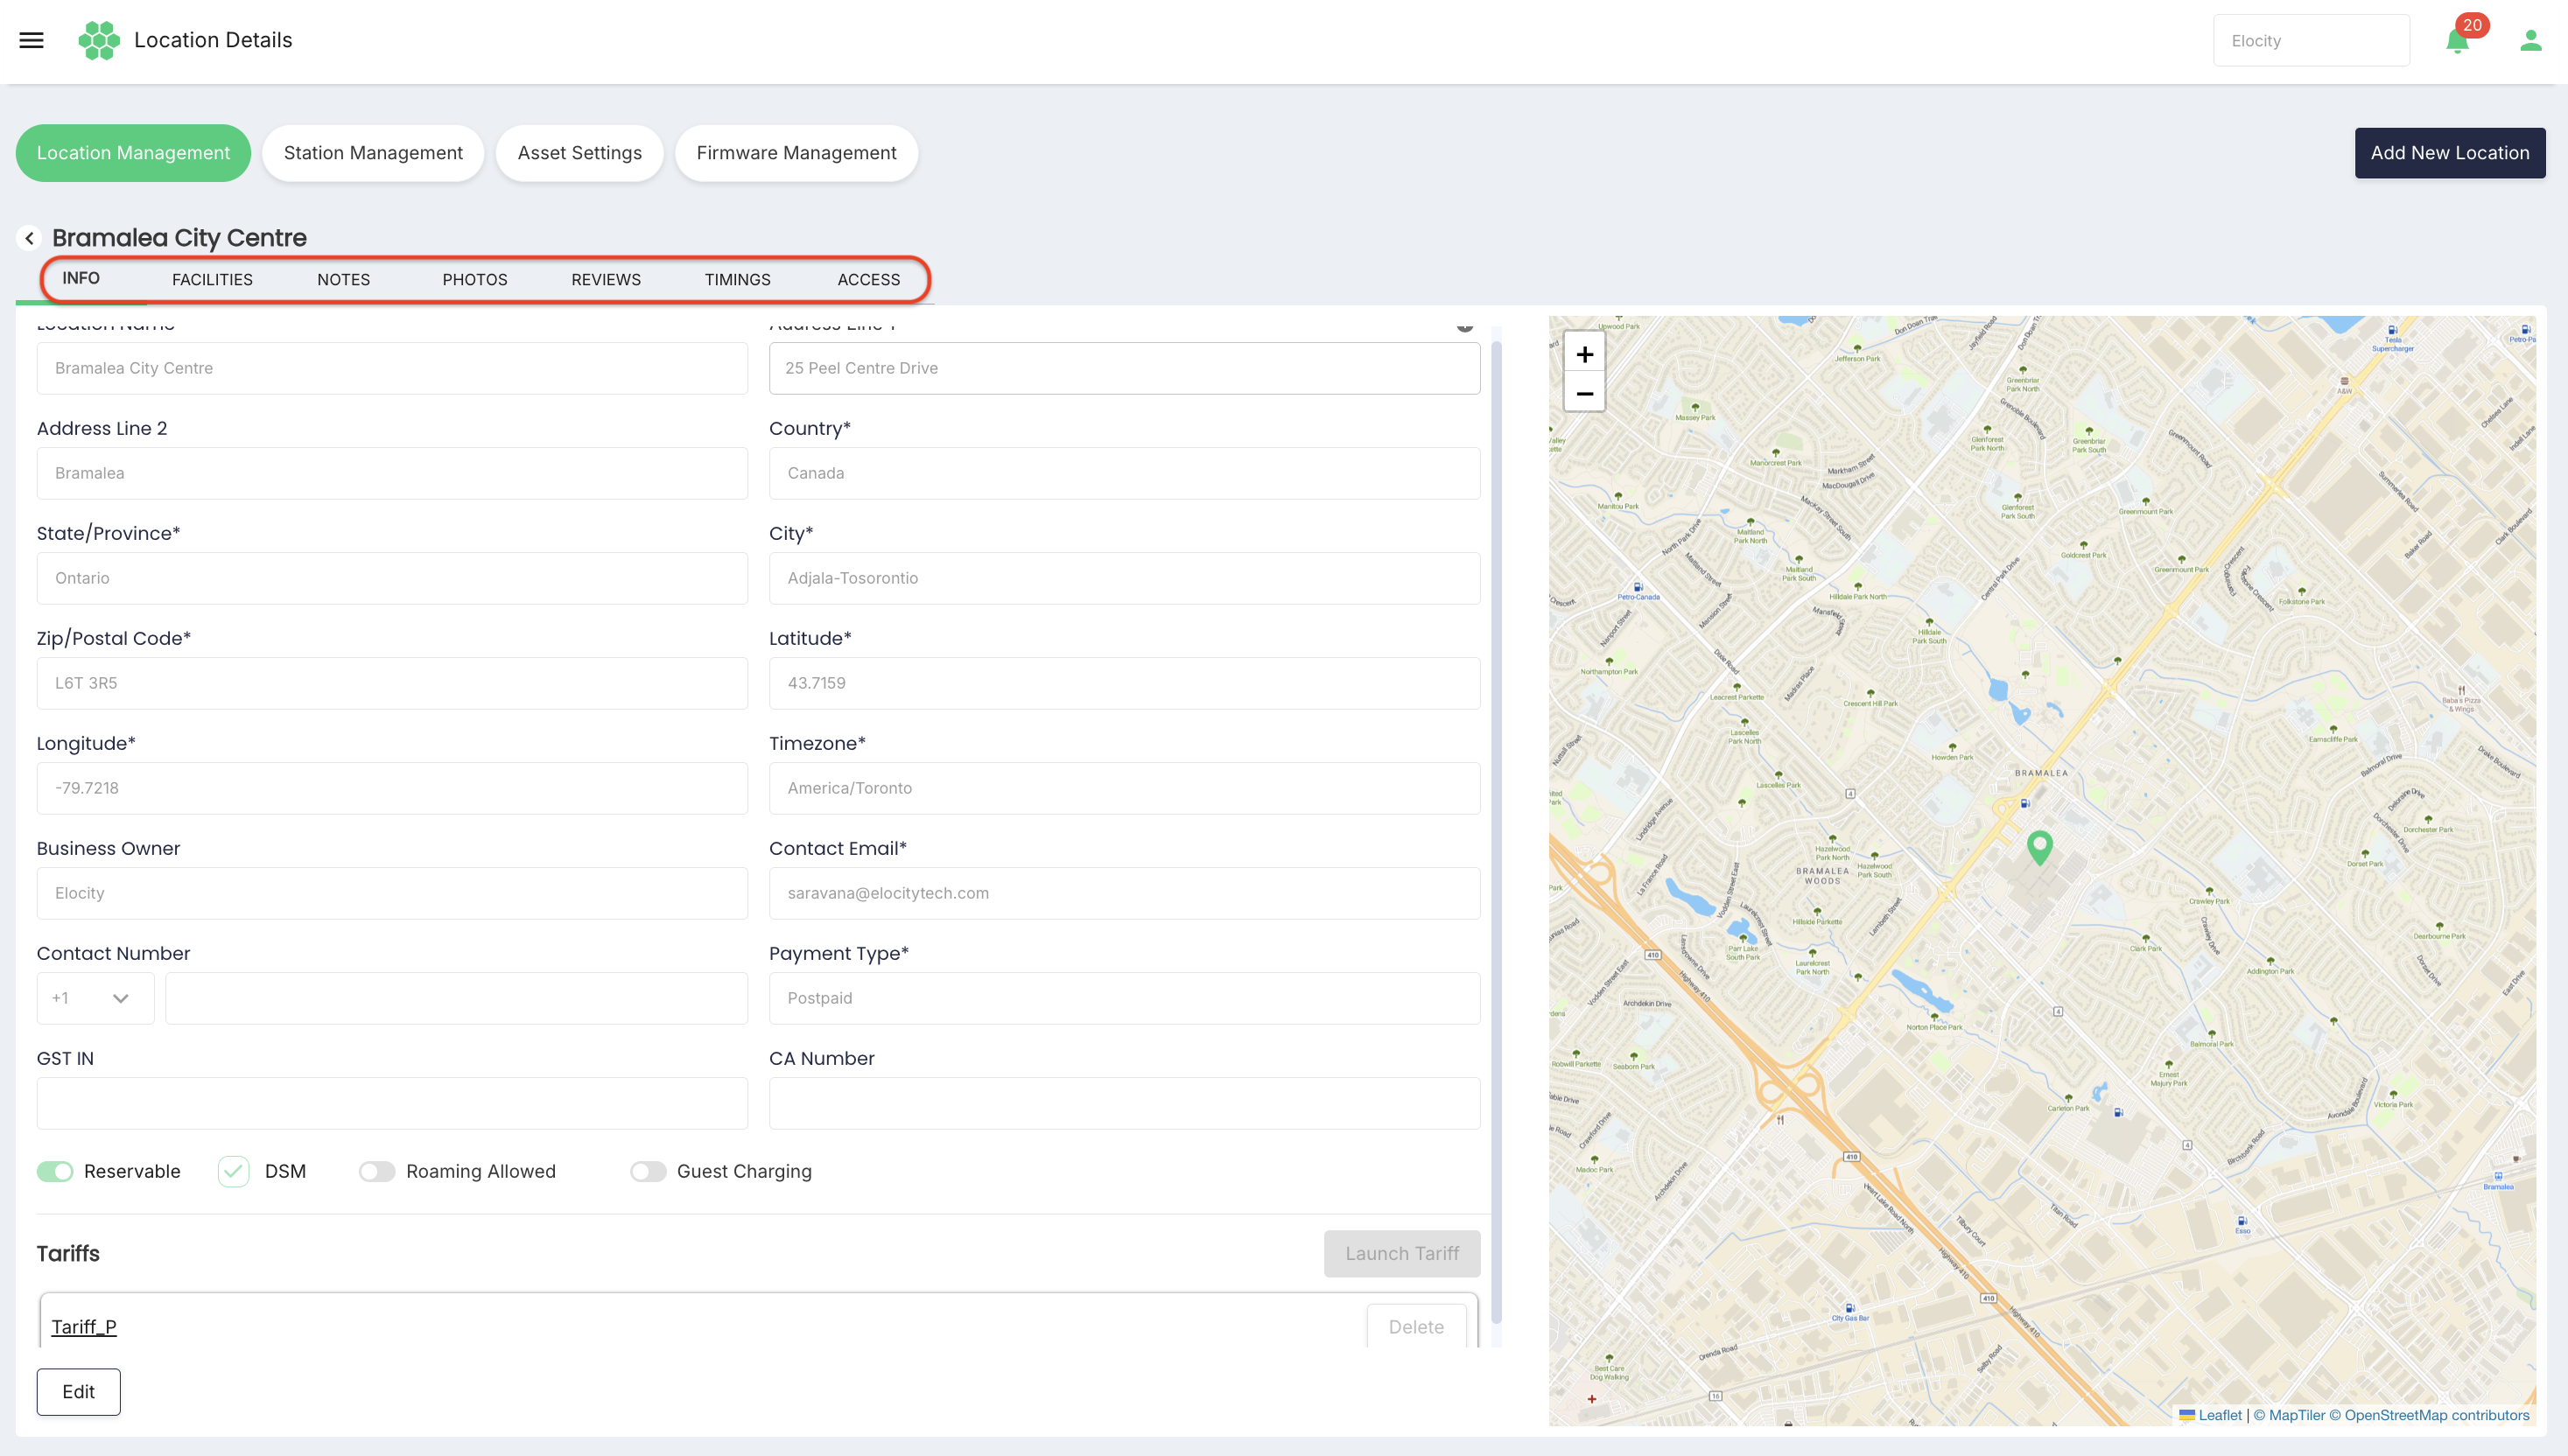
- Info
- Facilities
- Notes
- Photos
- Reviews
- Timings
- Access
Info tab
The Info tab displays the principal identity, address, commercial, contact, and map information for the location. The tab opens in read-only mode. Select Edit to modify supported fields.
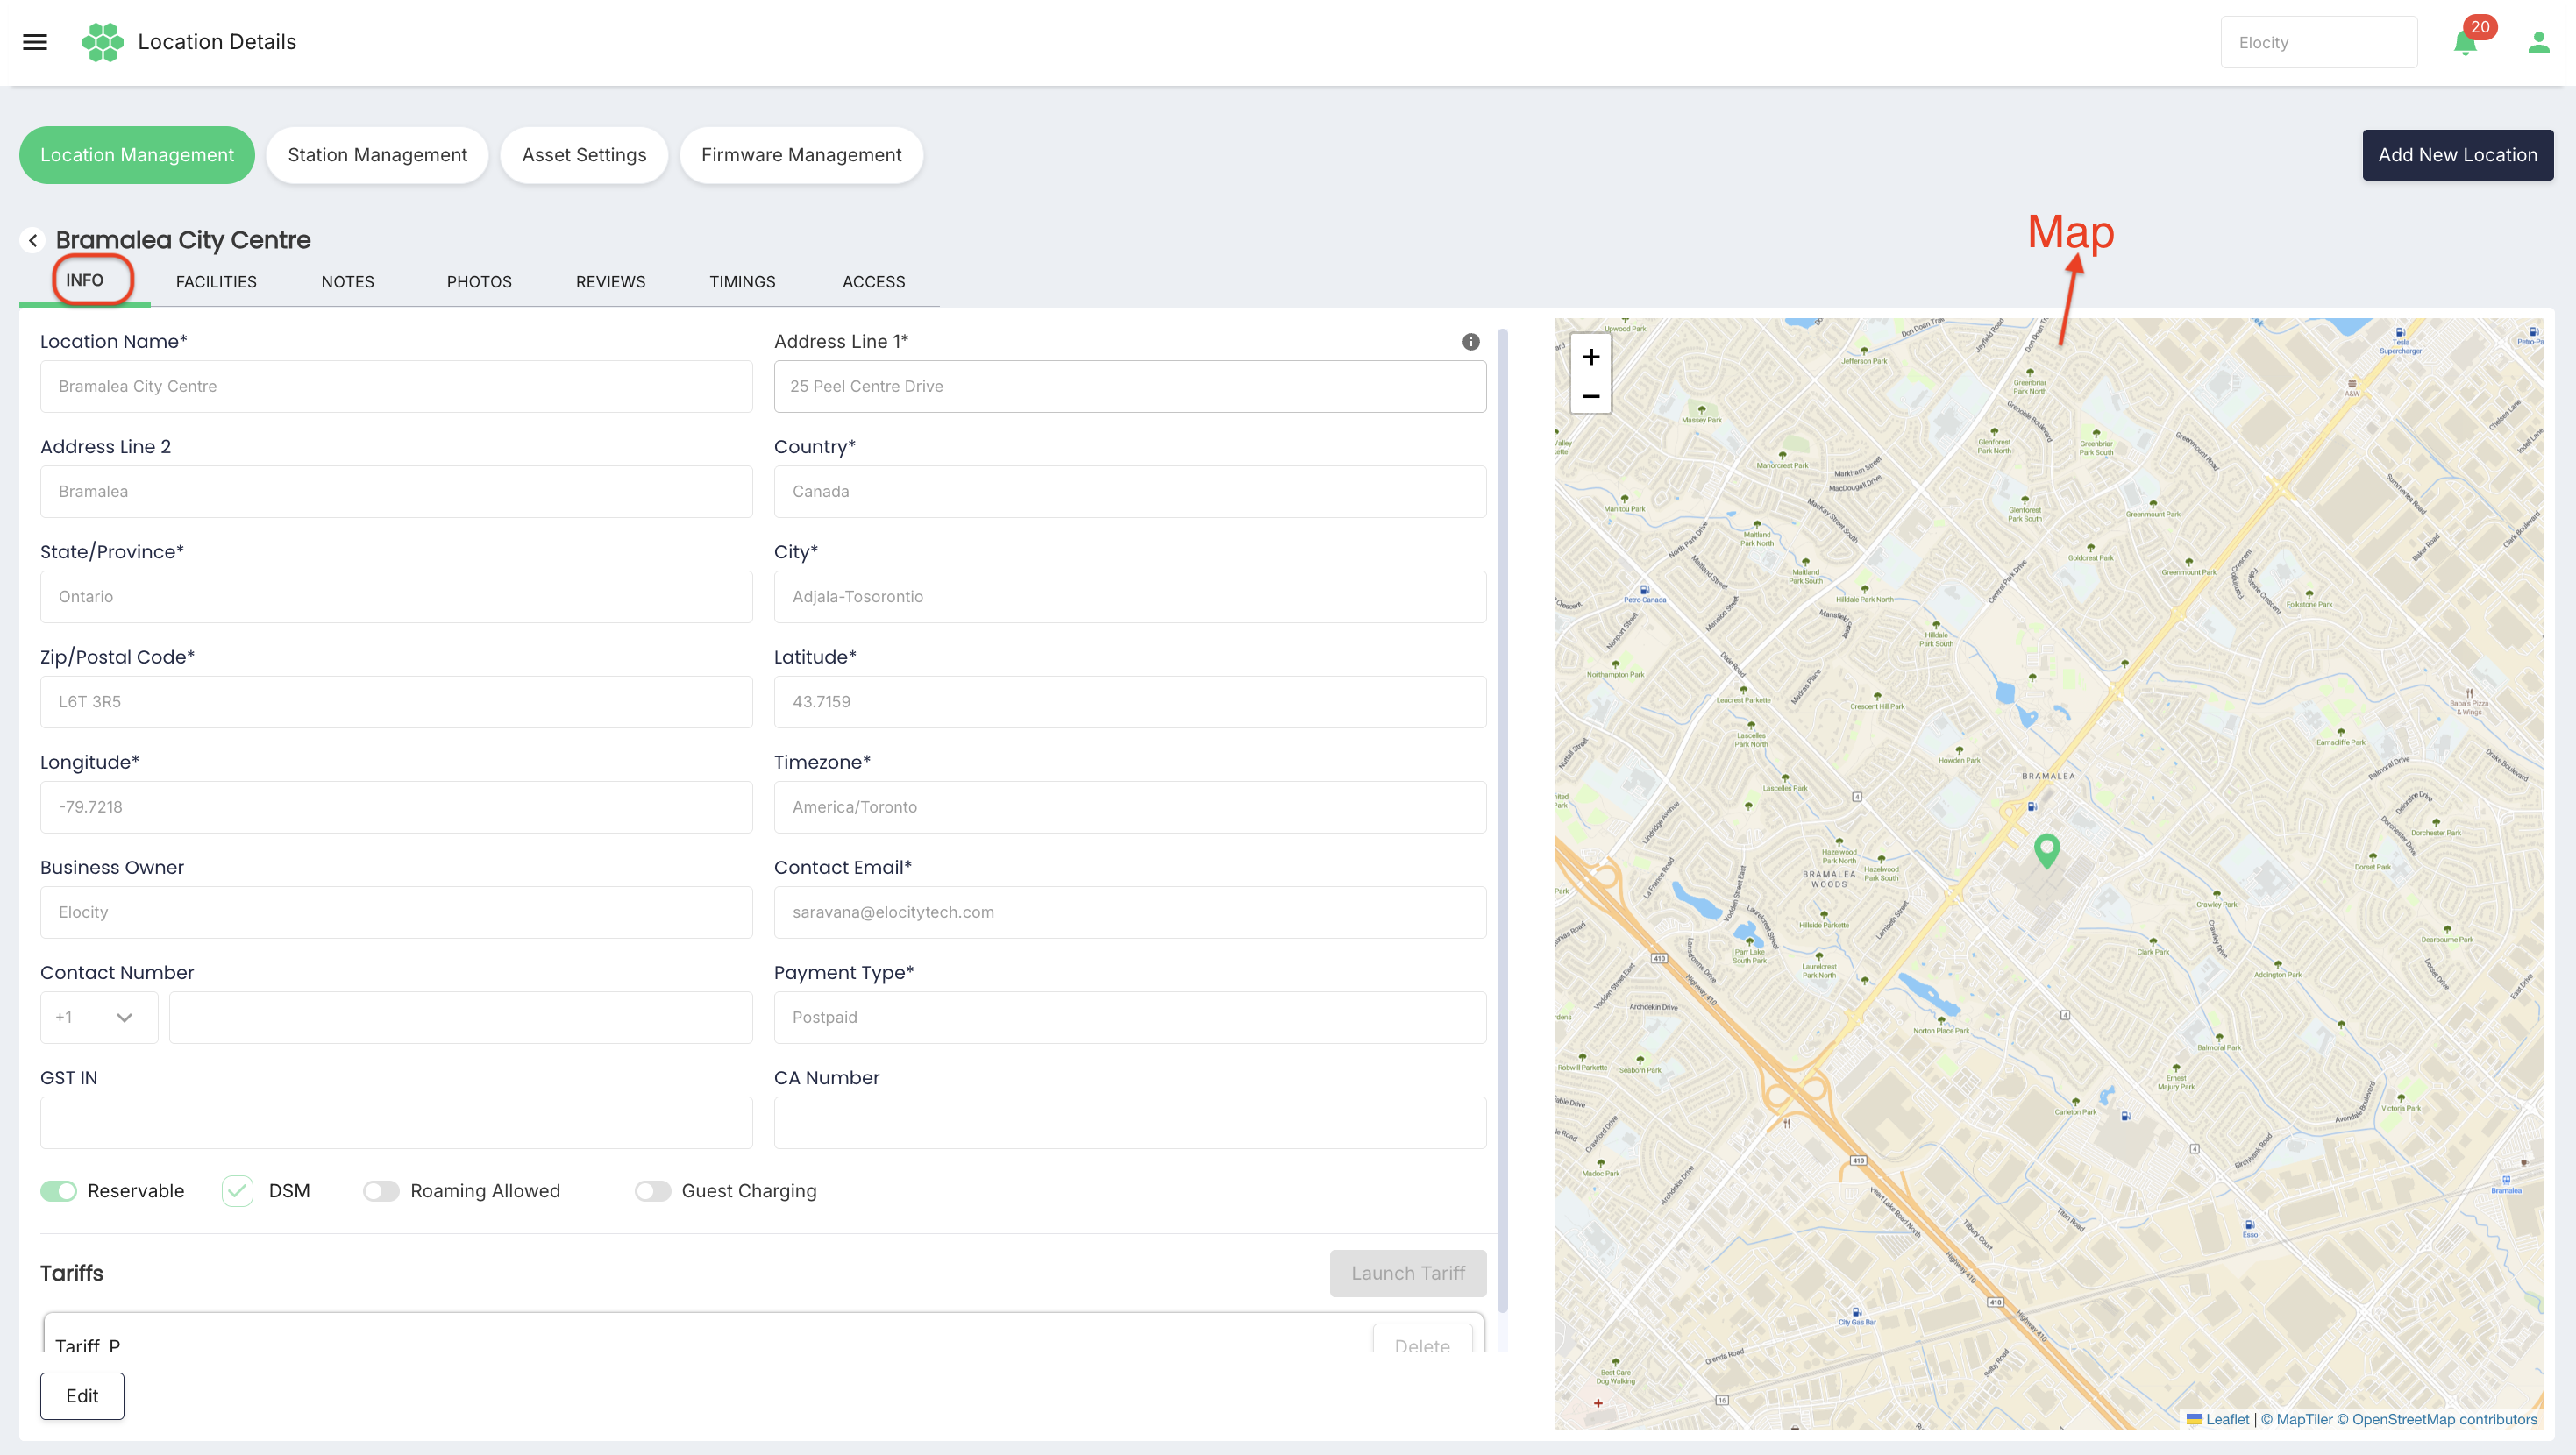
Info fields
| Field | Description |
|---|---|
| Location Name* | Required display name of the location. |
| Address Line 1* | Required primary street address. The edit form uses an address-search control. |
| Address Line 2 | Optional supplementary address, unit, floor, parking, or site-direction information. |
| Country* | Required country. The inspected Canadian deployment currently presents Canada. |
| State/Province* | Required province, territory, or state. |
| City* | Required city or municipality. Its available values depend on the selected state/province. |
| Zip/Postal Code* | Required postal or ZIP code. |
| Latitude* | Required geographic latitude stored for the location. |
| Longitude* | Required geographic longitude stored for the location. |
| Timezone* | Required operating timezone. The inspected deployment provides America/Blanc-Sablon, America/Dawson_Creek, America/Regina, America/St_Johns, America/Toronto, and America/Vancouver. |
| Business Owner | Business associated with the location. This field is read-only on both the inspected detail and creation forms. |
| Contact Email* | Required contact email for the location. |
| Contact Number | Optional contact country code and telephone number. |
| Payment Type* | Required payment model. At a Prepaid location, the user must load money into the application wallet before starting a charging session. At a Postpaid location, charging can begin first and payment details are requested after the session completes. |
| Reservable | Enables or disables connector reservation for the location. Detailed reservation windows, eligibility, cancellation, and duration rules are managed and documented in the separate Reservations module. |
| Guest Charging | Allows chargers at the location to be used without creating a HIEV mobile-app account. The driver scans the station QR code, continues on a web page, supplies a credit card when payment applies, and starts charging. |
| Tariffs | Displays the currently associated tariff. The inspected record displays Free Tariff. |
Fields marked with an asterisk are required.
Map
The Info tab includes a street map associated with the stored latitude and longitude. Use the + and − controls to zoom in and out.
Editing Info
- Select Edit.
- Update the required fields.
- Review the address, coordinates, timezone, payment type, reservation setting, guest-charging setting, and displayed tariff.
- Select Save to retain the changes.
Select Cancel to leave edit mode without saving.
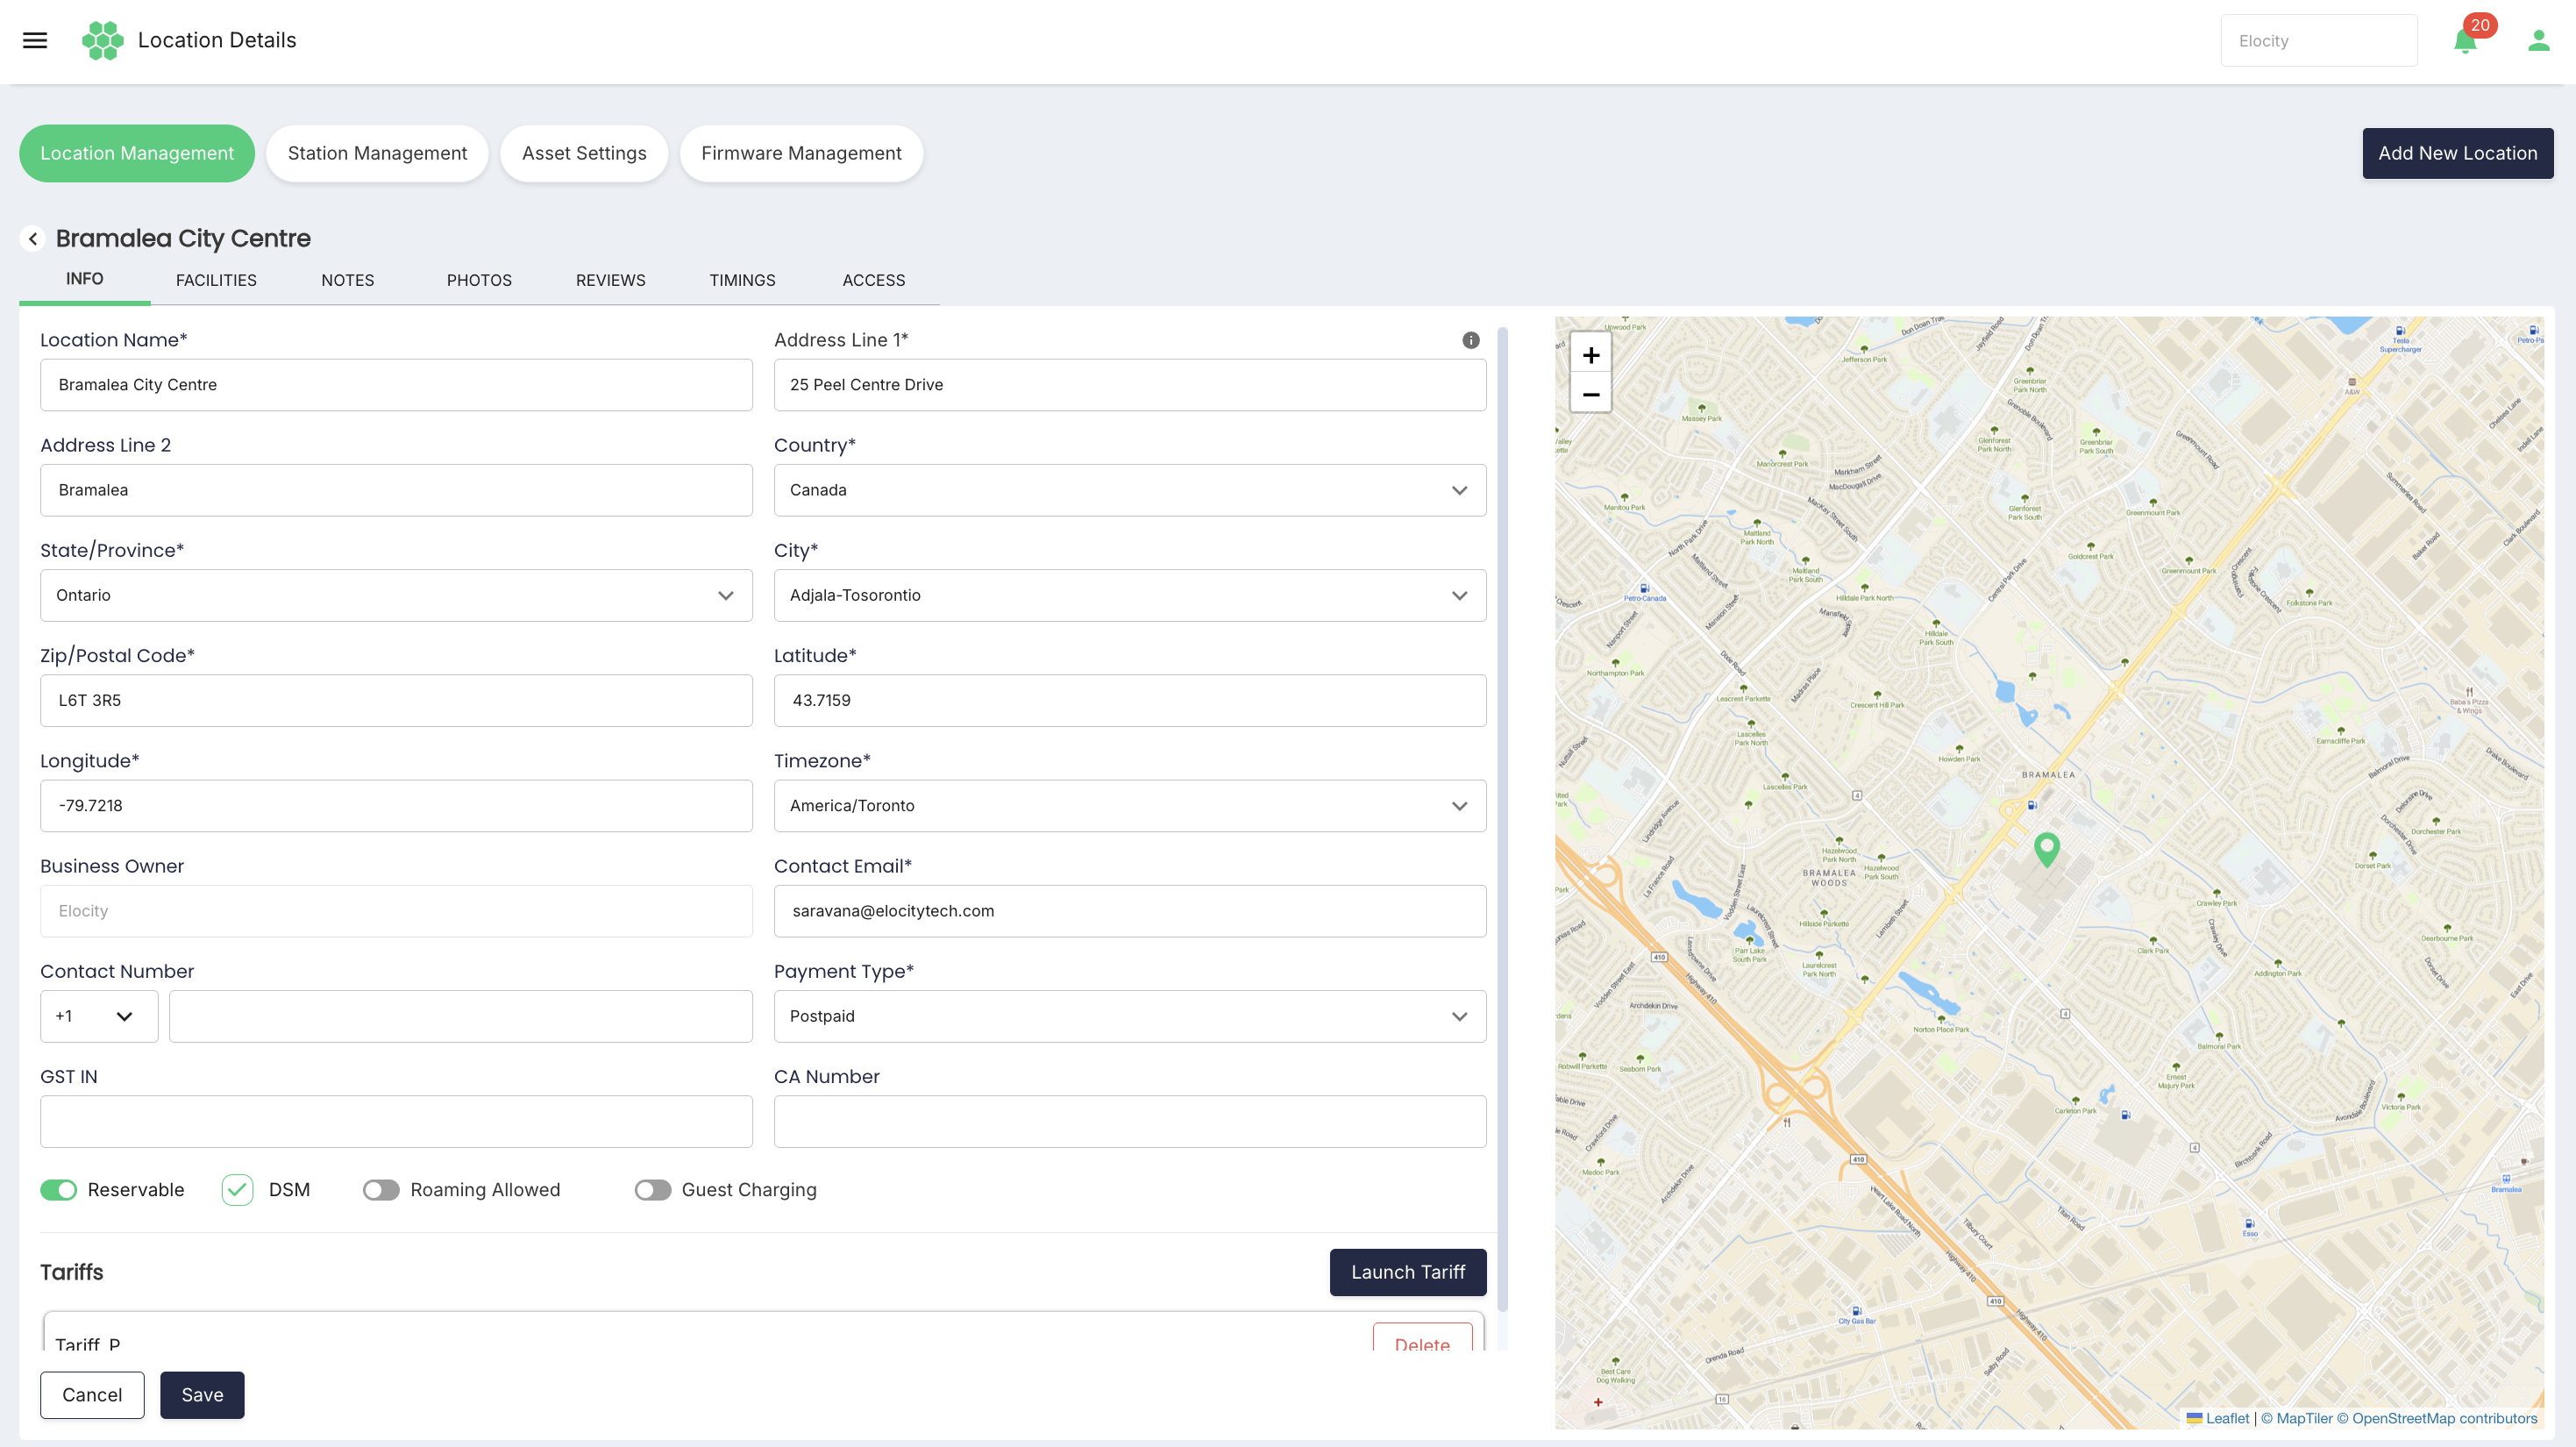
The Launch Tariff button is disabled in read-only mode and becomes available while the Info tab is being edited. Tariff assignment uses the selected power type and connector type and applies to the connectors on all stations at the location that meet those selections.
Facilities tab
The Facilities tab identifies amenities and transport services associated with the location. The live interface supports the following facility types:
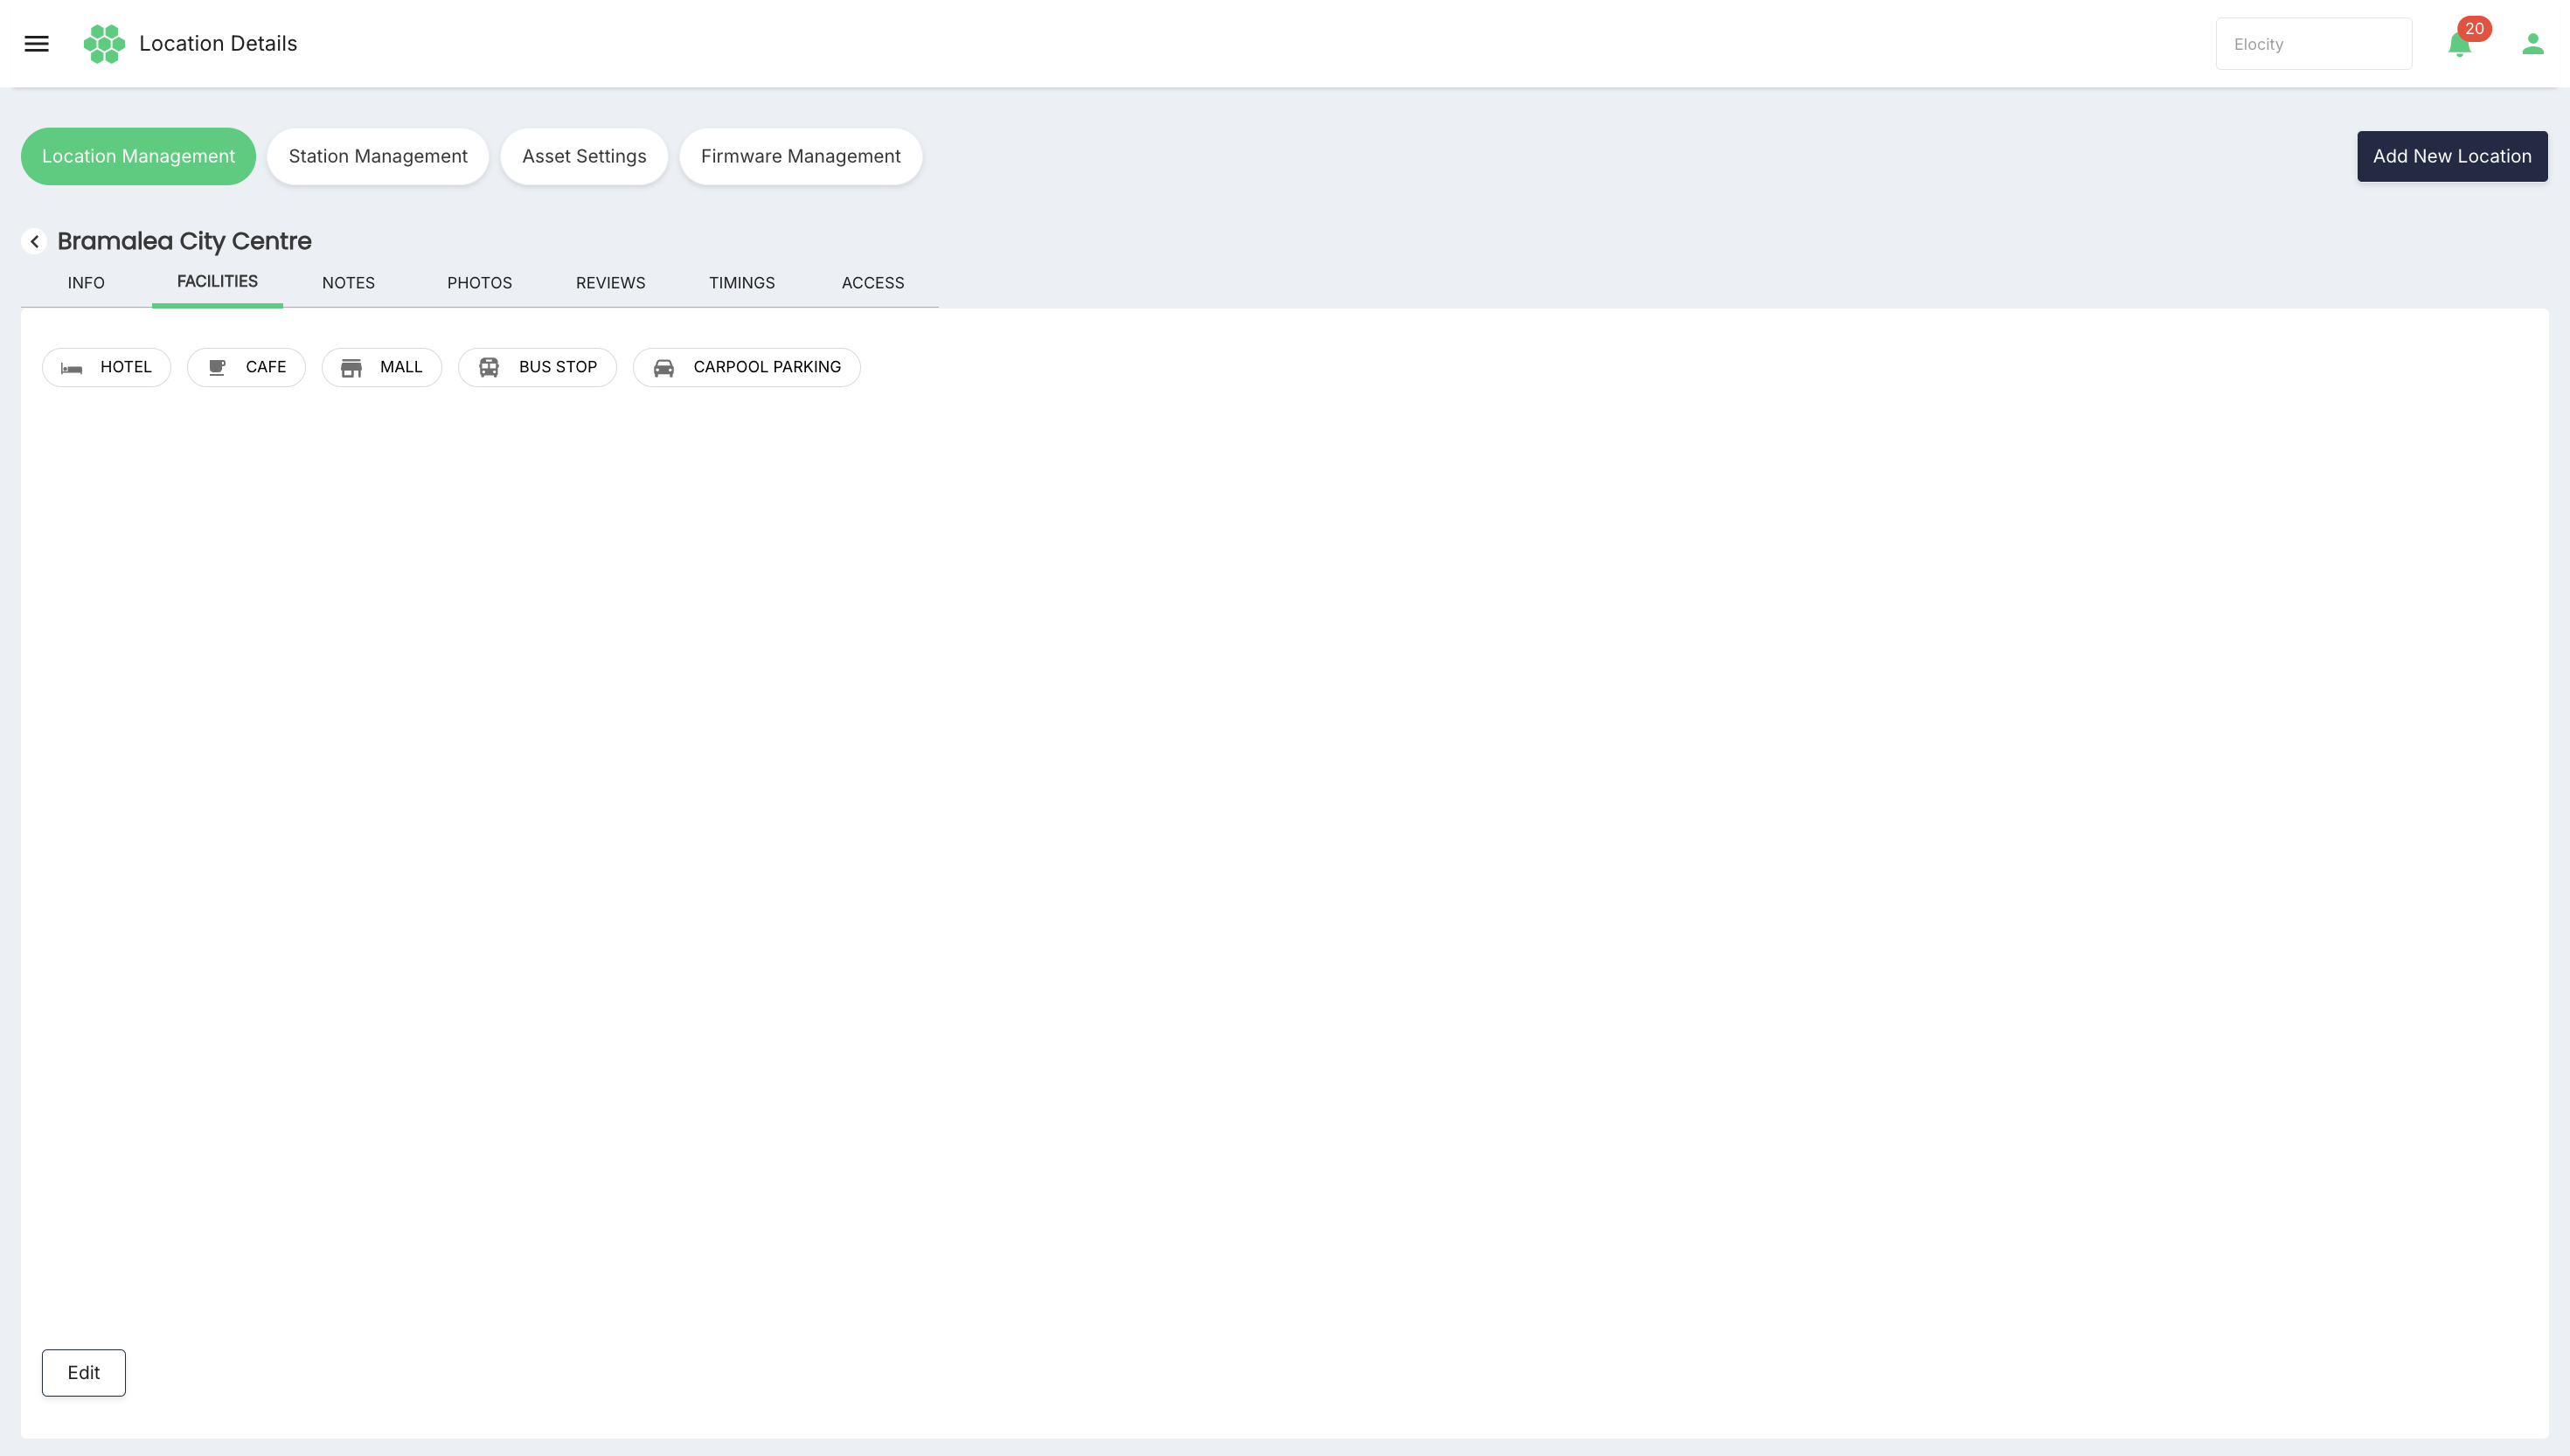
- Hotel
- Restaurant
- Cafe
- Mall
- Supermarket
- Sport
- Recreation Area
- Nature
- Museum
- Bike Sharing
- Bus Stop
- Taxi Stand
- Tram Stop
- Metro Station
- Train Station
- Airport
- Parking Lot
- Carpool Parking
- Fuel Station
- Wi-Fi
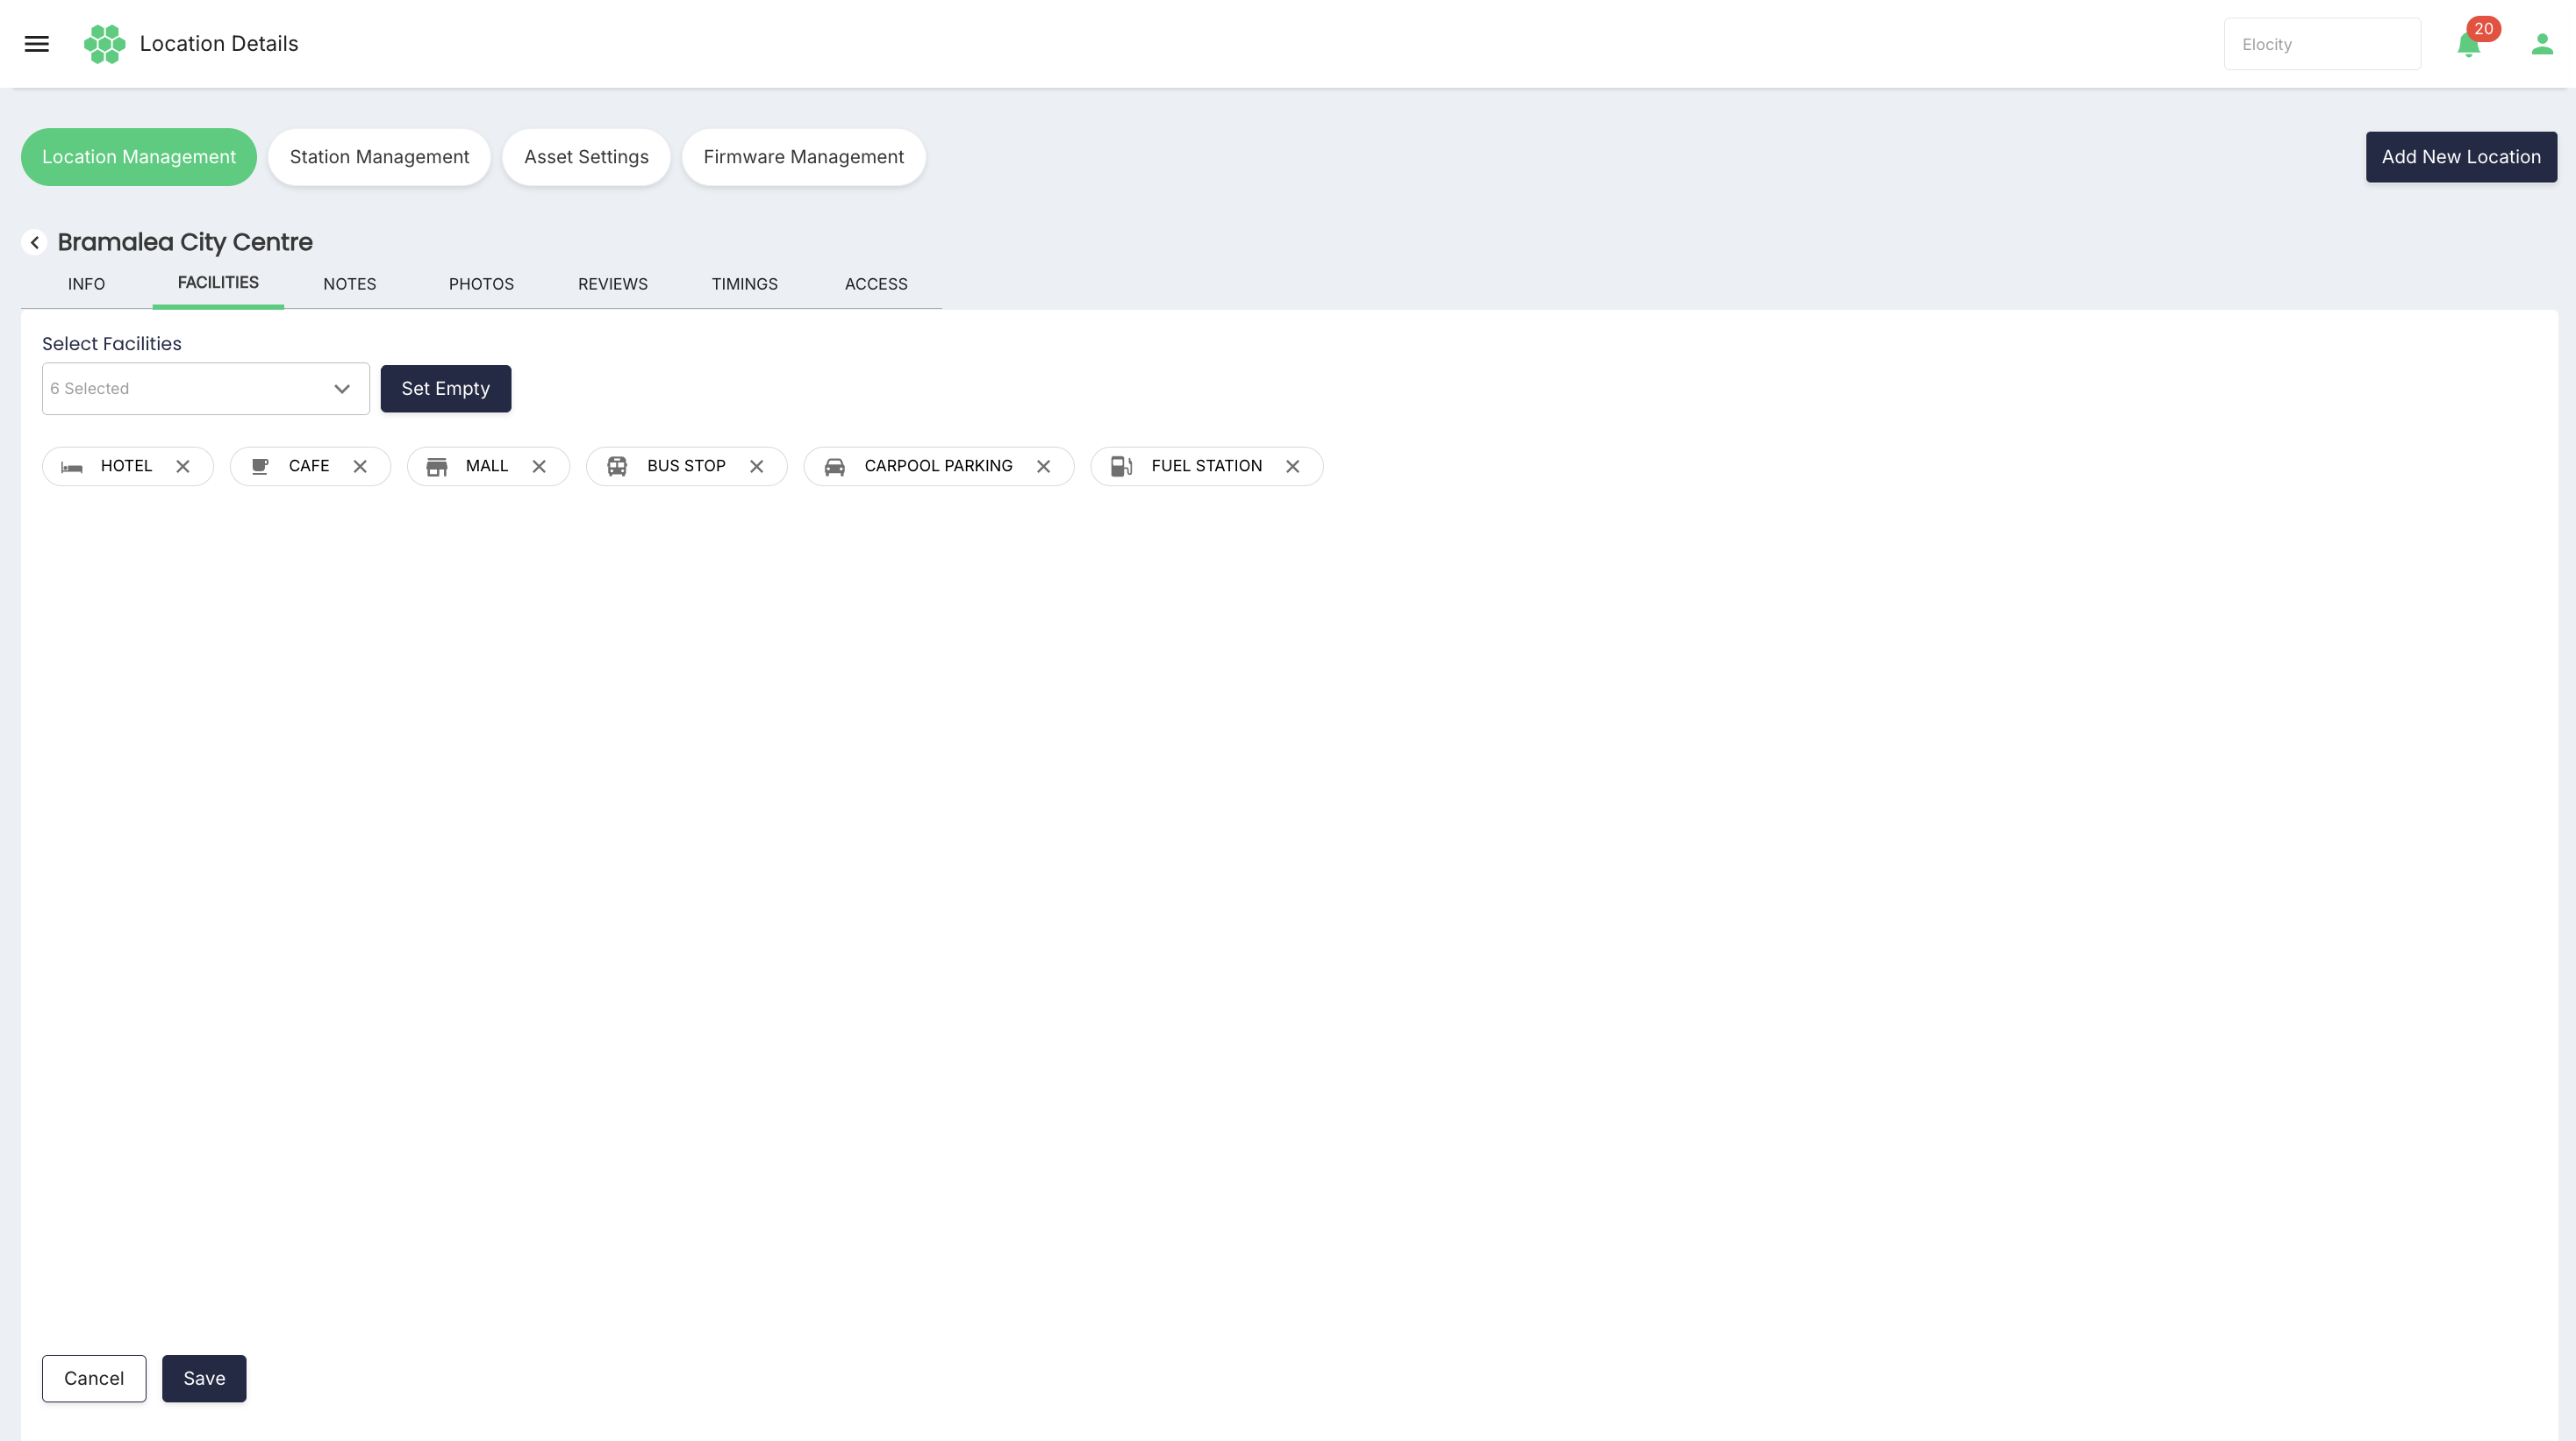
Editing facilities
- Select Edit.
- Open Select Facilities.
- Select the applicable facilities. The control displays the number currently selected.
- Select Save.
Use Set Empty to clear the facility selection. Select Cancel to discard unsaved changes.
Notes tab
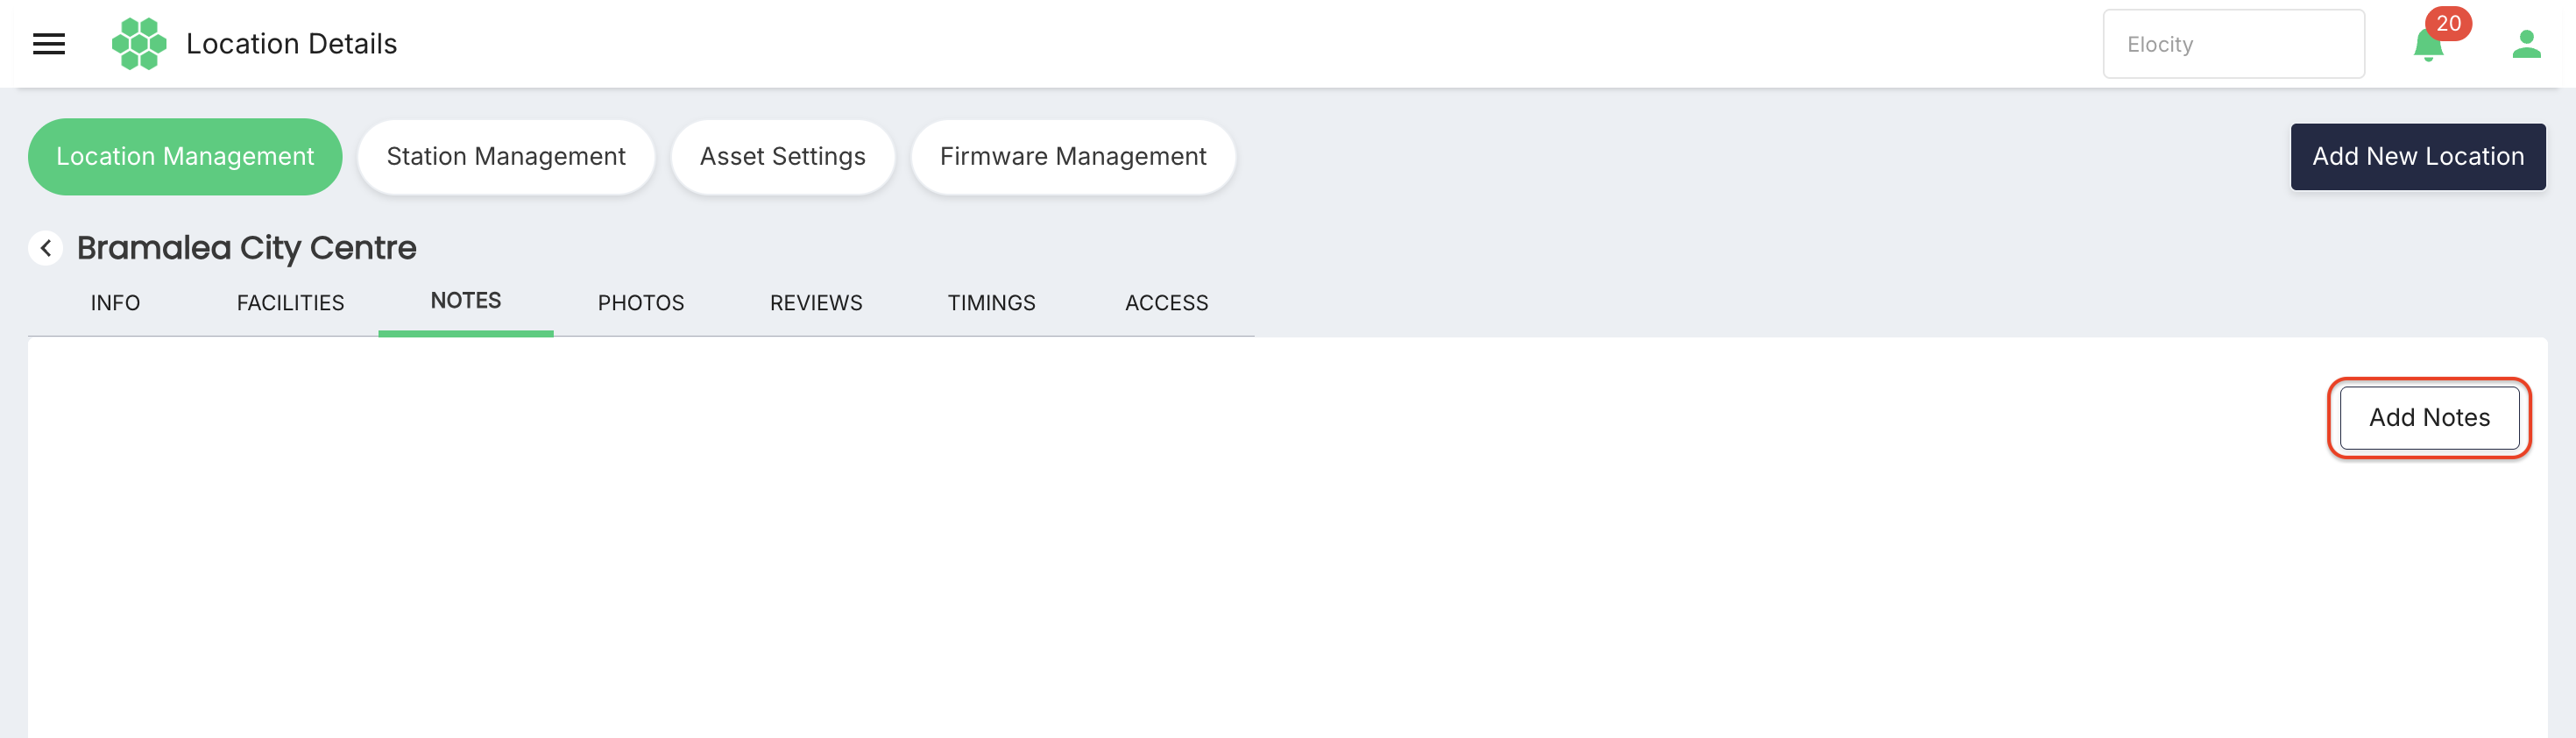
The Notes tab stores one operator note intended for EV drivers. The note can contain a long series of sentences, subject to the 700-character limit displayed by the entry form. When no note is present, the page displays No Notes Exist.
Adding a note
- Select Add Notes.
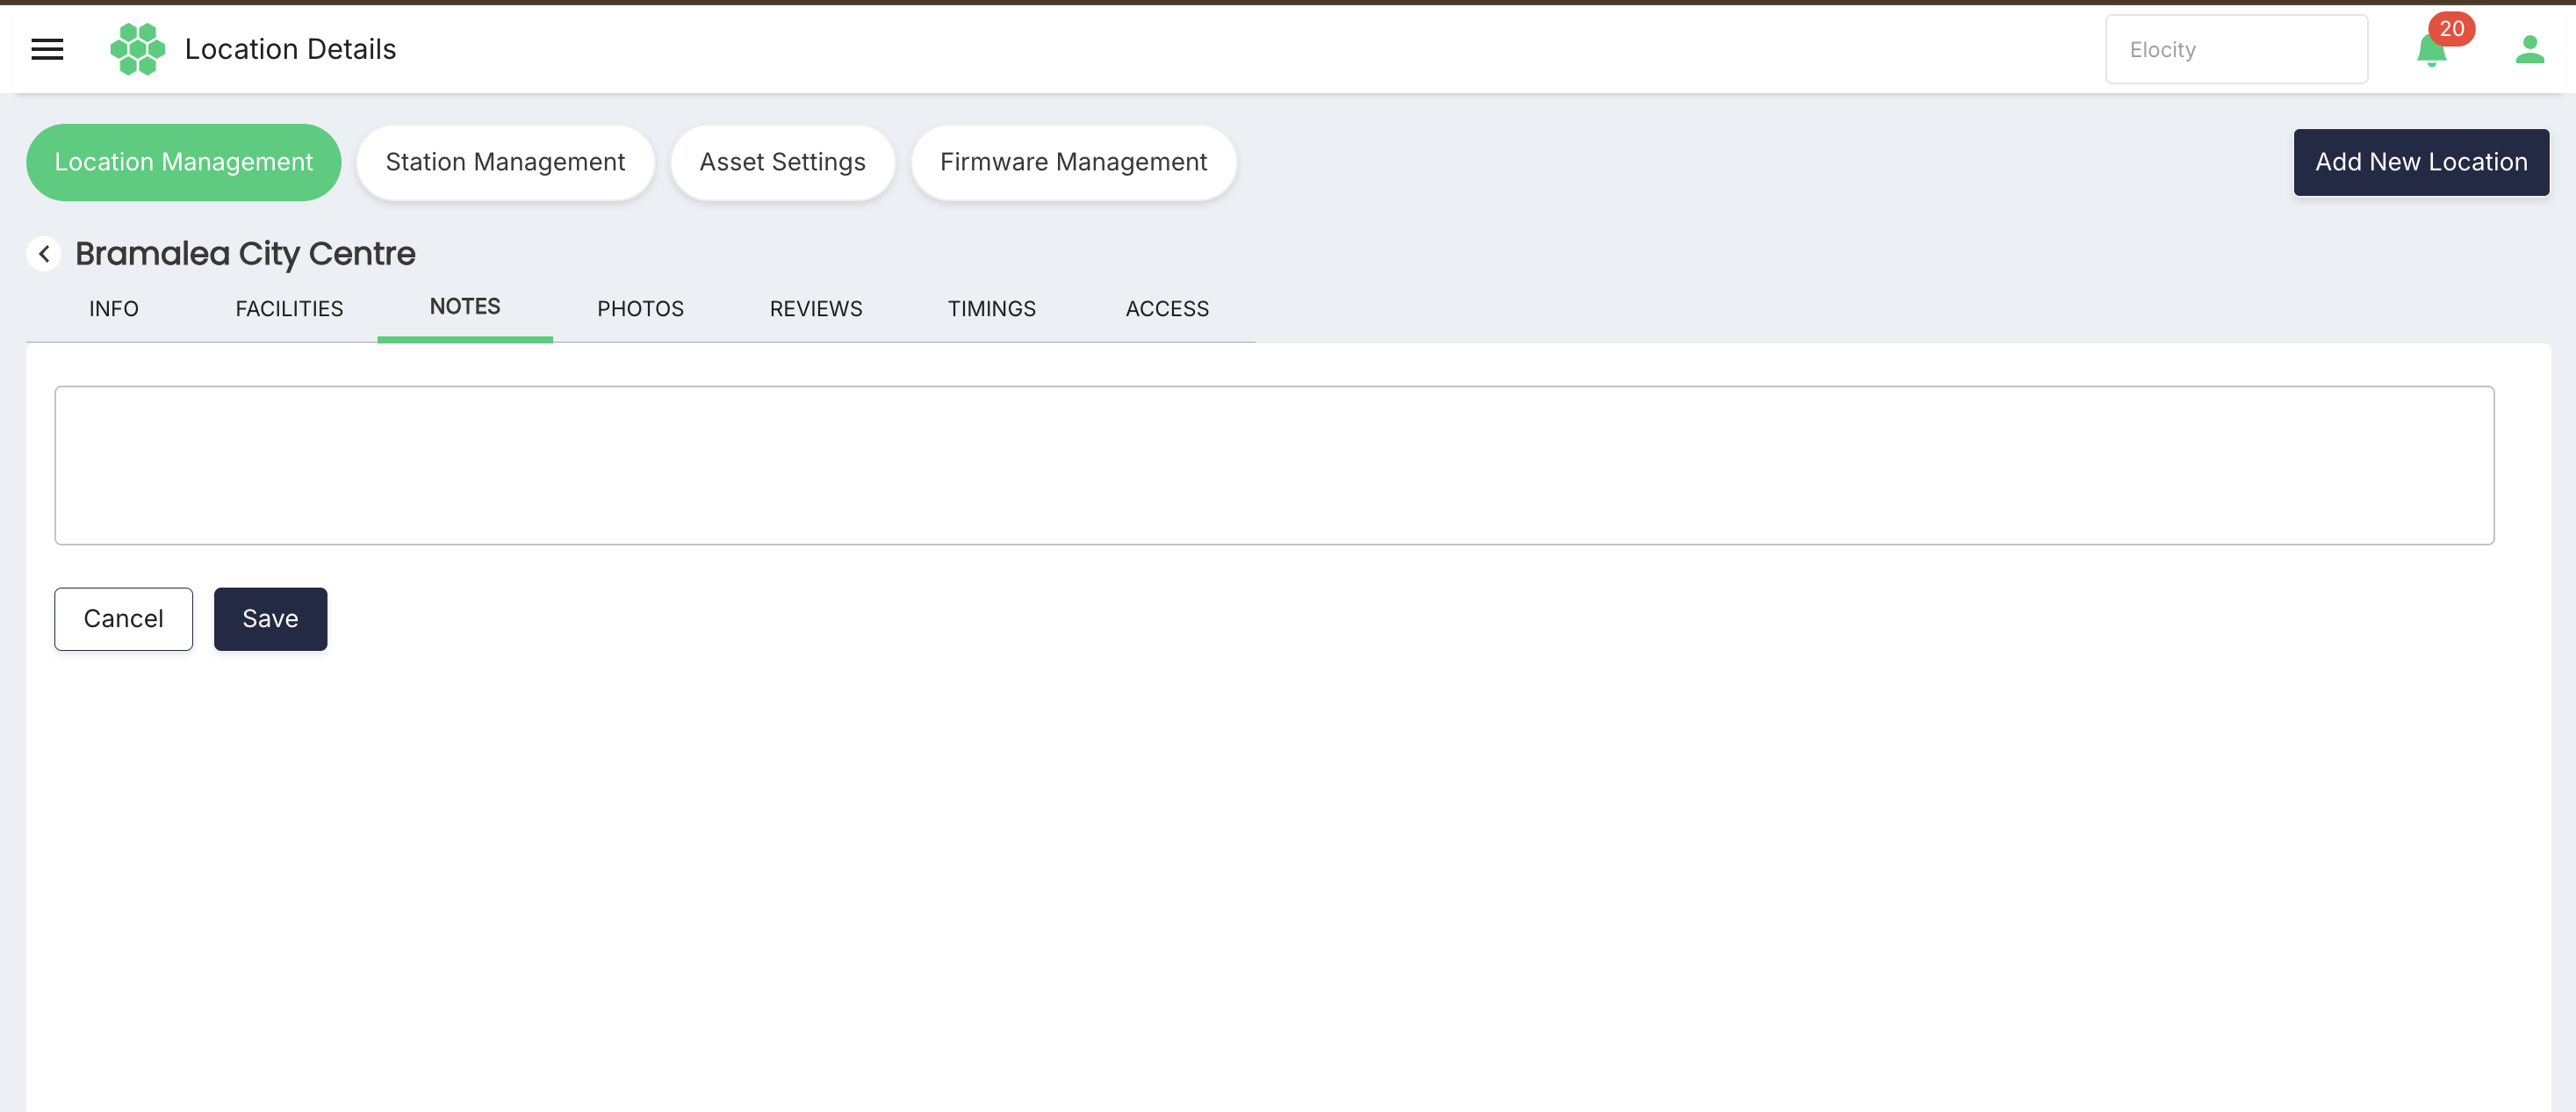
- Enter the note in the text area. The inspected form accepts up to 700 characters.
- Select Save.
Select Cancel to close the entry form without adding the note. Existing note content can be changed or removed through the location editing workflow.
Photos tab
The Photos tab displays images associated with the location and provides controls to add or remove photos.
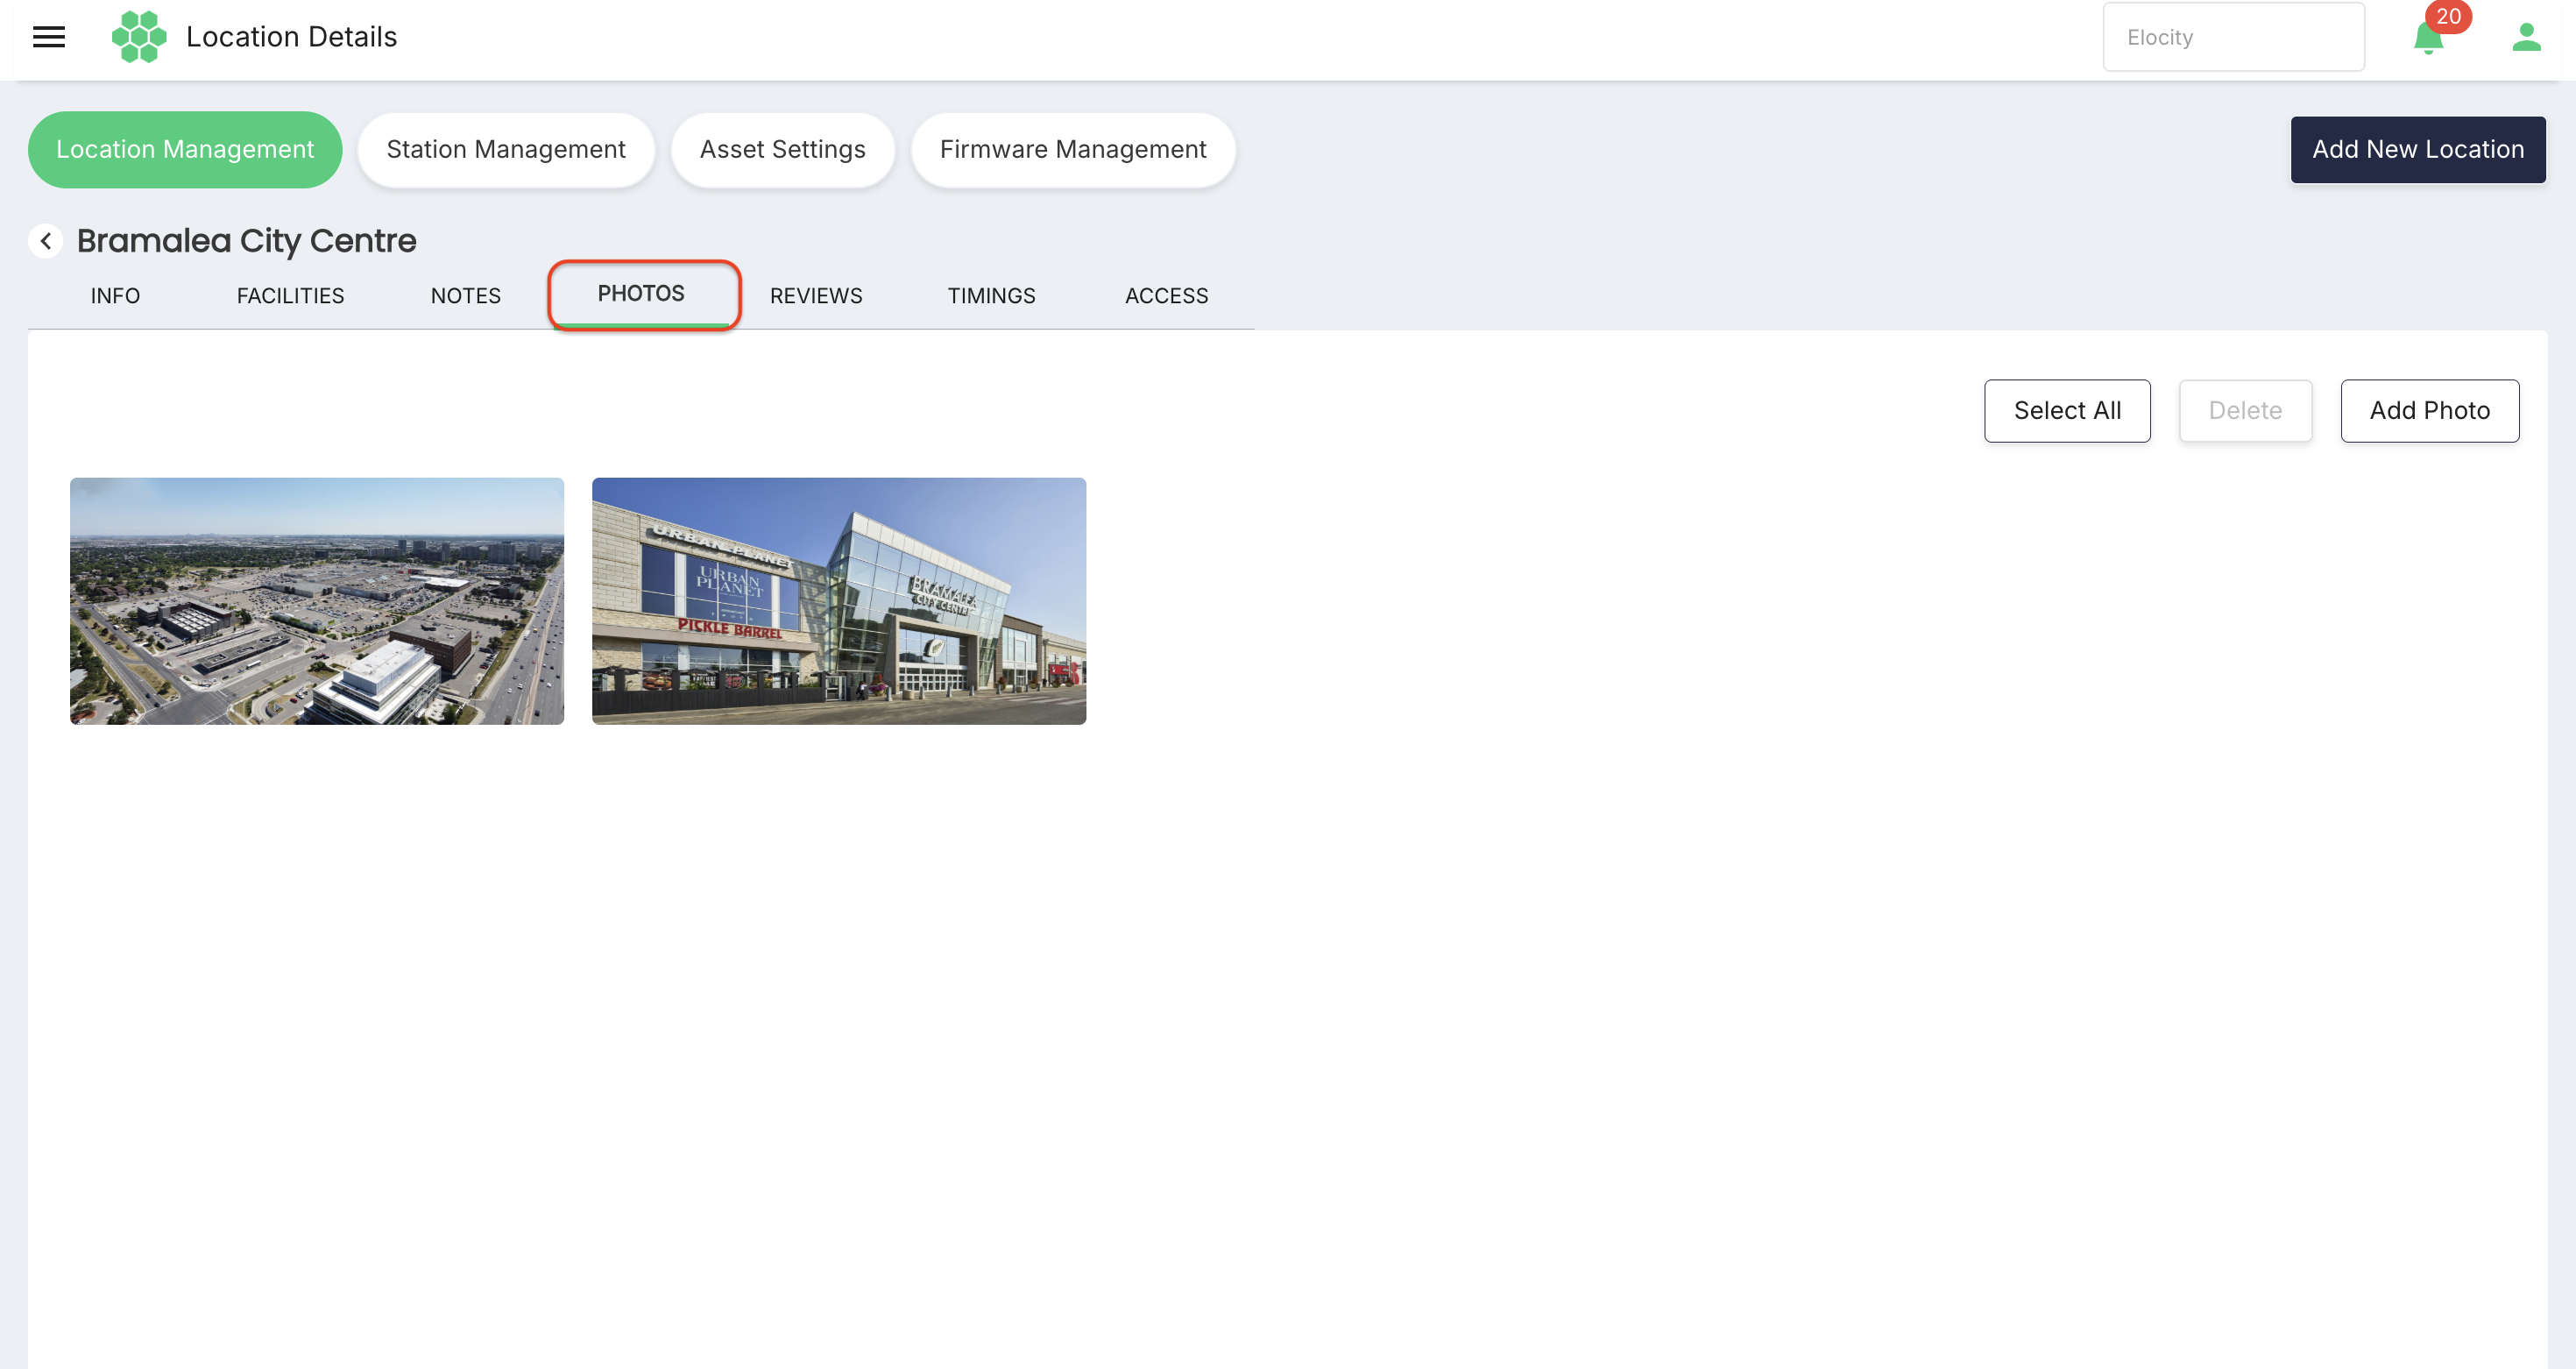
Adding photos
- Select Add Photo.
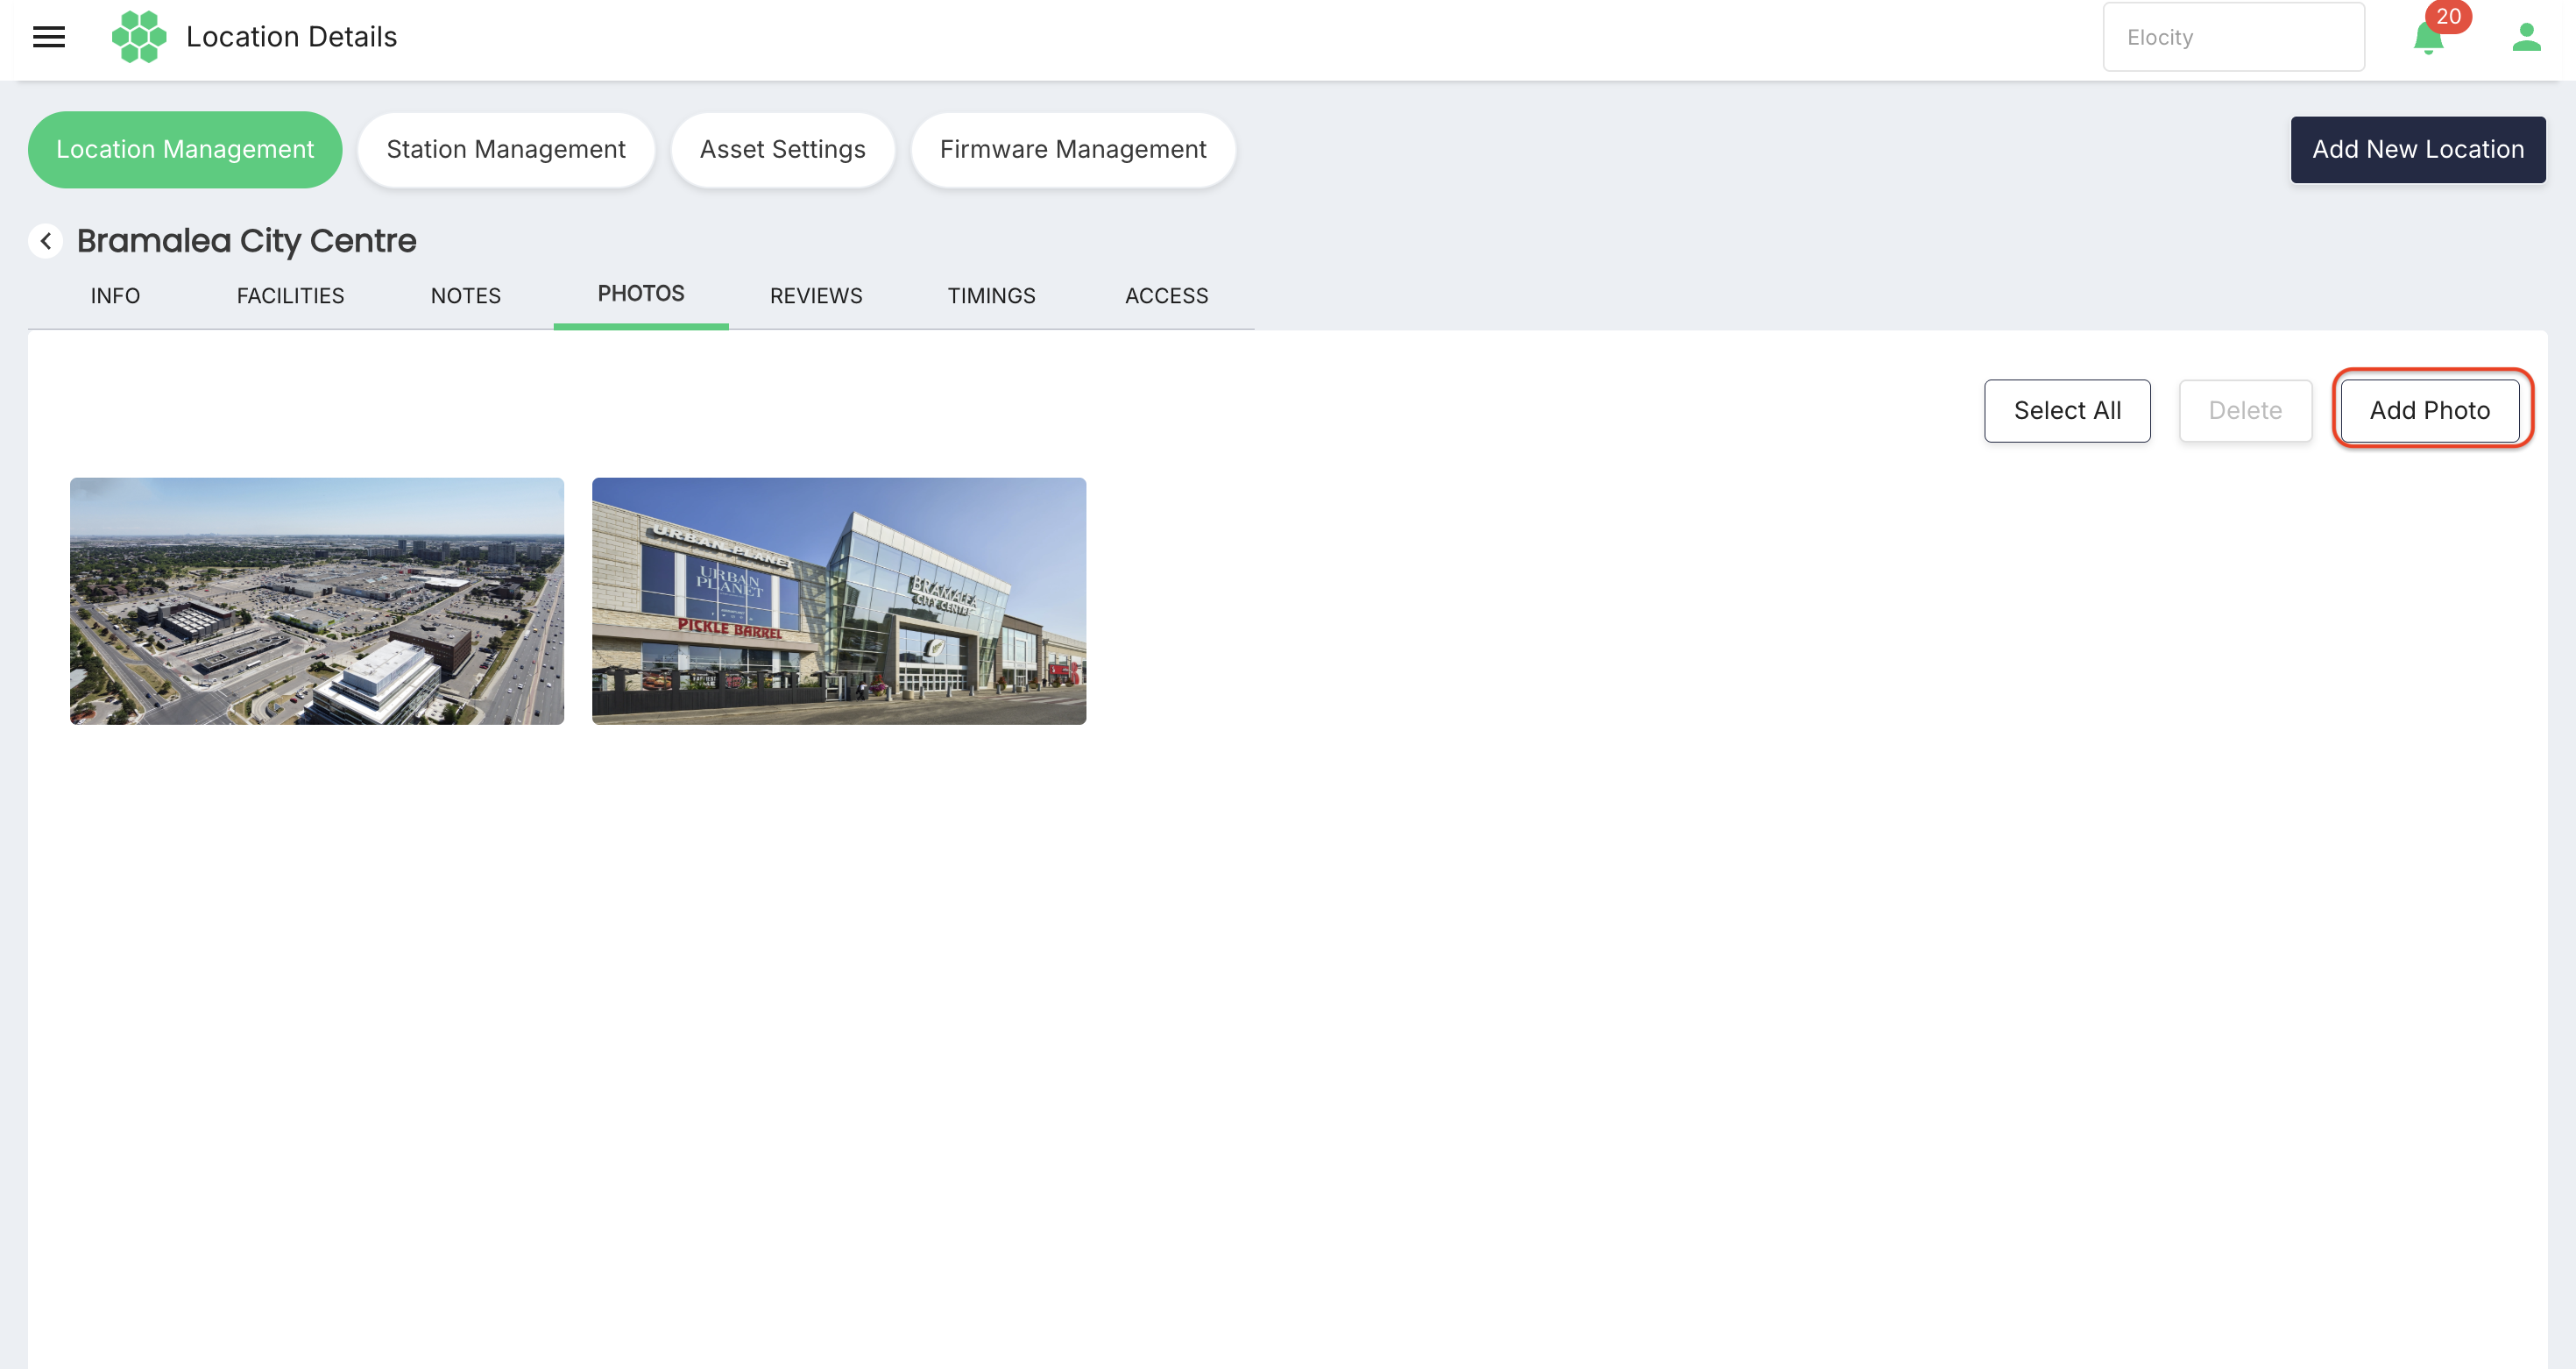
- Choose the required image files.
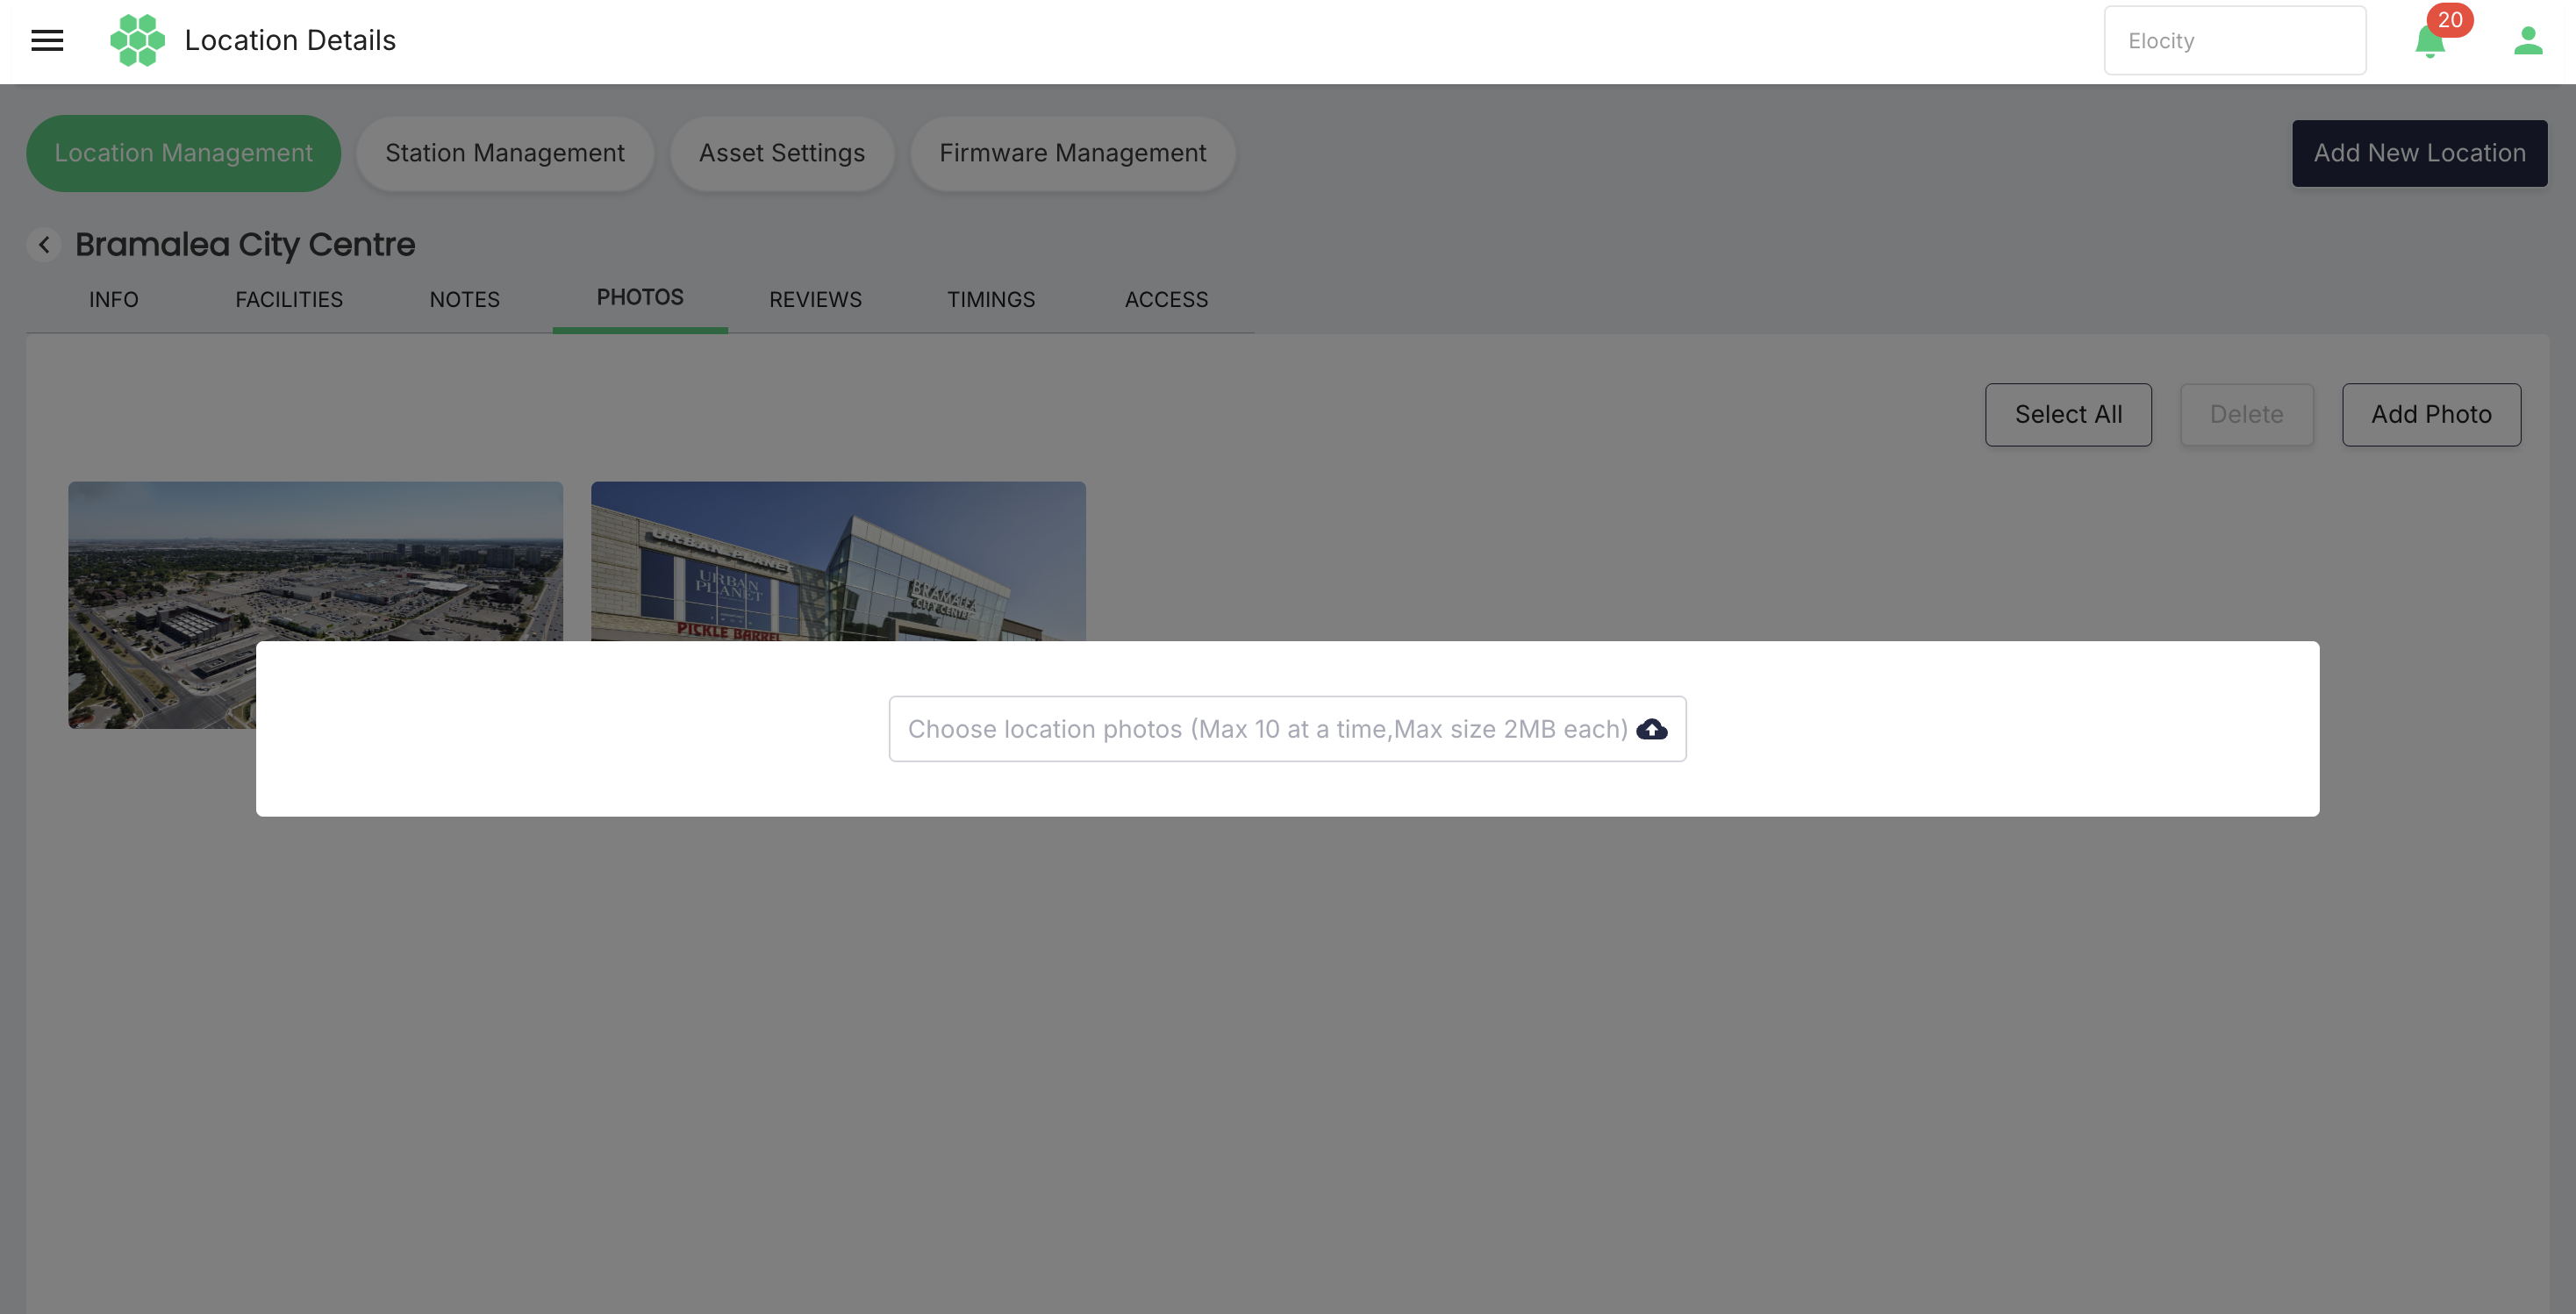 The live interface specifies the following upload limits:
- Maximum of 10 photos in one upload operation.
- Maximum file size of 2 MB per photo.
The supported formats are JPEG and PNG. The 10-photo limit applies to each upload operation rather than the total number of photos stored for the location.
Selecting and deleting photos
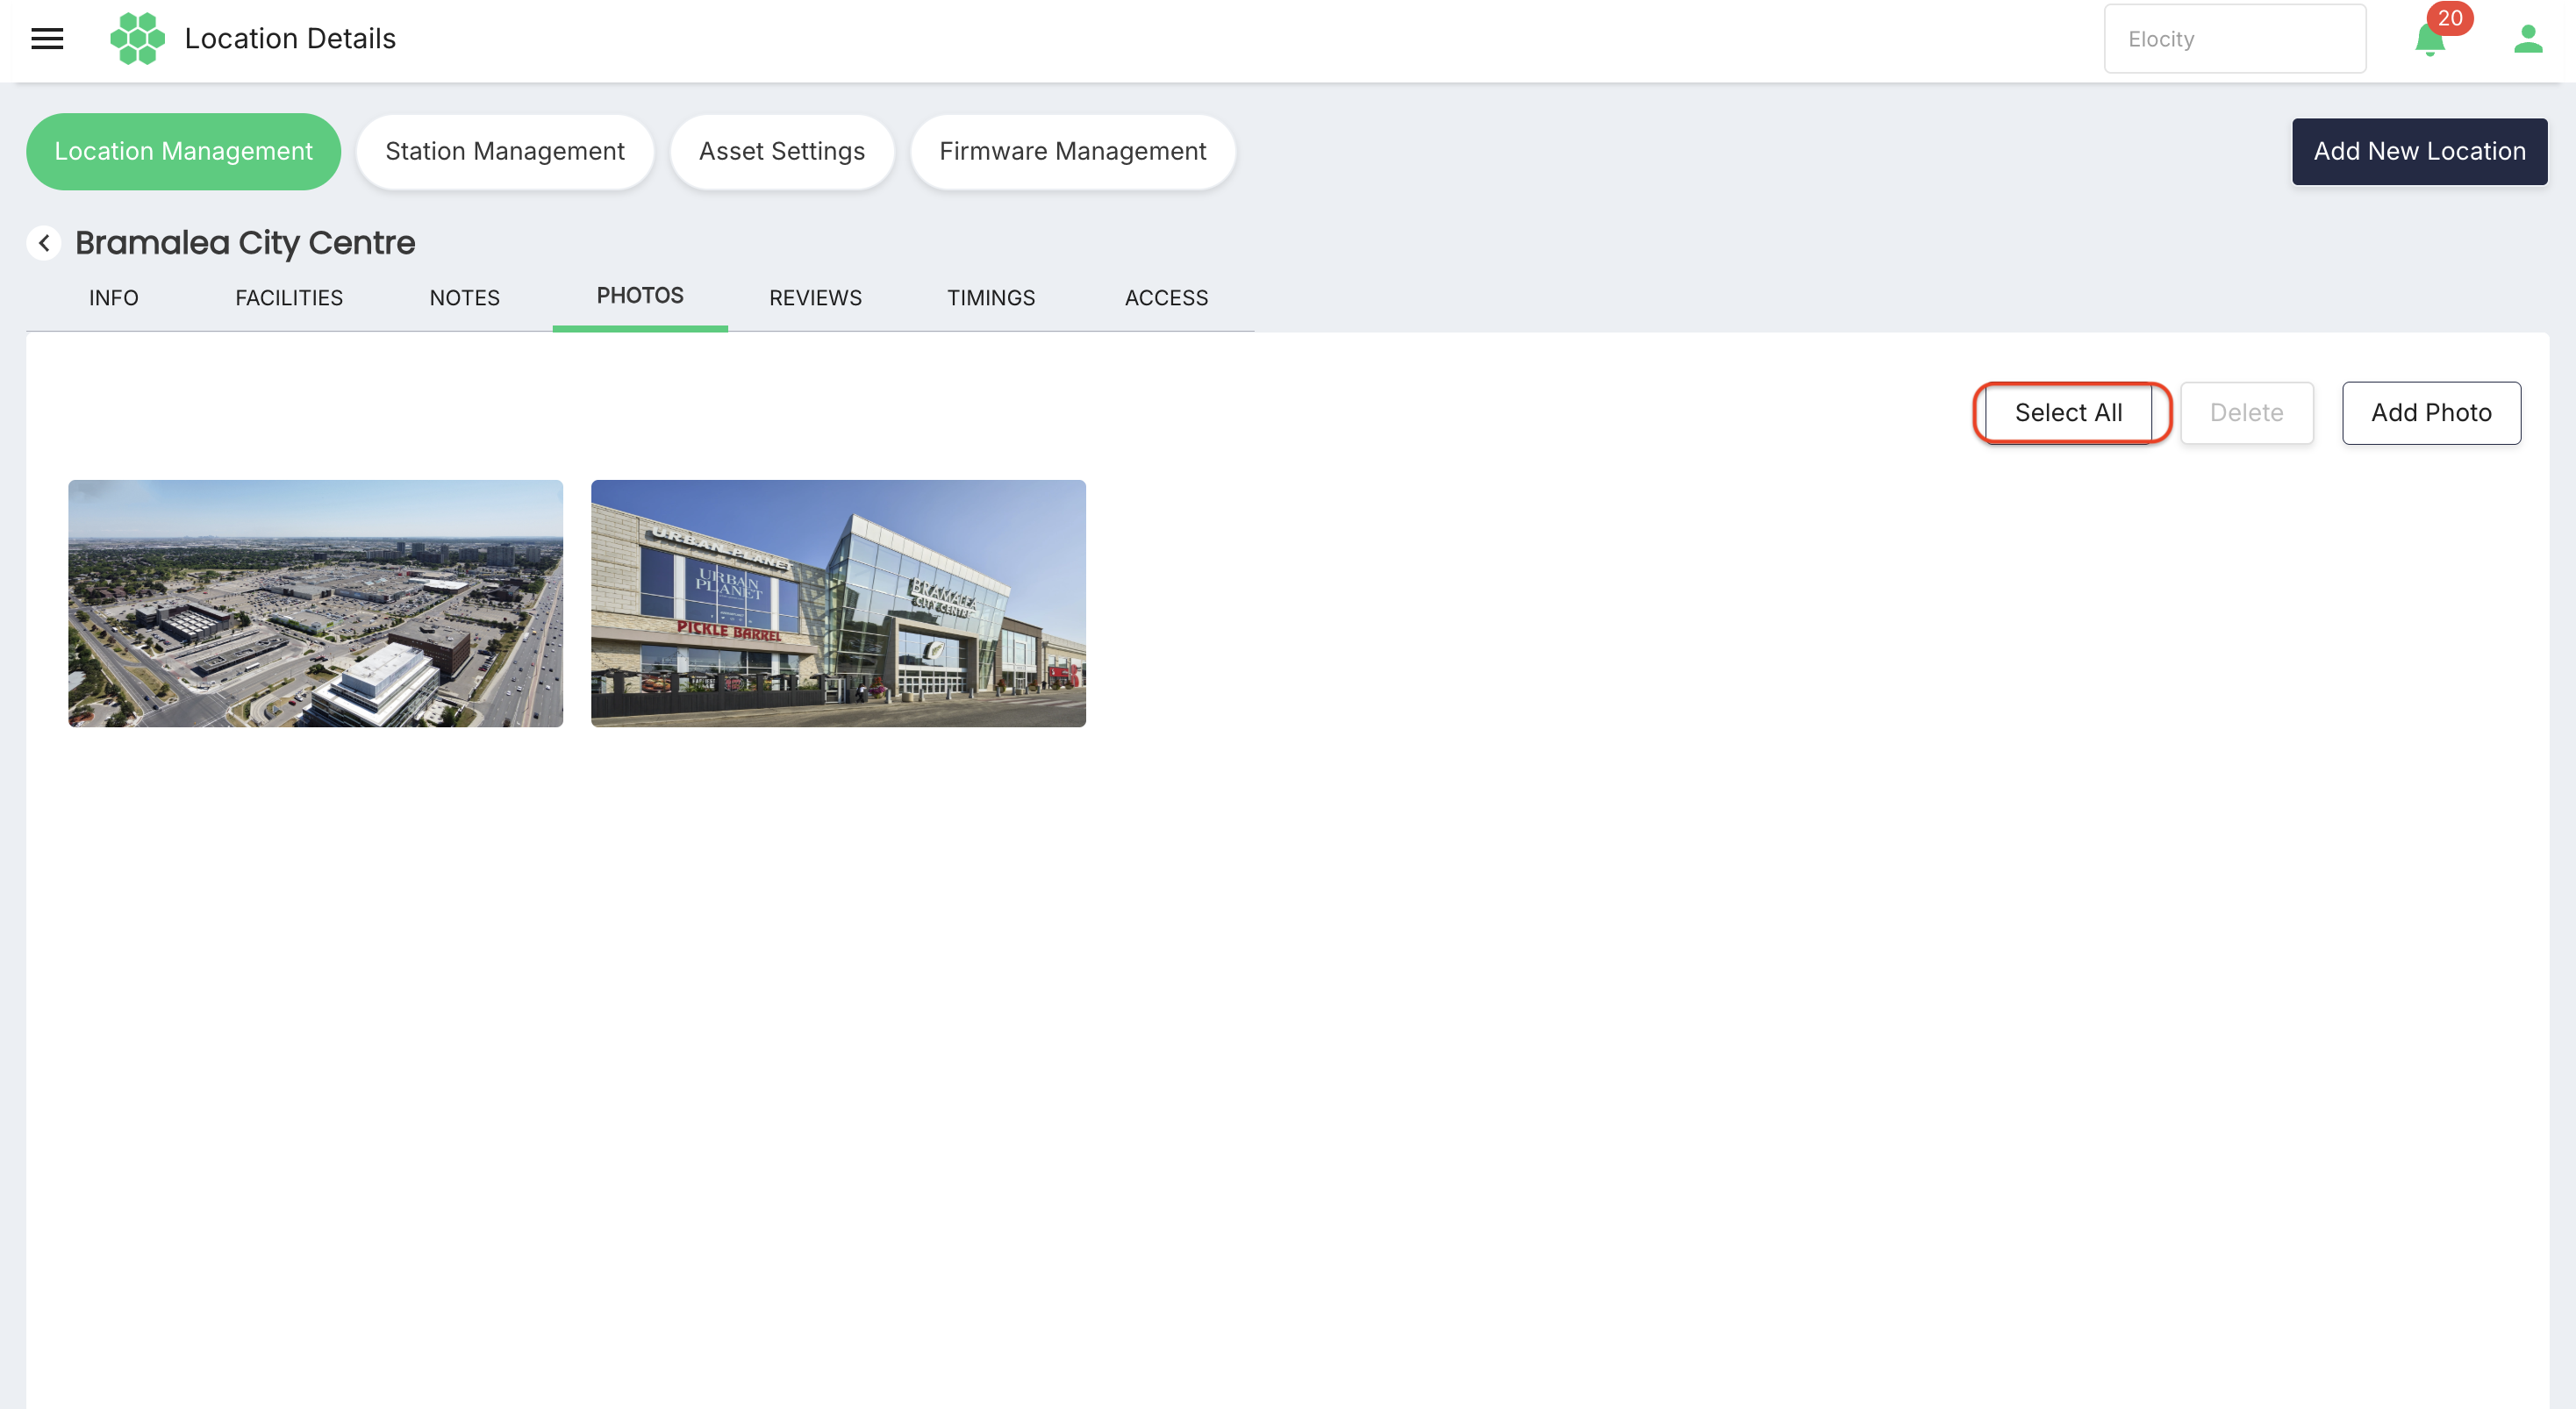
- Select Select All to select every displayed photo.
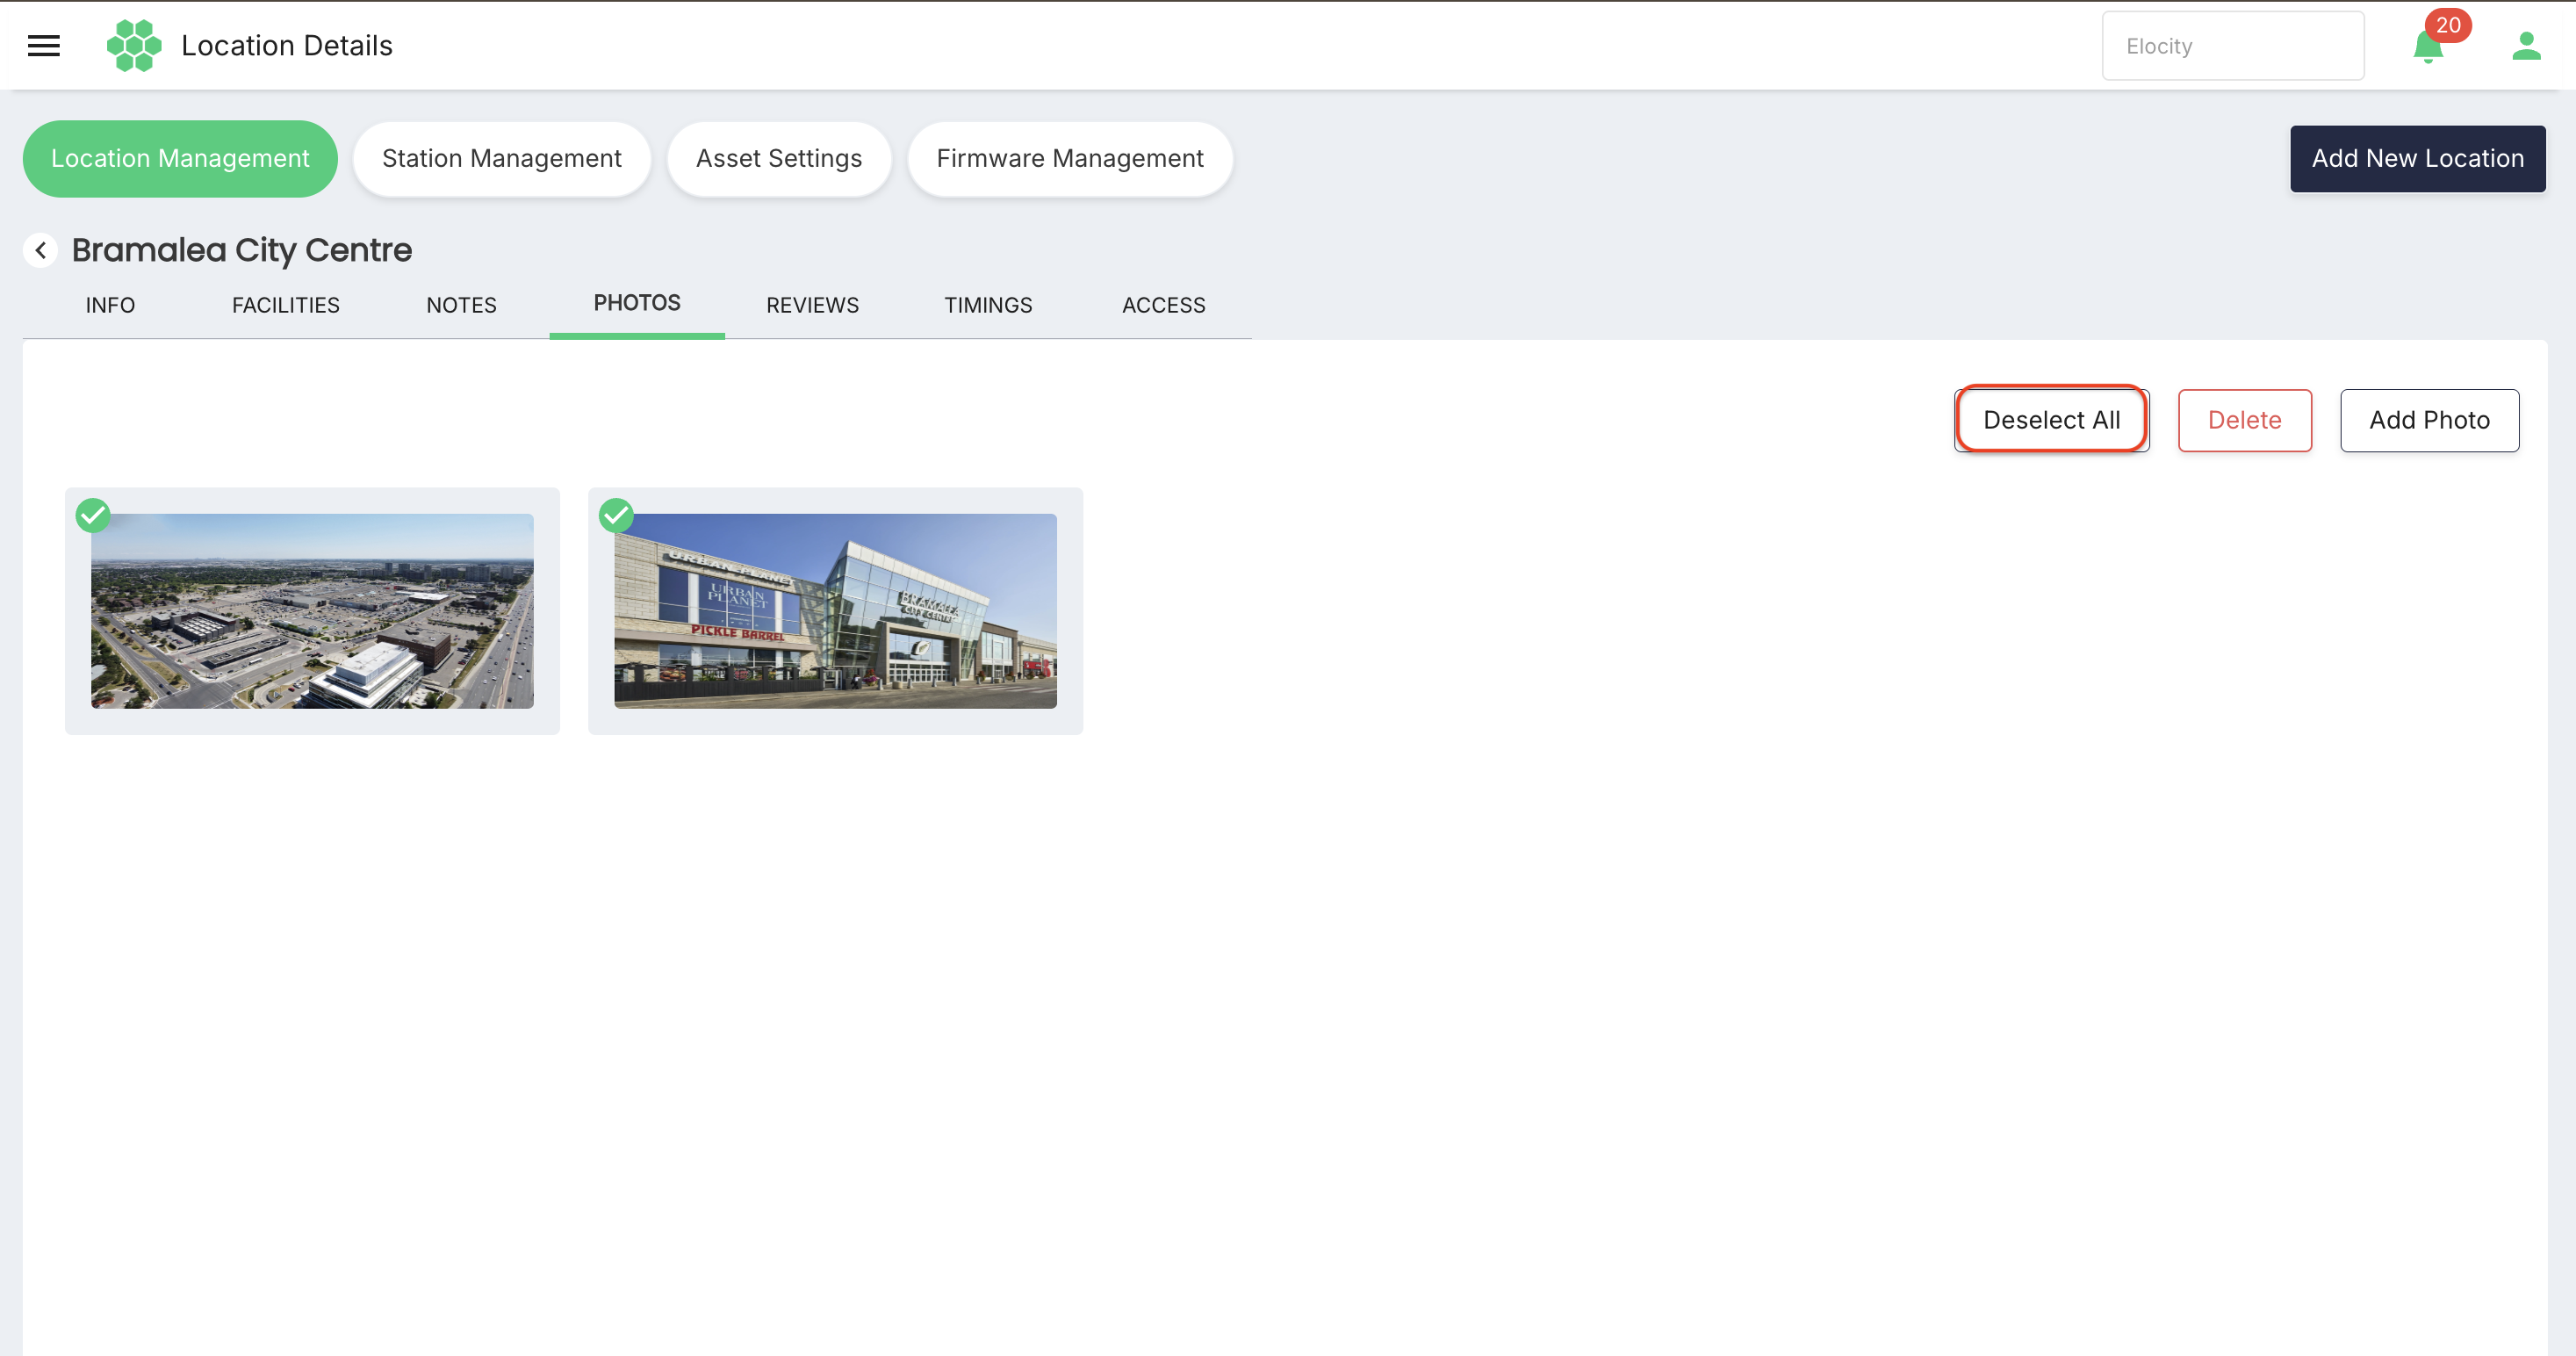
- After selection, the control changes to Deselect All.
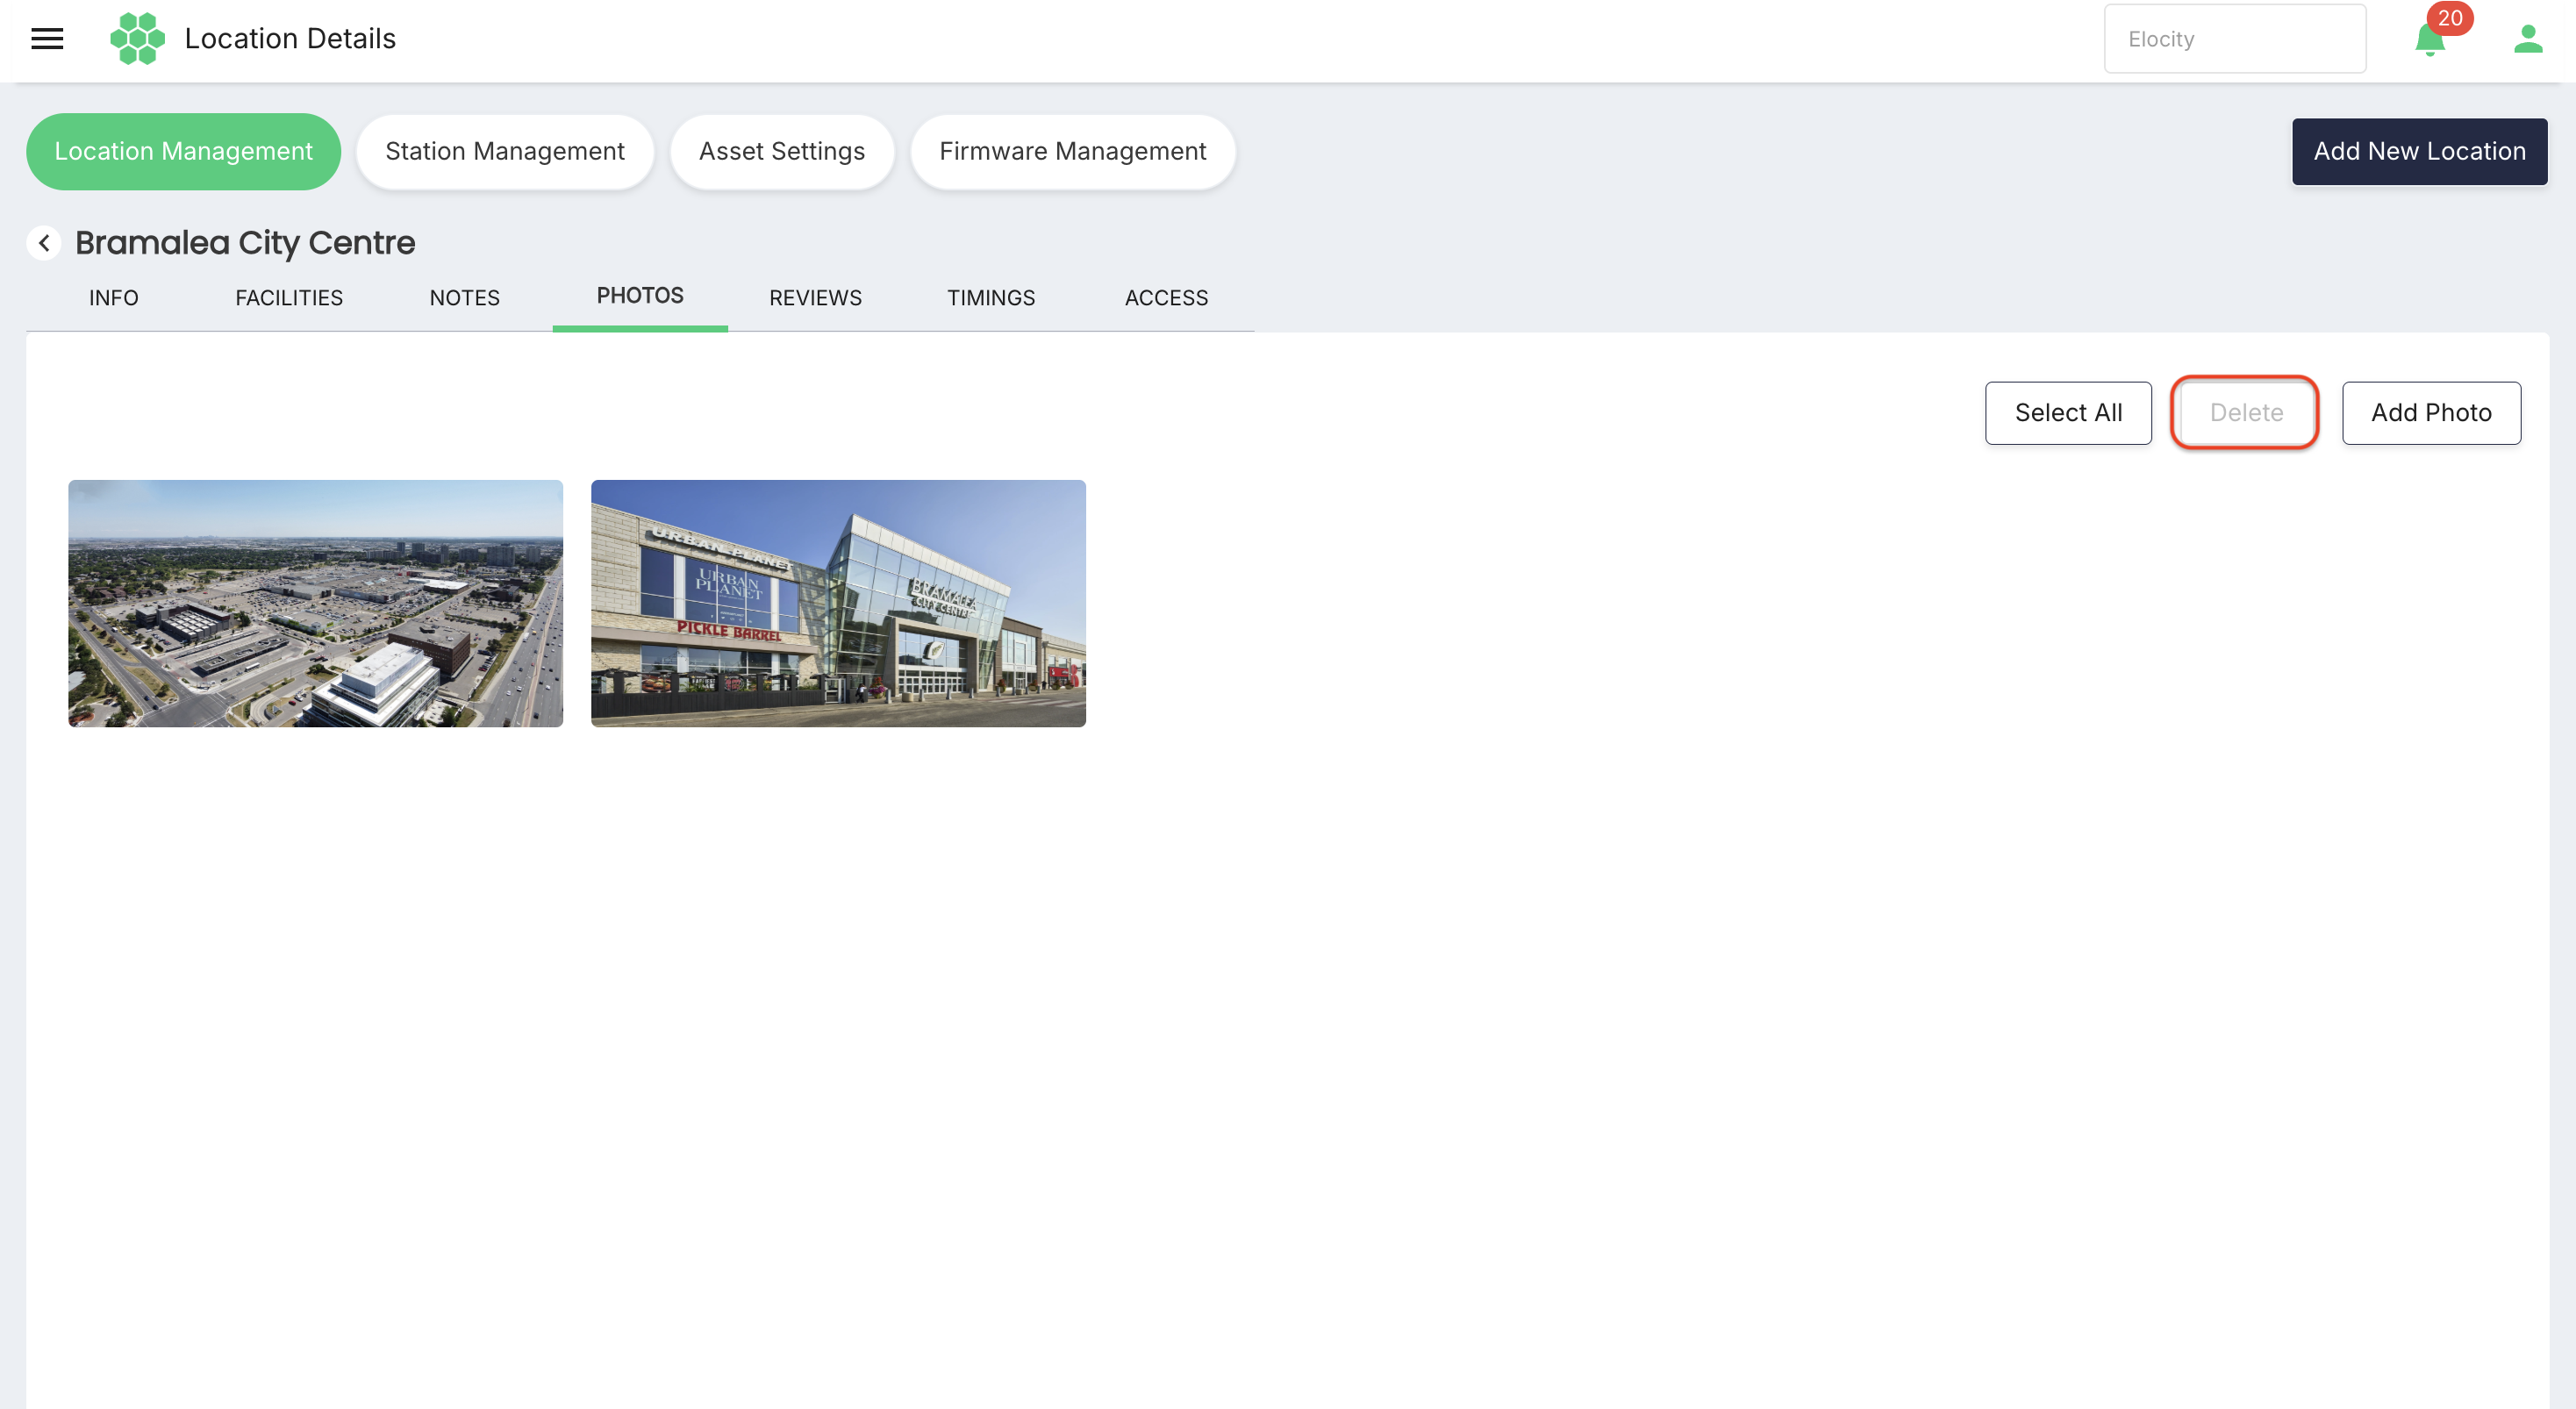
- Delete is disabled when no photo is selected and becomes enabled after one or more photos are selected.
- Select Deselect All to clear the current selection.
Deleting photos changes stored location content and should be performed only by an authorized user after verifying the selected images.
Reviews tab
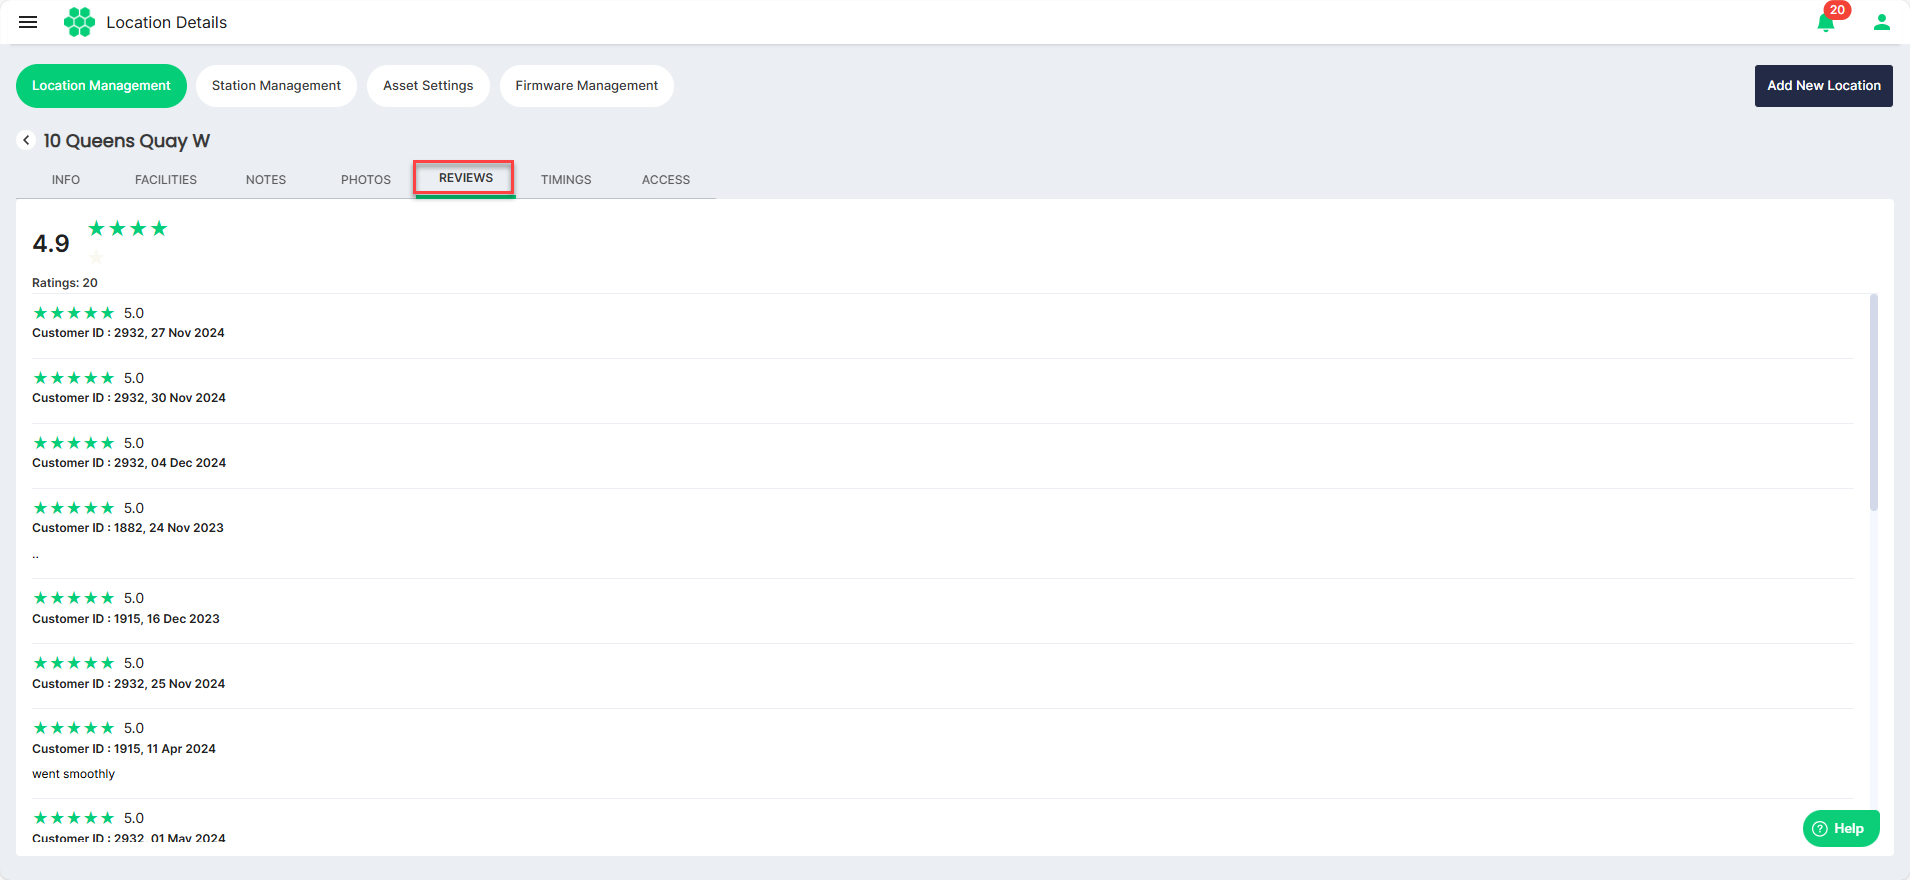
The Reviews tab displays feedback from users who previously used the charging infrastructure at the location. Users provide a satisfaction score from 1 to 5, which contributes to the Site Rating displayed in the Location Management grid. When a review exists, all fields recorded for that review are visible. When the selected location has no review data, the page displays No Review Exist.
Timings tab
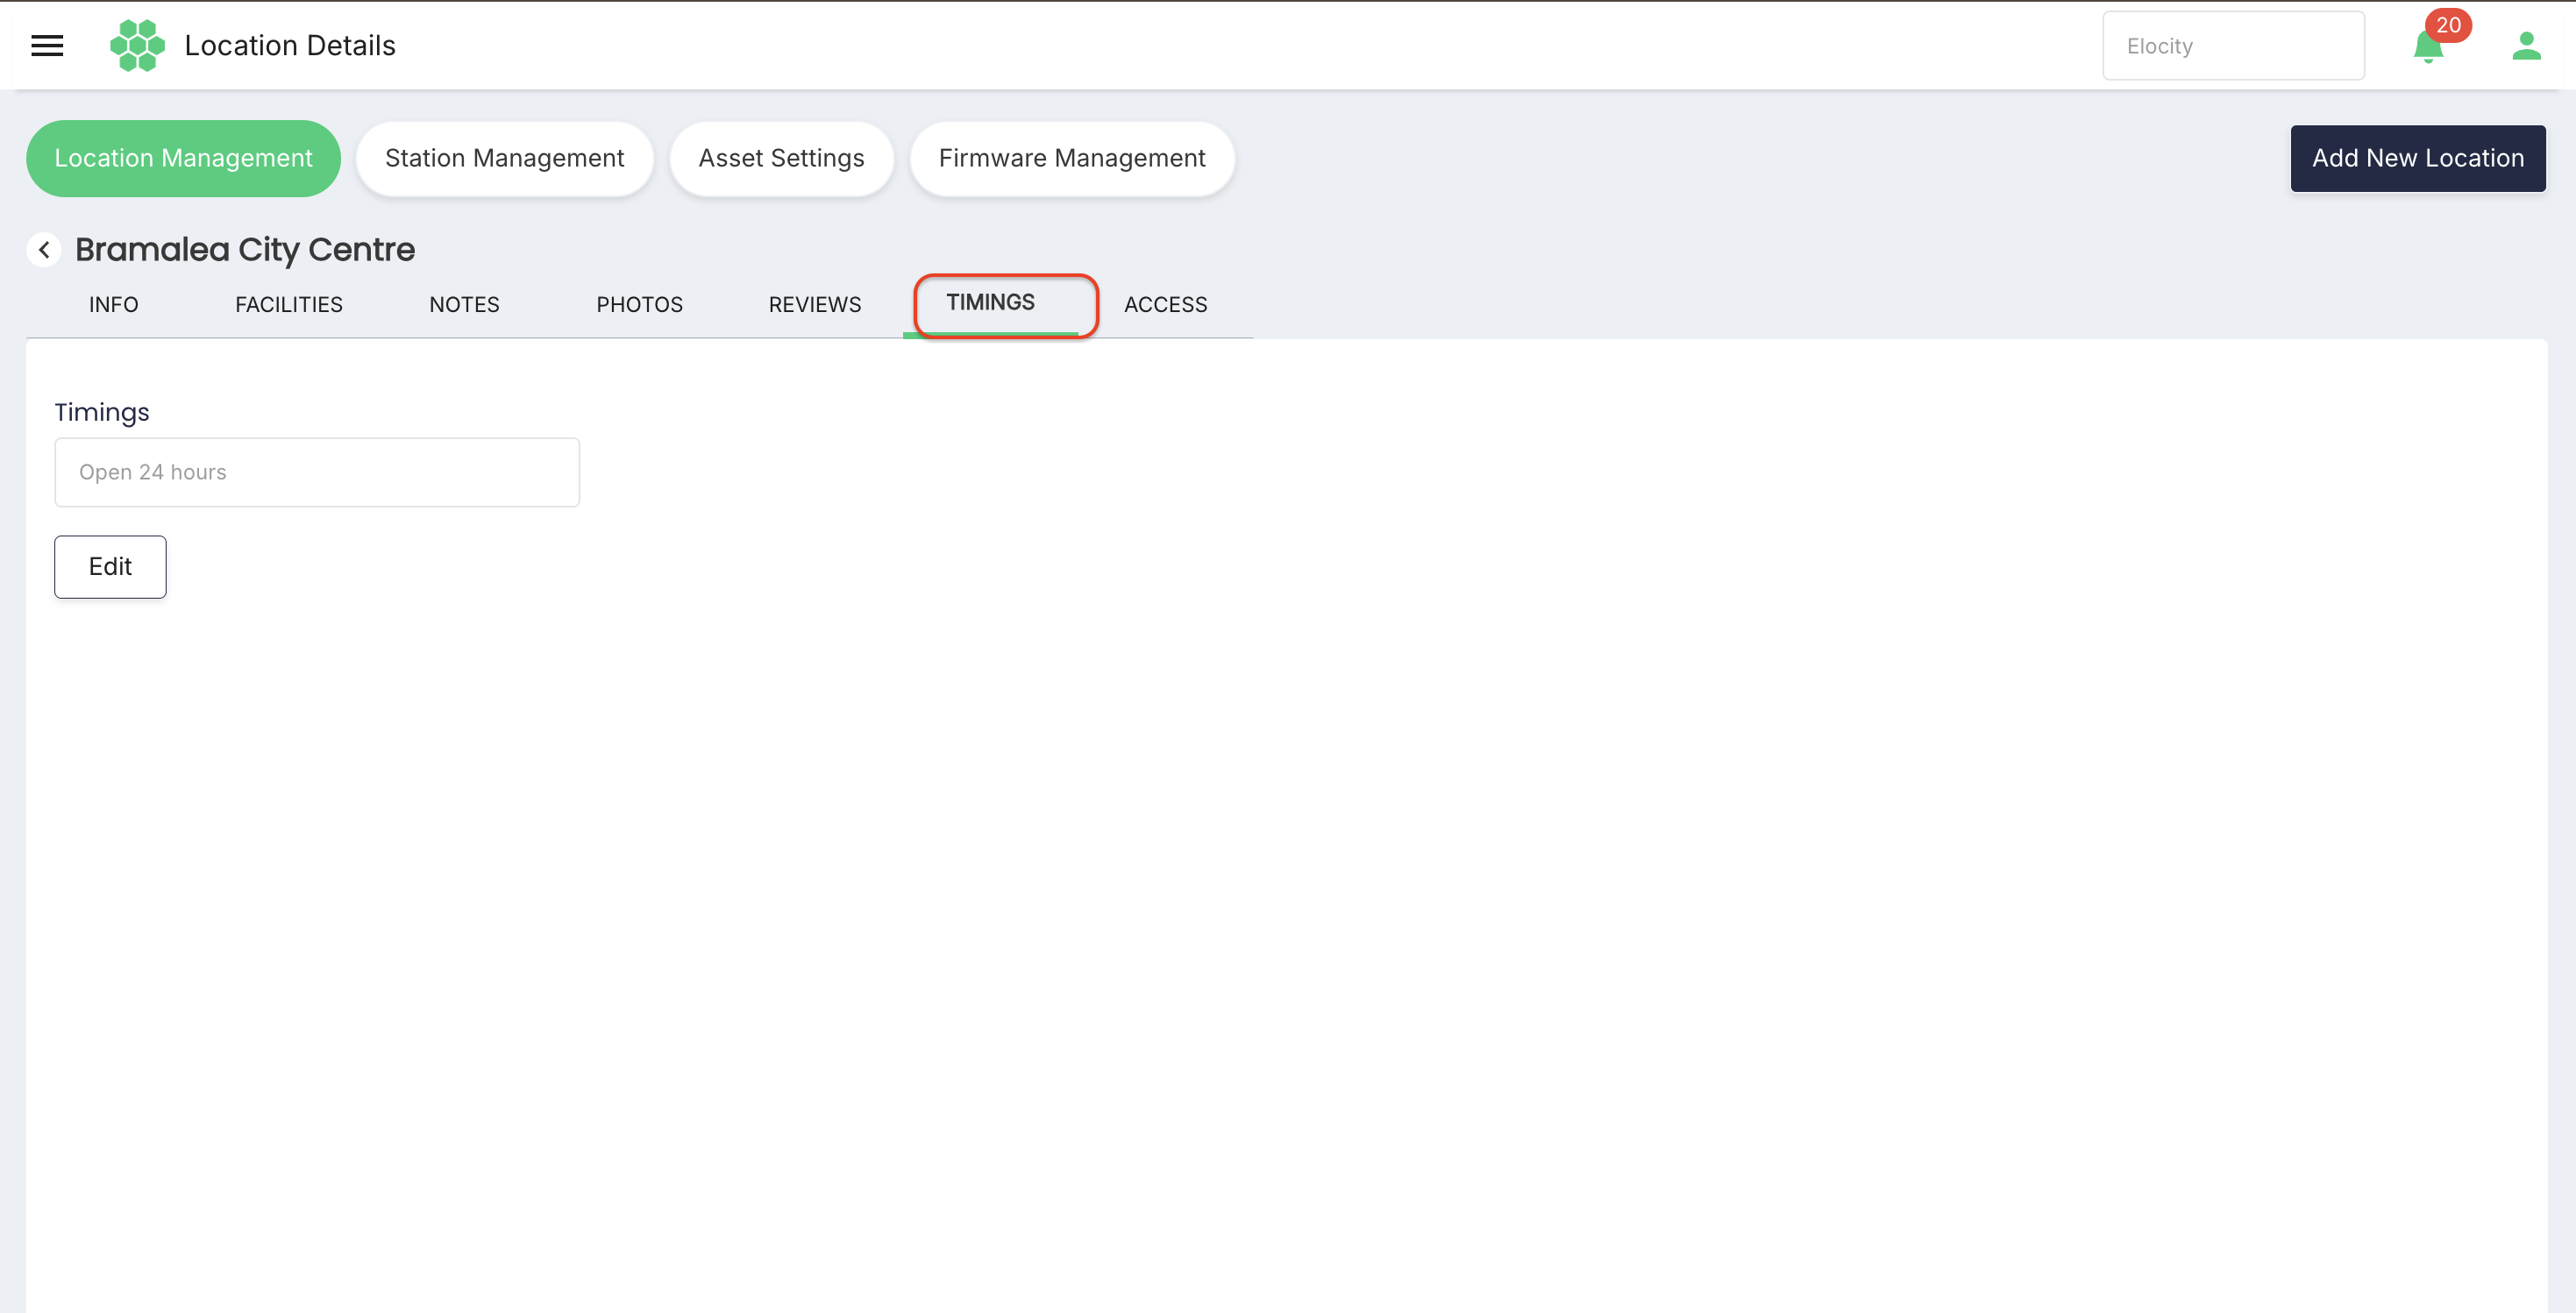
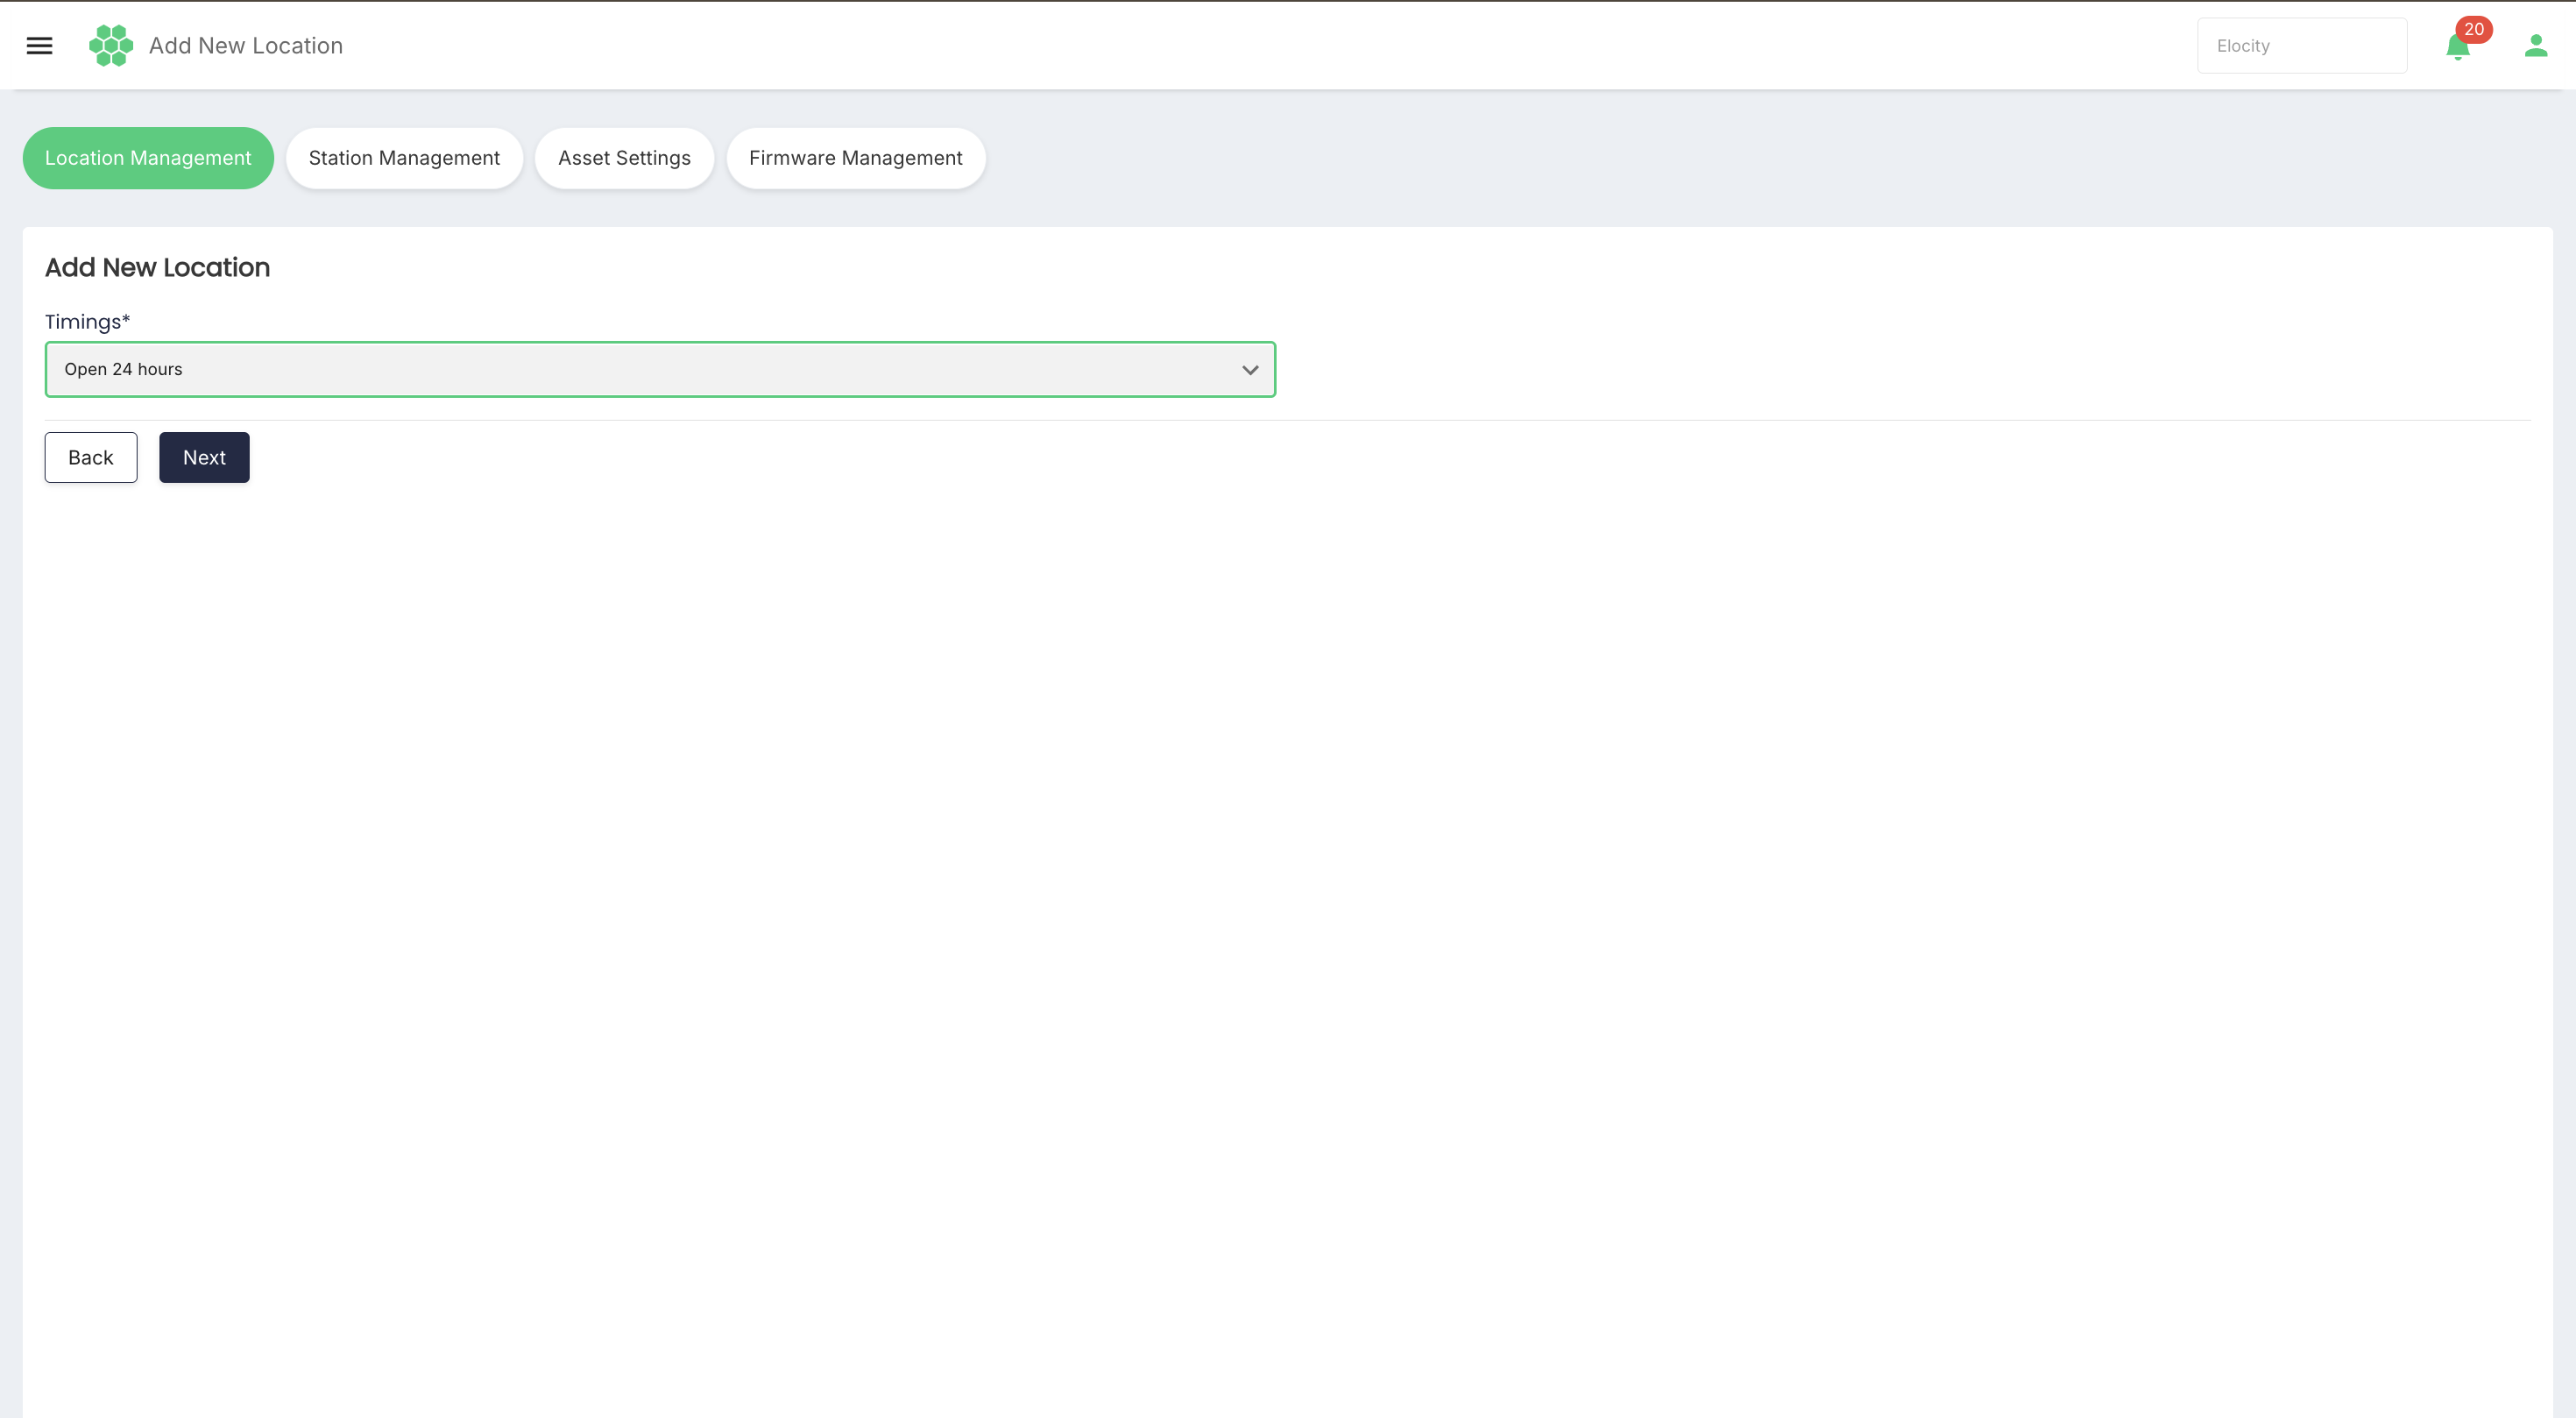
The Timings tab displays the location's operating-hours configuration. Select Edit to choose one of two modes:
Open 24 hours
Select Open 24 hours when the location should be represented as continuously open.
Customized
Select Customized to configure Monday through Sunday individually.
For each day:
- Enable Open when the location operates on that day.
- Enable Open 24 hours when that individual day has no closing period.
- Otherwise, enter the opening and closing times. The displayed time fields use
00:00and23:59values on a newly enabled day.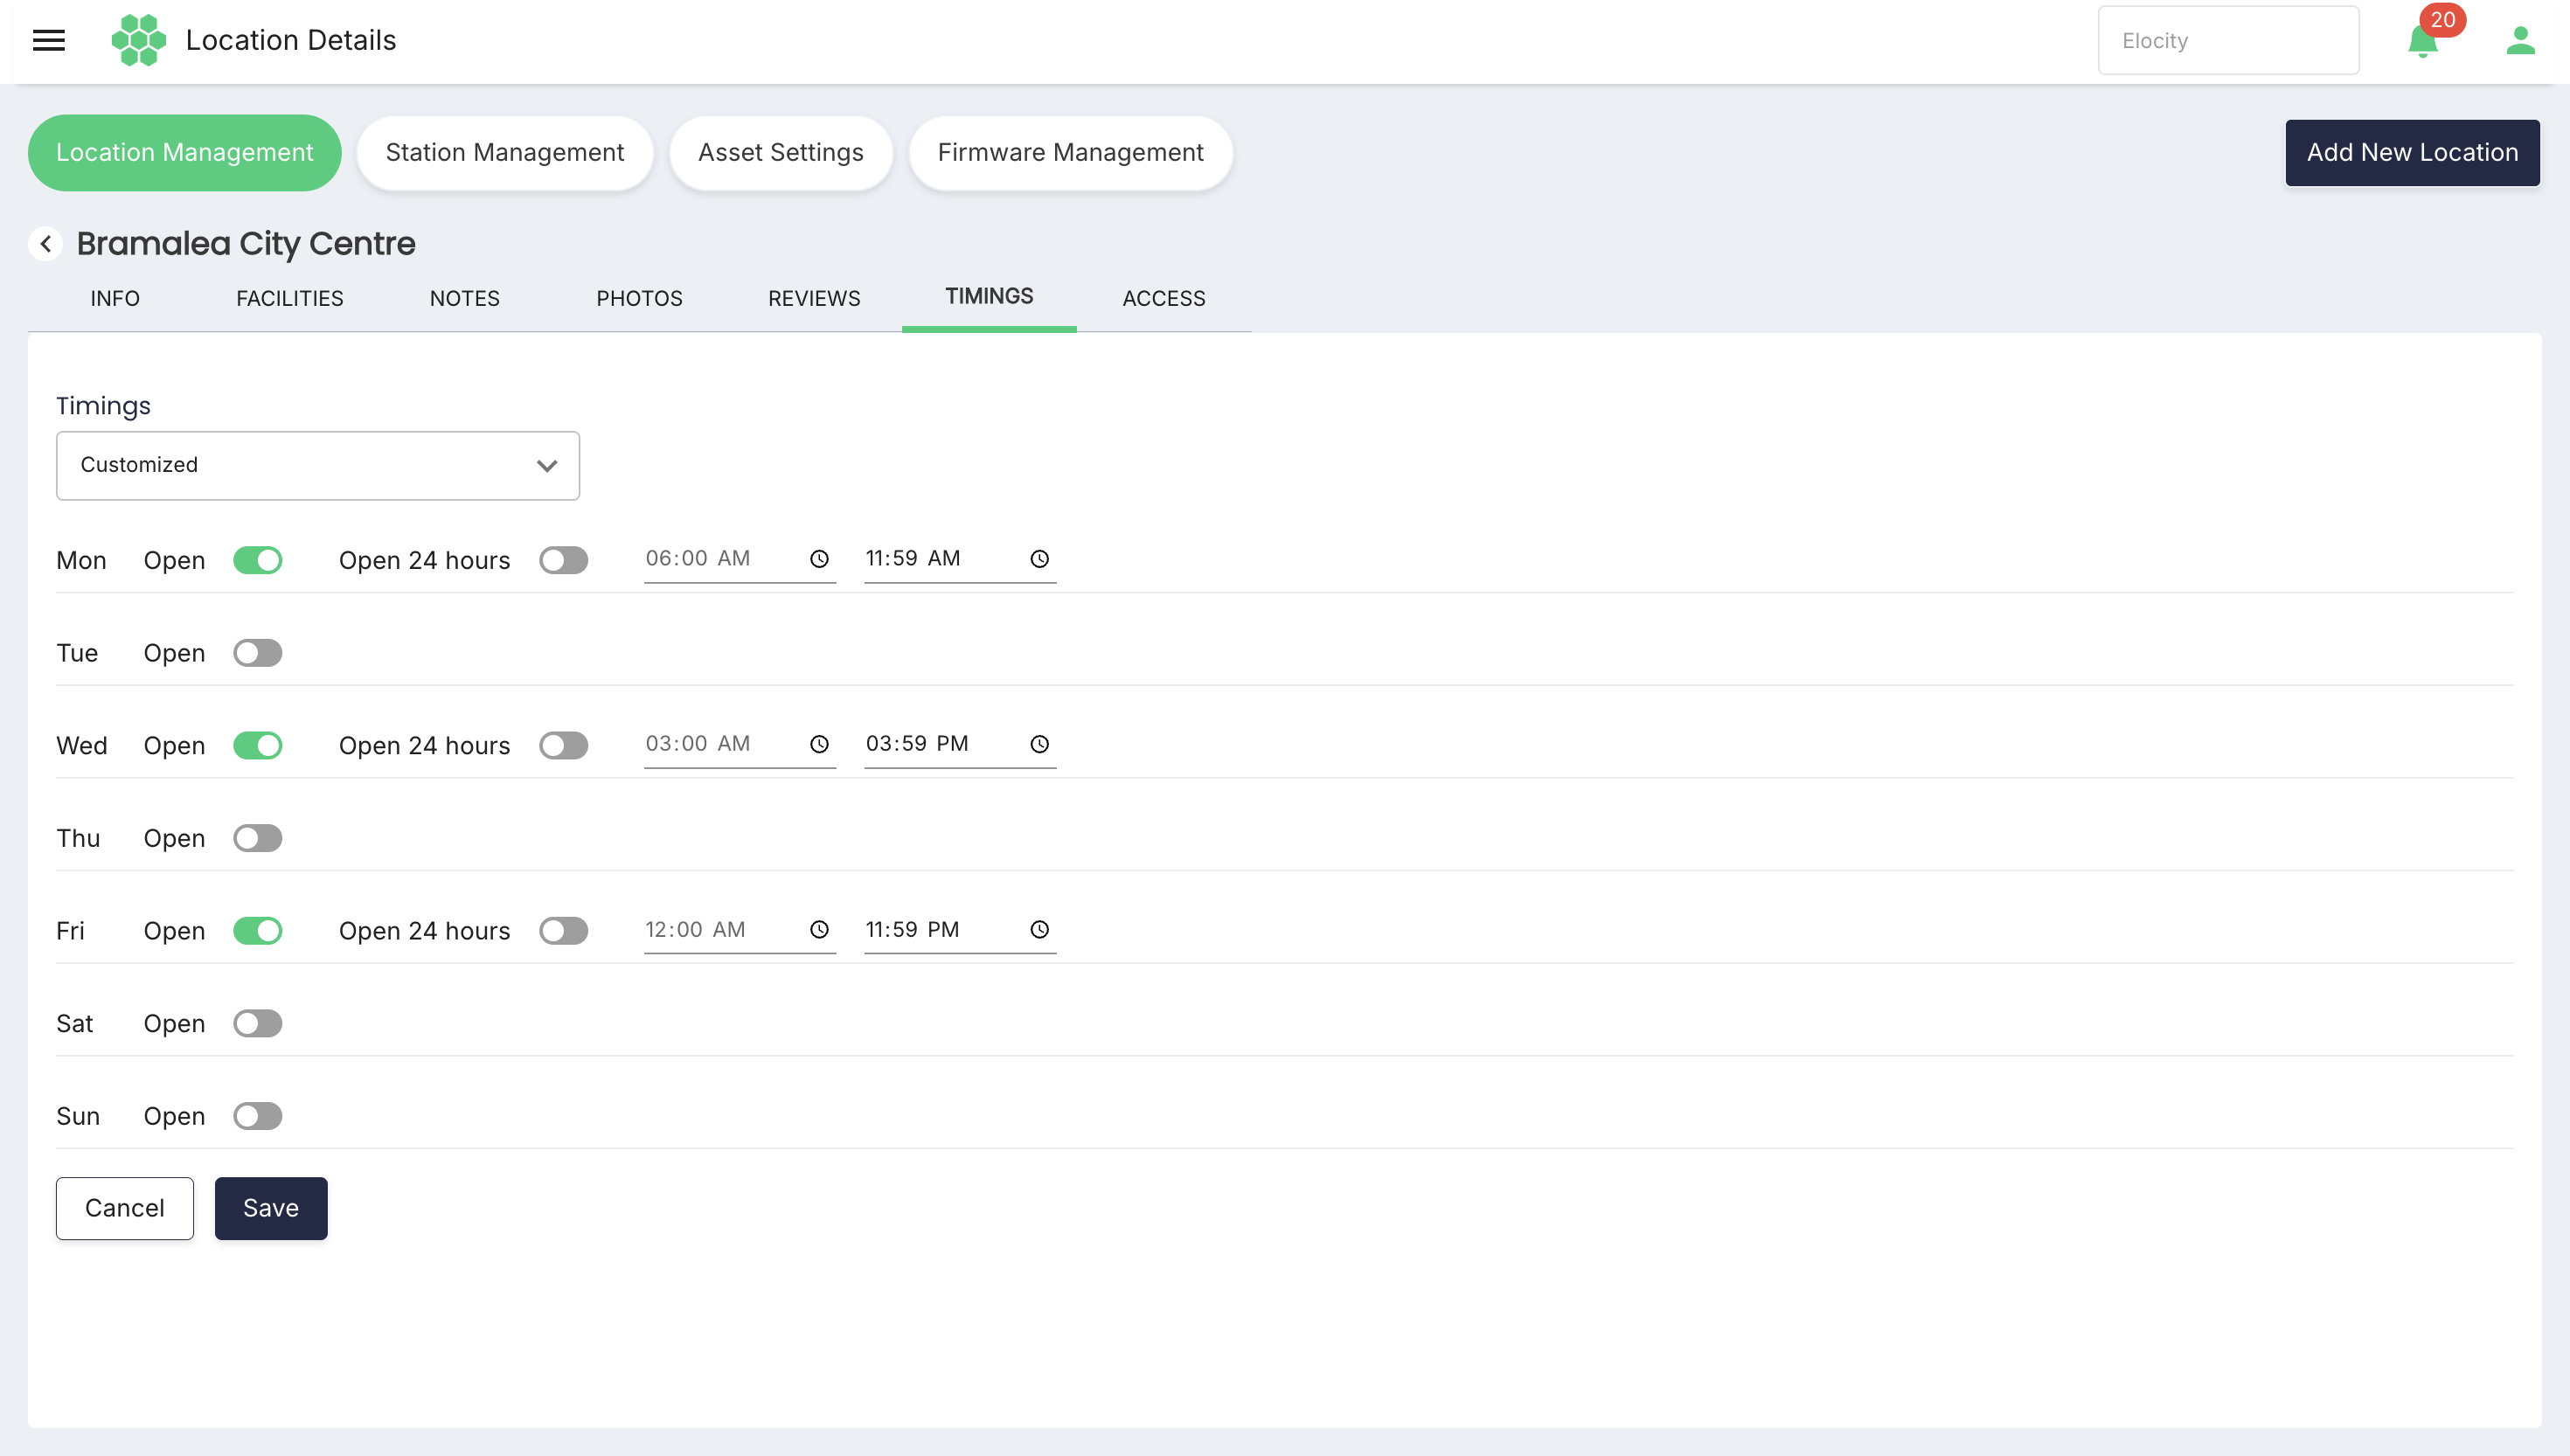 Select Save to retain the schedule or Cancel to discard the changes.
Access tab
The Access tab controls mobile-app visibility and charging eligibility. A private location displays two switches and three access-management tabs.
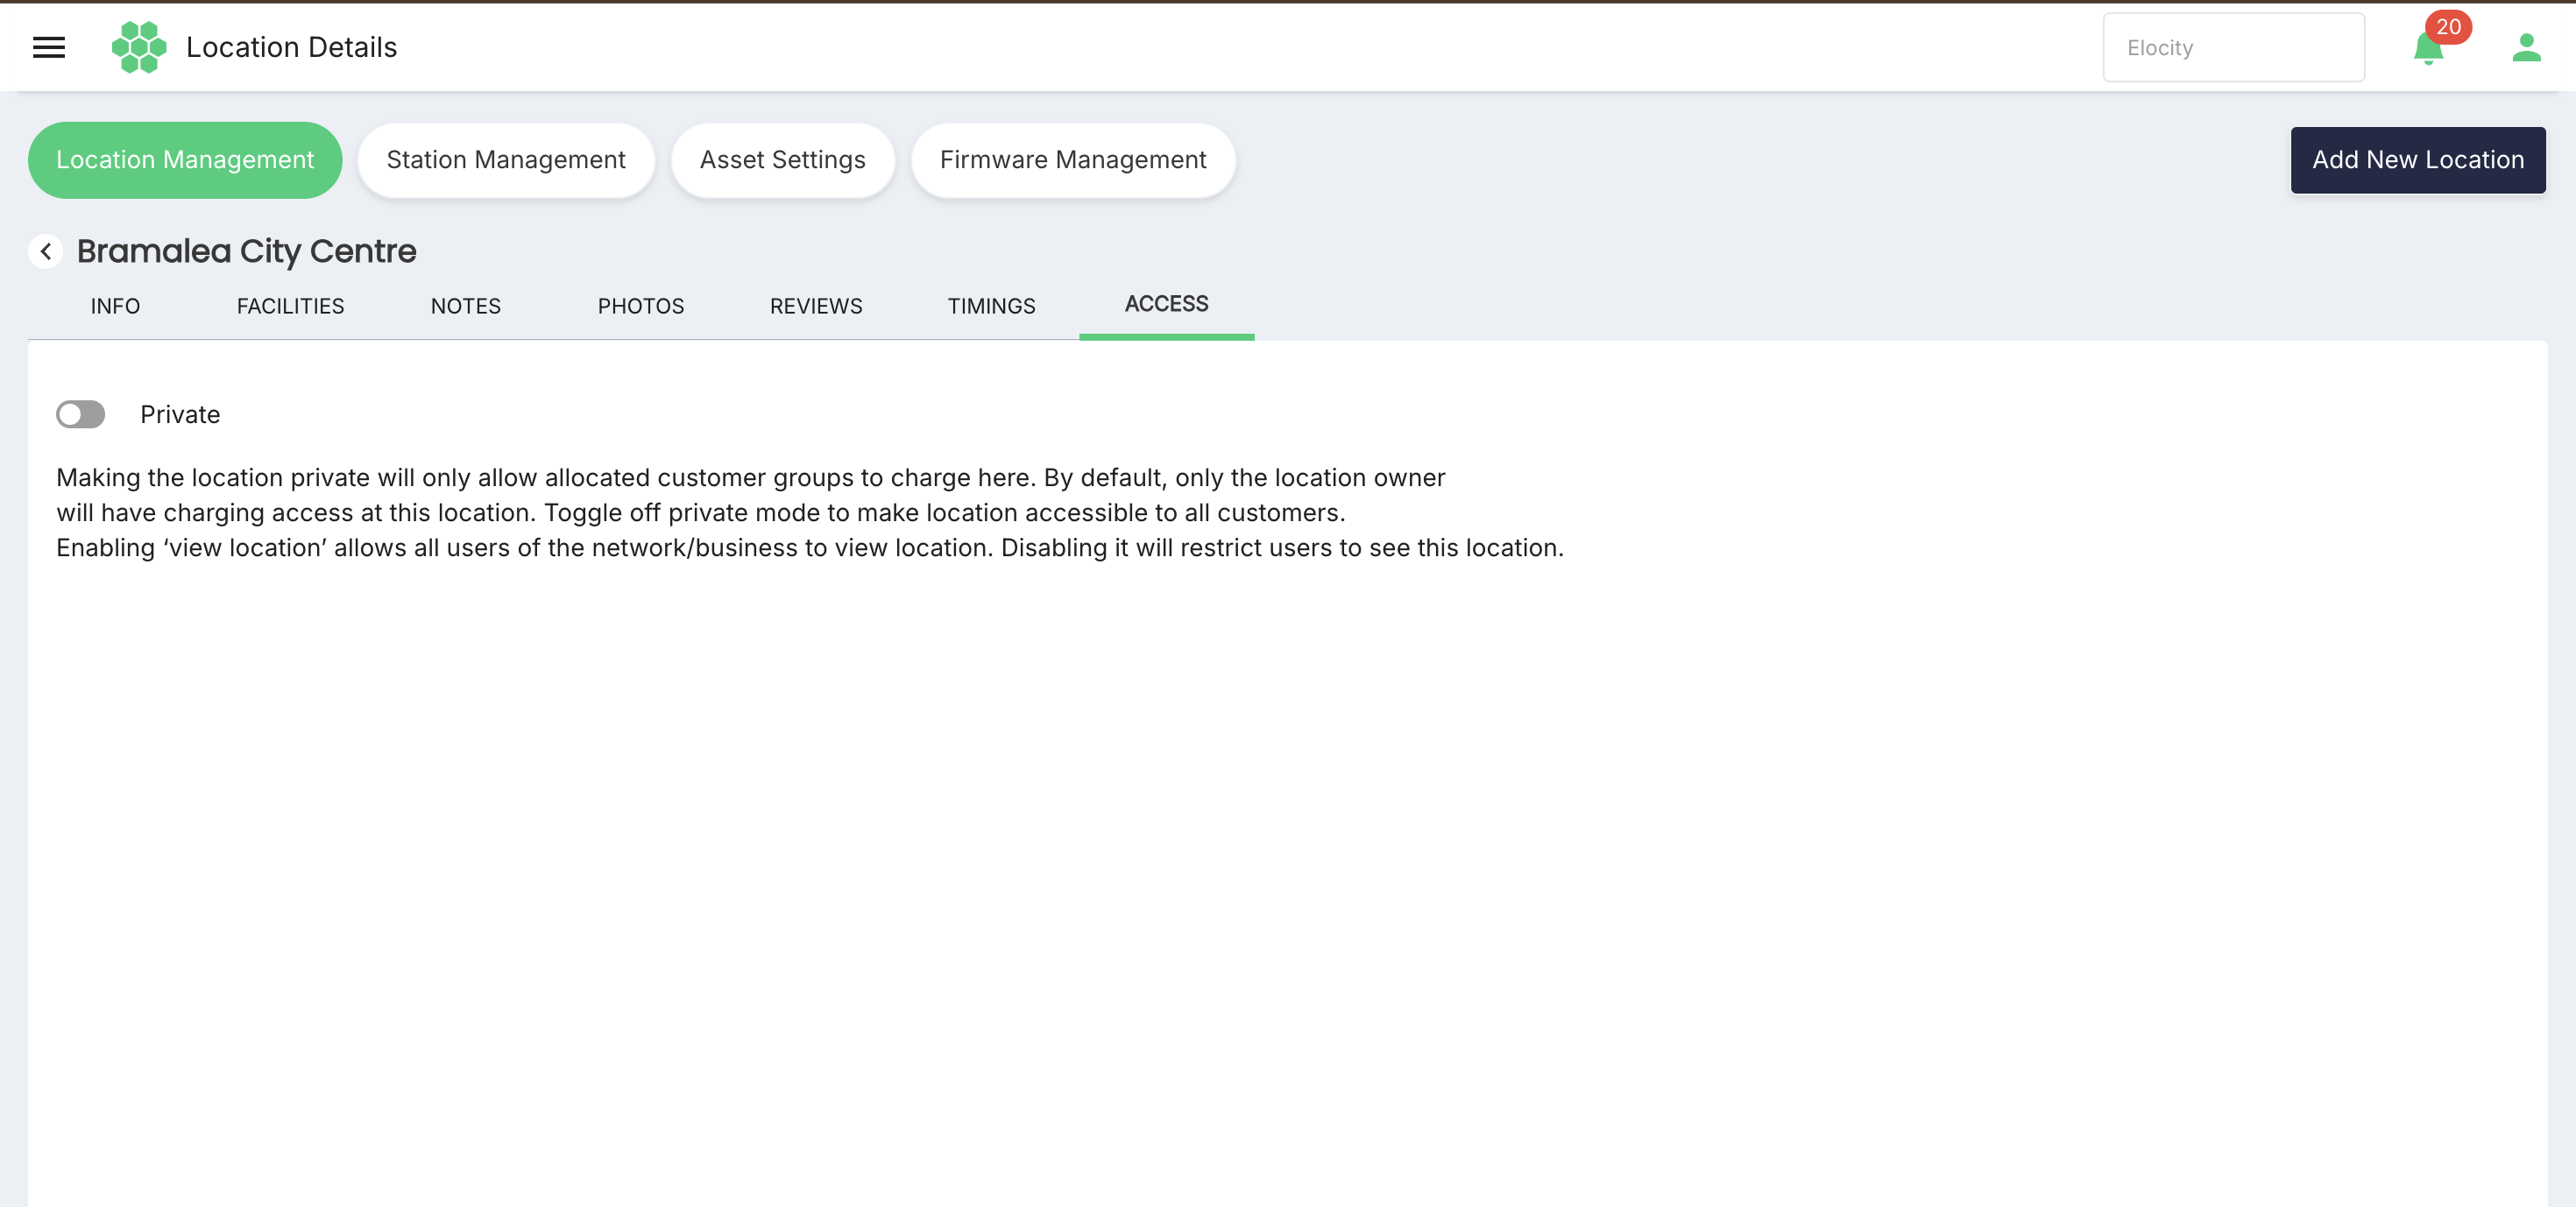
Private and Public View switches
| Control | Description |
|---|---|
| Private | Restricts charging to customers who have been granted access. By default, the location owner retains charging access. Visibility is then governed by Public View. Turning Private off makes the location accessible to all customers. |
| Public View | Controls whether a private location is visible to all users in the mobile app. When enabled, users can see the private location but must request access before charging. When disabled, only authorized users can see the location. |
When a location is private, access can be granted to an individual customer or to a customer group.
Changes made through the Private and Public View switches are saved by the application from the Access tab.
Request Access
The Request Access tab lists mobile-app users who have requested permission to use a private location. The count beside Request Access shows the number of returned requests.
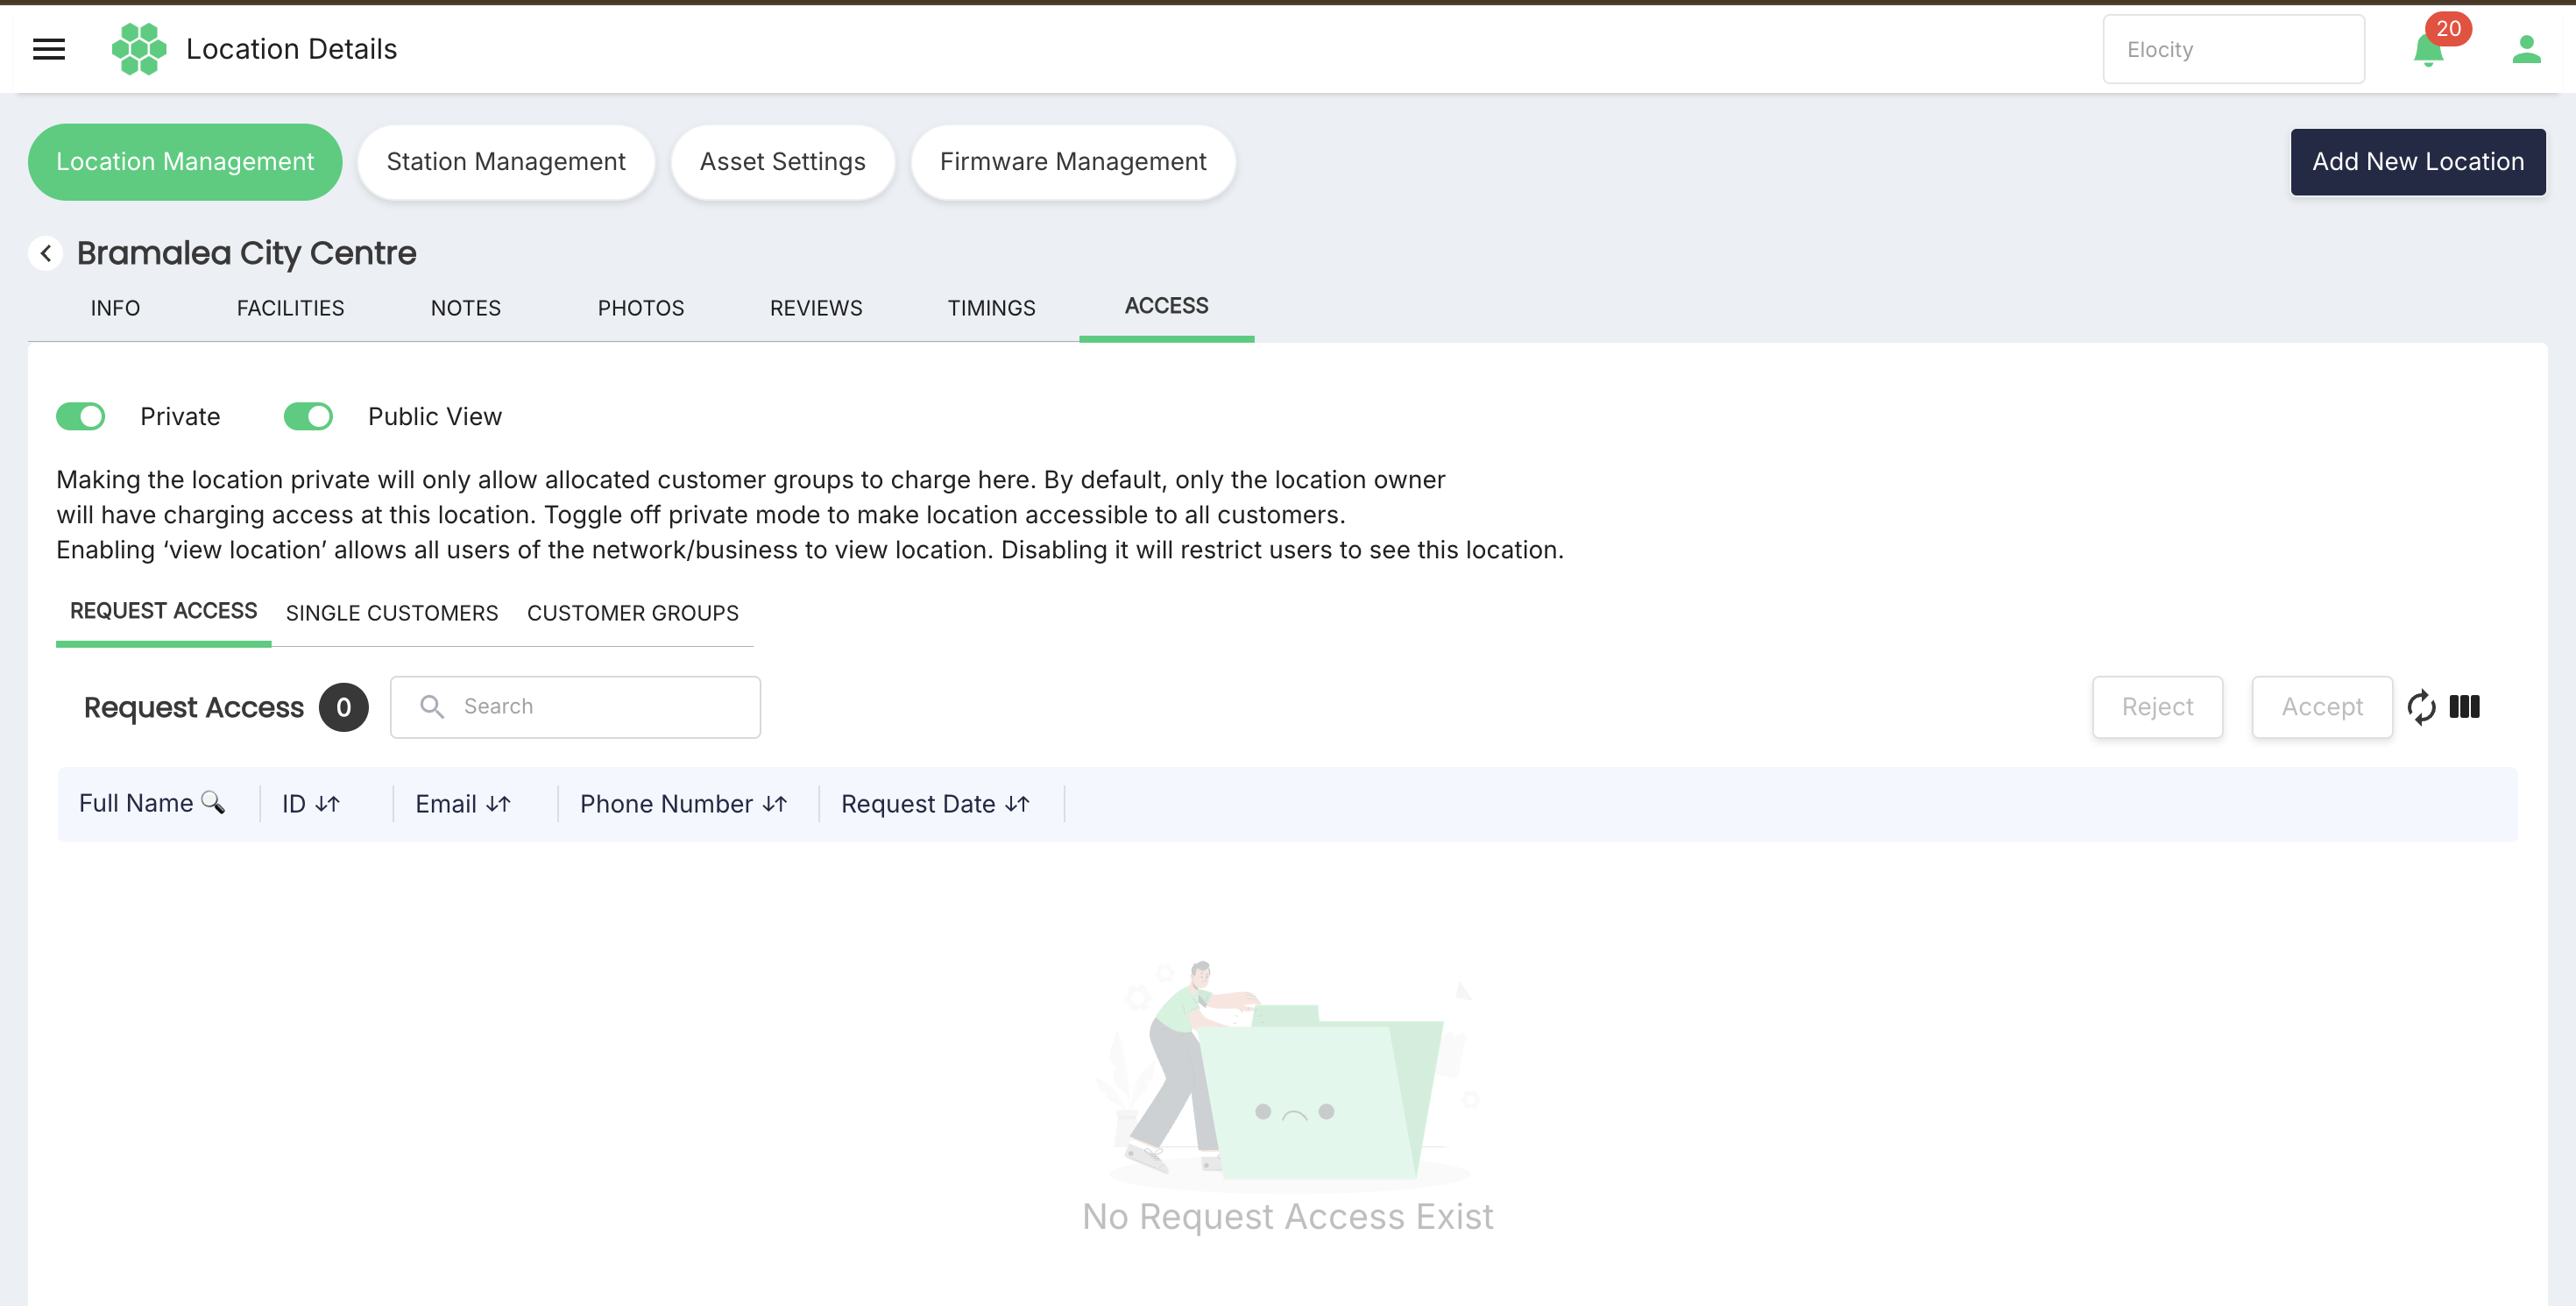
| Column | Description |
|---|---|
| Full Name | Name of the customer who requested access. |
| ID | Customer identifier. |
| Customer email address. | |
| Phone Number | Customer contact number. |
| Request Date | Date on which the request was submitted. |
Use Search to find a request, Refresh to request the latest records, and Column Filter to change the visible columns. Select a request and then select Accept to grant access or Reject to decline it. Accept and Reject remain disabled when no request is selected. When no request exists, the tab displays No Request Access Exist.
Single Customers
The Single Customers tab lists individual customers who have been granted access to the private location.
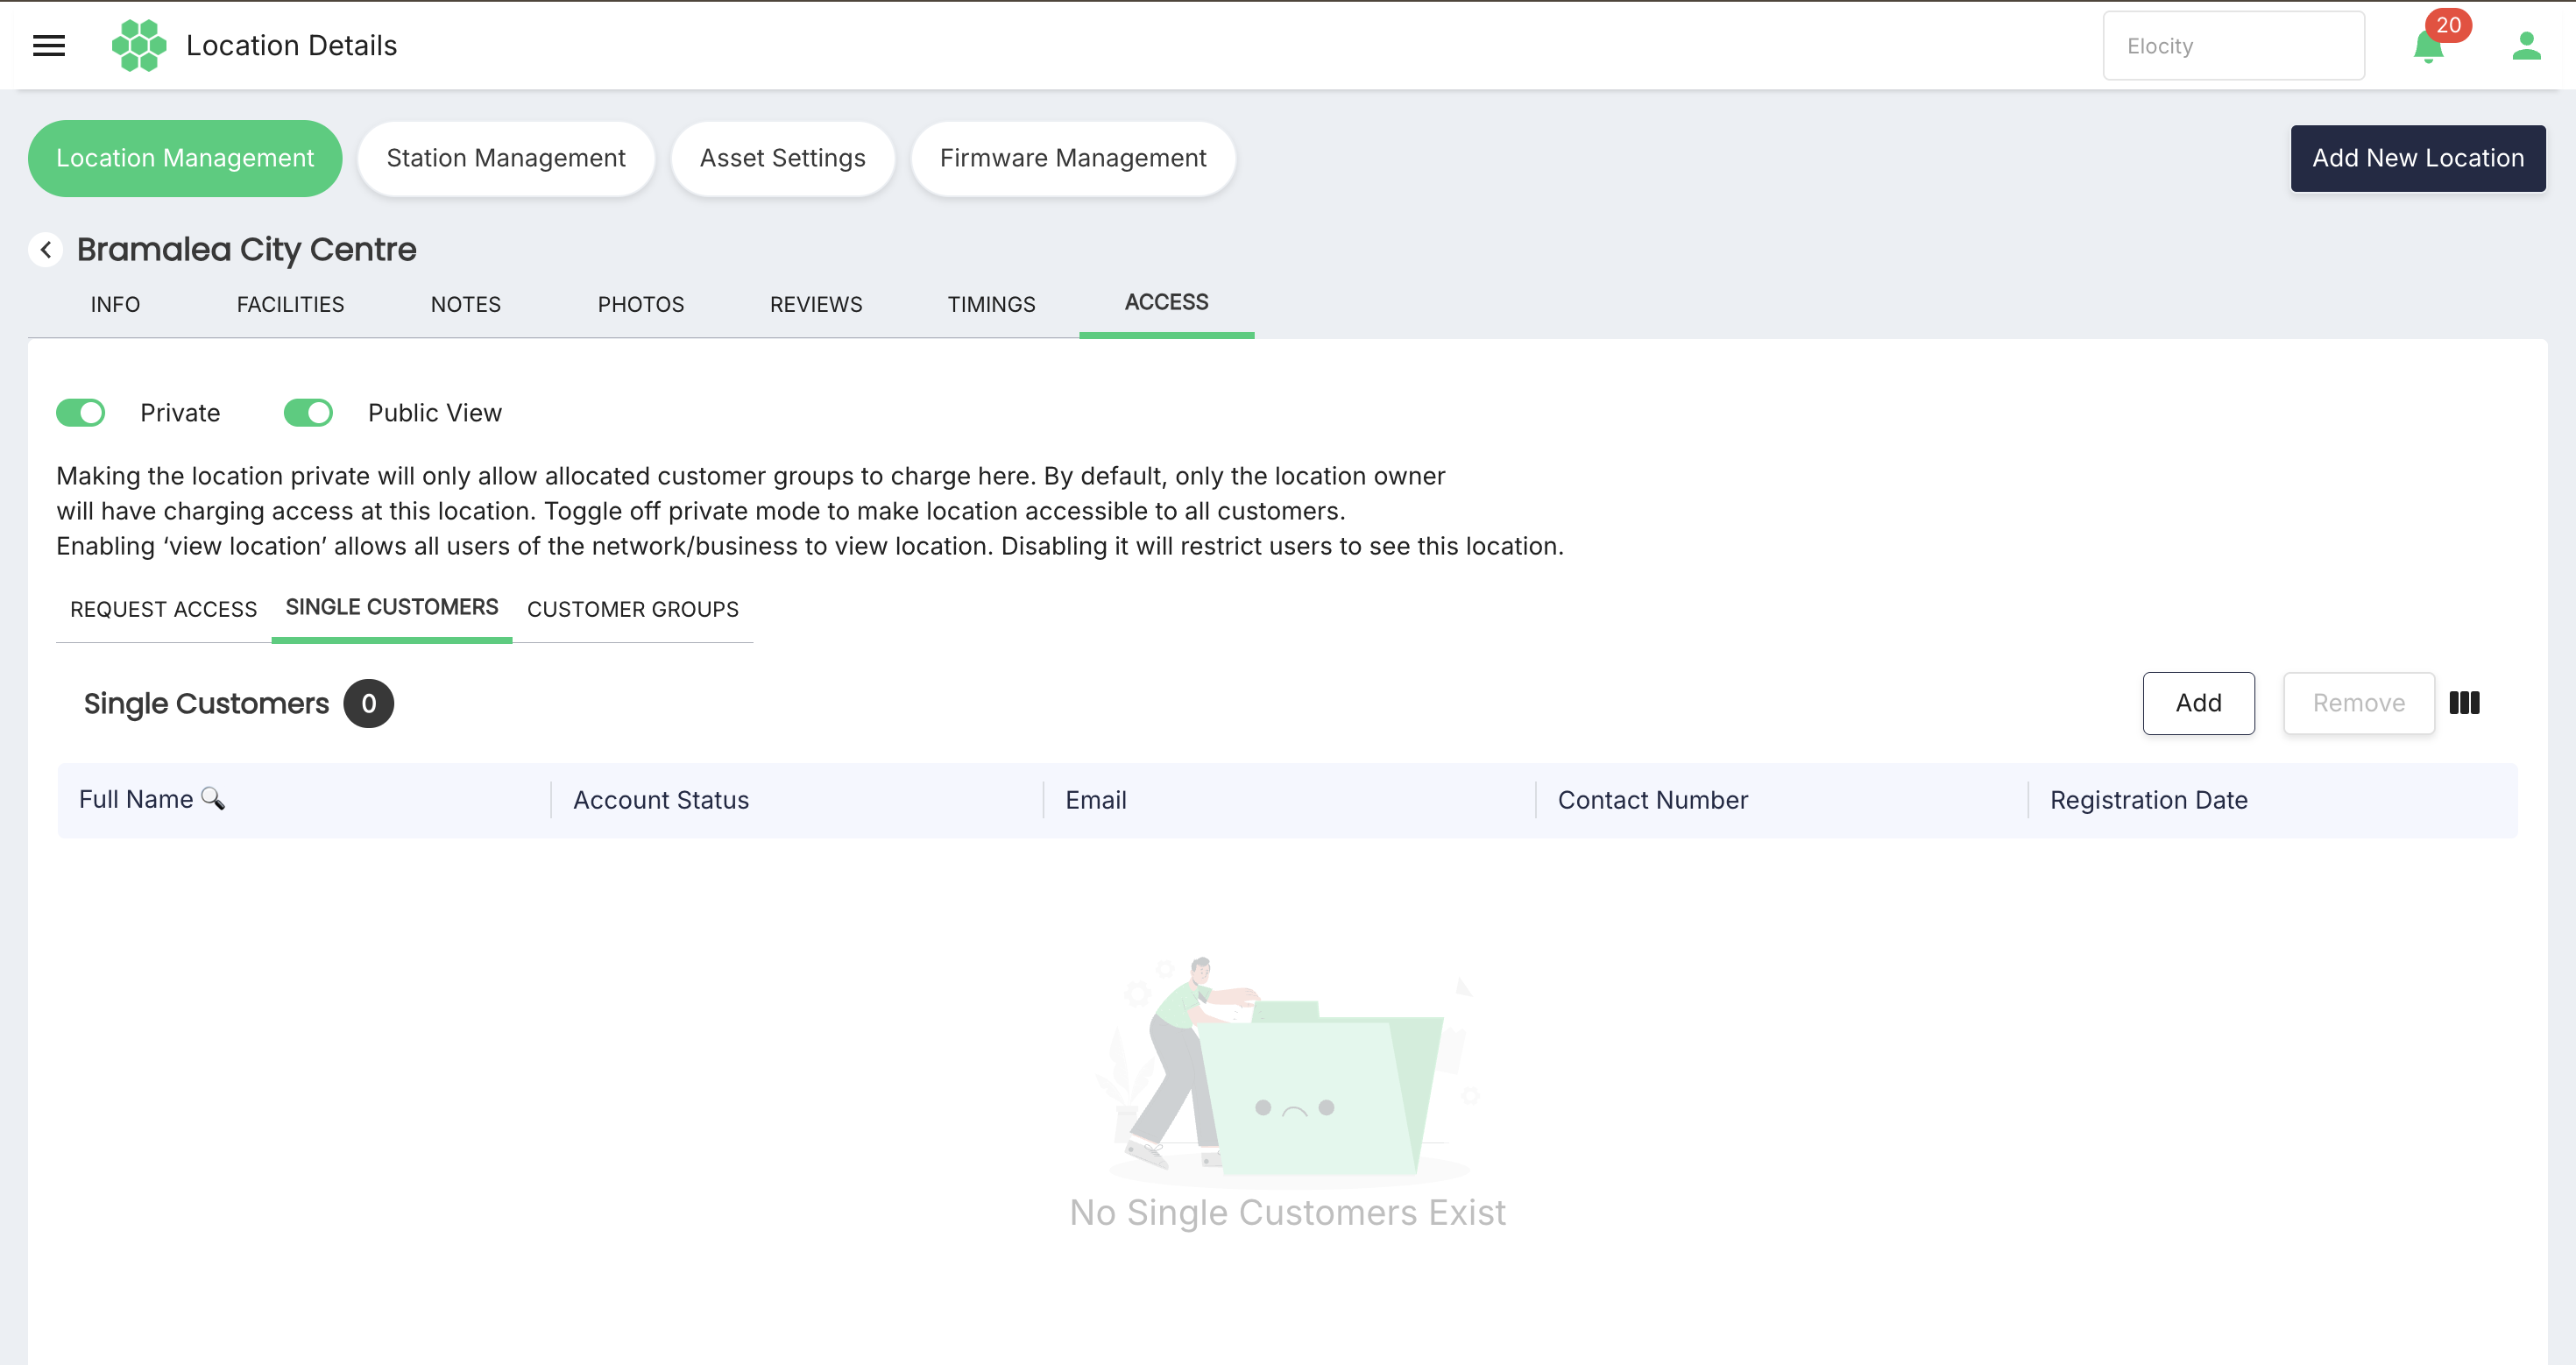
| Column | Description |
|---|---|
| Full Name | Customer's full name. |
| Account Status | Current account status, such as Active. |
| Customer email address. | |
| Contact Number | Customer telephone number. |
| Registration Date | Date on which the customer account was registered. |
The tab provides Search, Add, Remove, Refresh, and Column Filter.
To add an individual customer:
- Select Add.
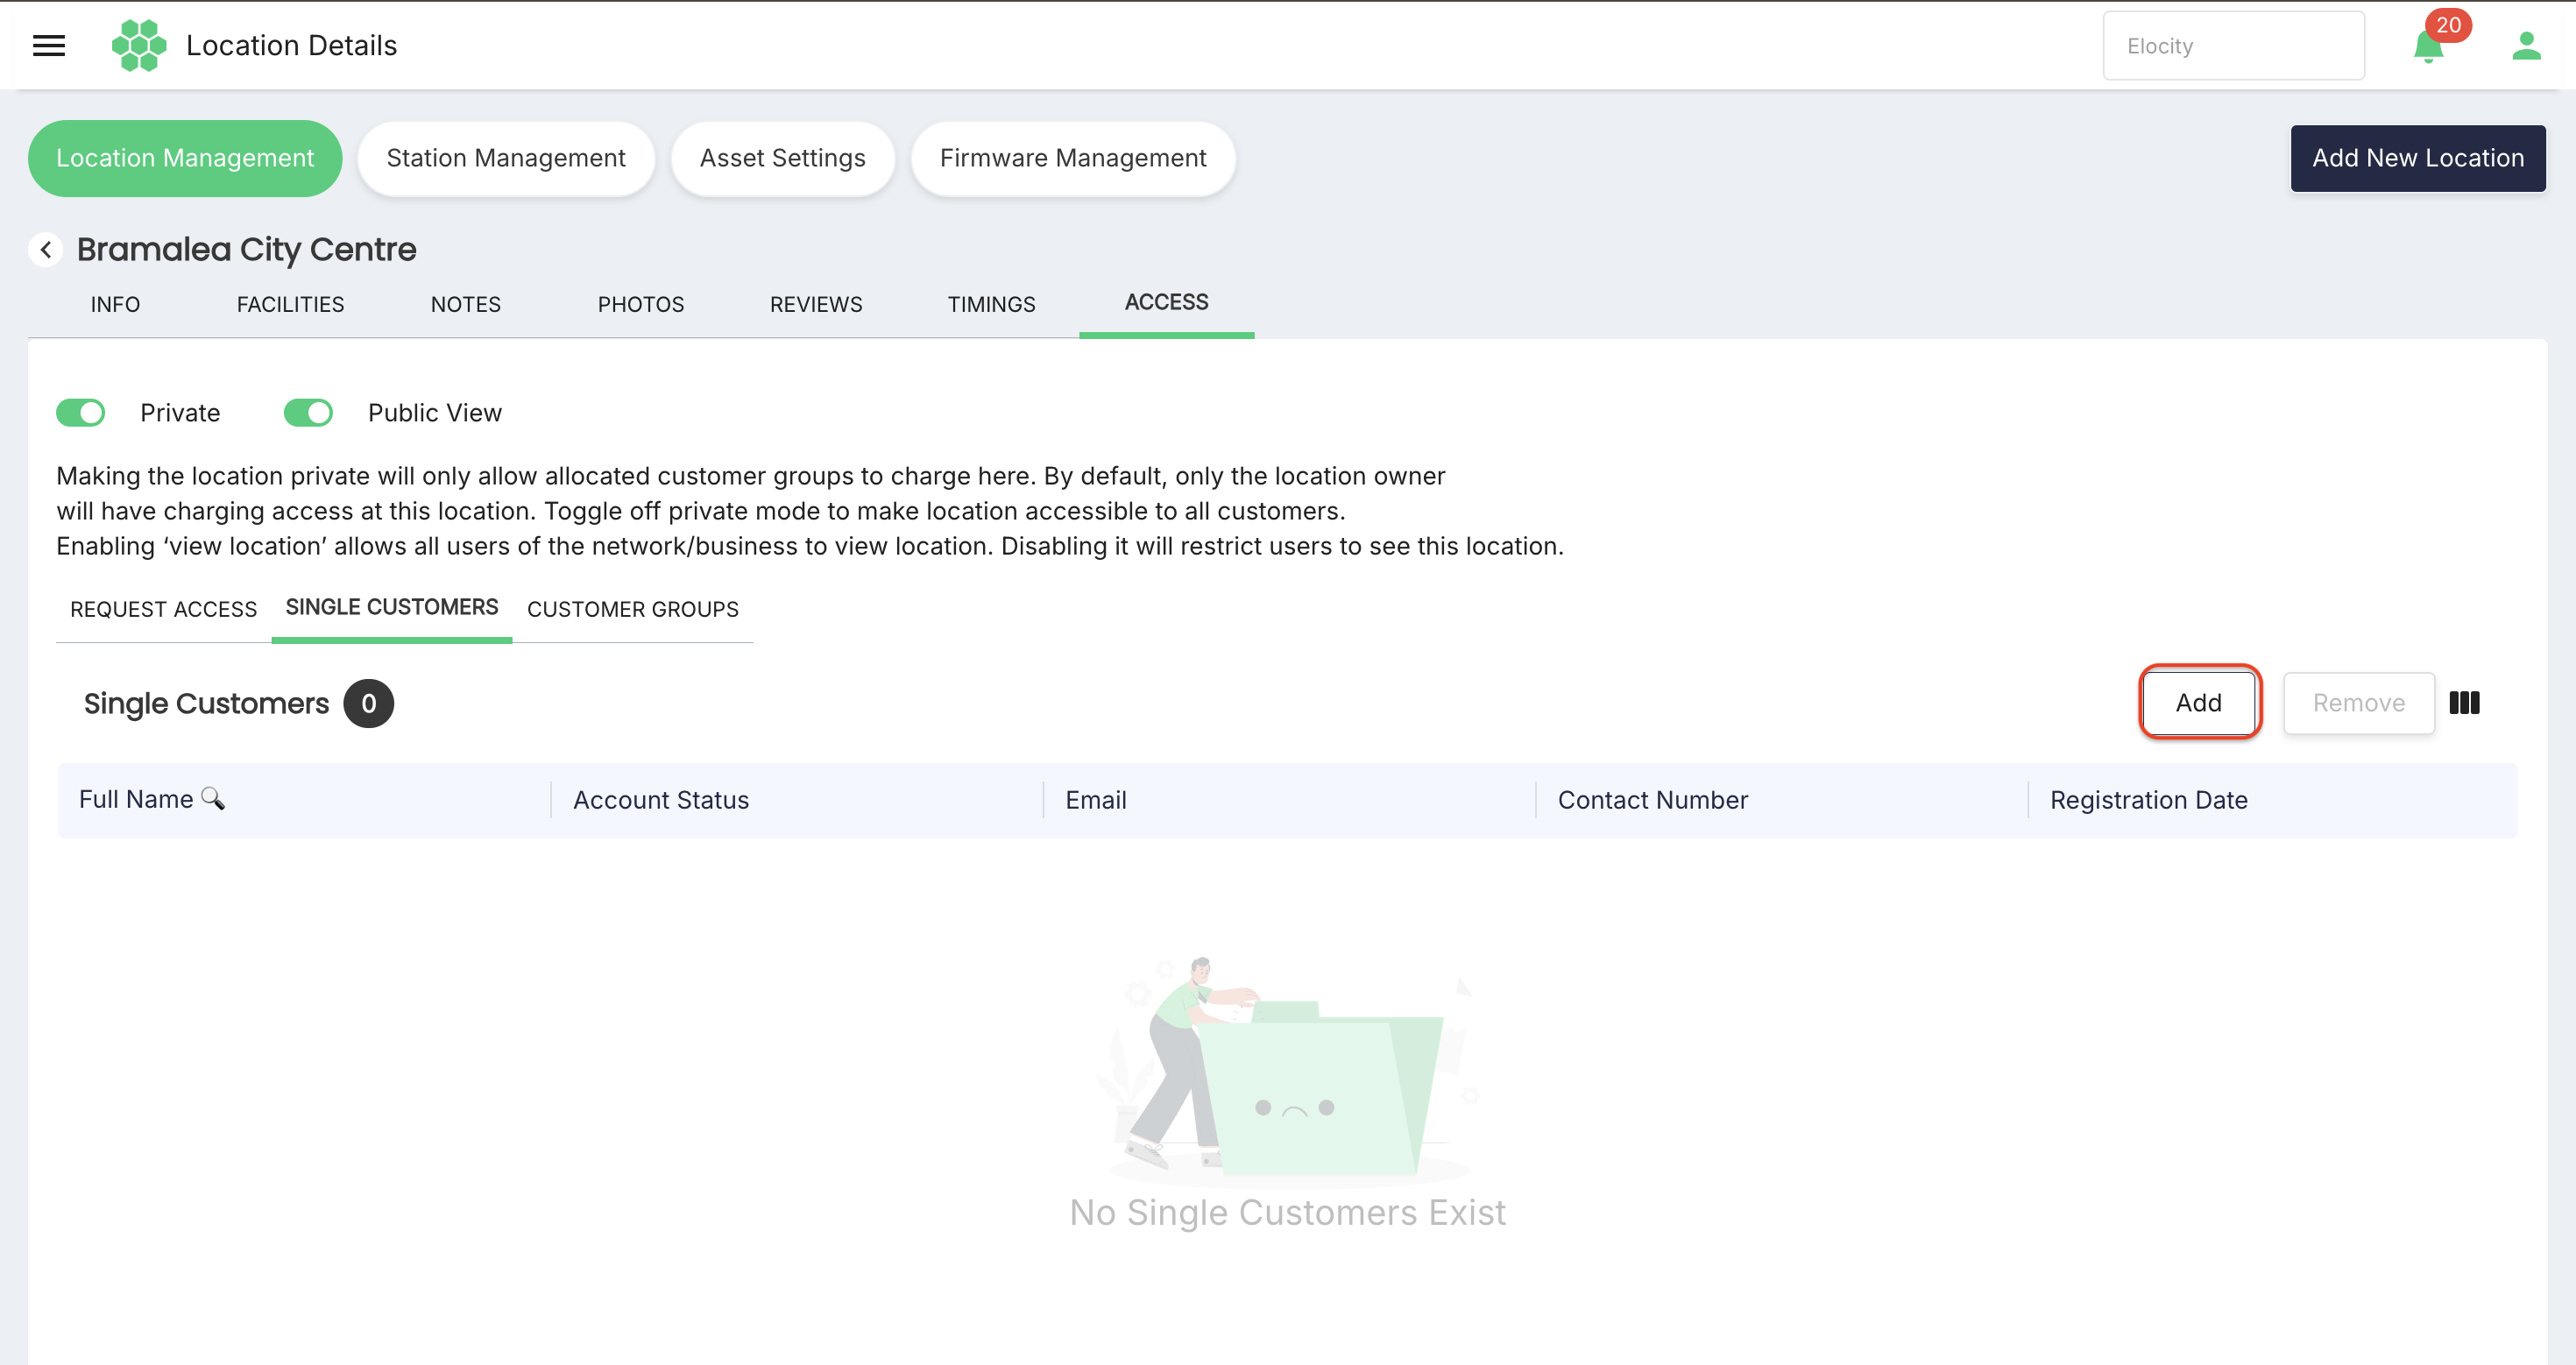
- Enter the customer's country code and contact number.
- Use the contact number to locate the customer.
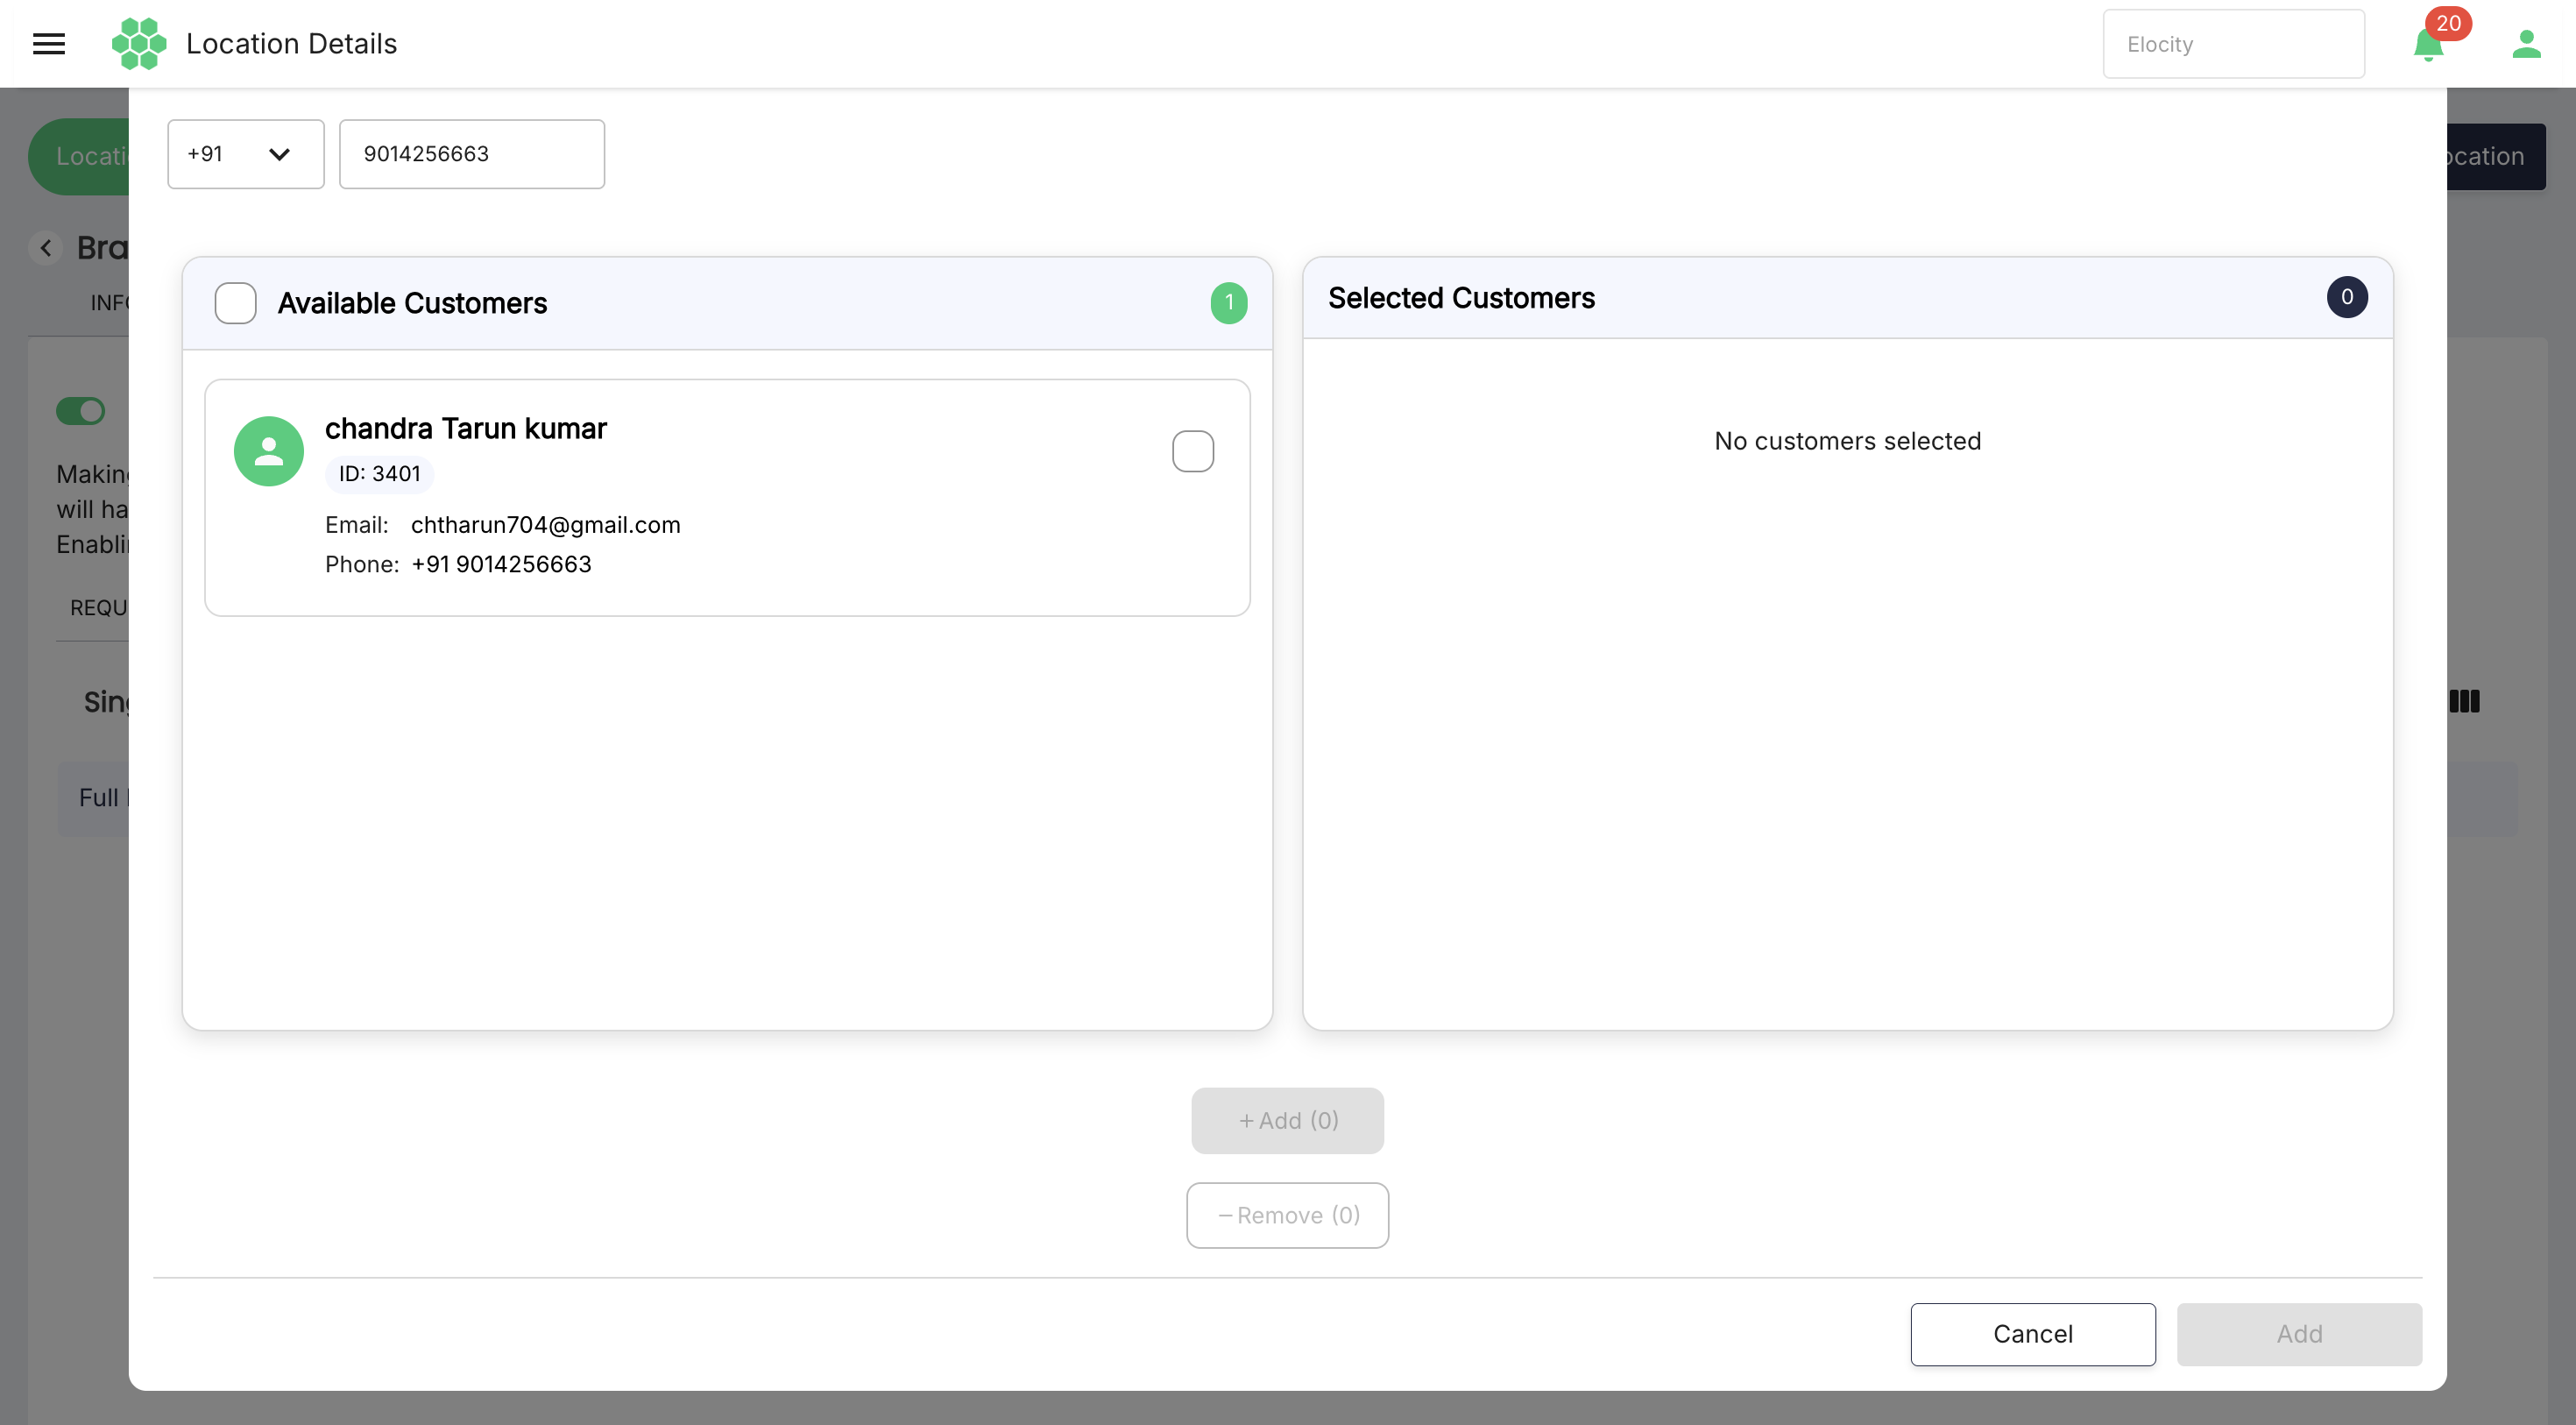
- Select Add when the required customer has been identified.
Select Cancel to close the form without granting access. To revoke existing individual access, select the customer row and select Remove. Remove remains disabled when no row is selected.
Customer Groups
The Customer Groups tab grants access to a defined group of customers.
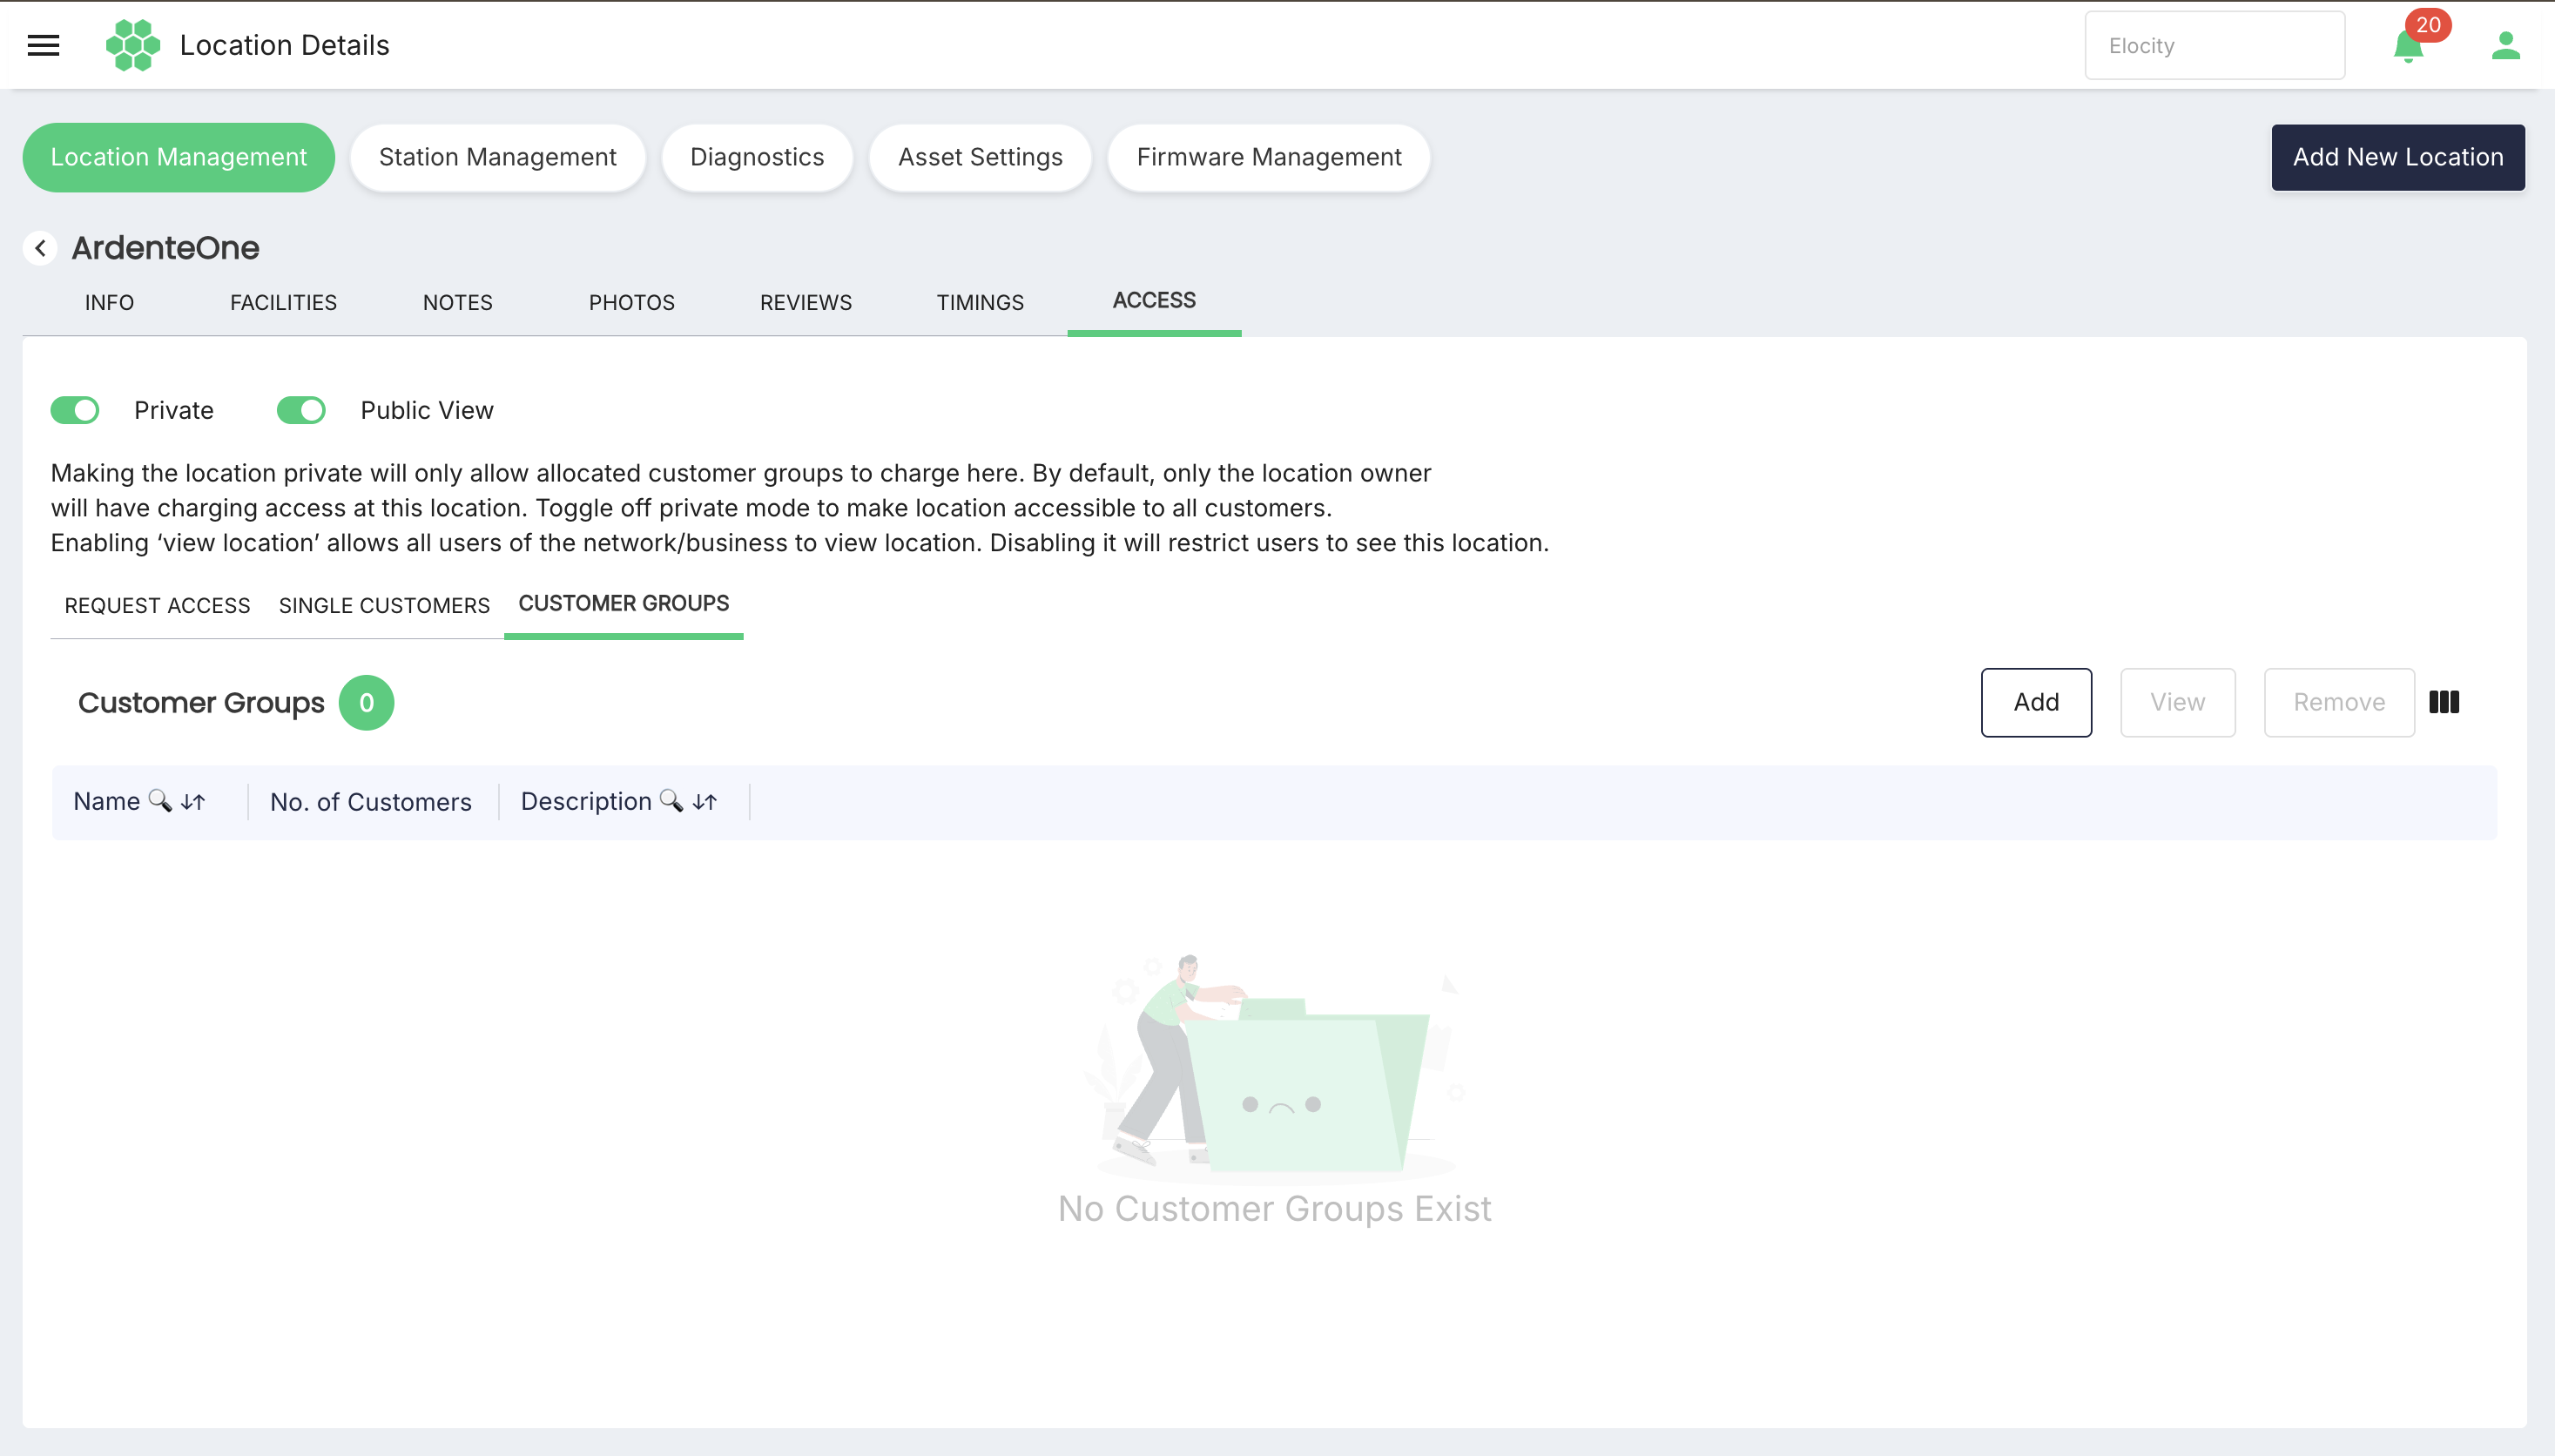
| Column | Description |
|---|---|
| Name | Customer-group name. |
| No. of Customers | Number of customers in the group. |
| Description | Description recorded for the group. |
The tab provides Search, Add, View, Remove, and Column Filter. View and Remove remain disabled when no group is selected.
To assign existing customer groups:
- Select Add.
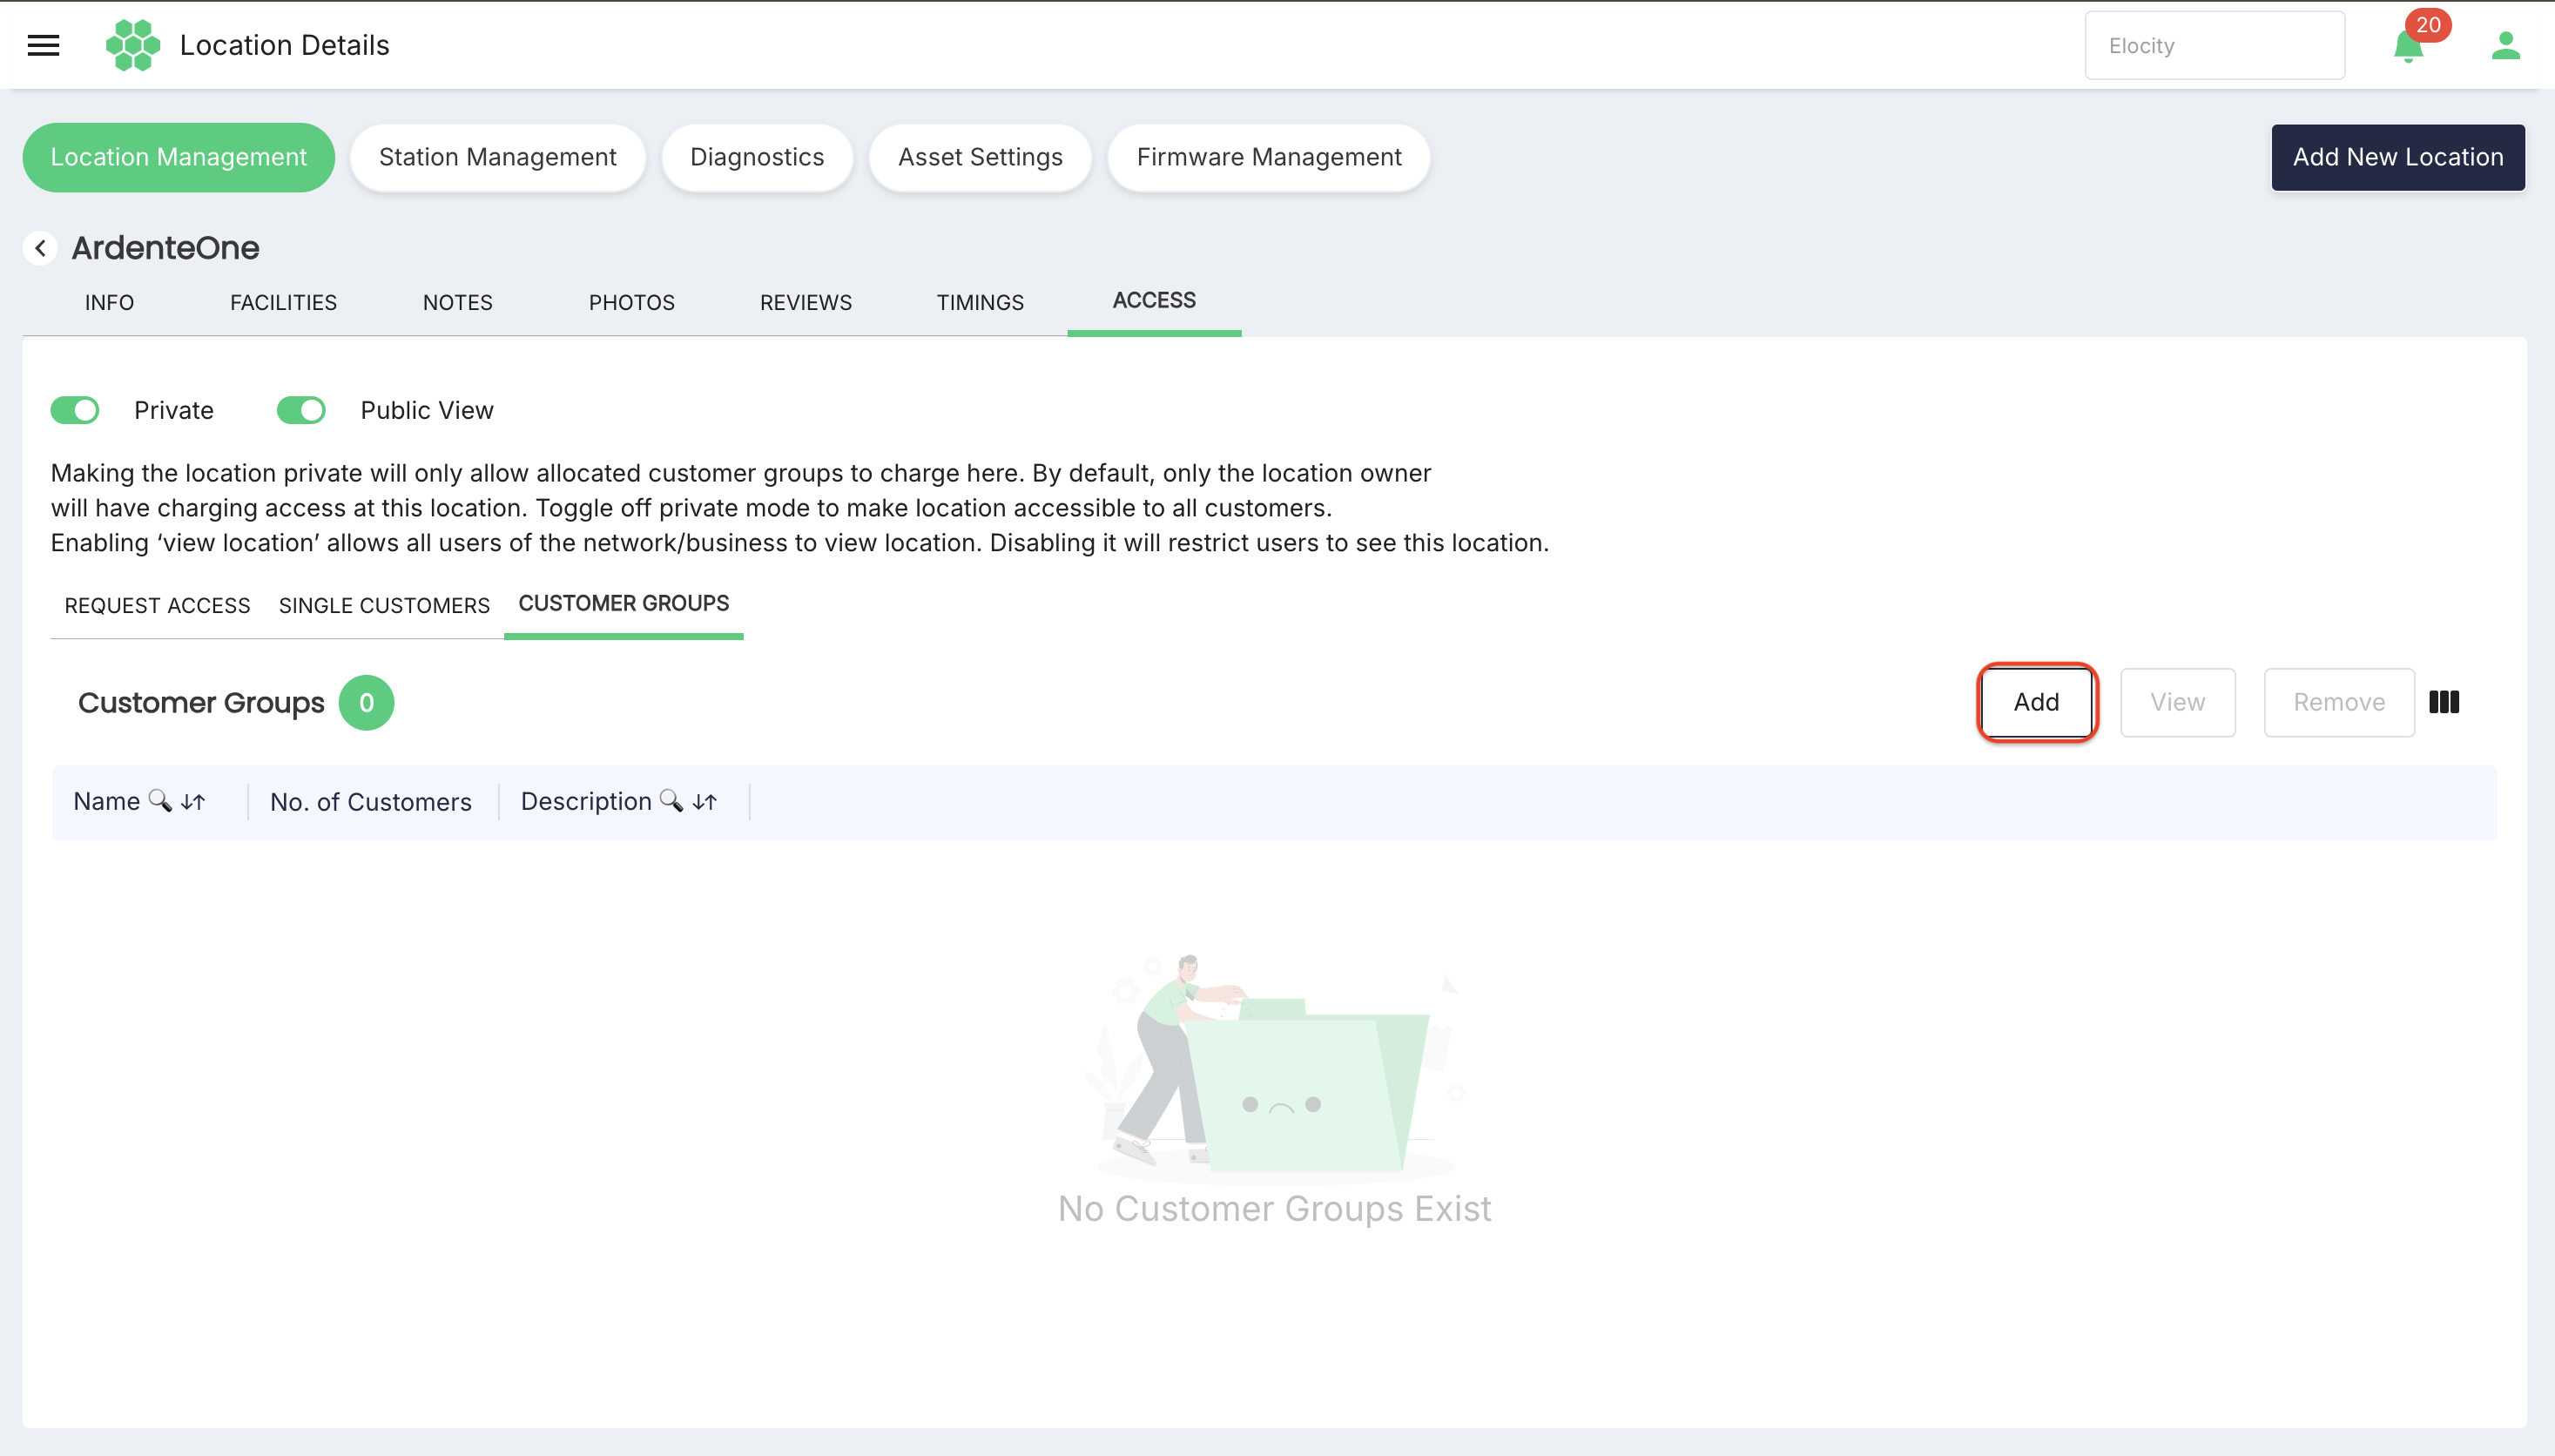
- Open All Customer Groups.
- Select one or more existing groups, or use Select all.
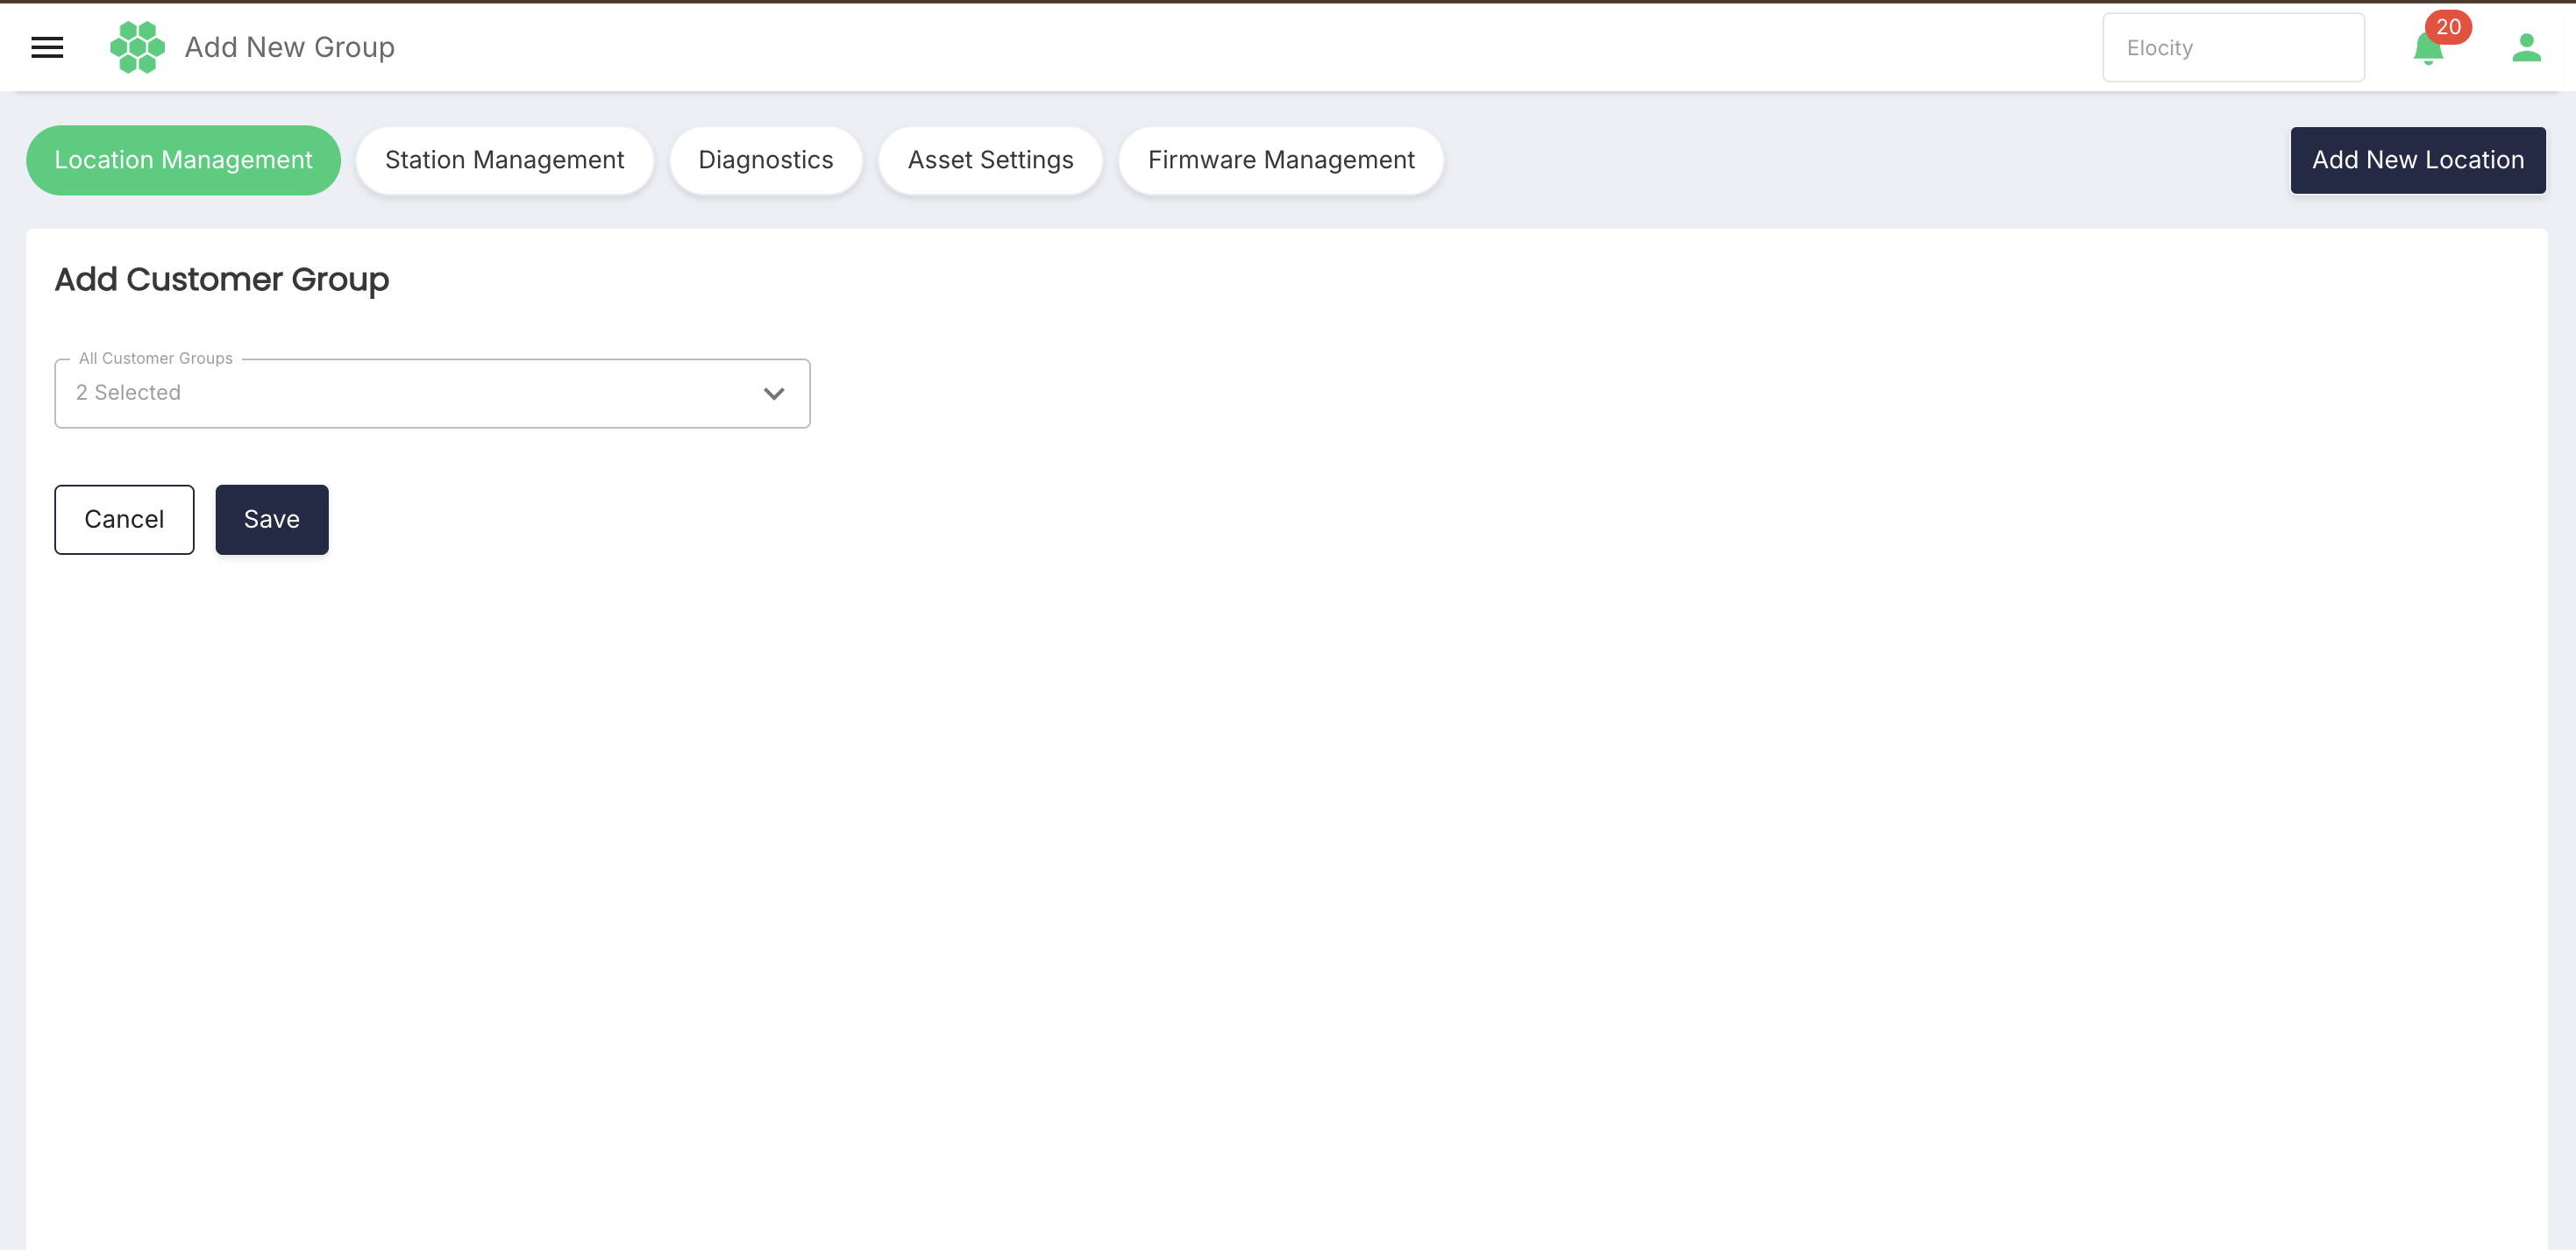
- Select Save.
Select Cancel to leave without assigning a group. Select an assigned group and use View to review it or Remove to revoke that group's access to the location.
Adding a new location
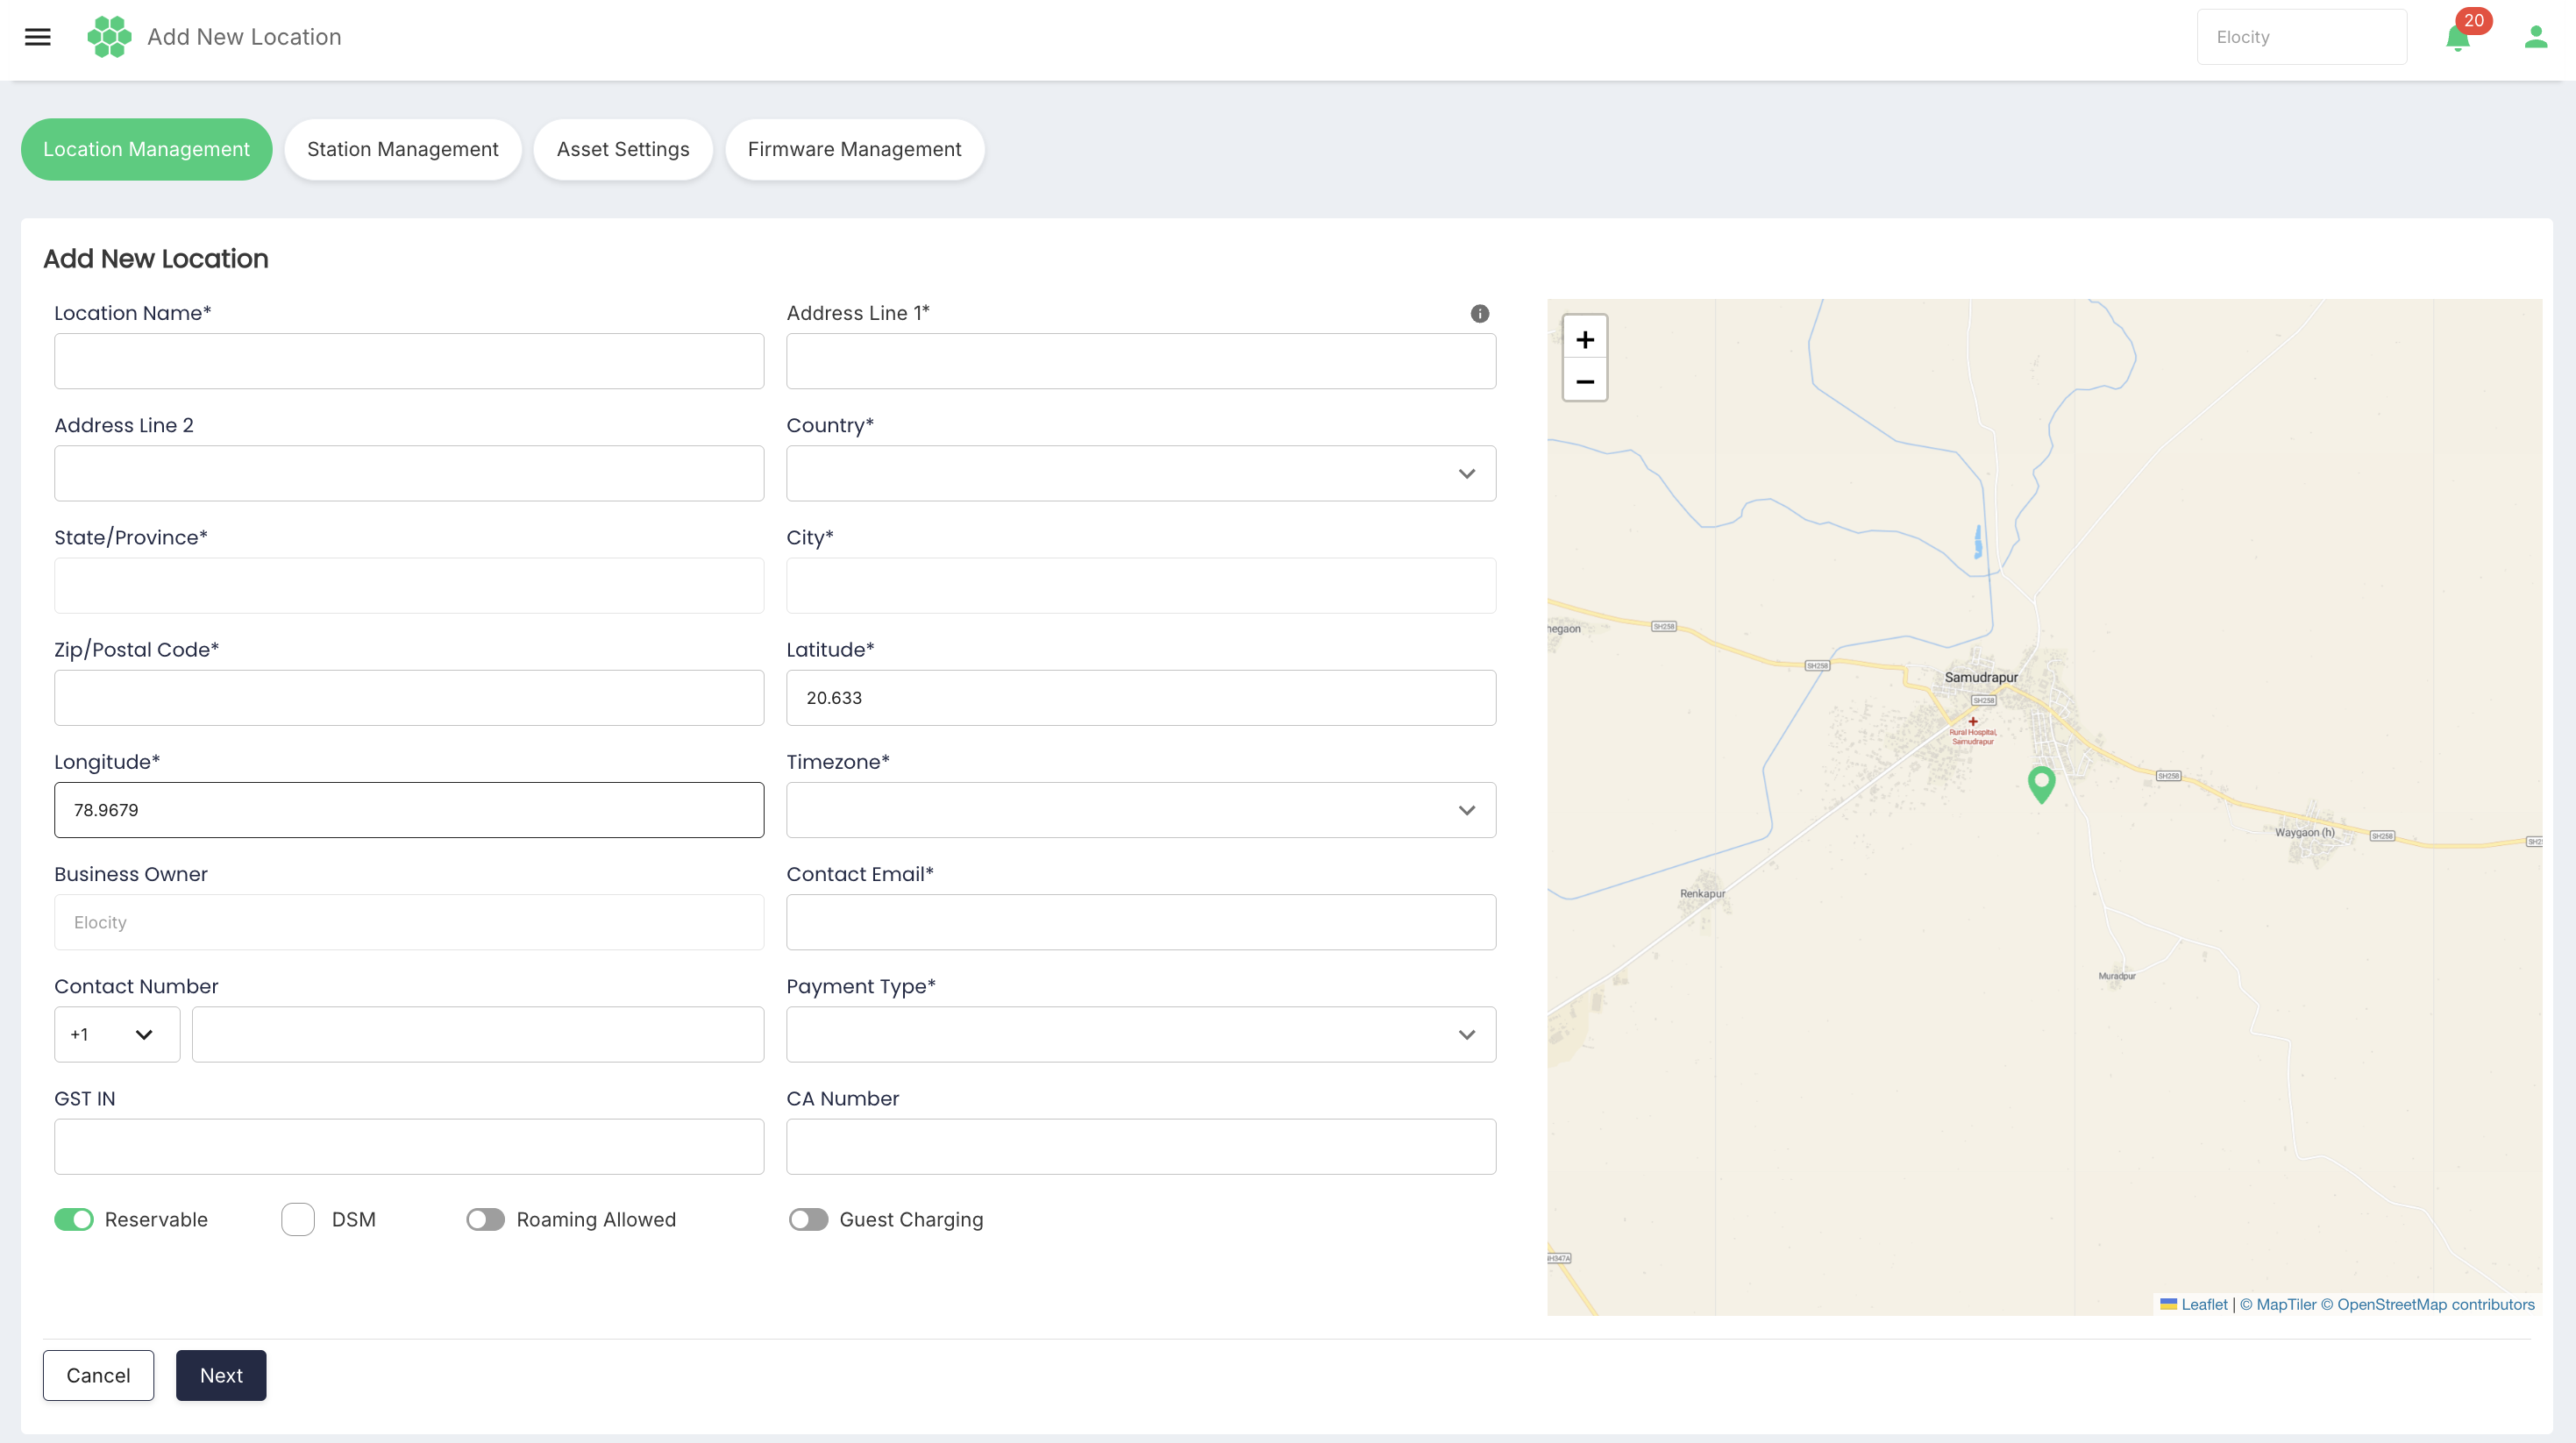
Select Add New Location to open the creation form.
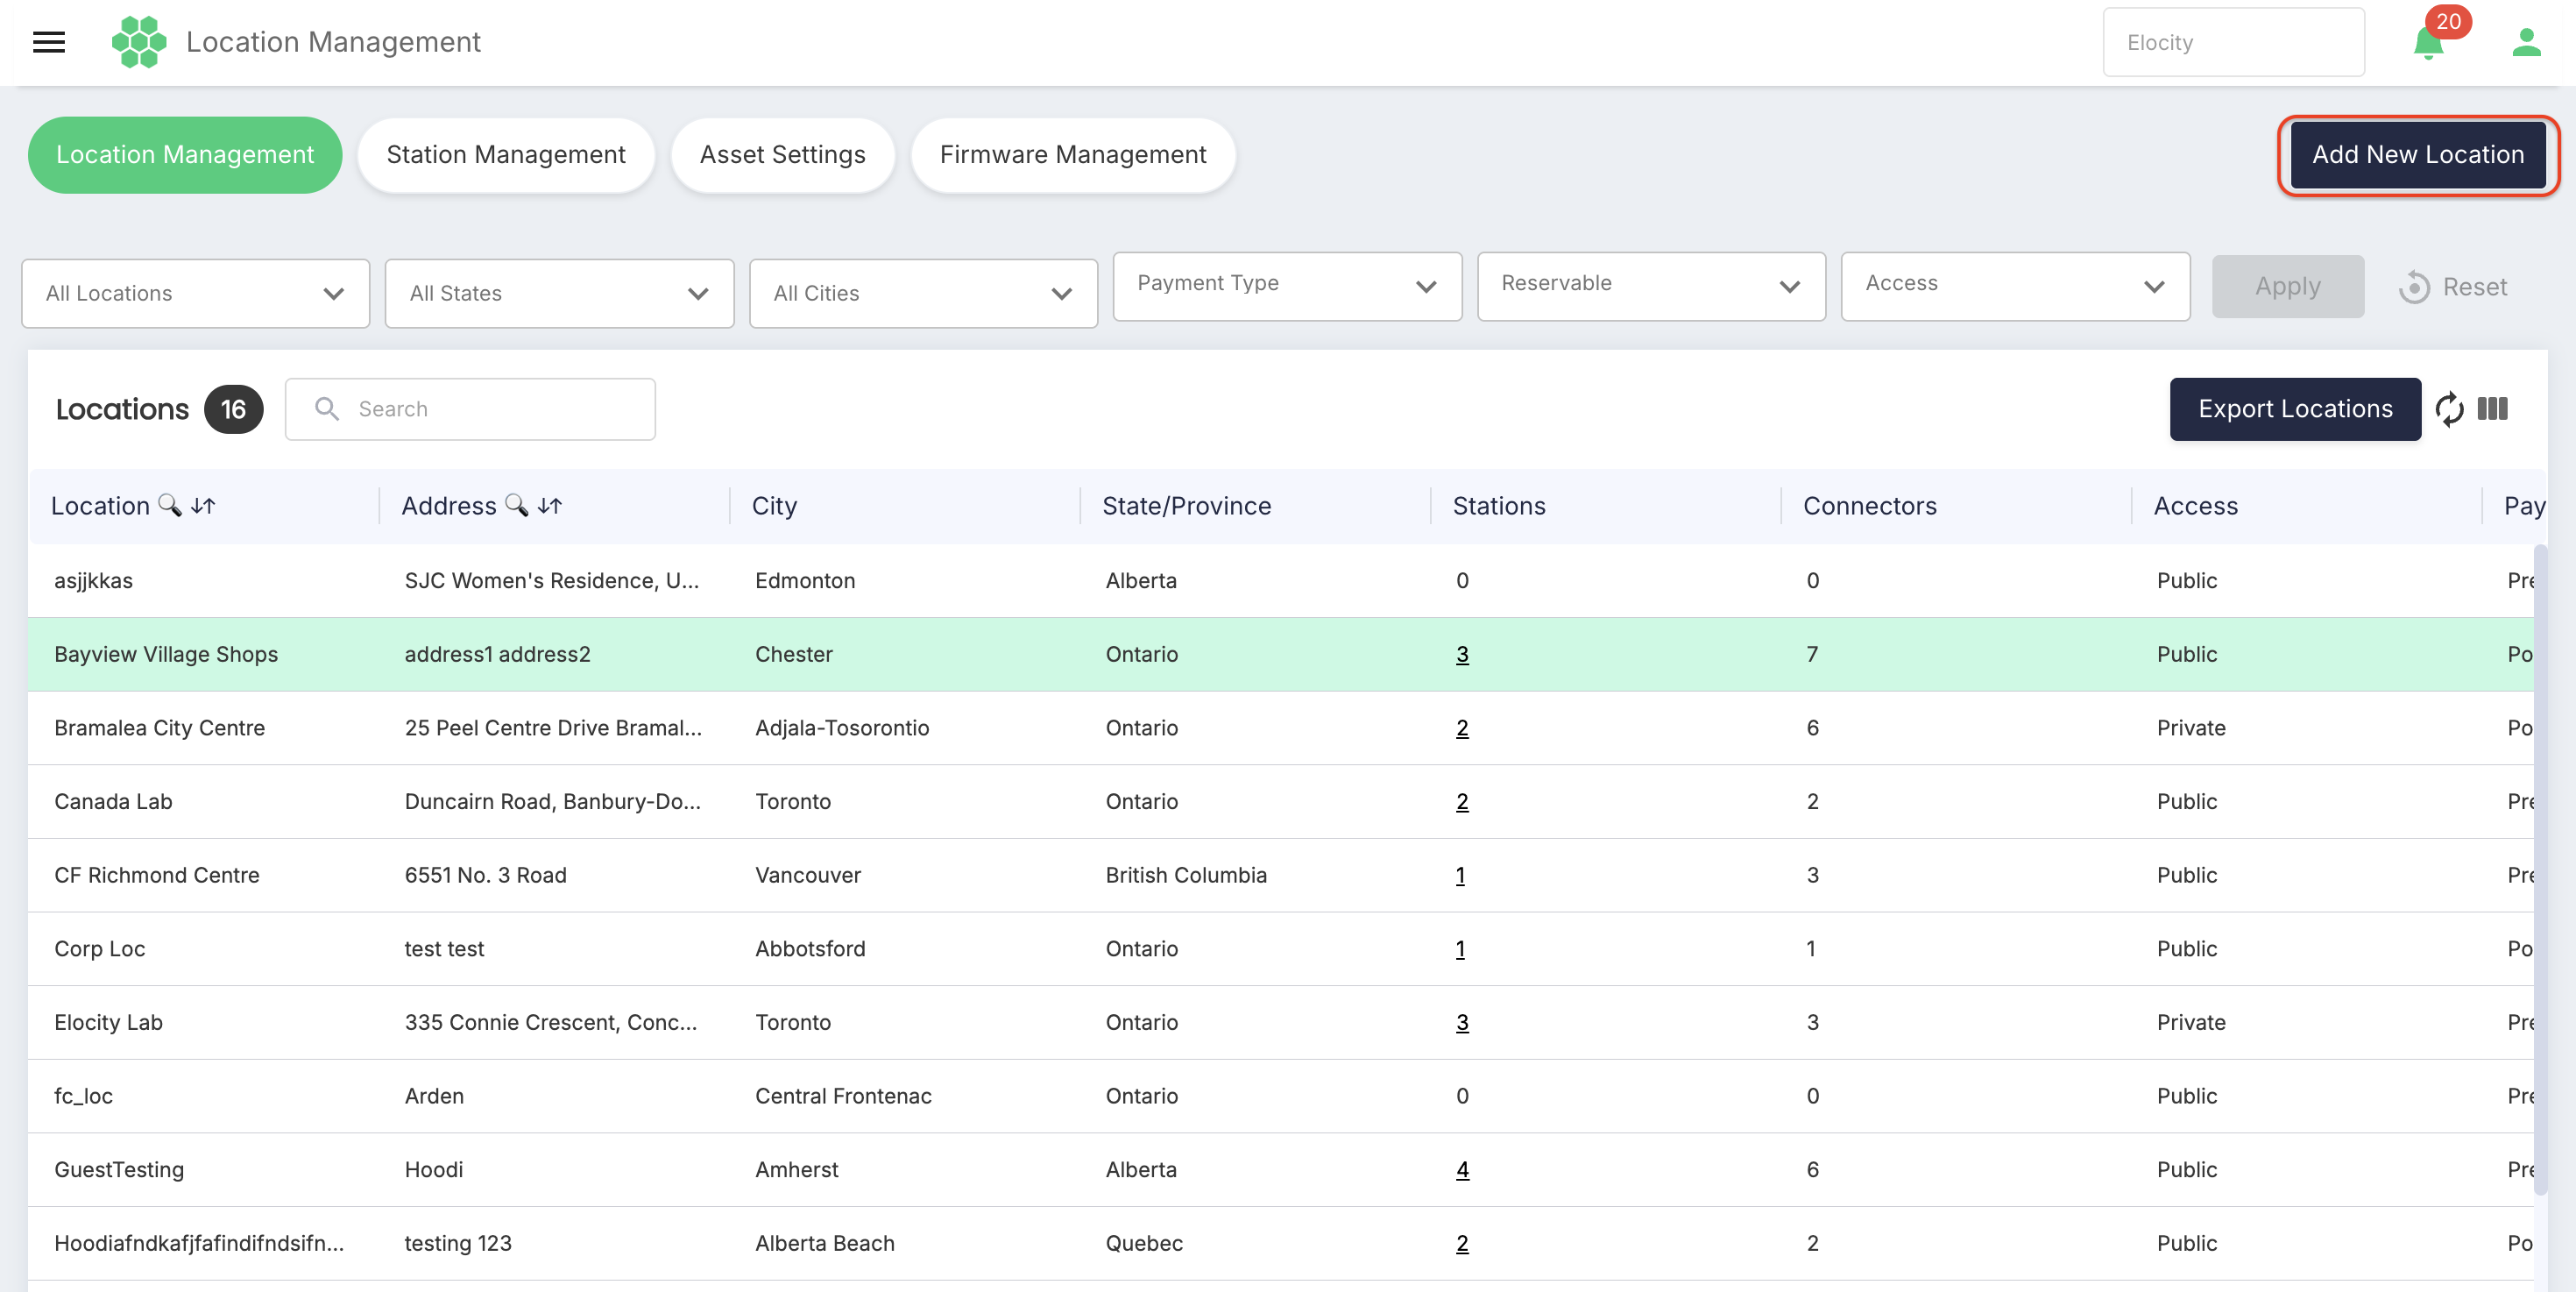
Creation fields
The first screen contains the same principal fields described under the Info tab:
- Location Name
- Address Line 1
- Address Line 2
- Country
- State/Province
- City
- Zip/Postal Code
- Latitude
- Longitude
- Timezone
- Business Owner
- Contact Email
- Contact Number
- Payment Type
- Reservable
- Guest Charging
- Map
On the inspected blank form, Business Owner is read-only, Reservable is selected by default, and Guest Charging is cleared by default.
Required-field validation
Selecting Next without completing the mandatory fields displays the following validation messages:
- Location Name cannot be empty.
- Address Line 1 cannot be empty.
- Country cannot be empty.
- Zip/Postal Code cannot be empty.
- Timezone cannot be empty.
- Contact Email cannot be empty.
- Payment Type cannot be empty.
After the required initial information is entered, select Next. The creation workflow then presents the same sub-tab areas used when viewing an existing location. Complete the presented areas to supply facilities, notes, photos, timings, access information, and the other required location details.
Location deletion
Location deletion is not available through the current Location Management list or Location Details page. When deletion is required, it is performed through the backend process rather than through the user interface.
Recommended operating workflow
- Confirm the selected business.
- Use the location, geography, commercial, reservation, and access filters to define the required scope.
- Select Apply and confirm the returned location count.
- Use Search when a specific record is required.
- Review all relevant grid columns.
- Select a row to review Location Details.
- Review each detail tab before making changes.
- Use Edit, Save, and Cancel according to the task being performed.
- Select the Stations count when station-level information is required for a location.
- Use Refresh after operational changes to request the latest grid values.
- Export the filtered list when an offline record is required.